
Happy Labor Day weekend, everyone!
Recently, I participated in an Instagram-based modern fabric postcard swap. Check out the great pictures under the hashtag #modernfabricpostcardswap!
Several people asked me how I made my cards so I thought a step-by-step tutorial would be helpful to post here on my blog with some pictures.
Fabric postcards are quick and easy to make and you can use leftover scraps from other projects. You can piece them traditionally, paper-piece them, or use applique. My one suggestion is to not embellish the cards with any 3-D type materials if your intent is to mail the card by itself. You don’t want the postal machines to get jammed up!
These cards are suitable to mail by themselves. You don’t need to put them in an envelope, and you only need 1 first-class stamp for domestic postage. If you are mailing them internationally, you’ll probably need a little more postage.
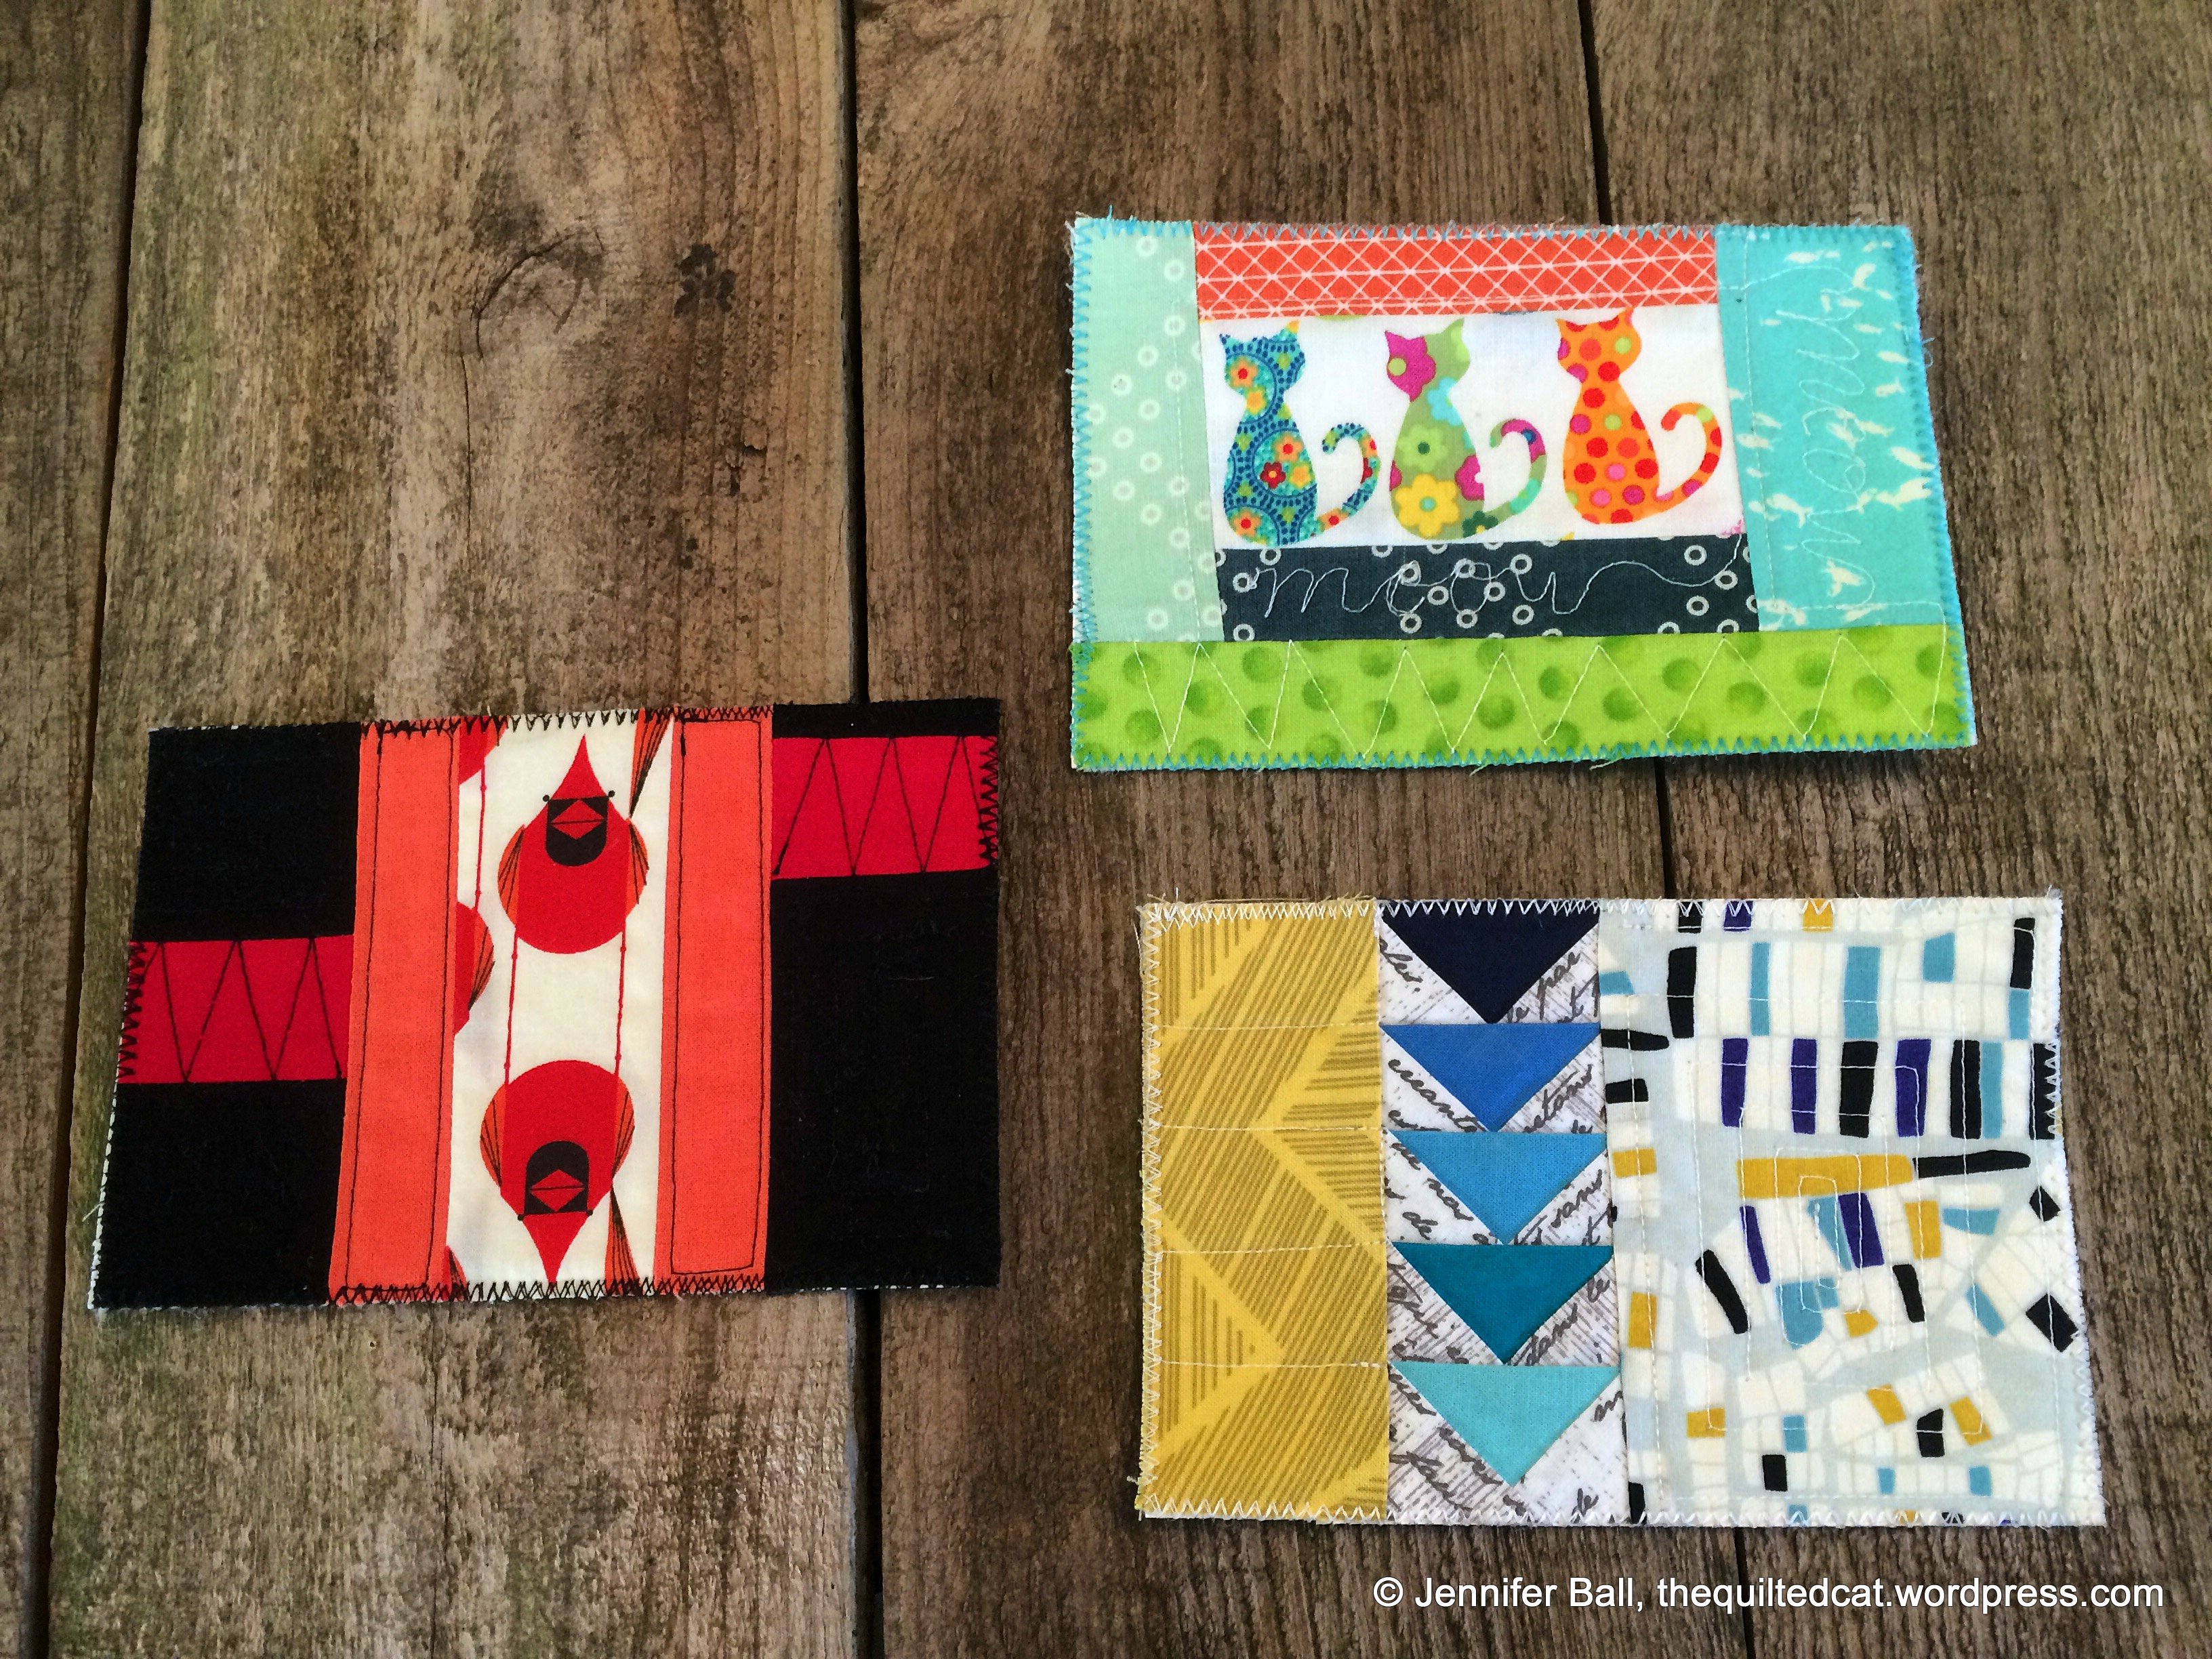
Here are the 3 postcards that I made for the swap:
Modern Fabric Postcards
Materials
- (1) 4″ x 6″ piece of white cardstock (or white fabric)
- (1) 4″ x 6″ piece of Heat n’ Bond lite (or any light weight, double-sided fusible)
- (1) 4″ x 6″ piece of Timtex interfacing (or any firm, one-sided fusible)
- (1) 4″ x 6″ fabric top (any technique)

Fabric Postcard Materials
How to Make the Fabric Postcard
Step 1: Piece the fabric top of your postcard using any technique – improvised piecing, paper-piecing, applique. No pattern needed just use your imagination! I often start with a focus fabric and then build from there.
Step 2: Press your fabric top to the Timtex interfacing. I use a towel to protect my ironing board from any adhesive.

Iron fabric top to Timtex
Step 3: Quilt the fabric top to the interfacing to give it structure and stability. You can straight-line stitch or practice your free-motion quilting. It’s up to you!

Quilt the postcard top
Step 4: On the white cardstock or white fabric, write the word “POSTCARD” across the top portion on one side. Add a divider line and address lines. If you use white cardstock, then any archival thin-tipped marker works well. I use a Micron pen. If you use white fabric, practice on a scrap first because you may need a special fabric marker.
Step 5: Press the Heat n’ Bond lite (double-sided fusible) to the backside of the white cardstock or white fabric.

Iron double-sided fusible to backside of cardstock
Step 6: Peel off the paper from the remaining side of the Heat n’ Bond lite.
Step 7: Stack the quilted postcard top onto the cardstock so that the remaining fusible side faces the back of the Timtex interfacing. You are essentially making a “postcard sandwich” much like layering a quilt. Press.
Center the postcard top to the bottom and then press.
Step 8: Stitch around all outside edges of the postcard to seal it. You can use a zigzag stitch or a satin stitch. I like to use a zigzag and go around the whole card two times.

Zigzag stitch on all edges!
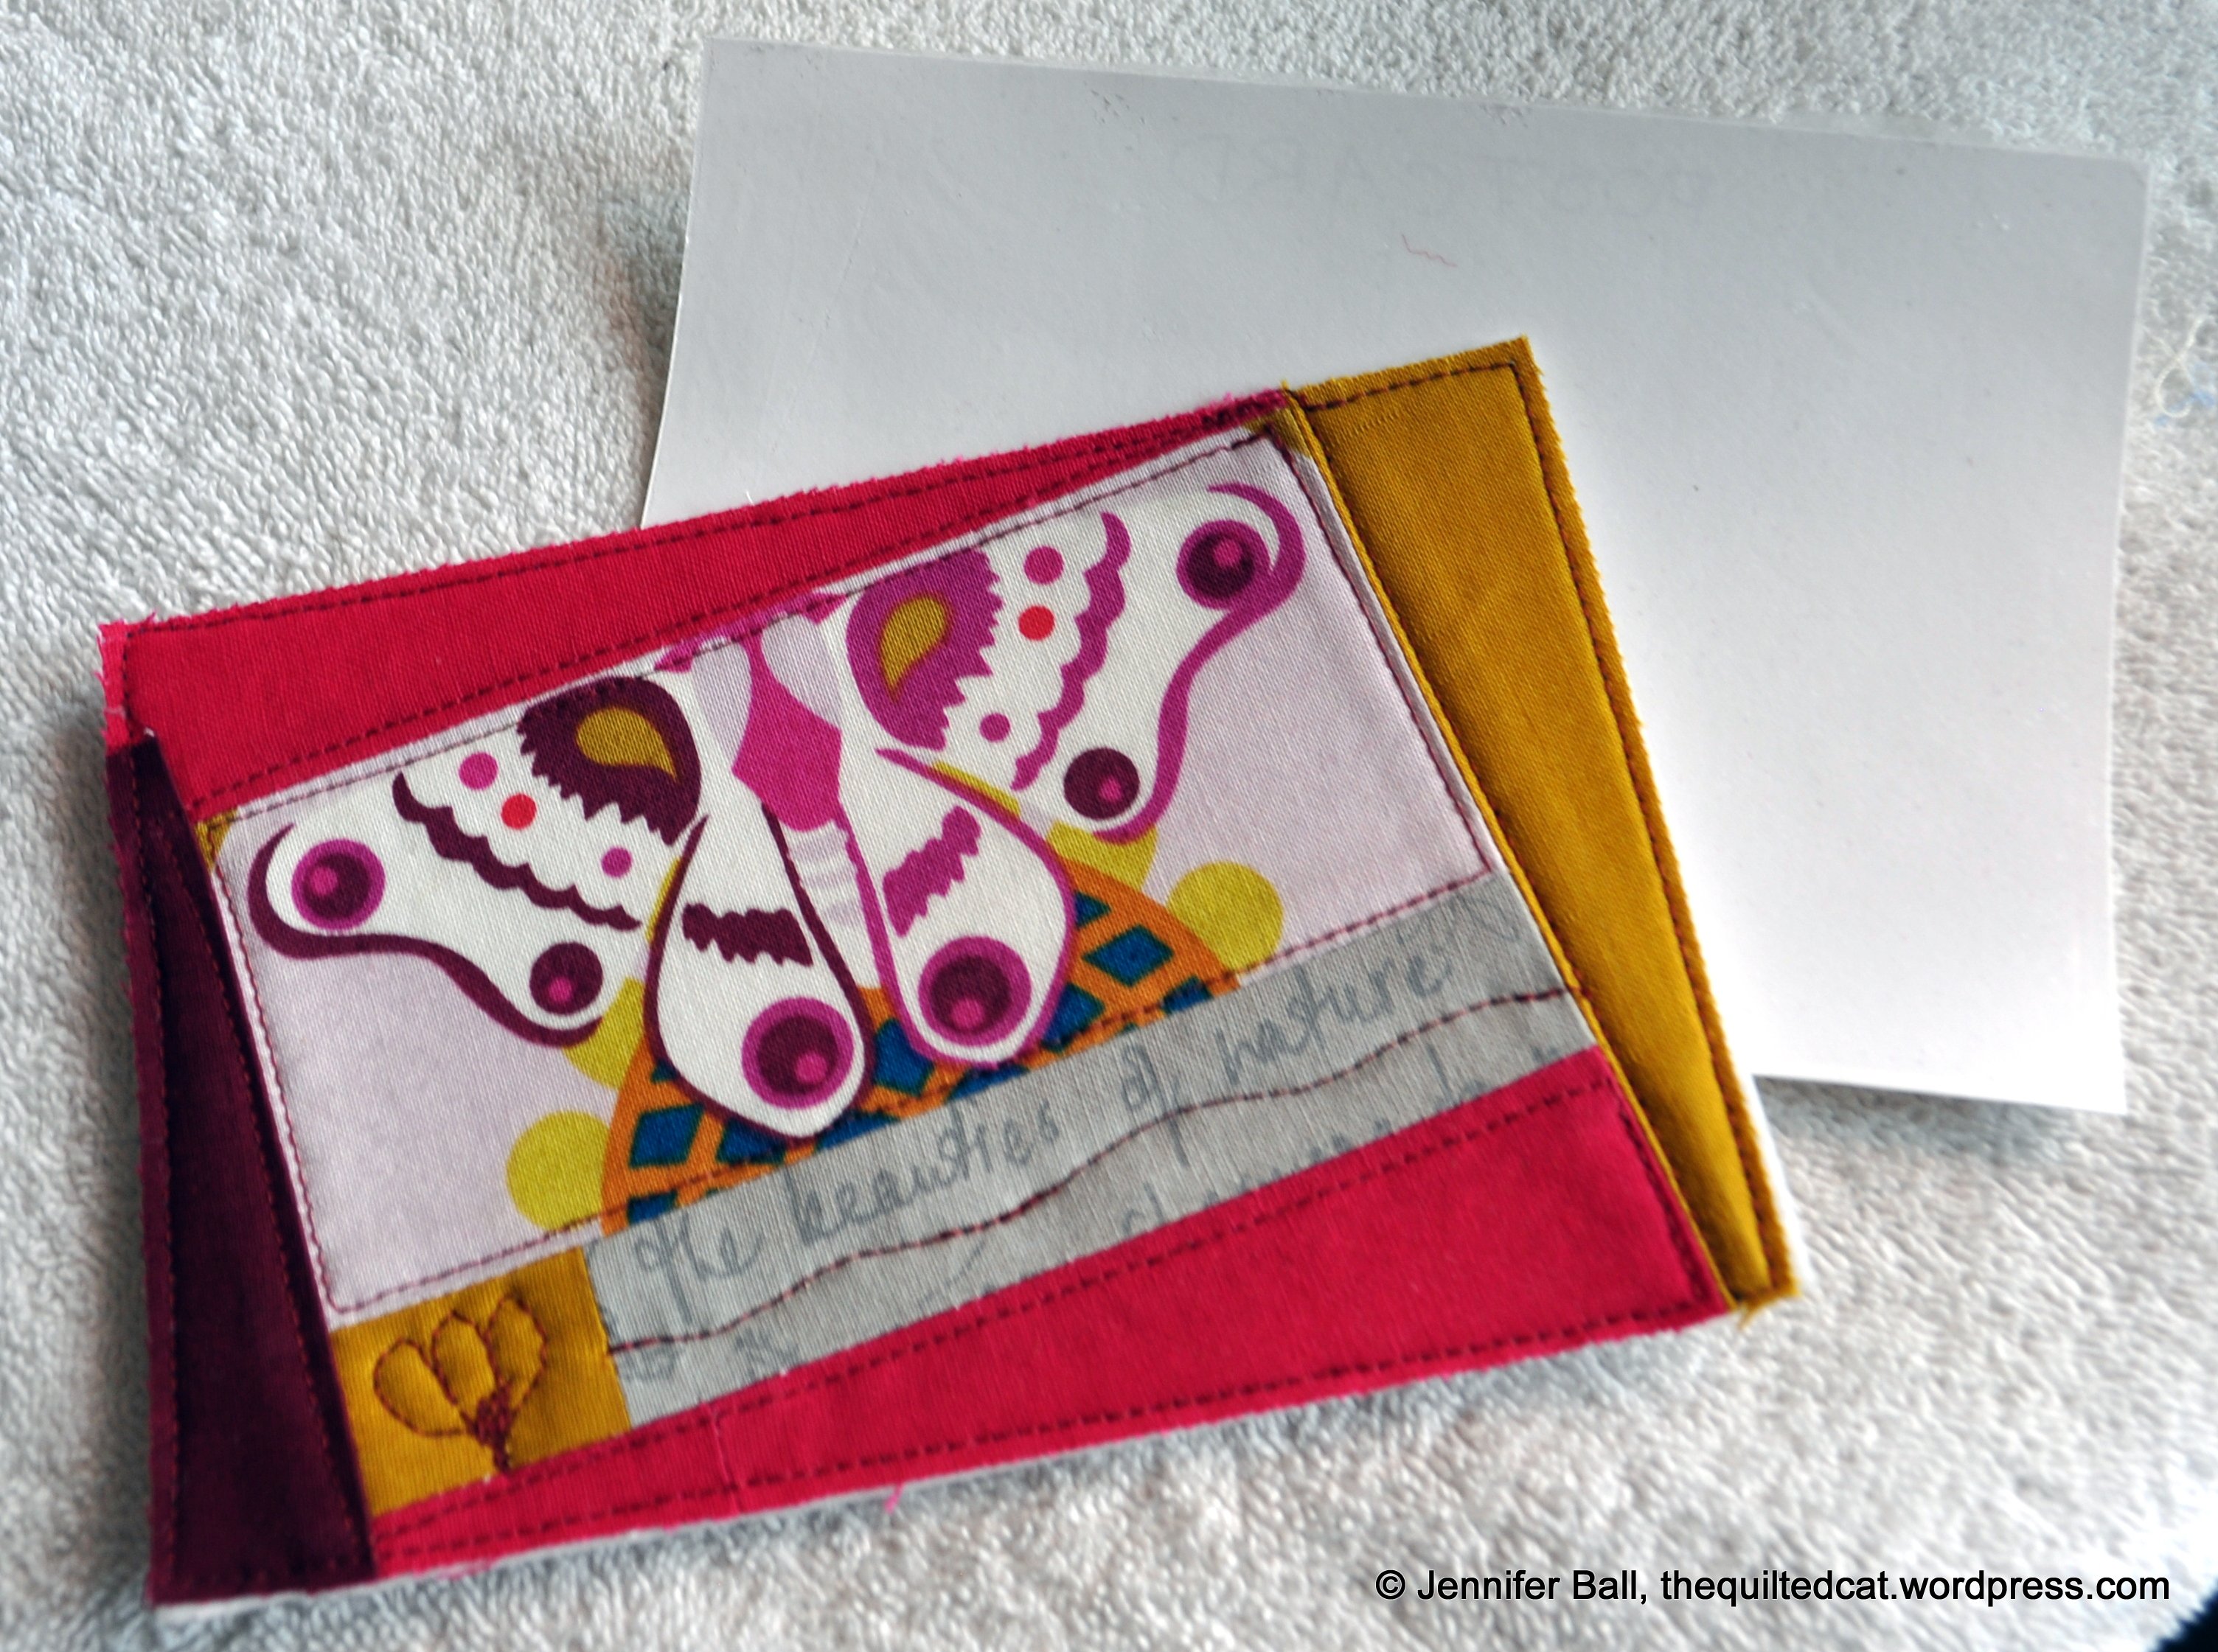
Step 9: On the backside, you can write your note and the lucky recipient’s address. Add a sticker-style stamp, and drop it in the post box!


Ready for your note, address, and stamp!
I hope you found this tutorial helpful! Fabric postcards are fun and addictive to make, and you’ll be an expert in no time!
Happy stitching!
~Jennifer

love making the postcards but it seems the post office is not happy and having trouble getting the delivered.
Thanks for this clear and easy tutorial , I seem to have an issue with the finished card being bent . Do you have a solution.
Thanks for you help.
Hi, what do you mean by a bent card? Is it bending on you while you create it or after you are finished?
Pingback: Tula Pink Postcard Swap | NW Quilted Cat
Thank you so much for the easy to follow tutorial. I made them years ago, but needed a new look and reminder course on all the steps. They will be appreciated by the recipients and great joy for me in the making!
Pingback: Loving Kindness Sewing Projects – Amy Loves to Sew
Thank you. This is the best postcard tutorial I have seen. Super clear pictures and text.
Pingback: One Dozen Homemade Postcards to Make and Mail | hometips.co.za
Pingback: One Dozen Homemade Postcards to Make and Mail - Crafting a Green World
That was a great tutorial, and I love every single postcard you have pictured here. Thanks!
awesome tutorial! Thanks 🙂
Great work. Thank you for the tutorial. They look like a lot of fun.
After recent surgeries, I have been looking for some special cards to show my thankfulness for the love and support I’ve been receiving. I hope I can manage to make some! Cutting and sewing should qualify for a little physical therapy. Accomplishing at least one or more will be the emotional therapy. 🙂 Thank you.
Thanks @nwquiltedcat ! I have seen these on IG, and haven’t taken the time to find out how they are put together. WIll have to add these to my Have To list 🙂
This is so awesome! Thanks for writing this tutorial.