Black Diamonds Quilt

Hi everyone,

I completed a new quilt called Black Diamonds from the Fat Quarter Shop. This quilt features a new ruler called the half triangle trimmer, which helps you to create perfect 2″ x 4″ half rectangle blocks.

If you purchase the supplies for this quilt using the links in my post, I get a small percentage of the sale to help offset the costs of running this blog. I appreciate any and all purchases via my affiliate links!!

Quilt Kit and Pattern Available Soon!

The Fat Quarter Shop will be announcing this new quilt pattern and quilt kit later in August or early September so watch for an announcement on their social media. The quilt kit will feature a fabric line called “Create” by Alli K Designs.

The half triangle trimmer is now available to purchase.

Let’s Take a Look at My Project!

For my version of the quilt, I used the Too Cute to Spook line by Me and My Sister Designs. I thought this pattern would make a really cute Halloween themed quilt.

Supplies for my Black Diamonds quilt: Too Cute to Spook Fat Eighth bundle, background fabric, pumpkin fabric for center blocks, binding fabric, half rectangle trimmer, and pattern

This pattern is really simple to make because it only contains 2 blocks: a star block and a diamond block. Both blocks use the half rectangle trimmer. I decided to make a test block before cutting out all the pieces and chain piecing.

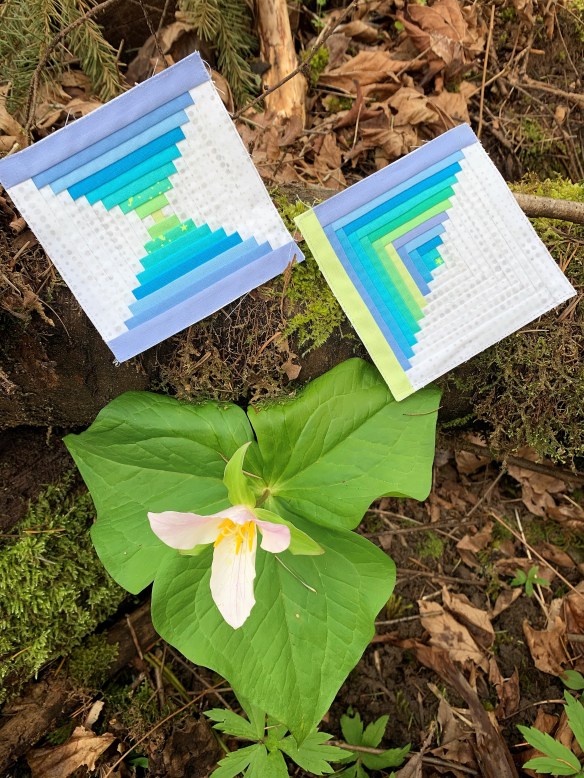
Here’s my test star block:

Black Diamonds quilt: a test star block

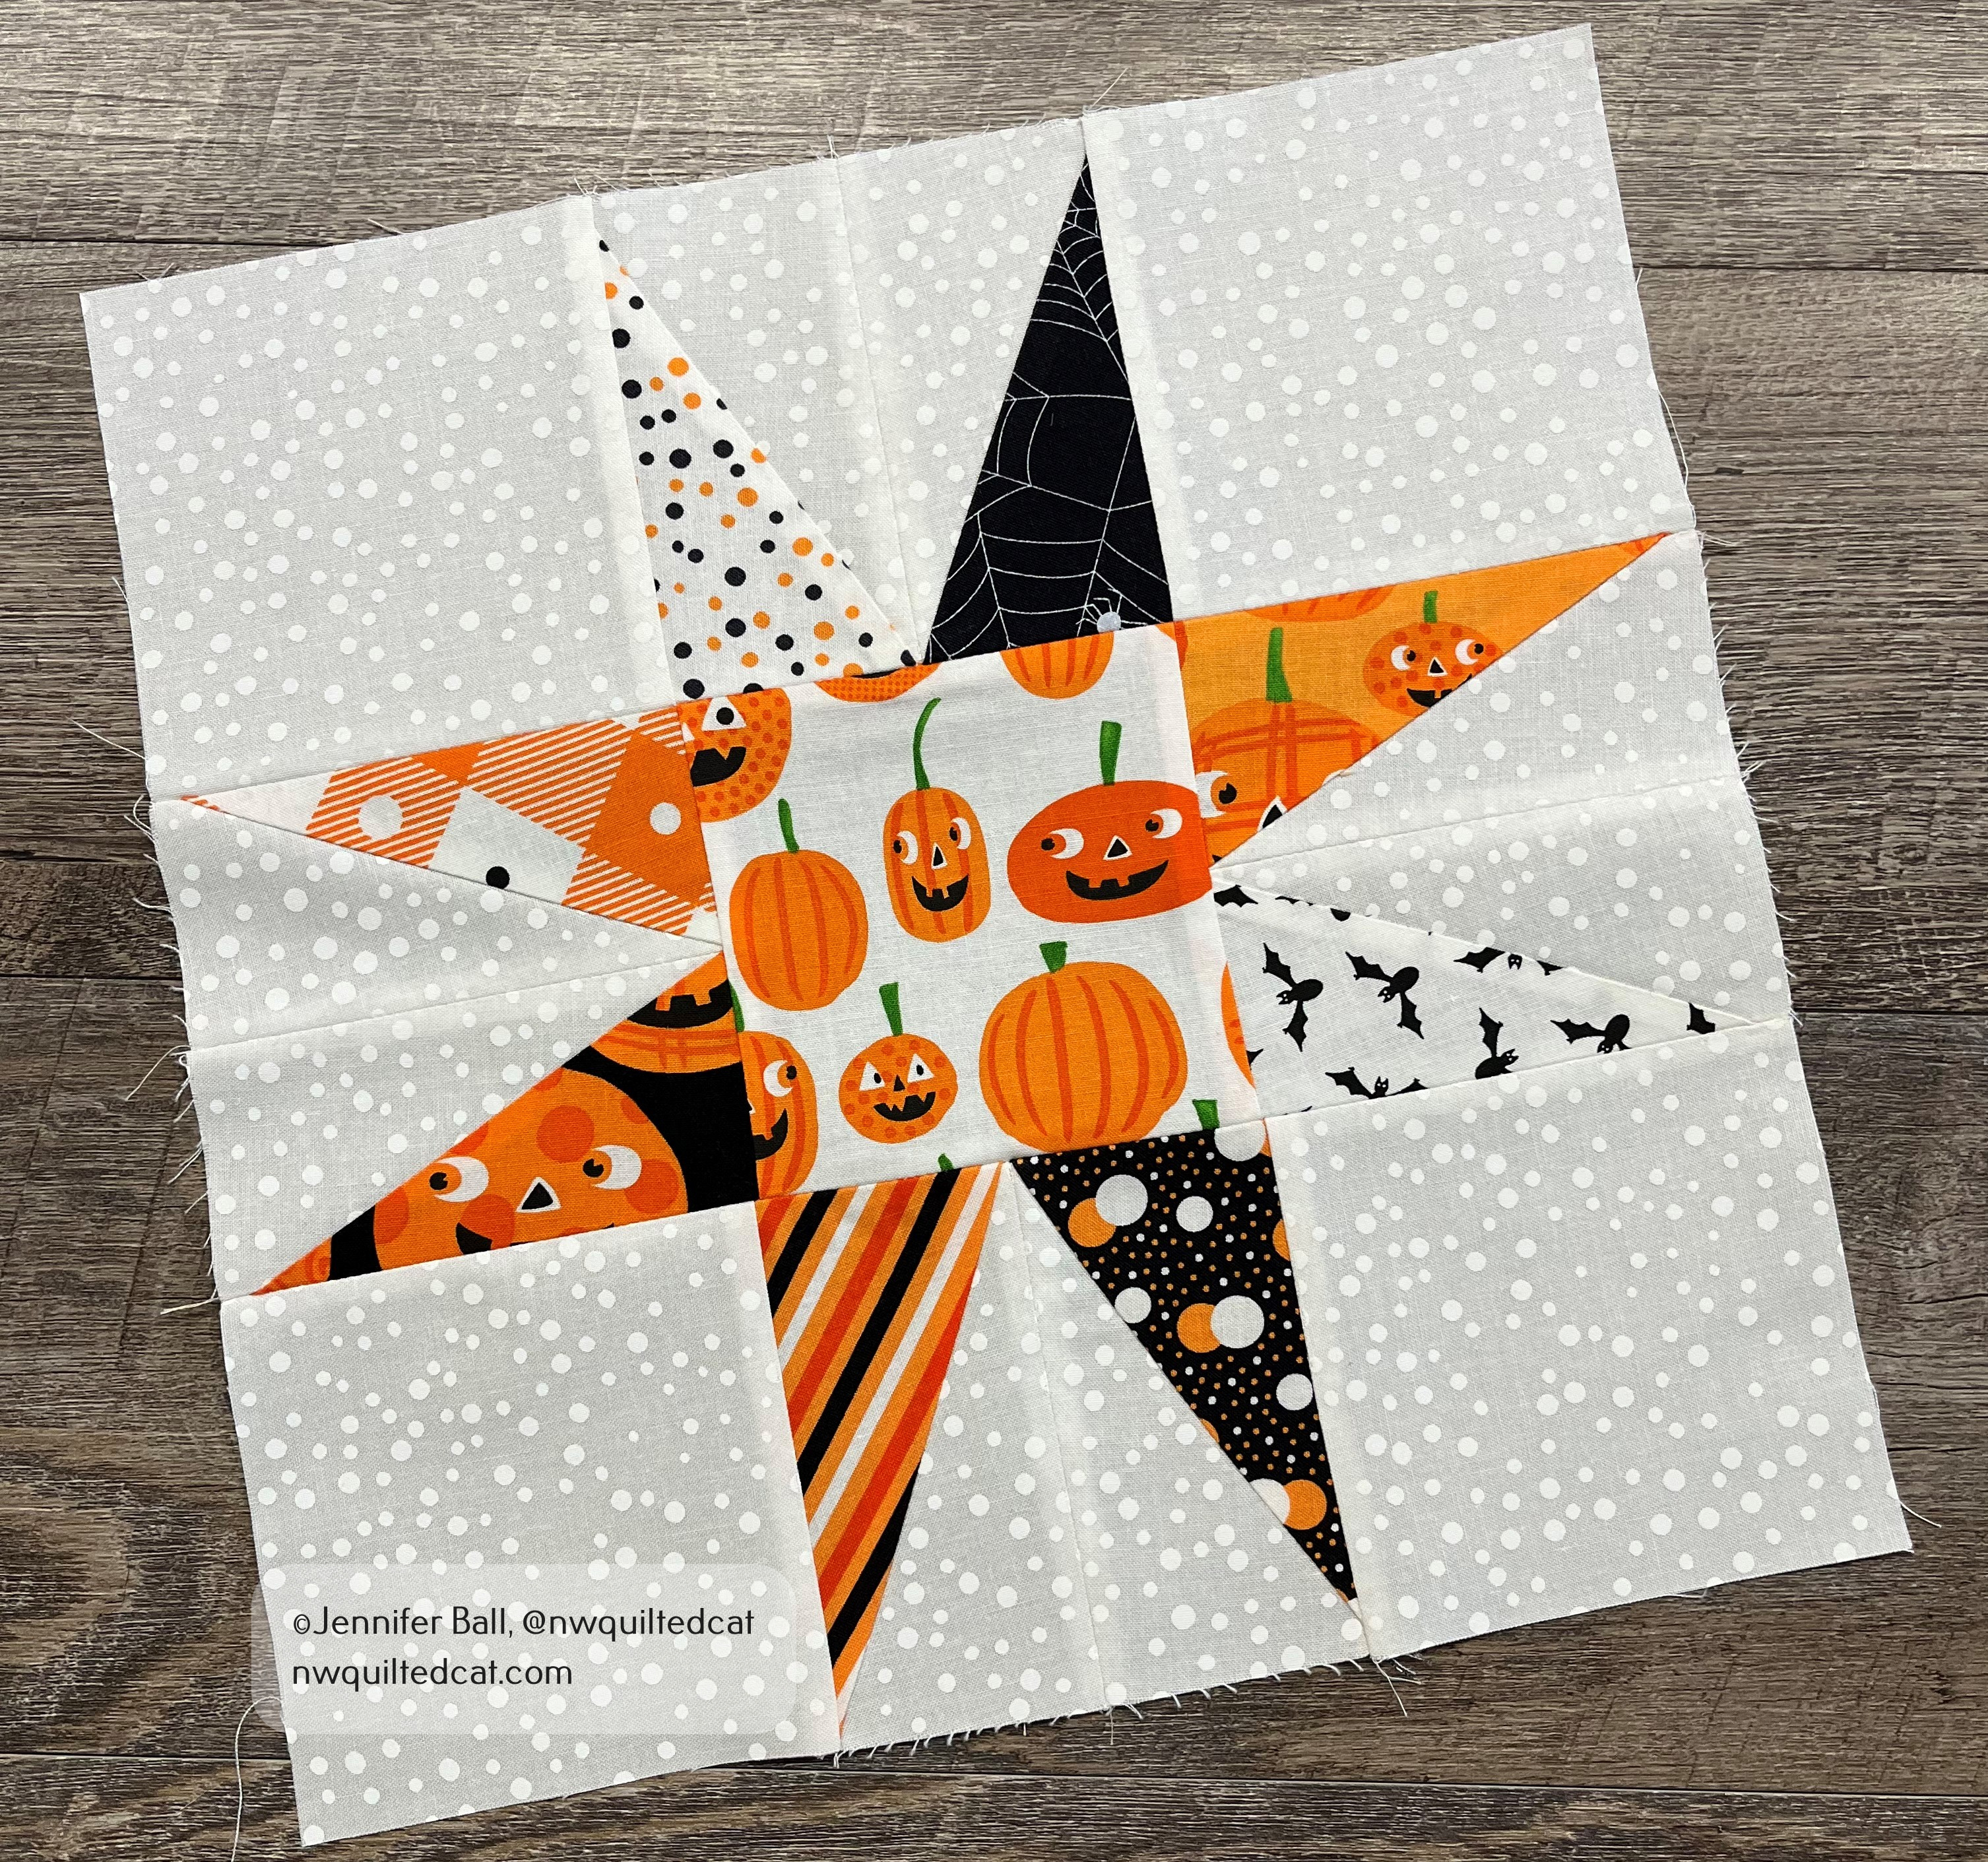
Usually, star blocks are made with half square triangles so I really like the look of this elongated star using the half triangle trimmer tool. It’s a really fun shape! I also made a test diamond block, which went together perfectly.

I decided to go for it and cut out all of my fabric pieces according to the directions. For my center squares in my star blocks, I used the same fabric for consistency. If you decide to go this route, then you’ll need a 1/2 yard of fabric. If you go scrappy, then you could use fat eighths or fat quarters.

TIP: A Stripology ruler saves you so much time and effort when cutting out strips of fabric.

I chain-pieced the star block units first and then the diamond block units. In this pattern, pay special attention to directions because you need to make right-side facing units and left-side facing units.

TIP: Use a Sue Daley rotating cutting mat when trimming your half rectangle units. As a bonus, I also use this mat to cut out pieces for English paper piecing.

Here’s a look at all my completed star blocks and diamond blocks:

Completed blocks for the Black Diamonds quilt

Aren’t they cute? When I pieced the units together, I didn’t worry about having 2 of the same fabrics touching each other. There is so much movement in the finished quilt that no one will notice!

After I had completed all these blocks, I laid them out on the floor with the help of my quilt assistant. As a way to check my placement, I usually take a picture with my cell phone. This picture helps to identify any block placement mistakes, and it also helps me to remember what order I need to sew the blocks.

My quilt inspector checks my block placement!

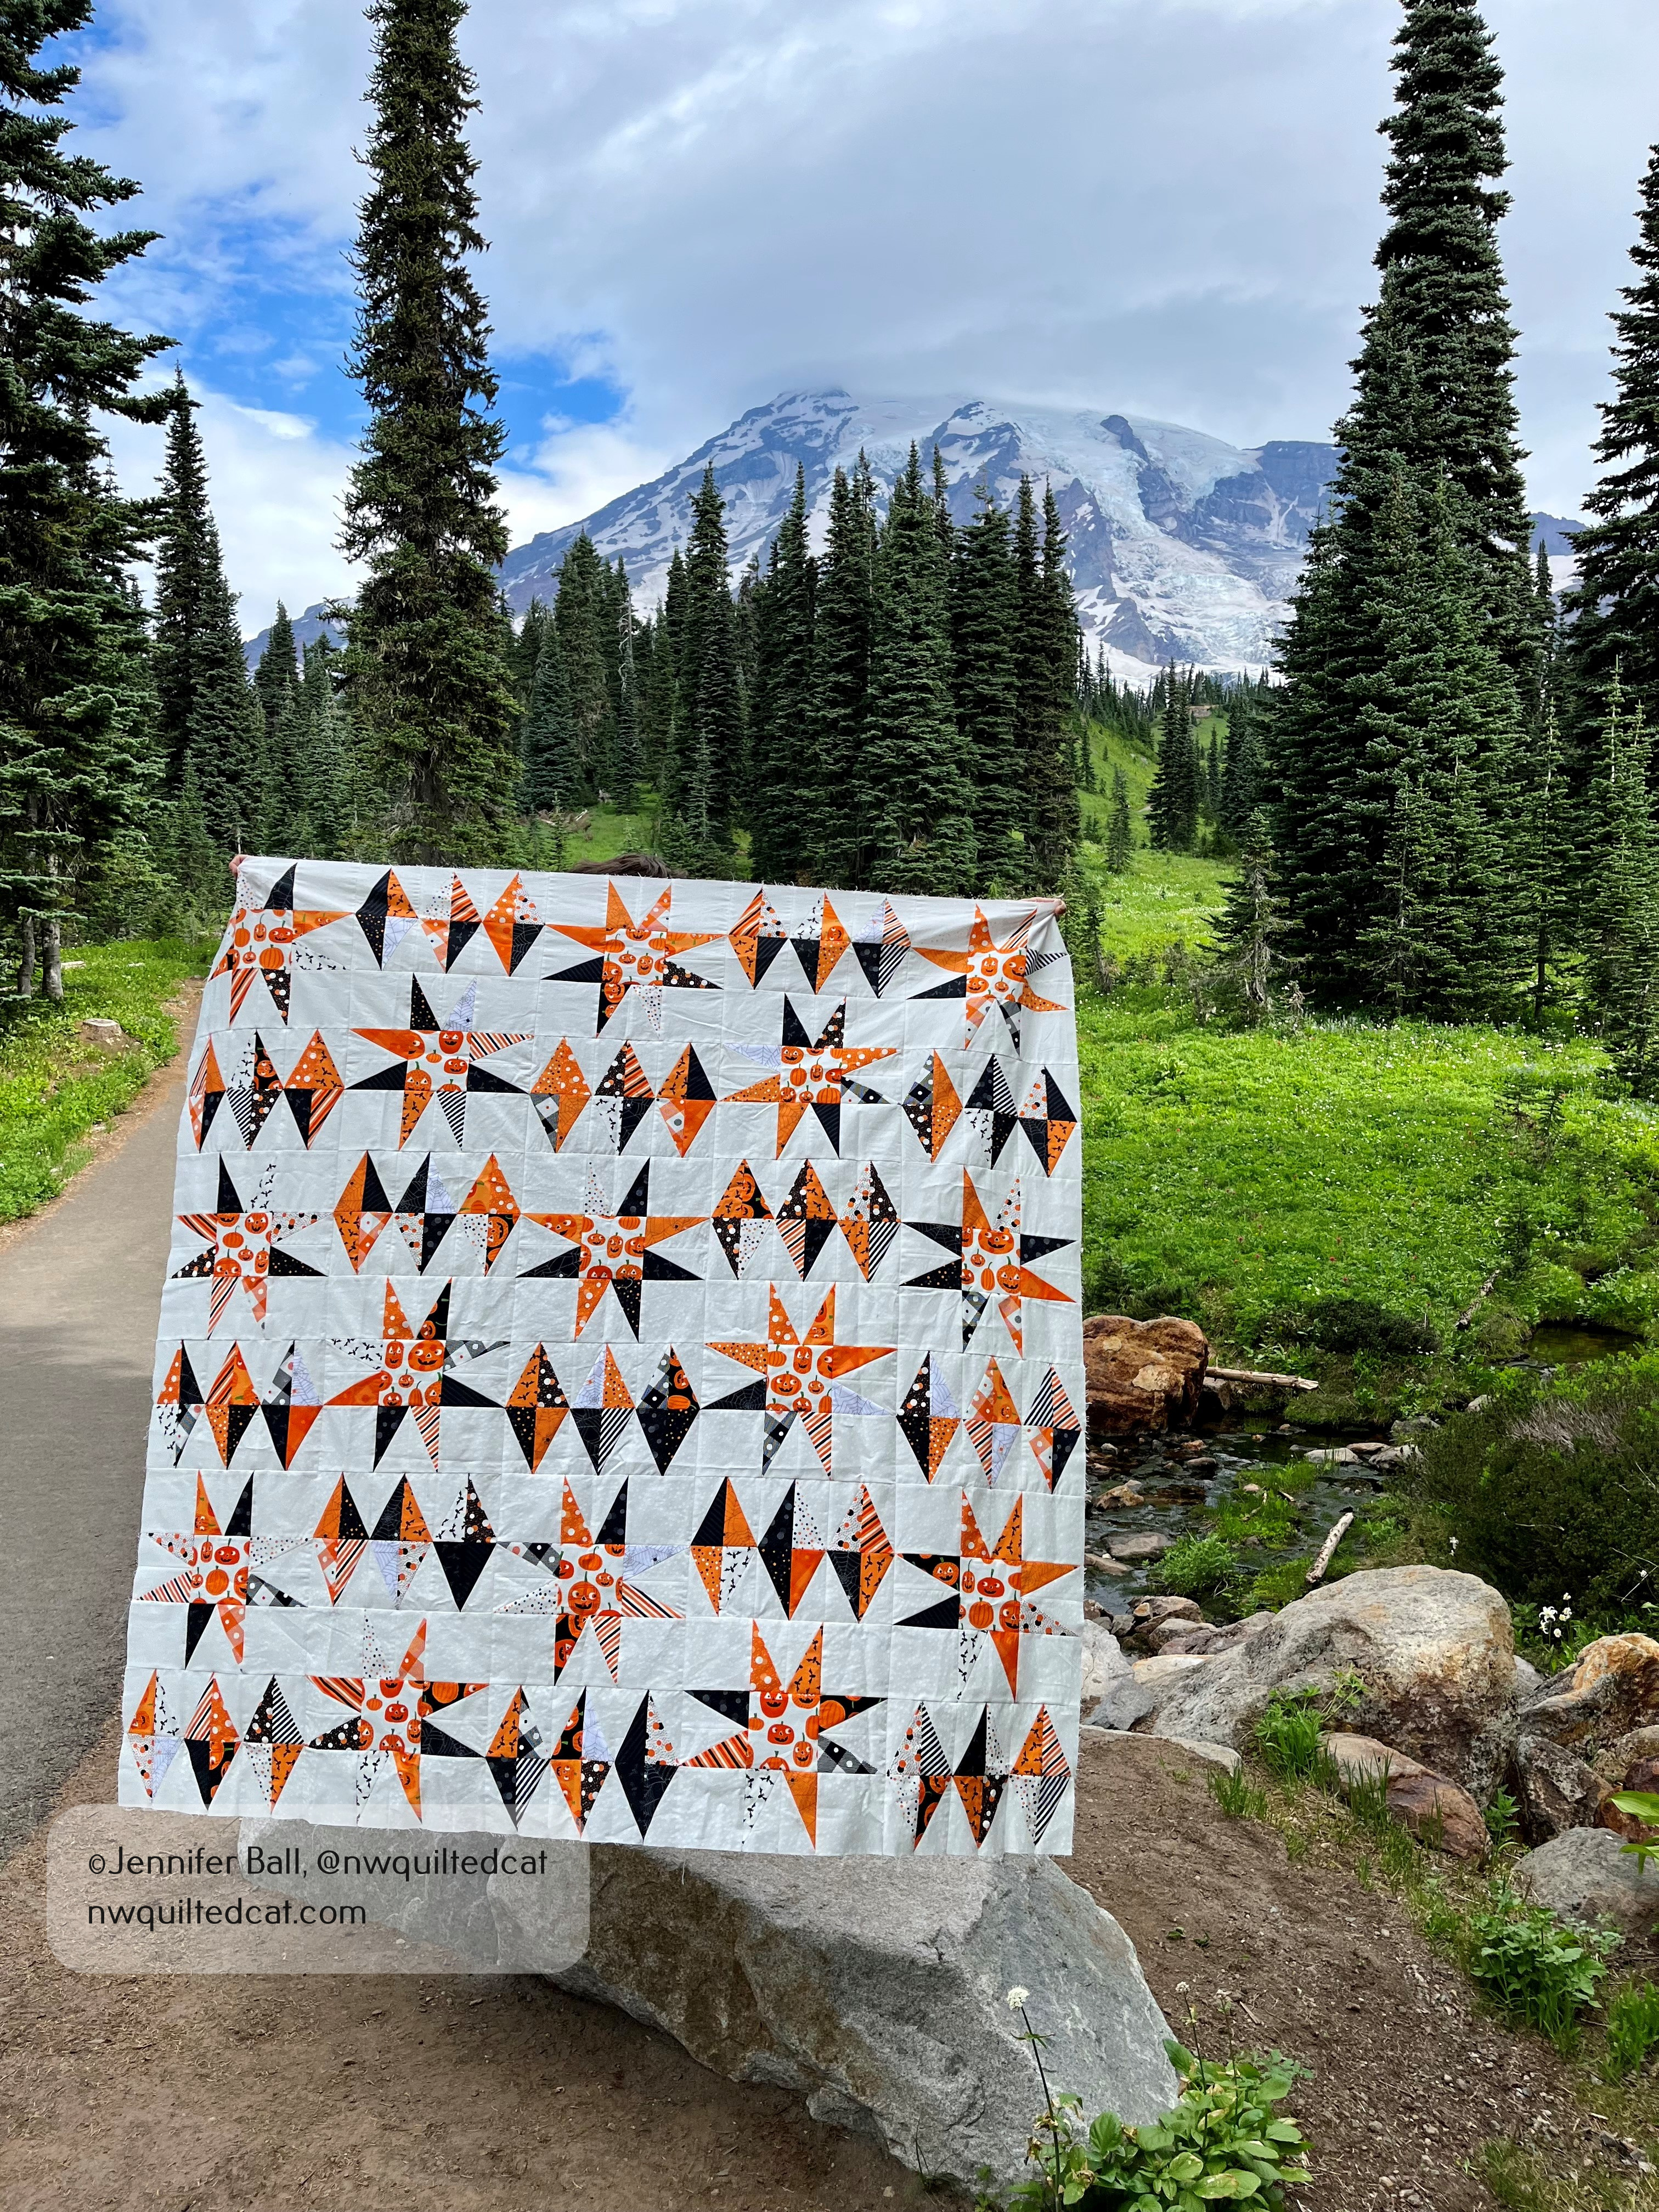
My quilt inspector sometimes likes to rearrange things when I’m not looking! I sewed the rows together and finished the quilt flimsy in time to take on a little mom and son hiking trip. My son was a good sport and held up the quilt top while I took a quick picture.

Black Diamonds quilt flimsy

Once home from our short adventure, I decided to quilt it with an open free-motion stipple pattern using white thread. For the binding, I used a striped fabric from the Too Cute to Spook line, which I think is the perfect finishing touch for this quilt!

Here’s a look at my completed Black Diamonds quilt, Halloween style!!

Completed Black Diamonds quilt

This quilt finishes at 60.5″ x 60.5″ so it’s a perfect lap size. You can easily enlarge it by making more blocks to expand it, and be sure to watch the Fat Quarter Shop for a blog post announcing the pattern and quilt kit plus a look at all the sample quilts. Watch for a live tutorial by the Fat Quarter Shop launching on September 8th.

Enjoy!

~Jen

My Quilt at QuiltCon Together

Happy March, everyone! We are seeing glimmers of spring everywhere around us after our ice storm several weeks ago. I have crocus and some early daffodils blooming and birds are joyfully singing!

A few weeks ago, I attended QuiltCon Together, which was a virtual quilt show this year due to the pandemic. Normally, QuiltCon, which features modern quilts in many categories, is held in person and alternates between west coast venues and east coast venues.

This year, I entered a quilt in the “Floral & Vine Fabric Challenge” category and, for the first time ever, I got a quilt juried into QuiltCon!! In this category, participants received 4
fat-eighths of specific fabric prints to use in the construction of a modern quilt. We could only use these prints plus any number of solid fabrics. We could buy extra quantities of the specified prints, but I decided to challenge myself by using only the provided fat eighth pack. I used 3 of the 4 prints plus a white solid in my quilt. The binding is a gray solid.

I drafted my pattern using paper and pencil initially. I wanted my quilt to express my hope that we will soon be able to gather together in person, and that this weird situation that we are currently living through will not last forever.

I came up with a design and then used EQ8 to create my foundation paper pieced templates and curved traditionally pieced templates. I then calculated my setting triangles to complete the design. I called my quilt, Concourse.

Here’s a picture of Concourse:

My quilt, Concourse, at QuiltCon Together, February 2021

Although QuiltCon Together is now over, the images below show what my quilt looked like displayed virtually. Quilt show attendees could zoom in on individual quilts and even listen to a short audio clip from the quilt makers.

My quilt, Concourse, hanging virtually at QuiltCon Together 2021, front view
My quilt, Concourse, hanging virtually at QuiltCon Together 2021, back view

I was very pleased to have my quilt selected as one of the entrants in this challenge fabric category. Although I did not win a ribbon, I’m just so happy to have had a quilt in the show.

I took a screen cap of the other quilts in the category so that you could see the variety of modern quilts that used just these 4 prints plus solids. Quite impressive!

QuiltCon 2022 is scheduled to be an in-person quilt show in Phoenix in February. I’m very hopeful that we’ll be returning to in-person events later this year. I hope to enter a quilt into that show and maybe (just maybe), I might get to attend it with my sister!

P.S. I added a new page to my blog with recommended quilting supplies and notions. Go check it out!

Happy quilting!

-Jennifer

Sorting My Scrap Bin for a Sew Along

Hi everyone,

I have a very large shoe box, the kind that fits boots, behind my sewing area where I toss scraps from projects that are large enough to reuse. These scraps have been growing and growing until my box was overflowing.

Then, I noticed that @thehomebodycompany and @the.weekendquilter were hosting an Instagram scrap busting sew along called the “Scrappy Summer Sew Along” with the hashtag, #scrappysummersal2020. This sew along uses a free pattern, which contains some different sizing options for using the simple 9-patch block for the quilt.

I dumped out my scraps and started sorting into color groups.

Sorting scraps

Wow, that got tiring fast in my very warm sewing room so I took a little break. When I came back into the room, I found my cat, Romeo, decided to reorganize things a bit.

Romeo reorganizes the scraps

I convinced Romeo to let me continue sorting by color. As the piles grew, I started thinking about how I wanted my scrappy quilt to look. I decided to do a limited color palette by using just pinks/reds and yellow scraps for a raspberry lemonade theme. My background will be a white-on-white fabric from my stash.

I’m making the rectangular throw size quilt so I needed to cut hundreds of 2″ squares from my scraps and hundreds of 2″ squares from my background fabric.

For the background fabric, I used the XL Stripology Ruler by Creative Grids to first cut the 2″ strips, and then sub-cut the strips into 2″ squares. This ruler is a lifesaver! I cut out all my pieces quickly and accurately without any hand fatigue. I highly recommend investing in one of these rulers.

Here’s a look at some of my pretty 2″ squares, just waiting patiently to be sewn into 9-patch blocks.

Pretty 2″ squares

I’m using this project as a leader/ender for other projects that I have underway. I’ll show you some of my 9-patch blocks using these squares soon!

Happy quilting,

Jen


Limited Edition Liberty Box from FQS

Hi all,

If you are a subscriber or just a fan of the Sew Sampler boxes from the Fat Quarter Shop, they are offering a 2020 limited edition Liberty Box for advanced reservation for $4.99.

The box will be red, white, and blue themed, and will contain 5 items that you can only get in this box.

I really love patriotic themed quilts, but I don’t have many for myself so I jumped at the chance to reserve one of these boxes. The box ships in late June, when you’ll be billed the remaining $23.99 plus shipping.

You can reserve a Liberty Box at the Fat Quarter Shop now until they are all gone. If you order via my link, I get a small commission (about 30 cents), which helps me to offset the cost of this blog.


Let me know if you ordered a box! Can’t wait to see the project.

Happy quilting,

Jennifer

2020 Mini Series SAL – Week 7

Happy Thursday, everyone!

This week, we are working on block 7 called the “Curved Cabin” in the Mini Series sew-along hosted by Giucy Giuce and Alison Glass.

This block is comprised of 4 tiny sections, giving you the ability to create many different looks from one block depending on your fabric choices and fabric placement. Each tiny section is 2-inches by 2-inches (finished measurements).

I’m continuing my color scheme by using a Kona charm pack in Mermaid Shores with a batik background that reminds me of tiny beach pebbles.

The pieces in each section are tiny! I narrowed my final block assembly to these 3 options:

I think it’s so wonderful how this block can completely transform depending on my layout! I really liked options 1 and 2, but I ultimately went for option 1 because I do enjoy the center circle that emerged.

My Curved Cabin block with a little frog friend!

I think a quilt made just from this block would be a fun project in the future. I could make the blocks all the same, or maybe do an ombre effect.

Here’s a look at my blocks together:

Mini Series SAL, blocks 1 to 7

We now have 7 out of the 8 blocks in the Mini Series completed. There is 1 bonus block available to the participants only, so I plan to make it next week along with the final block.

If you are participating in the SAL, I’d love to hear about it. Leave a comment and let me know your Instagram handle.

Happy quilting!

~Jen

2020 Mini Series SAL – Week 5

Hi everyone,

Surprisingly, this week is going by fast for me. I’m balancing working from home with helping my teen with his schooling from home, and fitting in some sewing each evening. I’m also trying to keep anxiety feelings at bay with regular exercise, mostly in the form of long walks with my dog.

The block in our sew-along this week is one of my favorites. It is called Stretched Geese. I really like any form of the flying geese block, and this one is really fun!

This is my 4-inch block in progress:

Stretched Geese block during construction

I decided to alter the block slightly by adding little border strips to the sides of the flying geese using my one print fabric from Tula Pink. I’m working in a little bit of this fabric into each block.

Stretched Geese block, slightly modified

I love my growing group of little blocks! The beachy feel of the fabrics is quite soothing.

Mini Series SAL blocks, weeks 1 to 5

We now have 3 official blocks left to make in the SAL, plus I need to make the bonus block.

On one of my dog walks this week, I saw one of my favorite flowers, lupine, starting to bloom. Isn’t it pretty?

I just realized that the colors in my lupine photo below match the fabric colors in my SAL blocks! What a happy coincidence.

Lupine starting to bloom

I hope you are all staying healthy and making a little time to work on sewing projects other than face masks.

Take care!

~Jen

2020 Mini Series SAL – Week 4

Hi everyone,

The little block for this week is called Hexagon Step. This is another block that took about 2 hours to sew together.

When I first saw the block, it reminded me of radiation danger signs!

Hexagon Step Pattern cover

I decided to change up the look by not alternating my color strips with background strips in each row. Instead, I used full color row around the hexagon shape and then followed it with a full row of the background fabric.

Here’s a look at my Hexagon Step block with one of my antique toy sewing machines. Isn’t the little seahorse cute?

My Hexagon Step block with antique toy sewing machine

I’m enjoying piecing these little blocks each week. There are small but satisfying in these unusual times. We have four more blocks left to sew in the SAL, not counting the bonus block, and then we have a 2 week window to make and finish a project using the blocks.

Here’s a look at my first four blocks together:

Mini Series SAL blocks 1-4

Next week, I’ll post my Stretched Geese block for week 5.

Take care and happy quilting!

~Jen

Add a Pipe Cleaner to Homemade Face Masks for COVID-19

Hi everyone,

I have made about 30 masks so far for my sister, a nurse practitioner, and her colleagues.

She asked if I could modify the mask to add a pipe cleaner along the top. Pipe cleaners are easy to bend into shape so that you can adjust the mask for a better fit.

I adjusted the Deaconess face mask pattern to allow for a pipe cleaner casing. I also slightly enlarged the pattern. This larger face mask will still fit smaller faces. If you are using elastic, just add a large safety pin to attach the elastic straps to each other around the back of the head. I’m running out of elastic so I made fabric ties instead, which allow you to adapt the mask to fit different sizes of faces easily.

I made a Star Trek themed face mask for my husband with the pipe cleaner casing  and fabric ties. It fits over his larger face with a full beard and mustache nicely.

Star Trek themed homemade mask with pipe cleaner

I put the Star Trek mask on my Tula Pink cat, pattern by Funky Friends Factory.

You can sort of see the shaping along the nose, provided by the pipe cleaner.

Star Trek themed homemade mask on Tula Pink cat!

If you’d like to make this homemade face mask modification, I put my instructions into a free Word document, Adding a Pipe Cleaner to a Homemade Face Mask. 

These instructions are free to use. Let me know if you found them helpful!

Stay safe!

~Jen

2020 Mini Series SAL – Week 2

Hi everyone!

Yesterday, quilters everywhere kicked off week 2 of the 2020 Mini Series hosted by Giucy Giuce and Alison Glass. You can read about my fabric selections and the first block, the Log Cabin, here.

The block this week is called the Courthouse Step, and it is very similar to the Log Cabin block with some minor differences. The Log Cabin took longer for me to sew because each piece slightly overlaps the prior piece, radiating outwards into the classic log cabin shape. Each piece must be pressed and trimmed separately before moving onto the next piece.

The Courthouse Step block sews together much quicker than the Log Cabin block because the little rectangle pieces on each step face each other, enabling me to sew two pieces before pressing and trimming.

For example, in the photo of my Courthouse Step block below, you can see each color is mirrored on the opposite side.

Courthouse Step block with a trillium

I love the look of these two blocks together. You can see the similarity between the blocks, but the differences really make them shine on their own.

Log Cabin and Courthouse Step with a trillium

While I was taking pictures of these blocks in a wooded area near my house, I saw a mama deer and her two fawns! Look closely in the background of this picture where you can see mama and one fawn.

Courthouse Step block with deer in background

Next week, I’ll post my completed Pineapple block. Are you participating in the SAL? It is completely free to join, but you do have to purchase the patterns either from your favorite quilt store or online at Alison’s website.

Happy sewing!

~Jen

Making Face Masks, Assembly Line Style

Hi everyone,

In my previous post, I mentioned that I’m making face masks for my sister, who is a nurse practitioner.

I’m making a few each day after work, and I’m mailing them to her in batches. I’ve made approximately 25 masks so far. I have run out of 1/4-inch elastic, but I do have some 1/8-inch elastic. I think I have enough of the smaller elastic to make another 20 masks or so. After that, I will start making fabric ties for the masks.

I’ve become really efficient at mask making. Initially, I was making complete masks, one at a time as I learned the pattern. Now, I’m making them assembly line style.

After work yesterday, I did the first mask making step upstairs in my sewing room. I stitched, right-sides together, about a dozen masks with the elastic inserts.

Then, I brought the masks downstairs to work on the next step while watching a movie with my husband and son. After turning each mask right side out, I’m use the new Oliso mini iron to press each mask.

This little iron is very portable and gets nice and hot for my smaller quilting and sewing projects. I do use it on a wool pressing mat so that I do not need to have an actual ironing board.

Once I press the masks, I eyeball the 3 pleats and pin them.

I now have a set of 12 masks to take back upstairs and finish the top-stitching.

Pressing Face Masks with an Oliso mini iron

I find that making the masks in batches of 12 goes pretty smoothly for me, and I don’t feel overwhelmed by the project.

I’m very happy to be able to contribute in this small way. My sister is sharing these masks with her colleagues until the medical grade masks are available again.

Stay safe and happy quilting!

~Jen