Aviatrix Medallion, Border 4

I finished adding border 4 to my Aviatrix Medallion quilt. I love how it keeps growing and growing! We have just 2 more (larger) sized border to add to it over the next month or so.

You can follow along and make your own Aviatrix Medallion quilt. Just hop on over to Elizabeth’s blog and pattern shop, Oh Fransson.

I love the bright, cheerful solids and prints in my quilt. I can envision making the quilt again up until border 4 in a different color scheme and perhaps as a picnic quilt.

The difficult part now is that I can no longer attach the quilt top to my design wall for photographs. I’m using the floor and, curiously enough, no cat happened to wonder by during this picture!!

Here’s Aviatrix Medallion with border 4 added:

Aviatrix Medallion with Border 4 Added

Aviatrix Medallion with Border 4 Added

I have my fingers in quite a few quilt pies at the moment so I’ll be blogging updates on a few of my projects later on this week.

Happy quilting!
~Jennifer

Bonnie Hunter Workshops!

Happy Wednesday, quilty friends!

I had a fun-filled two days this week as I attended some Bonnie Hunter workshops sponsored by the NW Quilter’s guild. I took 2 vacation days from work and got to play with fabric, meet Bonnie in person (woo hoo!), and meet some fabulous quilters as well.

On Monday, we worked on the Cathedral Stars quilt blocks. This quilt is available as a free pattern on Bonnie’s blog here. For my blocks, I wanted my brights to be really bright so I selected different batiks to use.

Here’s a picture of me (in the blue), Bonnie in the middle, and my quilt blog friend Beth of Words and Stitches who I got to meet face-to-face!

Meeting Bonnie and Beth!

Meeting Bonnie and Beth!

By the end of the class, I had 5 blocks completed:

Cathedral Stars Blocks

Cathedral Stars Blocks

I attended Bonnie’s lecture and trunk show on Monday evening. So many beautiful quilts! I took pictures and hope to create a slideshow to upload soon.

On Tuesday, we worked on the Smith Mountain Morning quilt. This pattern is from Bonnie’s book, Scraps & Shirttails II. I used pinks and grays for my colors. Two of the students brought in this “Quiltzilla” dinosaur, and I took a picture of it next to the completed quilt. So fun!

Quiltzilla with Smith Mountain Morning

Quiltzilla with Smith Mountain Morning

I got 3 blocks finished in this class – two star blocks and 1 log cabin block. The second picture is from my iPhone so it didn’t capture the colors too well, unfortunately.

I highly recommend attending of one Bonnie’s workshops! You’ll learn great techniques, sew some fun blocks, and meet new friends. Now, I’m back at work wishing that I was stitching.

Enjoy!
~Jennifer

Celtic Solstice Finished!

Whew – what a binding marathon for me this week! I finished the quilting and binding on my Celtic Solstice mystery quilt just in time for Bonnie’s classes in Portland this coming week. This quilt is designed by Bonnie Hunter over at Quiltville. As of June 1st, the pattern is no longer a freebie, but will included in a future publication.

For my quilt top, I kept to Bonnie’s suggested color palette of greens, oranges, yellows, and blues. The fabrics came from my stash with the exception of the green outer border and the blue backing.

I do have a couple of piecing boo-boos on this quilt top, but I’m really happy with how it turned out in the end. There are literally hundreds of individual fabric pieces comprising the blocks in this quilt!

The entire quilt is pieced and quilted with Aurifil 50 wt in Light Sand, #2000. The batting is Quilter’s Dream Poly in Mid Loft. I did free-motion quilting using a domestic machine.

Here is the quilt front with my little guy:

Ian standing in front of my finished Celtic Solstice quilt

Ian standing in front of my finished Celtic Solstice quilt

The quilt front by itself:

Finished Celtic Solstice Quilt

Finished Celtic Solstice Quilt

I used a solid blue for the back and attached a label to the lower corner. The binding is the same green fabric as the outer border.

Back of Celtic Solstice

Back of Celtic Solstice

I’m so happy to have another quilt finished!

Happy quilting,
~Jennifer

Aviatrix Medallion Border 3 + Celtic Solstice (Almost Finished!)

This week, I’ve been catching up on a few quilty projects in the evenings.

First up is border 3 on this amazing Aviatrix Medallion quilt by Elizabeth Hartman. Each border keeps adding to the awesomeness of this quilt! I have a few errors and piecing mishaps in this border, but overall I’m pretty happy with it and using it as a great skill builder.

Here’s the quilt top with border 3:

Aviatrix Medallion with Border 3

Aviatrix Medallion with Border 3

Next, I finished quilting my Celtic Solstice top. I used an all over meandering stitch using a domestic machine and Aurifil thread #2000. After quilting, I placed it on the floor to measure for my binding. My cat had to come inspect!

Romeo inspects my Celtic Solstice quilt (before binding)

Romeo inspects my Celtic Solstice quilt (before binding)

Celtic Solstice is designed by Bonnie Hunter and was a free pattern until June 1st this year. Since we’re past that date, the quilt instructions will be included in one of her future publications. If you missed out on this one, she will offer the next free mystery on her blog this fall.

I’m now feverishly working on hand stitching the backside of the binding before getting to see Bonnie in person next week in Portland for a class! Woo hoo!

Enjoy!
~Jennifer

Doggie Poo Bag Holder Tutorial

This weekend while walking our dog, we discovered that our usual doggie poo poo bag holder was missing. In the past, I’ve tried the plastic ones that you can buy at the store, but they always break or I can’t get them open in certain weather conditions.

I decided to stitch up a little bag this weekend. It is the perfect size for a holding a roll of doggie poo bags plus some treats.

I used a cute dachshund dog print fabric for the main bag body and an Essex Yard Dyed Linen in Black for the trim. I used black 1/4″ cording that I had on hand and green Aurifil thread for a fun pop of color.

Here is what you’ll need:
(1) 9 x 6 inch piece of print fabric
(1) 9 x 3 inch piece of trim fabric
(1) 21-inch length of cording
Thread
Basic sewing supplies

Doggie Poo Bag Holder Supplies

Doggie Poo Bag Holder Supplies

Assembly instructions:
1. Sew the trim to the print, right sides together, along the top edge. Sew with 1/4″ seam allowance.
2. Press the seam towards the trim.
3. Add button holes or other sturdy stitching on the lower portion of the trim, about 1/2-inch away from the raw edge. Cut the button hole slot opening with scissors.

Trim Stitched Down to Print Fabric

Trim Stitched Down to Print Fabric

4. Fold the unit in half, right sides together, and stitch around 3 sides but leave the top edge open for turning inside out.
5. Keep the unit wrong sides out, but fold the trim down to the previous seam line to form the casing. Sew along the casing edge.
6. Turn the bag inside out so that the right side is facing out.
7. Press.
8. Insert the cording through the holes in the casing.
9. Optional. Tie the cord ends together after securing the doggie poo bag to a leash, backpack, or belt.
10. Add in your doggie poo bag roll and treats and take your pooch for a walk!

Doggie Poo Bag and Treat Holder

Doggie Poo Bag and Treat Holder

I use a carabiner type clip to attach my doggie poo bag holder to the leash handle. The doggie poo bag holder is removable so I can later tie it to a backpack or belt, if needed.

Doggie Poo Bag Holder Attached to Leash

Doggie Poo Bag Holder Attached to Leash

Ta da! You now have a fun little holder to carry a not-so-fun roll of doggie poo bags.

Enjoy,
~Jennifer

Aviatrix Medallion Border 2 + Oregon Coast

Happy Memorial Day, everyone!

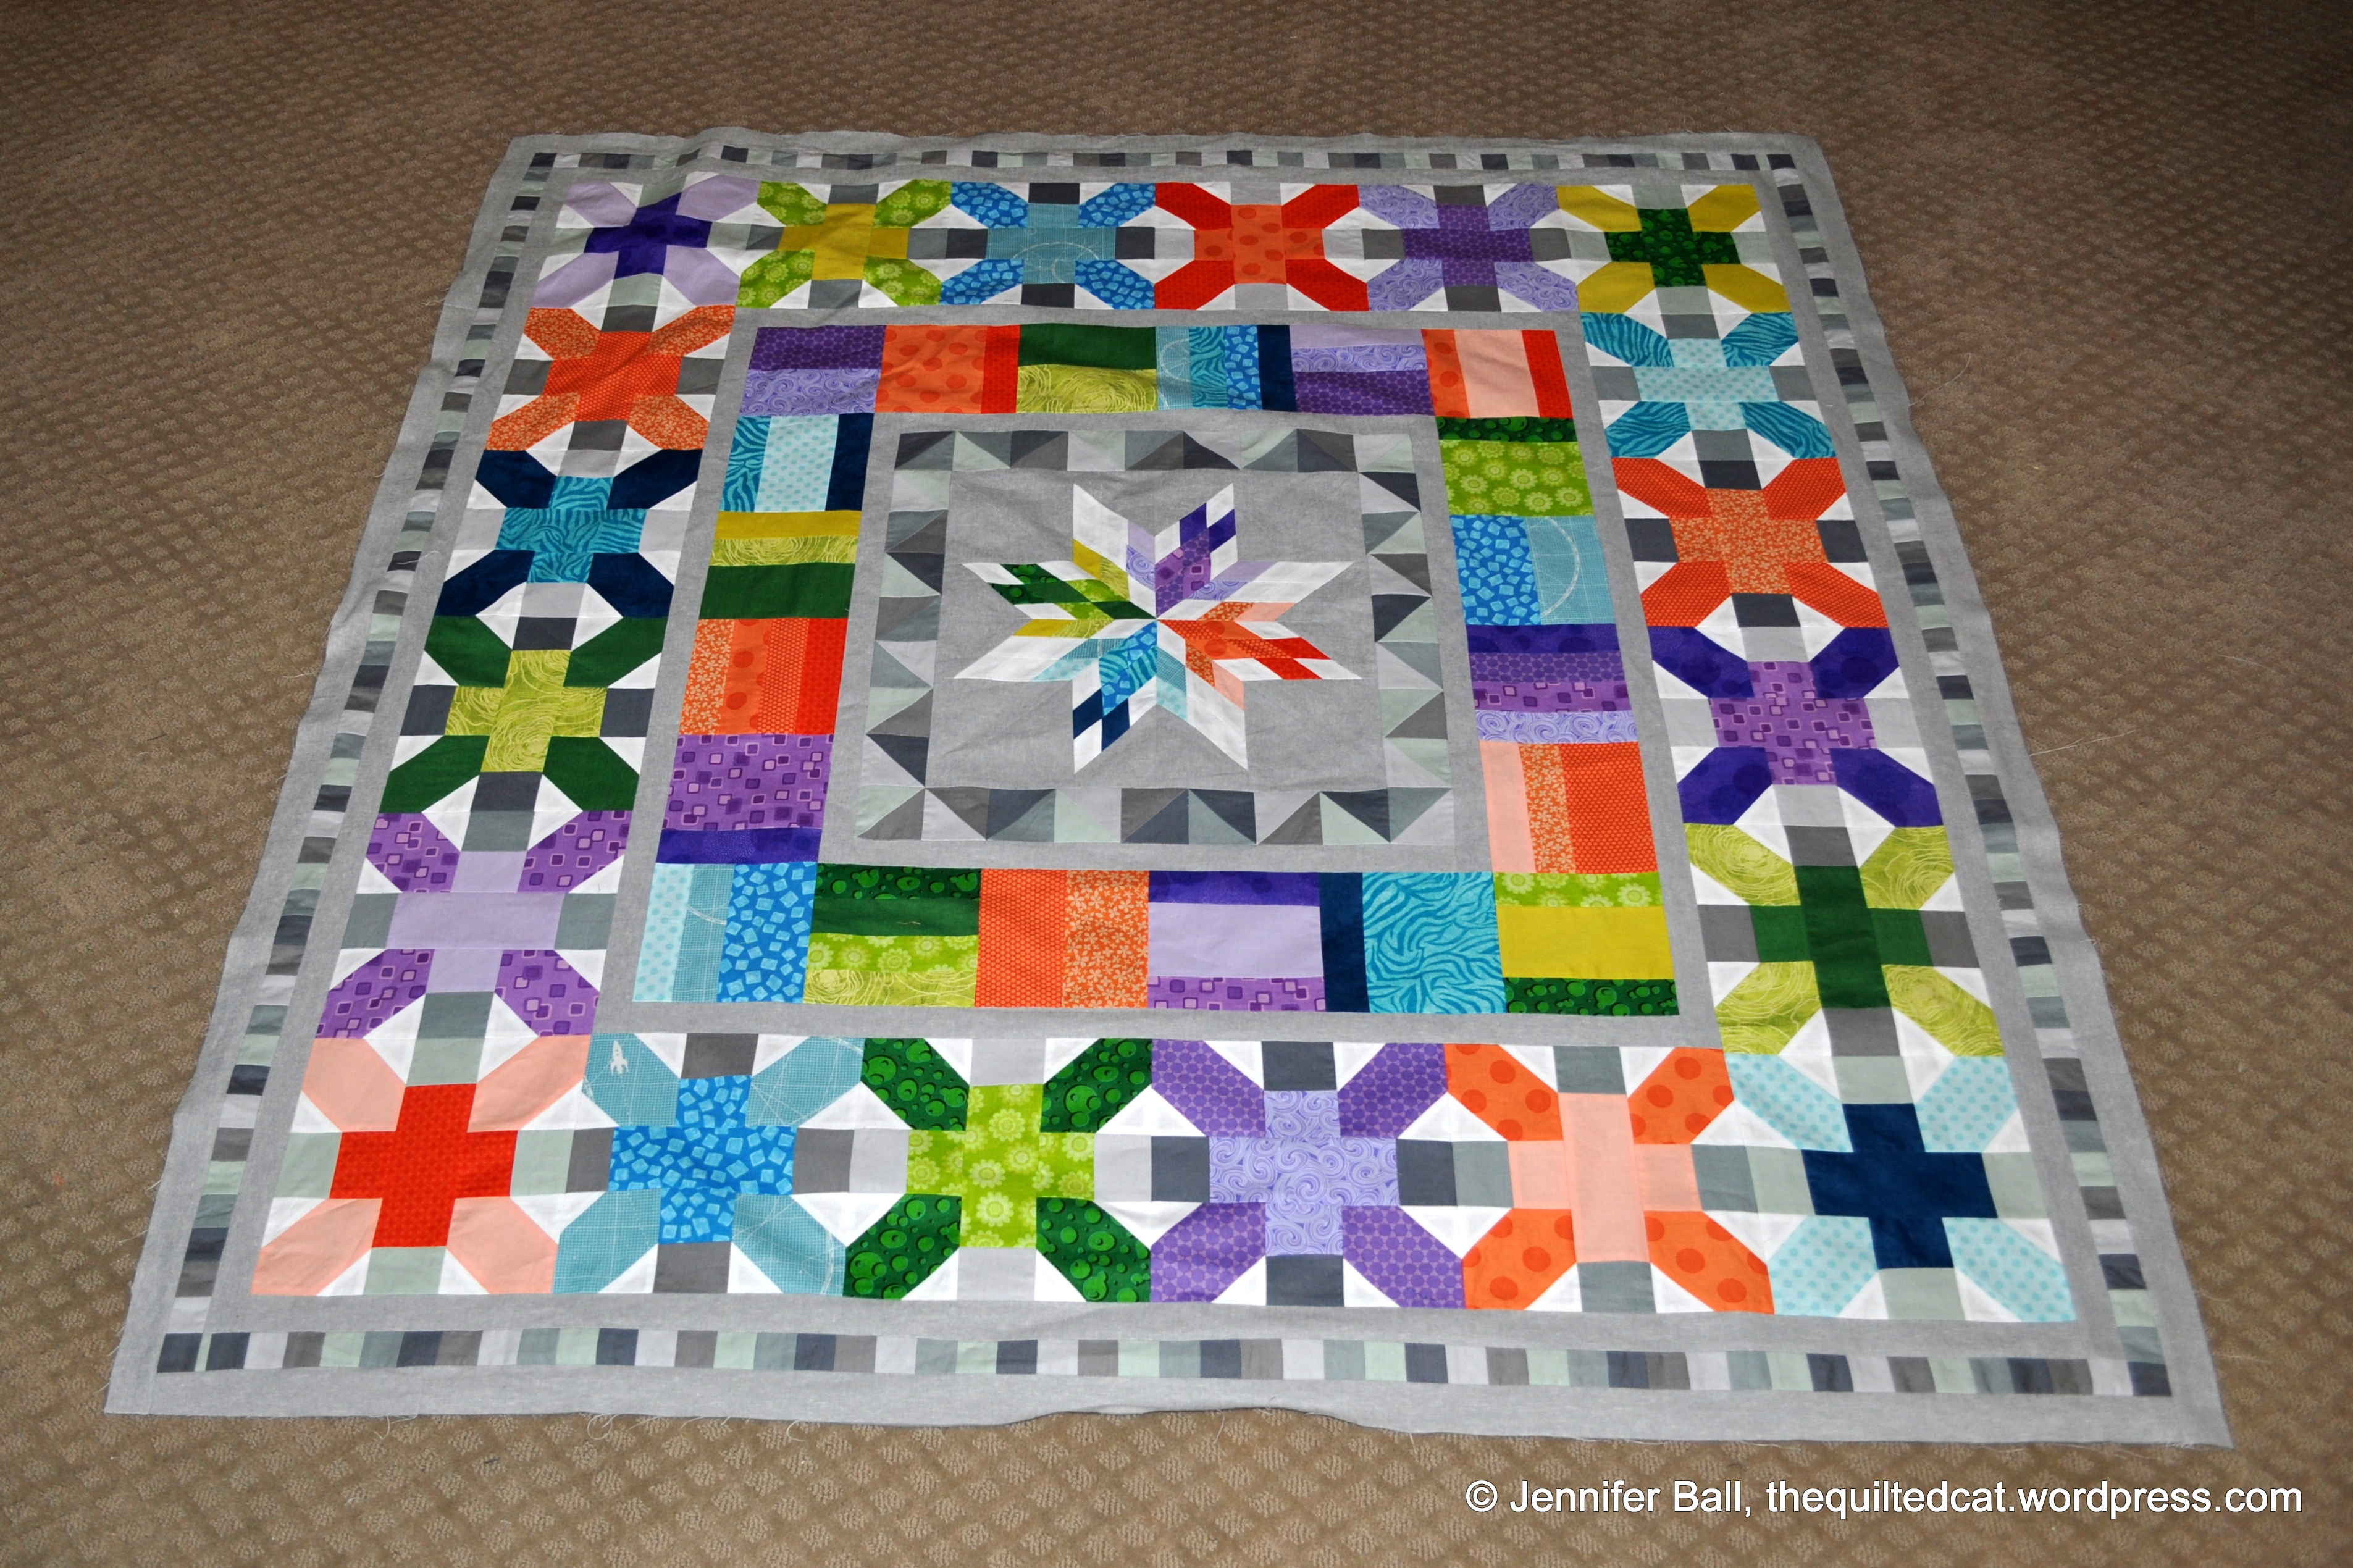
My Aviatrix Medallion quilt now has colorful border 2 added, and I’m working on stitching the units together for border 3 today. You can purchase the pattern and follow the quilt-along on Elizabeth’s blog, Oh Fransson.

Border 2 went together fairly quickly as the piecing was simple.

Aviatrix Medallion, Border 2 Added

Aviatrix Medallion, Border 2 Added

Before I had the chance to add the sashing border to border 2, my cat inspectors arrived. I think my little grey kitty likes it!

Cats Inspect Aviatrix Medallion

Cats Inspect Aviatrix Medallion

My family and I took a nice day trip this holiday weekend to visit the Oregon Coast, specifically the Newport area to tour several tall ships, the Lady Washington and the Hawaiian Chieftain. The weather was gorgeous!

Tall Ship - the Lady Washington

Tall Ship – the Lady Washington

Later that afternoon, the tall ships were scheduled to take ticketed passengers on special tours. We drove over to the Yaquina Head Lighthouse Natural Area to see if we could see the ships. Although we didn’t have binoculars, we did spot them out in the ocean.

Yaquina Head Natural Area with Tall Ships in the Distance

Yaquina Head Natural Area with Tall Ships in the Distance

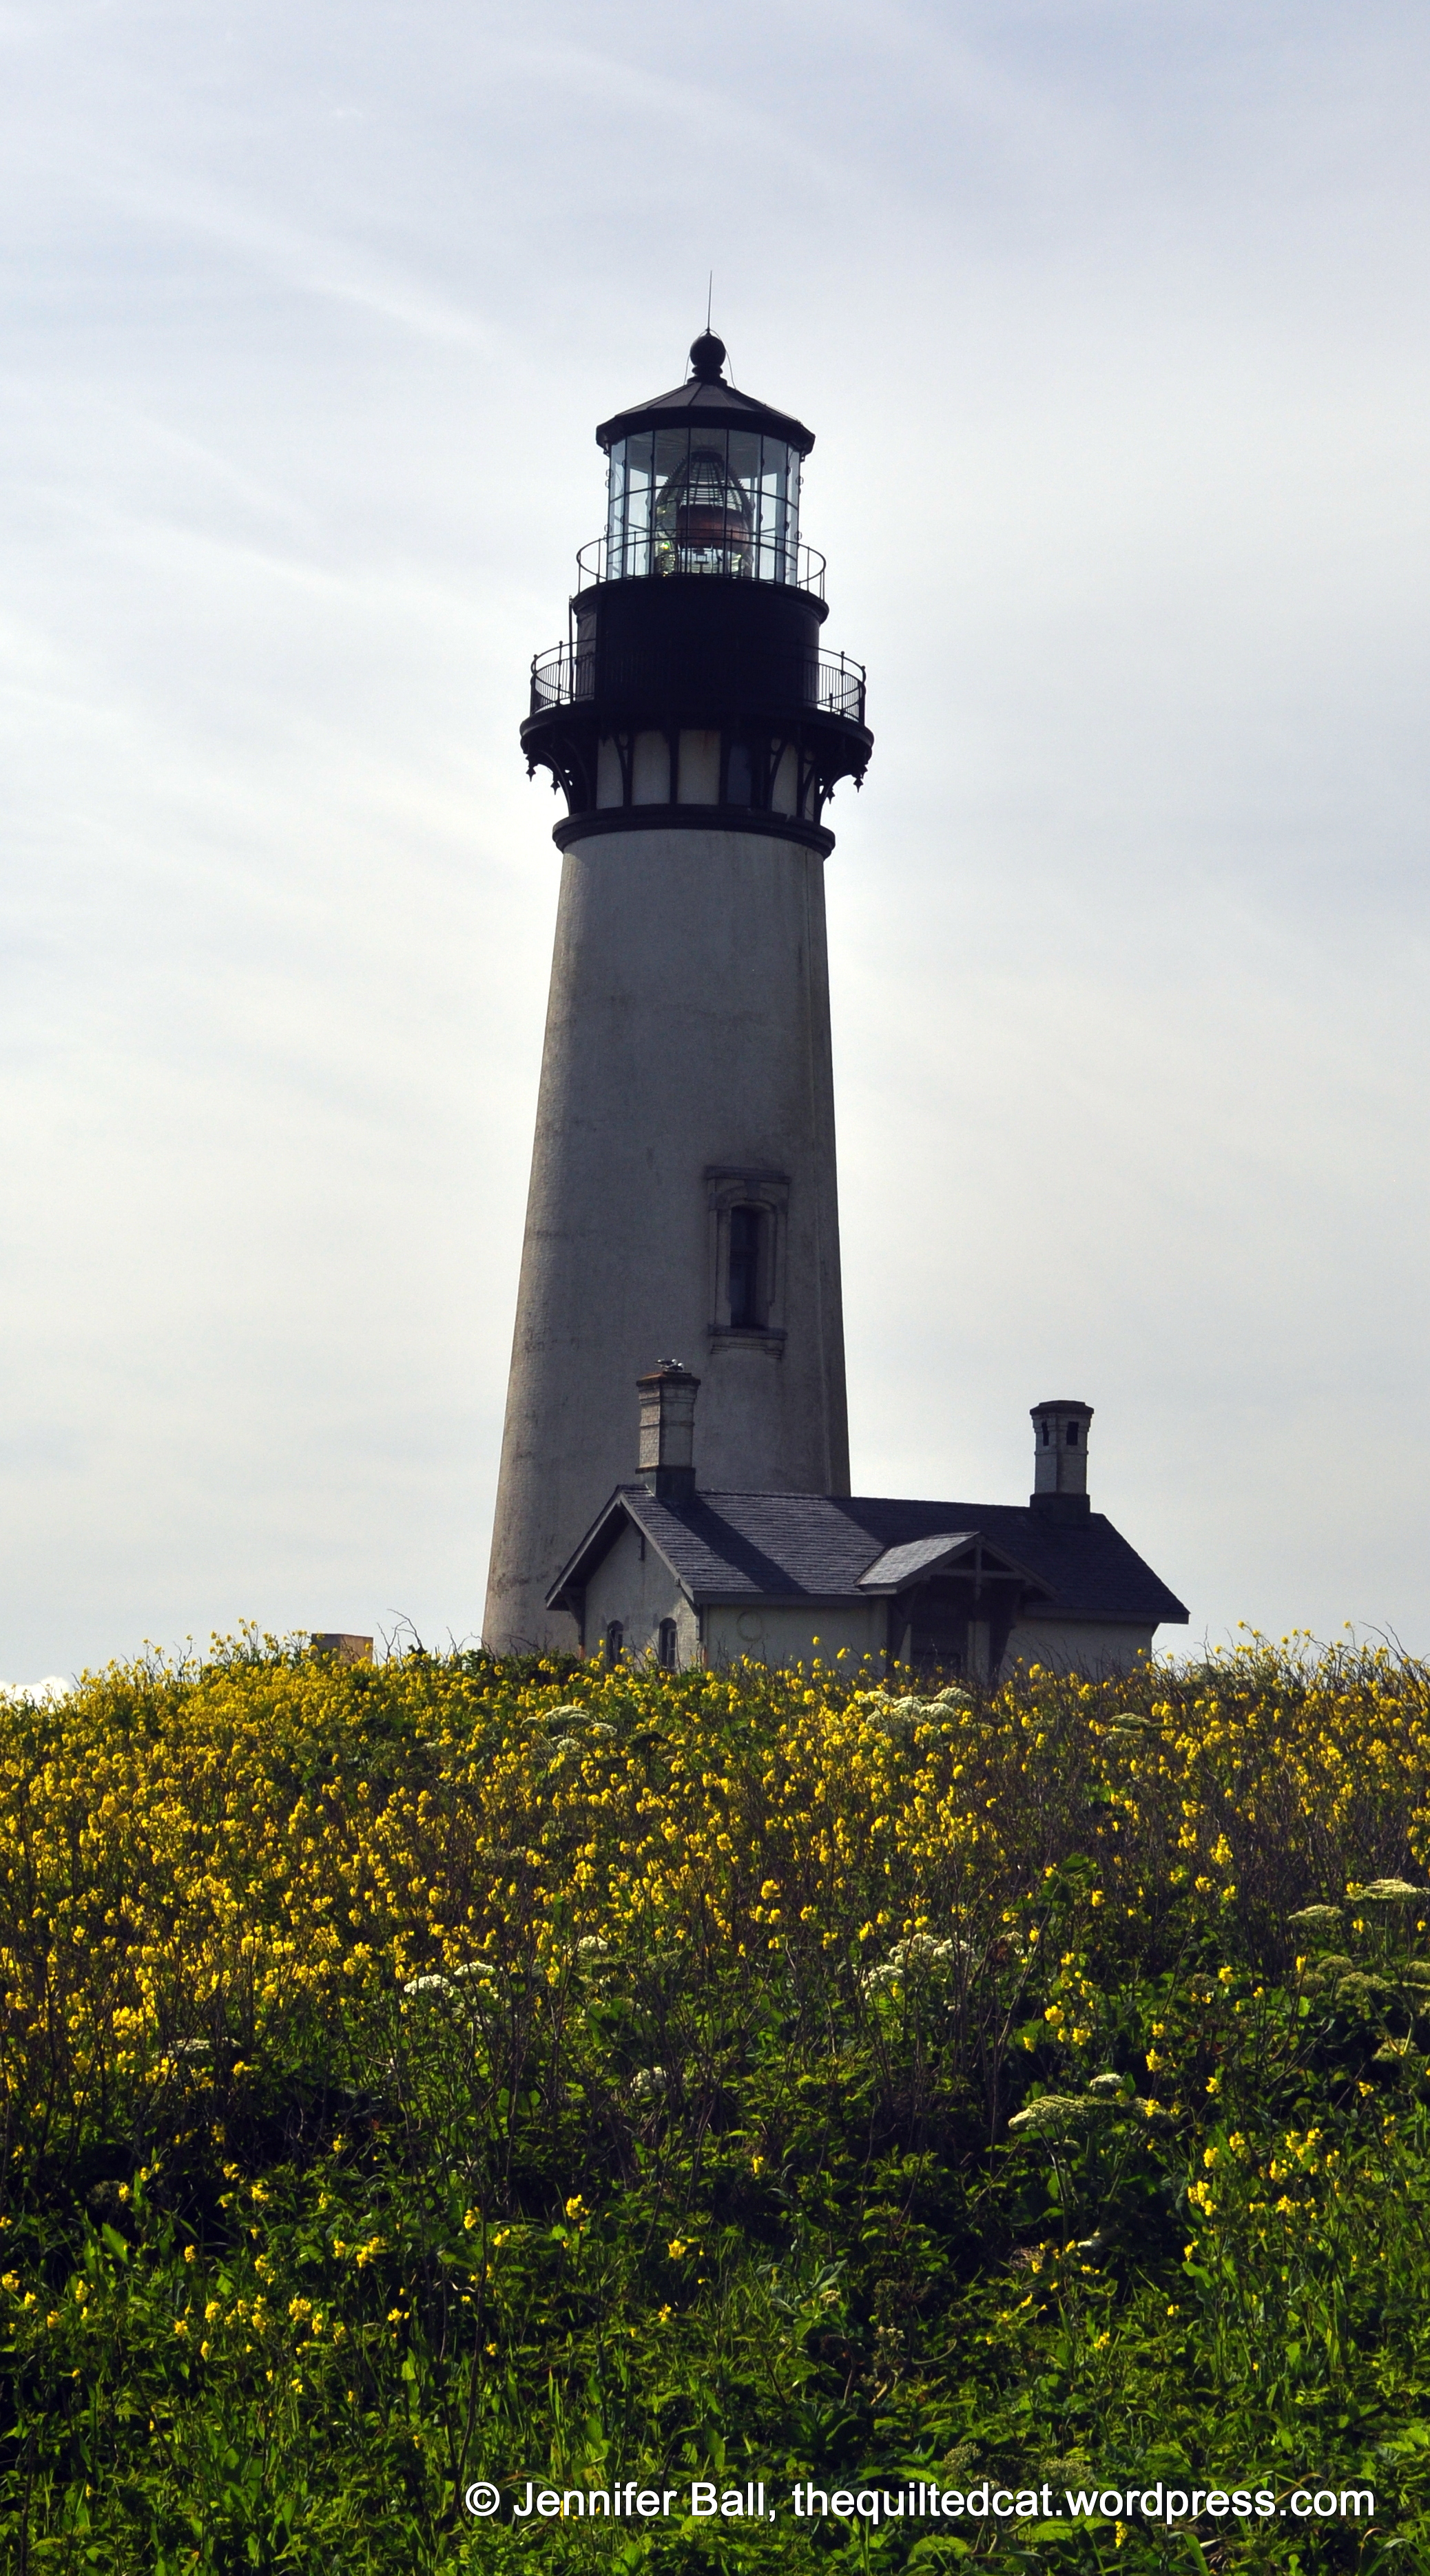
The Yaquina Head Lighthouse is a great place to visit with walking paths, tidepools, a visitor’s center, and the light itself. The fee is $7 per car. Near the lighthouse, we spotted 2 bald eagles on a tree. We saw them in flight carrying meals back to the tree. I wish I had a better camera lens for close-up photos!

Yaquina Head Lighthouse

Yaquina Head Lighthouse

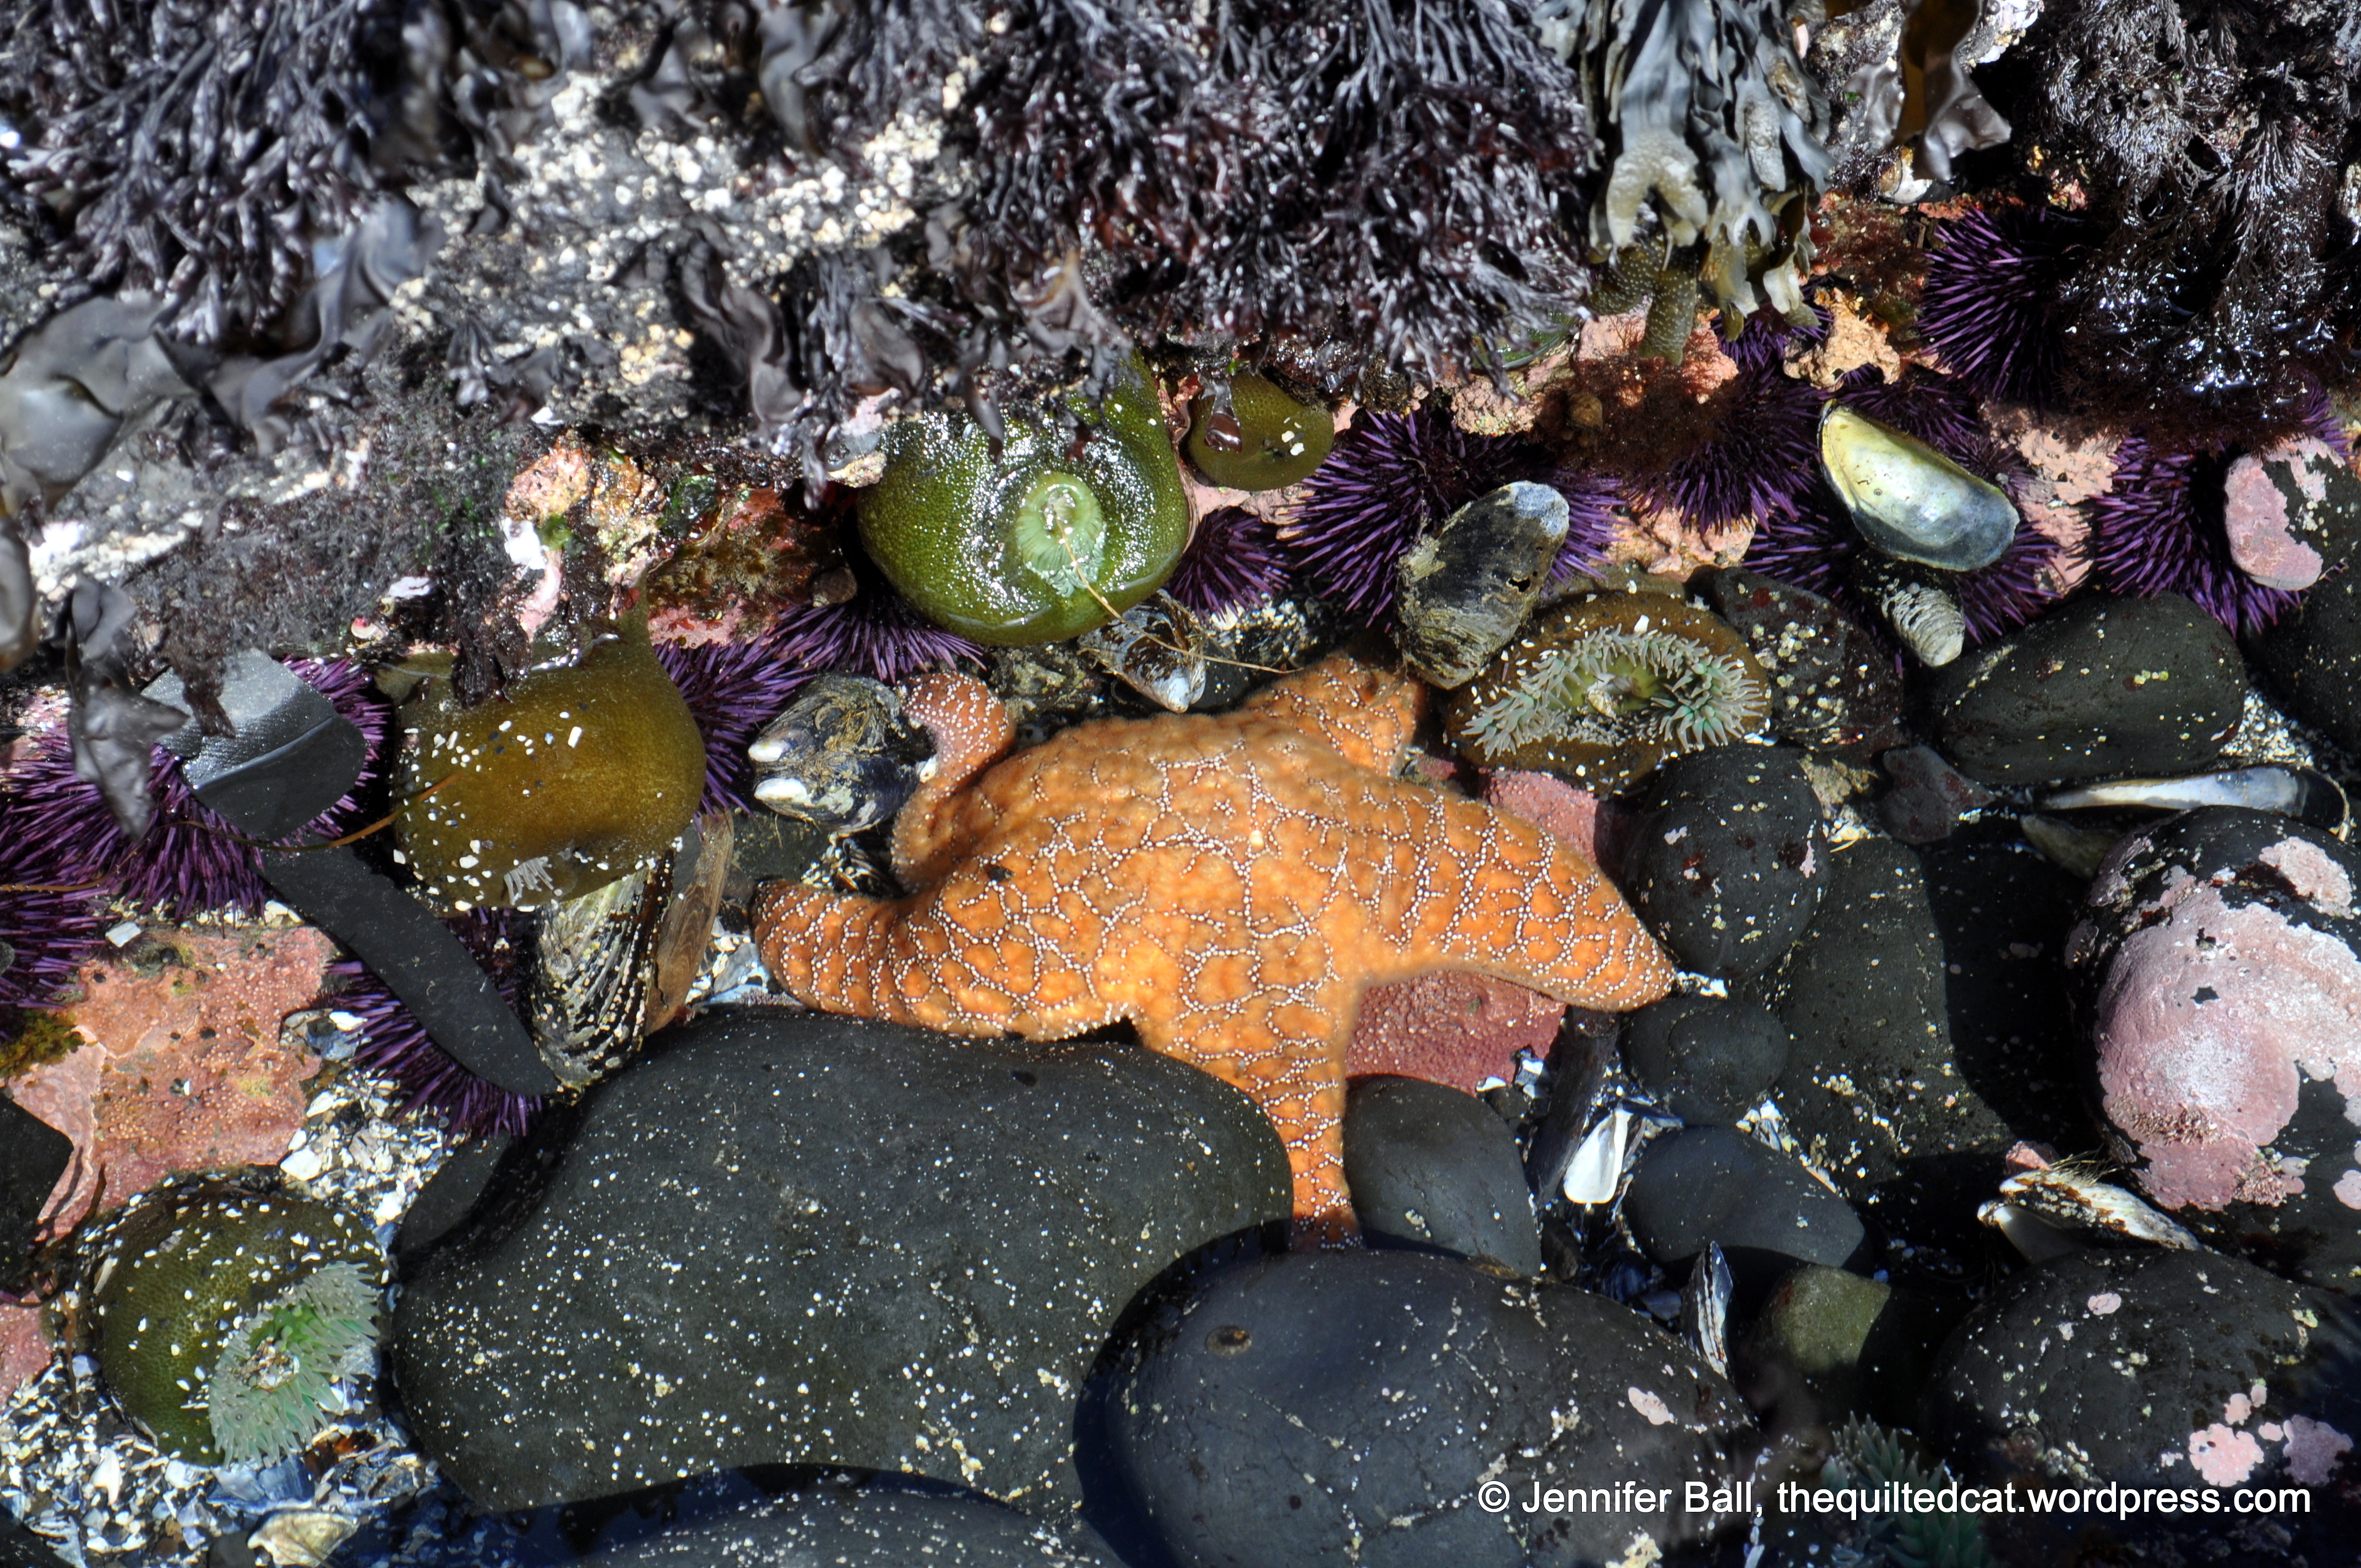
We walked down to the tide pool area. Our 8-year-old loved this part of our trip! We saw quite a few critters in the tide pools.

Tide Pool Area and Agate Beach in the Distance

Tide Pool Area and Agate Beach in the Distance

Tide pool critters

Tide pool critters

We ended our day trip by walking along Agate Beach, searching for treasures. We didn’t find any agates, but we had a fun time walking the tall ships sail out for a second excursion. The dog loved it too!

Dog on Agate Beach

Dog on Agate Beach

Hope you had a safe and happy holiday weekend! Thanks to all who have served our country.

Enjoy!
~Jennifer

Blogger’s Quilt Festival 2014, Art Quilt Entry

Happy Friday!

Many talented quilters are linking up some fabulous quilt projects this week over at Amy’s Blogger’s Quilt Festival for 2014.

At first, I was uncertain whether to add a project that I worked on this past year that has special meaning for me. I did blog about this art quilt earlier so long-time readers may recognize it. The art quilt is a fabric portrait of my very special cat and quilt inspector, Tiger. This is my first time entering the Blogger’s Quilt Festival, and I’m loving all the entries!

This quilt is my own design based on a photograph that I took of Tiger. I used different orange fabrics to imitate the orange stripes in his fur. I also accented the piece with free-motion quilting on my domestic machine. This quilting really accents his fur, the clouds in the sky, and the illusion of grass in the lower background.

I did some paper-piecing on the corner border blocks to draw the eye into the center of the quilt and to accent the colors in the cat’s fur.

I really love how this project turned out, and I now use a cropped image of the cat face as an avatar for various social media sites.

Here’s a view of the whole quilt:

Tiger, A Quilted Portrait

Tiger, A Quilted Portrait

Here’s a closer look at the free-motion quilting:

Tiger, quilting close-up

Tiger, quilting close-up

And a look with Tiger himself!

Tiger inspects his quilt

Tiger inspects his quilt

Close-up view of a paper pieced corner:

Fan block

Fan block

I hope you enjoyed my entry into the art quilt category. I really loved making this unique quilted portrait of my cat buddy!

You can pop on over to the festival here and look at all the wonderful entries in many categories in the festival and vote starting May 24th.

Enjoy!
~Jennifer

Vice Versa BOM, May Blocks

I have quite a few little projects that I’m working on right now – several BOMs, a quilt-along, and more. It’s definitely fun for me to work on multiple projects and different fabrics at the same time while watching these projects come to life, month after month.

I stitched together the May blocks this week for the Vice Versa BOM, hosted by Anne Marie at Gen X Quilters.

Here are my May blocks, side by side:

Vice Versa BOM, May Blocks

Vice Versa BOM, May Blocks

We now have 10 blocks in total completed:

Vice Versa BOM, 10 Blocks Completed

Vice Versa BOM, 10 Blocks Completed

I’m doing the smaller, lap sized version with 9″ finished blocks. We’re over 1/2 way finished with this BOM so it’s exciting to see the blocks come together.

Enjoy!
~Jennifer

Singer Featherweight Find

Hi everyone,

I hinted in earlier blog posts about my wonderful thrift store find. I found a Singer Featherweight 221-1 with its original case with key, instruction manual, presser feet and bobbins!! I do not have any antique sewing machines so I was so happy to finally get one.

She’s in pretty good condition with some of the decals partly rubbed off. The light turns on and she runs well. The case is in pretty good condition with some minor scuffing. I’ve signed up for a Singer Featherweight maintenance class at a local quilt shop in June so that I can learn how to care for her properly!

Based on the model number, she was manufactured on November 18, 1949. I really want to give her a name – any ideas?

Here are some pictures:

Singer Featheweight

Singer Featheweight

Singer Featherweight Side View

Singer Featherweight Side View

Singer Featherweight, Front View

Singer Featherweight, Front View

For now, I have her sitting on a side crafting table in my sewing room. I only have one other sewing machine – my trusty Bernina Activa – so it feels really good to have this beautiful machine to use on future quilty projects.

Have you made any good quilt or sewing related thrift store or garage sale finds?

Enjoy!
~Jennifer

Aurifil BOM, May Block

The rain has returned to Oregon, and I spent a few hours sewing today. I worked on my Aurifil BOM block and finished up my Celtic Solstice top!

The May block for the Aurifil BOM is designed by Amy Smart, called Nine Patch on Point.

I’m continuing my theme of using black and red fabric scraps from my stash with Kona Shadow as my neutral.

Here’s my finished May block:

Aurifil BOM, May Block designed by Amy Smart

Aurifil BOM, May Block designed by Amy Smart

If you’ve been sewing along with this BOM, we’ve now finished 5 blocks!

Aurifil BOM, Months 1-5

Aurifil BOM, Months 1-5

Well, housework awaits on this rainy day so I will post again soon about my antique sewing machine find with pictures.

Enjoy!
~Jennifer