Remember my post about making fabric baskets? Well, I couldn’t stop with just one, and so I made 4 similar baskets for a group of quilting friends.
I wanted to get a picture of the baskets all together in an outdoor setting. So, my family and I took a weekend drive to a beautiful little lake, with falls colors beginning to emerge.
I placed all 4 baskets into a plastic bag, and I took them with me on the very short hike. It was only 1 mile around the little lake, with a some heavy brush in a few sections.
How cute are these baskets all lined up on a log with the lake in the background?
Fabric baskets on log
We had a great time, having this little lake all to ourselves. It wasn’t chilly, but there was a beautiful cloud hovering over the lake surface and providing a misty backdrop to our time here. The foliage was quite wet, and so our pants became soaked as we walked around the lake, but we didn’t mind at all.
The maples were starting to turn color, with many trees displaying vibrant yellow leaves and a few turning towards orange and red.
Cloud hugging Daly Lake
Wooden bridgeFall foliage
I hope my friends like their fabric baskets! Getting out in nature is one of my favorite things to do, and it really helps me deal with times of stress. I can’t wait to go again!
This summer, I started an English paper piecing (EPP) project so I could have some handwork to do while waiting in parking lots due to Covid restrictions. I blogged about starting the Tula Nova quilt here.
I’ve had a bunch of time in the past few weeks due to my son’s taekwondo classes and surgery follow-up appointments for my dog. We used to be able to go inside, now we must wait in the car. I’m not sure what will happen will we start getting below freezing, lol!
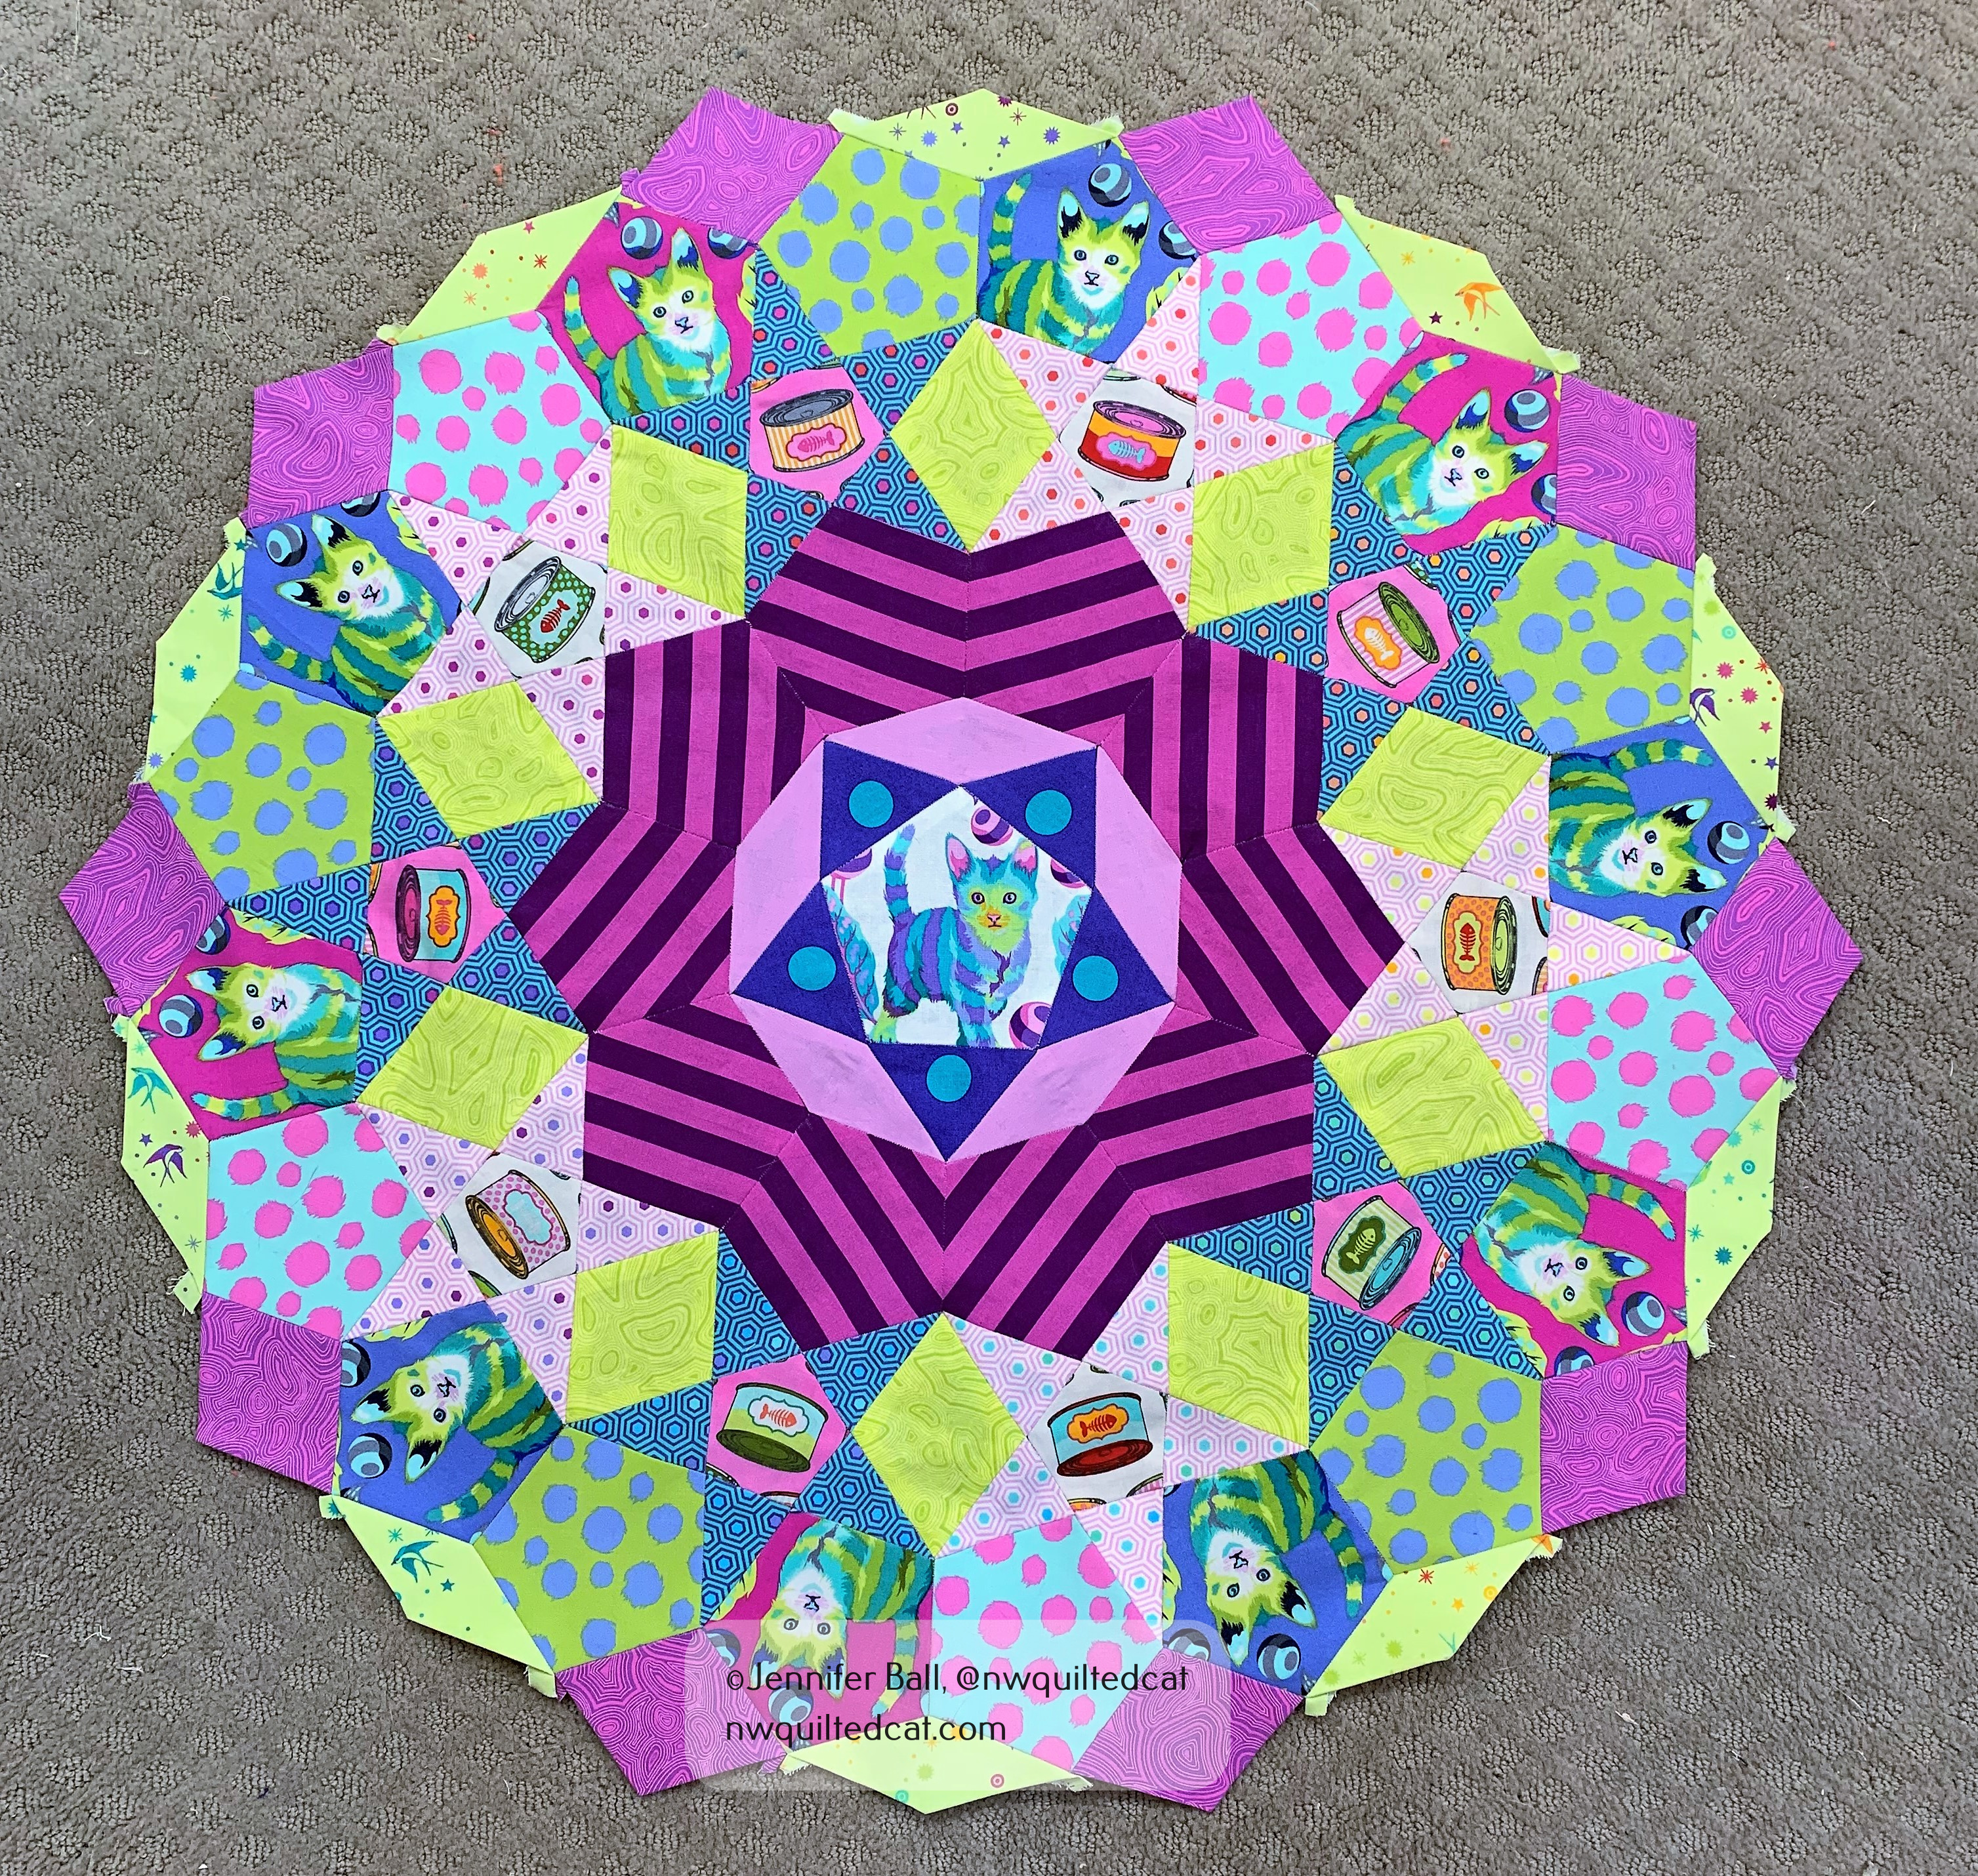
I’ve added some more rounds to my cat themed Tula Nova. I’m using as much of the “Tabby Road” line as possible, but I don’t have many of the coordinating prints so I’ve been trading with people on Instagram for different pieces. I’m also using fabrics from the True Colors line, such as the mineral prints, hexy rainbows, and fairy dust.
Do you see the cute cans of cat food in the star blocks?
Once I complete each round, I audition fabrics from my stash. It’s quite a messy process! I have fat quarters and half yards scattered about the room, until I decide on something.
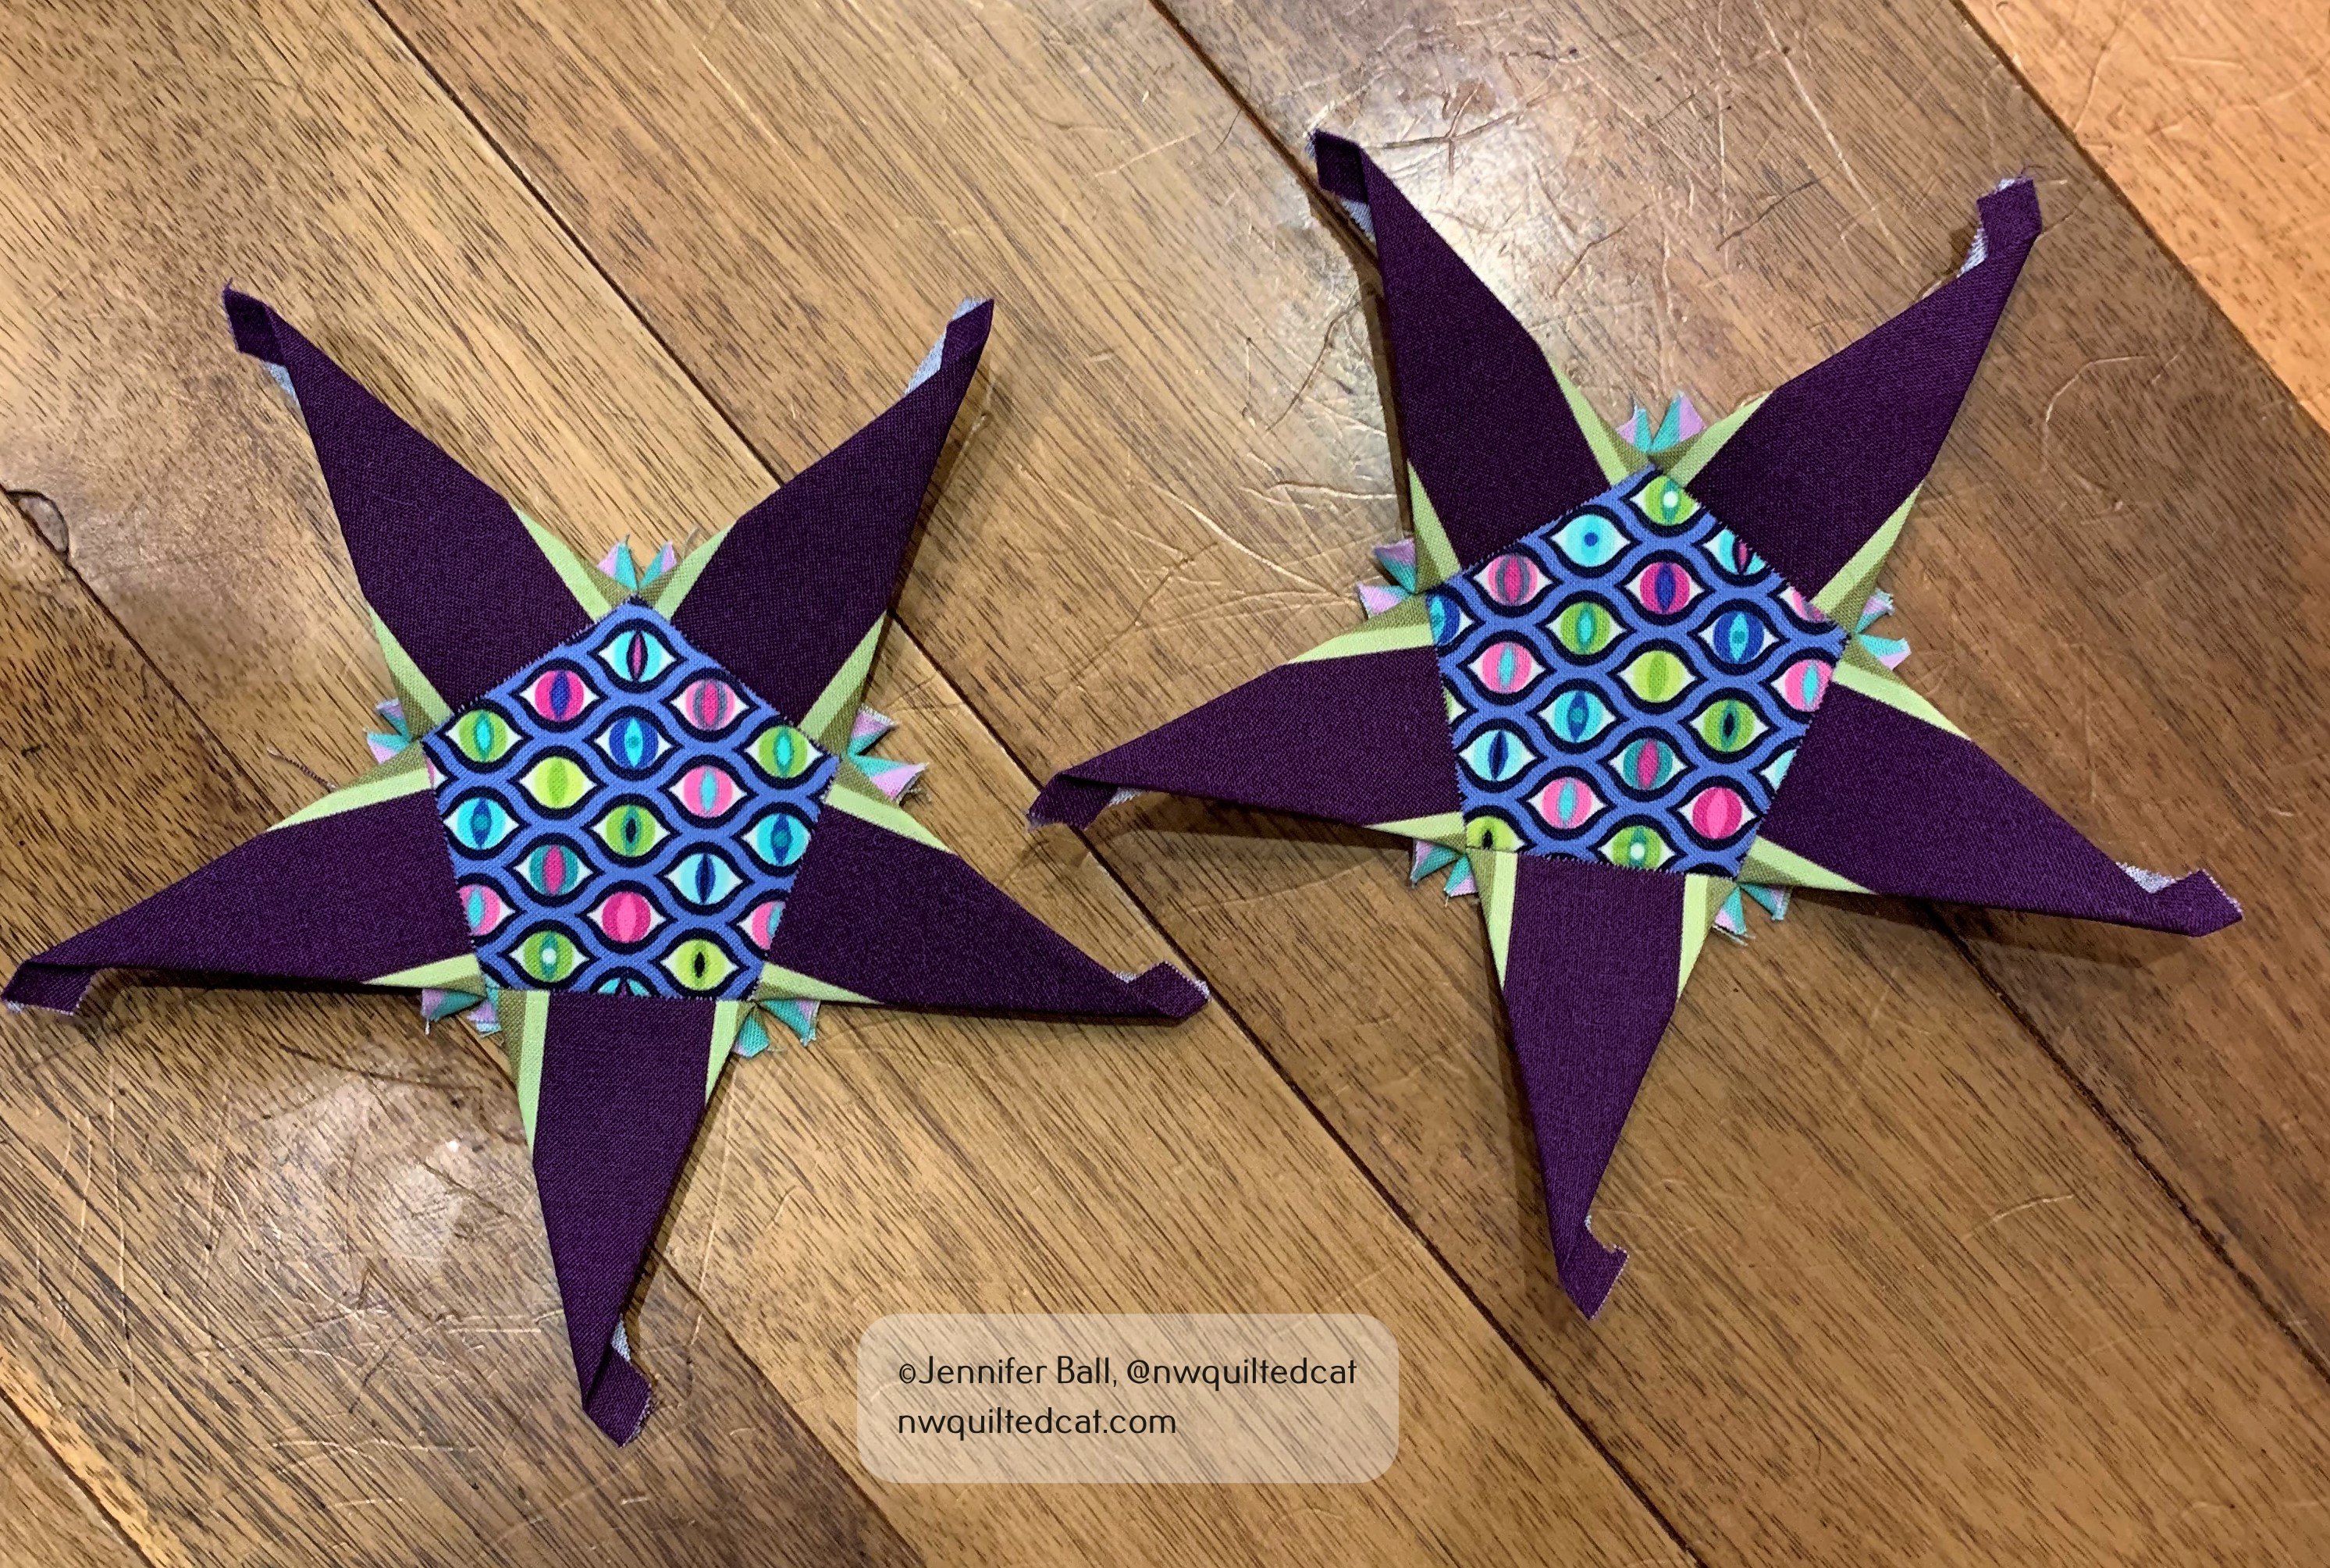
The next round has 10 stars and 20 medium hexagon shapes. I decided on some purple stars to pull out the purple in the center of the quilt.
I fussy cut a striped print from the “Chipper” fabric line so that the dark purple fabric was more or less in the middle of the star points with some green on each side. I had just enough of the cat eyes print from “Tabby Road” to make enough small hexagon centers for the 10 stars needed.
“♪ ♪ ♪ I always feel like someone is watching me . . . ♪ ♪ ♪”
After I finished hand piecing these 10 stars, I placed them next to the my Tula Nova to decide what color I wanted for the medium hexagons in between each star.
Well, my quilt inspector had a strong preference, which I will reveal in a future blog post! He is really loving this cat themed quilt, and loves to help me “arrange” fabrics.
This is a bright and cheerful quilt, and I’m so happy that I started learning how to EPP.
Recently, I came across a fun sew along on Instagram where the participants were making fabric baskets, also called tubs. I was intrigued by them, by I knew that I didn’t have time to complete one within the sew along timeframe. I purchased the pattern called “Tub Family” from RosieTaylorCrafts on Etsy, and set it aside for a couple of days.
Then, several weekends ago, I had a few hours to try my hand at making one. The pattern comes with 3 sizes of fabric baskets, and I opted to make the largest one. I have some of the beautiful Homemade fabric by Tula Pink, which I think is absolutely perfect to make all sorts of things for my sewing room.
The pattern walks you through the construction steps pretty well, but I have a few pointers if you decide to make one.
Once you have your main basket panel, liner, and foam all ready for quilting, I do recommend using the straight-line quilting as mentioned in the pattern. I tried doing an all over swirly type quilting on my test basket, but I had a much harder time attaching the bottom and getting the basket to sit properly. It’s just kinda floppy!
On my “real” basket, I did straight-line quilting using a beautiful Aurifil bright green thread with a seam guide on my Bernina. In the picture below, you can see my seam guide helped to give me perfect 1-inch quilting lines.
After quilting at 1-inch and .5-inch intervals, I had my finished main panel, ready for my quilt inspector. I used some fun Tula Pink ribbon along either side of the fussy cut sewing machine in the center of the panel. This pattern is so flexible that you could make baskets out of scraps, a single piece of fabric, or several large chunks like I did.
My finished main body panel with quilt inspector
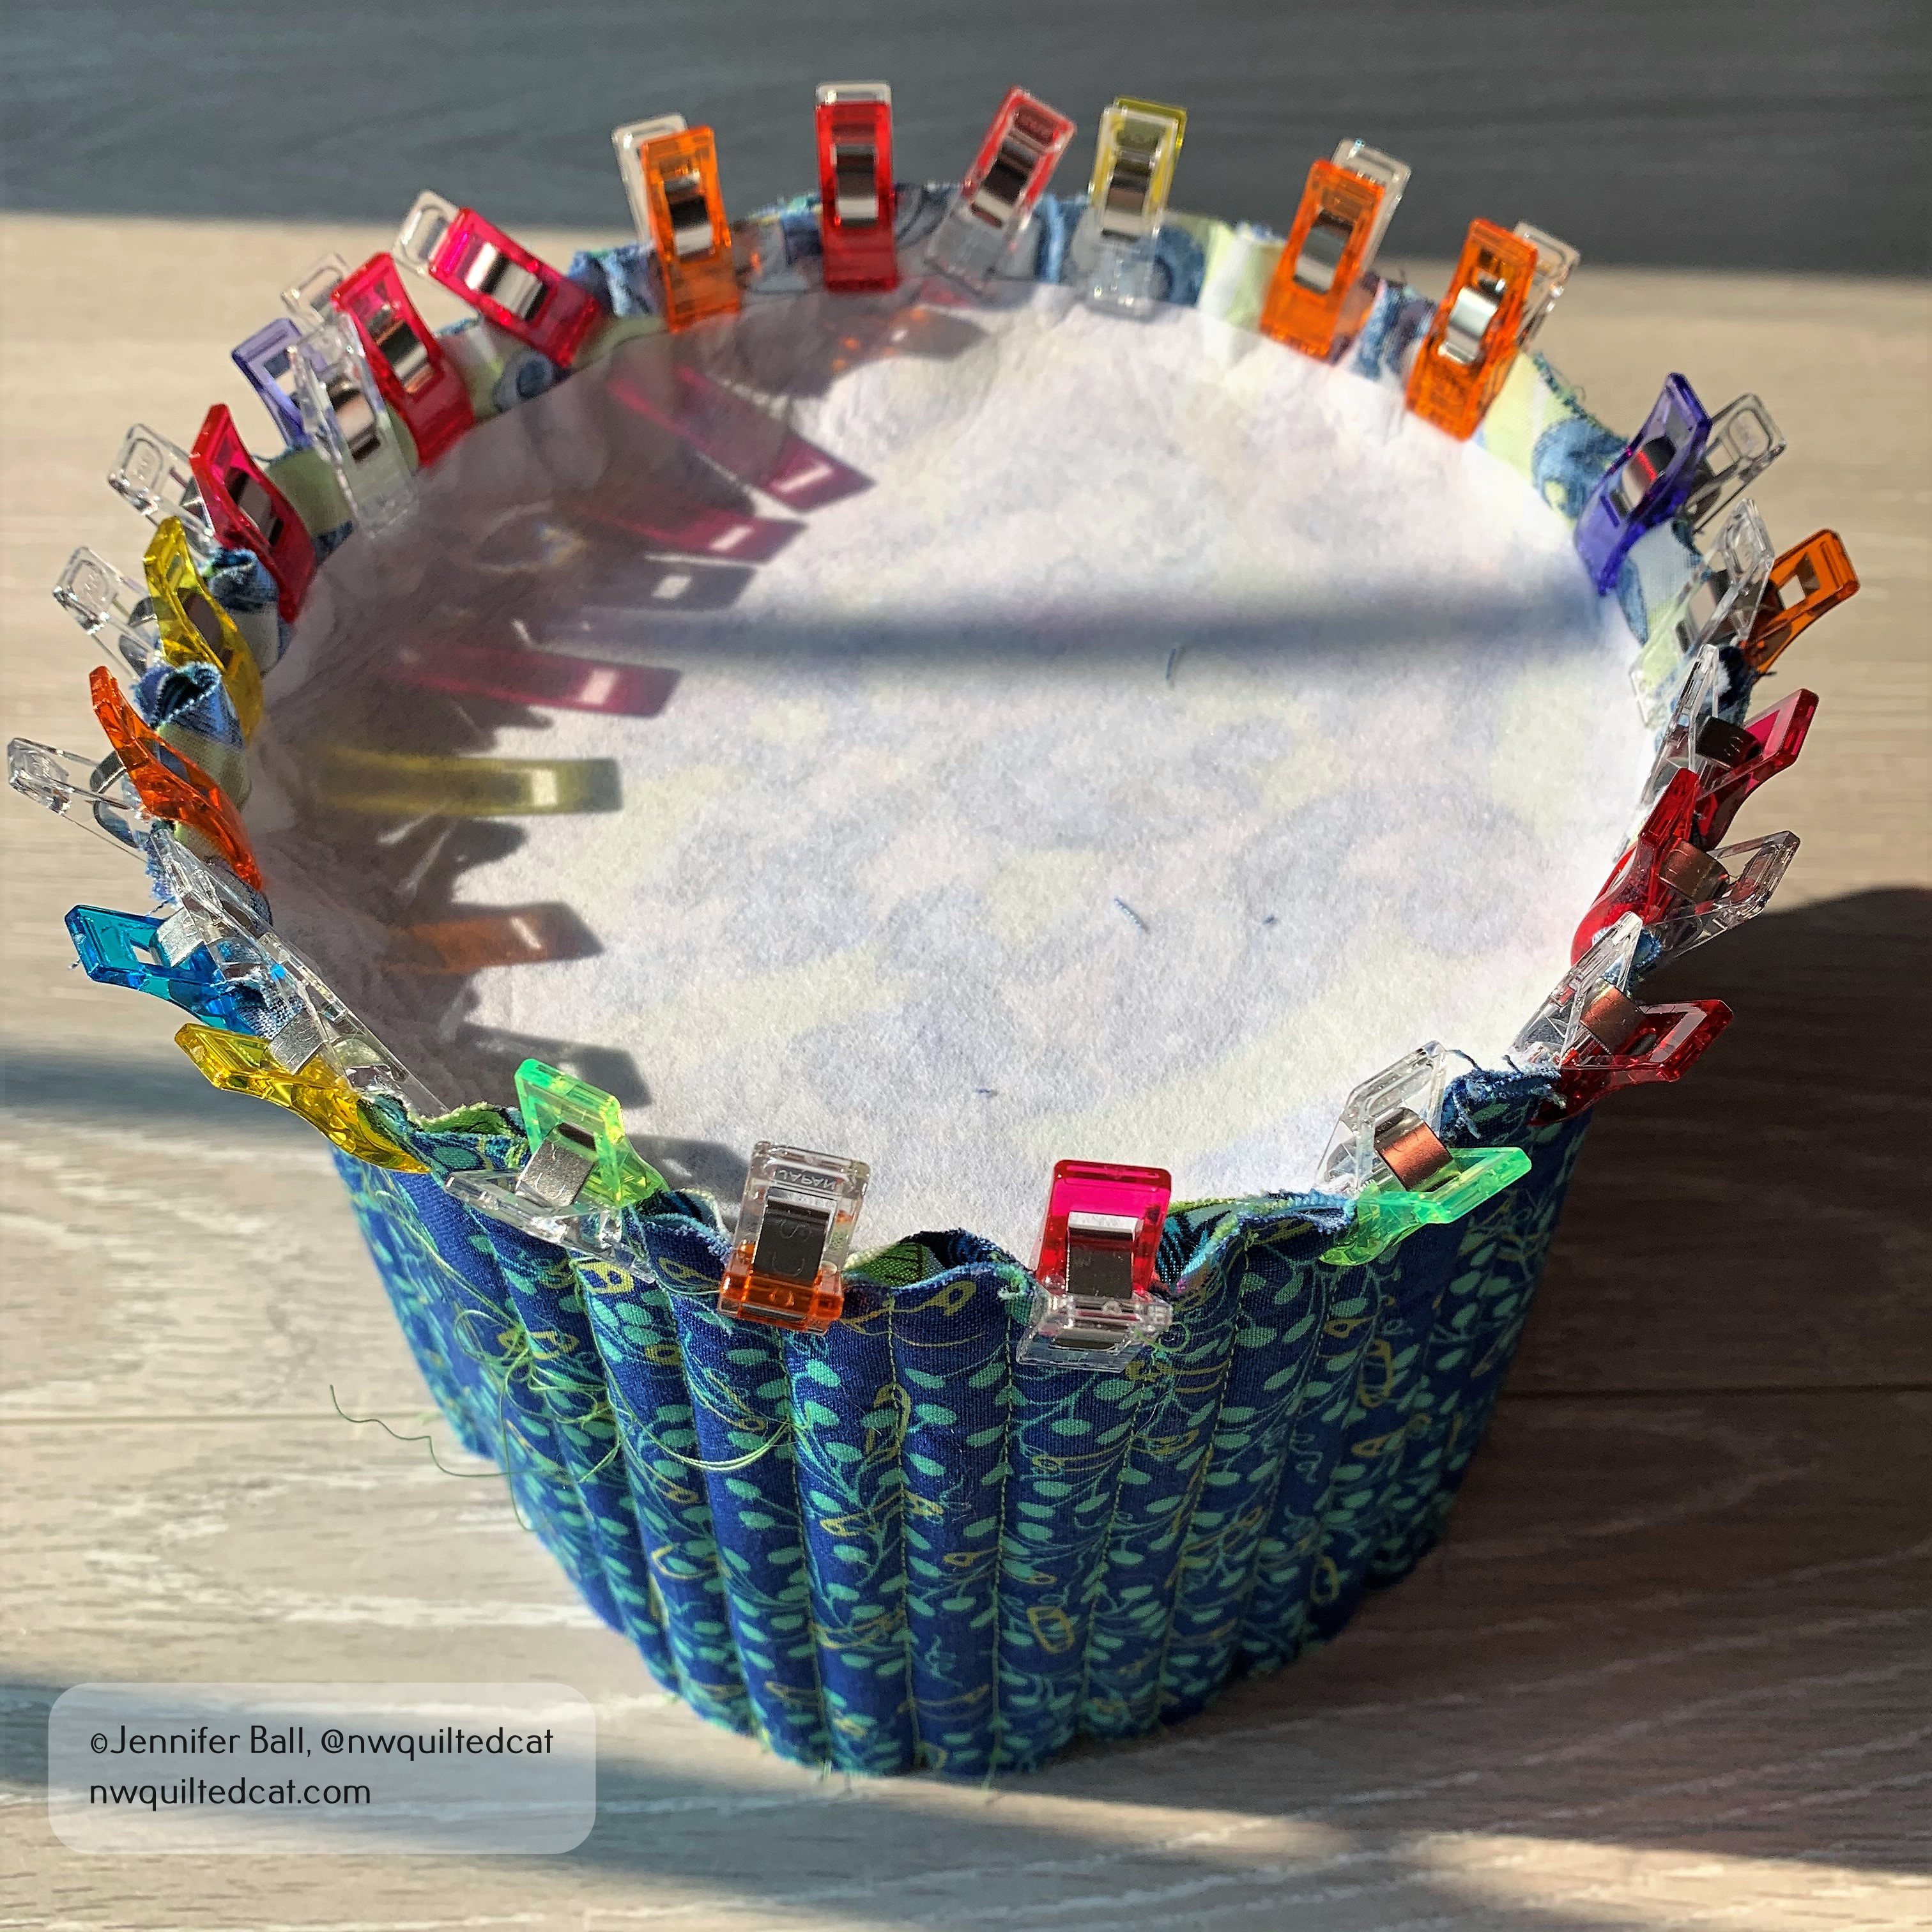
After trimming the main panel to the correct size, I started to attach the base to the body. This step is the hardest part of the whole pattern because the base really needs to be eased in using clips or pins.
I used Clover clips to secure my base rather than pins. No blood! If the base is still too large after easing it, you may need to trim it down slightly.
Using Clover clips to attach the base
The pattern does have you hand stitch the base to the body before using your sewing machine to help with puckers. I highly recommend doing this step. You can remove the clips after hand basting, and then use your machine to slowly and carefully stitch the base to the body.
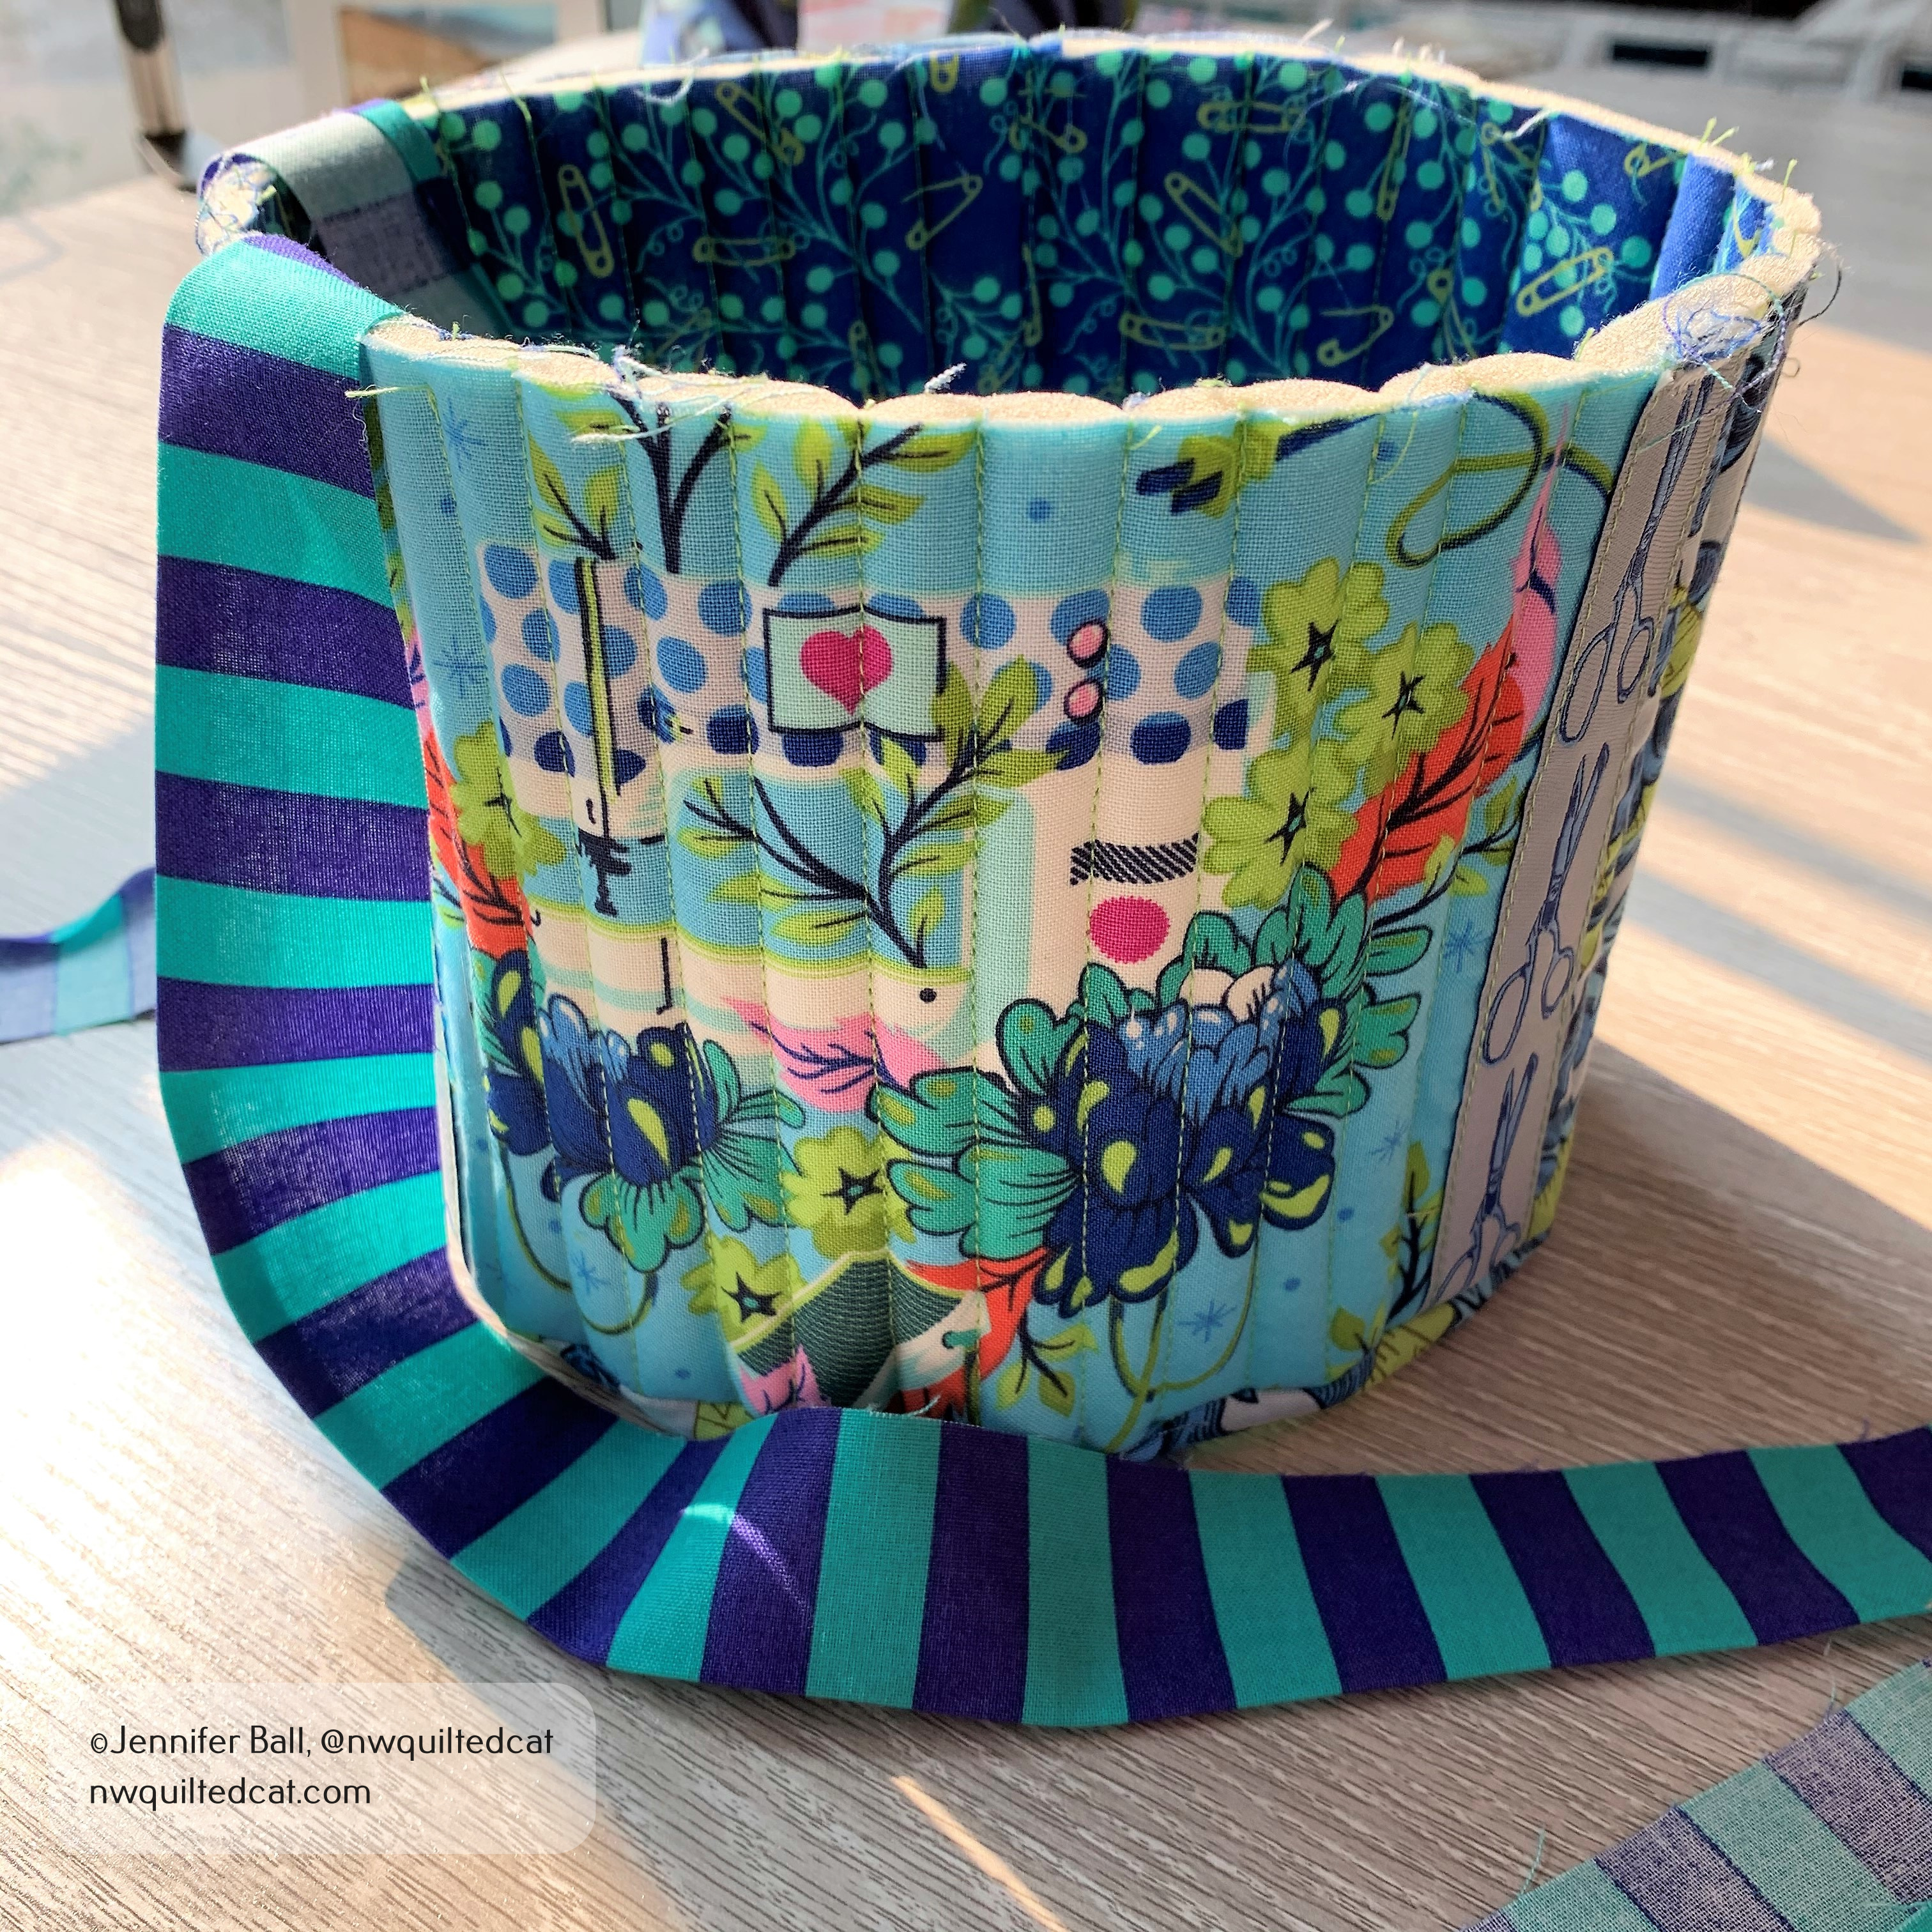
I did my binding a bit different from the pattern by pressing one side in 1/4-inch so that I’d have a nice finished edge to work with when sewing the second long edge to the inside of the basket.
Getting the binding ready
I did completely machine stitch my binding rather than hand sewing the inside, just for lack of time. I used the same color thread as the quilting, and I think it looks fine.
Here’s a look at my completed fabric basket, filled with some EPP supplies:
My finished basket!
These baskets are addictive to make, and I want to try making the medium and small sized ones soon. Maybe Christmas themed ones as well!
There are many examples of completed baskets using the #tubfamily hashtag on Instagram.
I’ve caught up with my Sea Glass block of the month program by Fig Tree & Co!
In September, we got the fabric pack and pattern for month 8, which instructed us to make 24 setting blocks instead of the regular 2 focus blocks that we usually make. At first, I thought that 24 blocks would take a long time, but the setting blocks come together very quickly with chain piecing.
We only used solid fabrics in these blocks, alternating the colors in small squares between a light aqua and a light green.
For this month’s block, we returned to the standard format of 2 focus blocks. The block this month did not come with a name, as they usually do, so I’m sure that we just a small oversight. I really love the block this month, and how the blue color really pops!
We have 3 more months to go left on this wonderful BOM. I have all the blocks up on my design wall in my sewing room, and I just love the soothing color palette. I can’t wait to see how it will all come together in the final month!
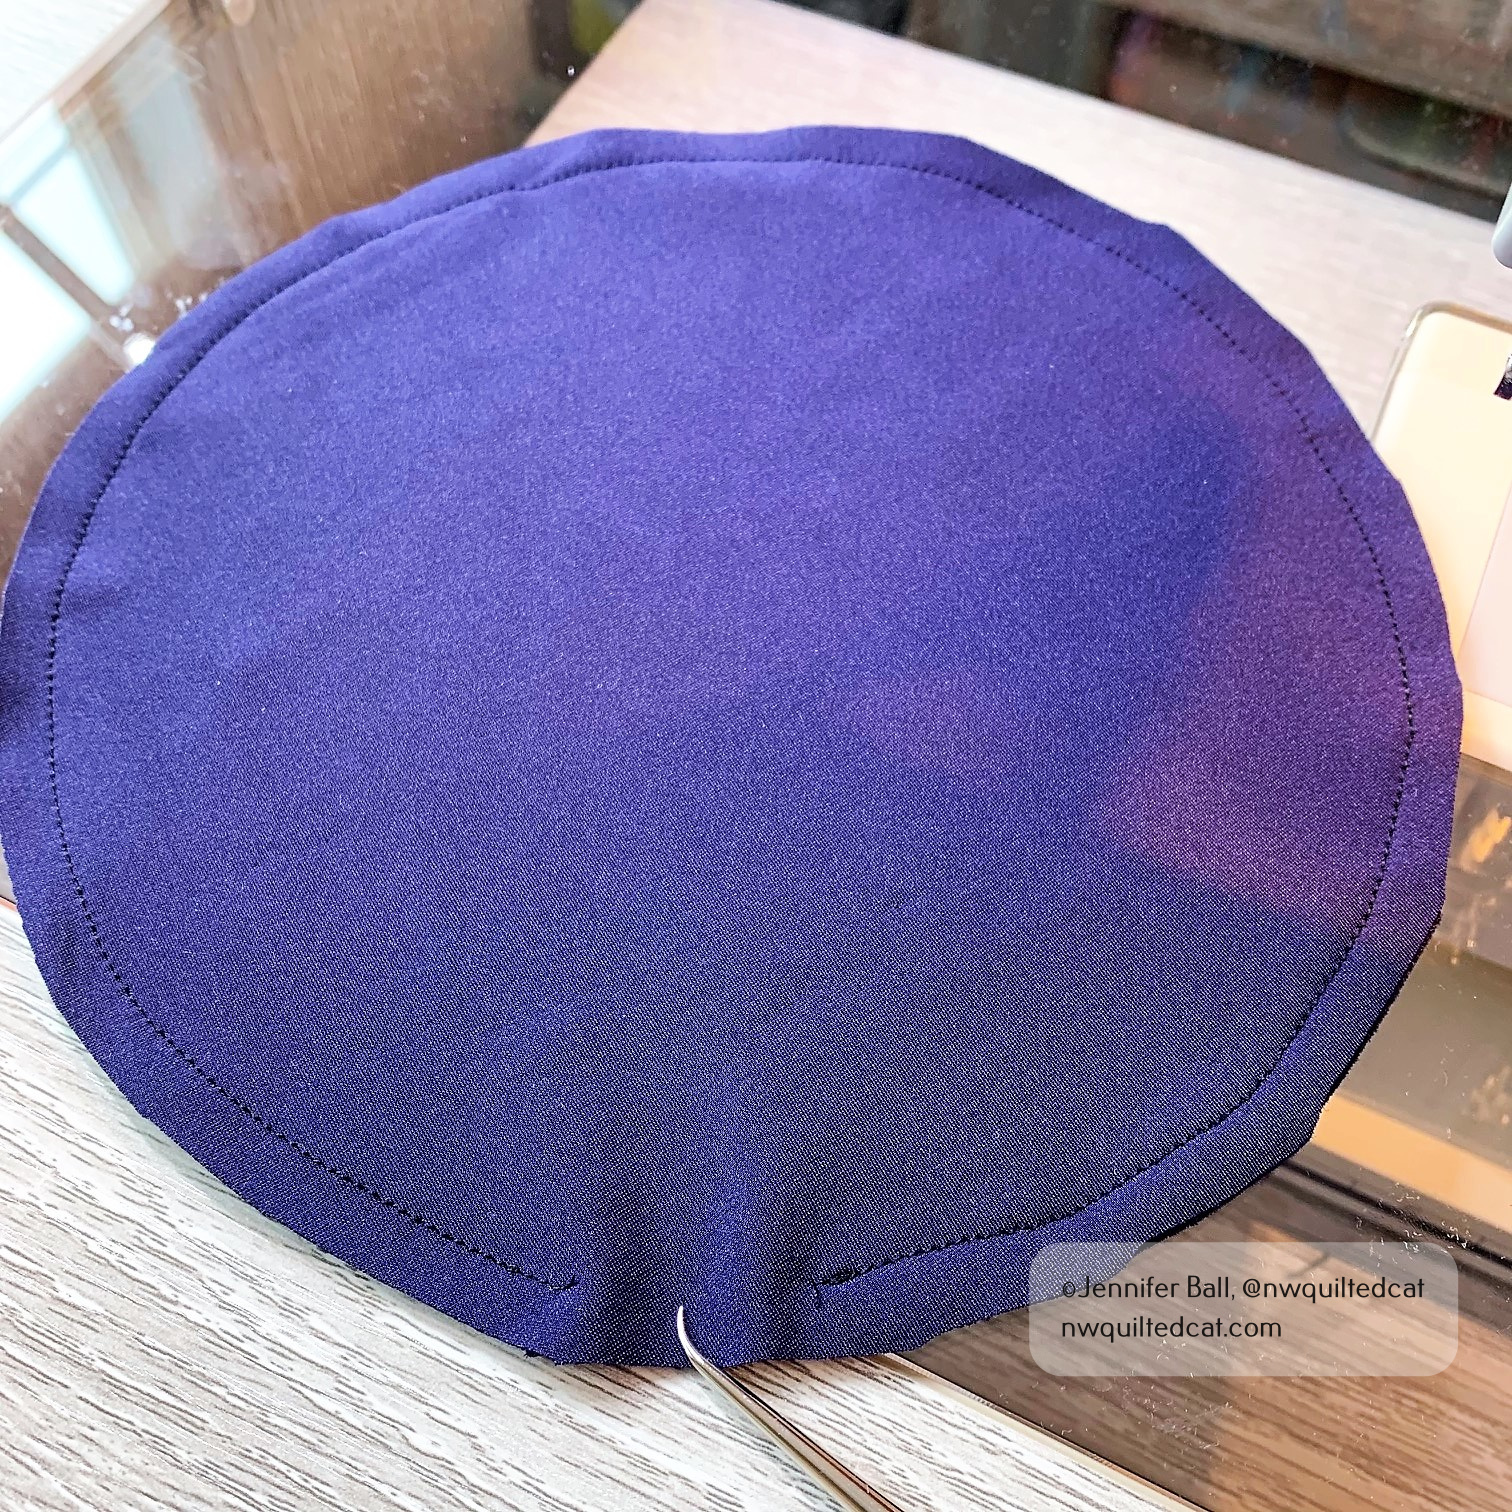
Recently, my son’s high school band received permission to begin in person outdoor rehearsals. They are limited to 10 students per rehearsal time, and they need to have a bell cover and wear a mask.
I decided to make bell covers for all the trumpets in his group so that they wouldn’t have to wait for an online order, which could take weeks. There are 7 trumpets in his cohort group, and each bell cover takes about 10 minutes to make.
7 trumpet bell covers!
Supplies Needed
Stretchy material (polyester/spandex blend). I purchased some athletic apparel fabric from my local fabric store in blue, which matches one of the school’s colors.
3/8″ elastic
Safety pin
Thread to match
Paper and pencil for template
Sewing machine and basic sewing supplies
Instructions
Trace the trumpet bell onto a piece of paper.
Enlarge the bell shape by about 1.25 inches to create your pattern. I used a school compass for this step or you could eyeball it. I found that a 1″ enlargement was a bit too small to fit over the bell comfortably. If you use cotton fabric instead of the poly/spandex blend, you’ll likely want to cut it 1.5 inches larger.
Cut (2) circles from the fabric.
Place the circles right sides together (RST), pin or clip together, and stitch using a 1/4″ seam allowance. Be sure to leave a small area open for turning right sides out and backstitch at the start and end of your stitching.
Sew a 1/4″ seam, leaving an opening for turning
Opening in the bell cover before turning
Turn right sides out.
Stitch another seam about 5/8″ from the edge of the circle to create the casing for the elastic. Stitch around the entire circle and backstitch. You do not need an opening for this second seam.
Cut a piece of elastic about 11.25 inches long.
Place a safety pin on one of the short edges of the elastic to help you insert the elastic into the casing. Be sure to hang onto the other end so that it doesn’t get sucked into the casing.
Inserting the elastic into the casing
Overlap both ends of the elastic about 1/2″ and sew together securely. I removed the pin before stitching.
Overlap the elastic about 1/2-inch and sew
Sew the opening closed.
Sew the opening
Ease the elastic around the casing so that it is more or less evenly dispersed.
Inside of trumpet bell cover
Place the bell cover on your trumpet and play!
Trumpet standing with bell cover
Trumpet bell cover
My quilt inspector supervised me very closely during this process. Maybe he thought I was making him a shower cap? Ha, ha!
Is it a cat shower cap?
I hope to make my son a reusable face mask with a little slot or flap for the trumpet mouth piece next. Until then, the band members have to cut a little slot into disposable face masks in order to play. They are also social distancing during practice.
It’s a strange new world in so many unexpected ways!