A Quilted Dog Portrait!

I have a wonderful dog companion named Pepper. She is a great family dog, and she loves to go hiking and camping with us. She is 31% German Shepherd, and loves to patrol and keep a careful eye on anyone walking down the sidewalk. Her favorite thing in the world is to go for walks, followed by chasing squirrels. She does not have a keen interest in being a quilt inspector, unlike her cat brother, ha, ha!

Last year, I had the wonderful opportunity to take a 3-day class at the Stitchin Post in Sisters, Oregon with the amazing June Jaeger. The class focused on creating pet portraits out of fabric and fusible web. I decided that I really need a pet portrait quilt of my best girl!

I had this wonderful photograph of Pepper that I snapped during one of our hikes to a waterfall. I was taking a picture of the waterfall when Pepper leaned her head over to see what I was doing while I snapped the pic. I then dubbed it: Pepper’s Selfie! It just captures her cute, inquisitive face so perfectly.

In the class, we prepared our patterns using our photos. We enlarged these photos and traced them in reverse so that the final quilt would be facing in the correct orientation. The colored pencils are matched with fabric swatches to create a code.

Pepper’s Selfie pattern in progress

Once we had prepared our patterns and made our fabric swatch codes, we could then start creating our pet portraits. I started with Pepper’s nose. This is a layering technique to give the perspective of the nose being closest to the viewer while the cheeks are farther away. You could almost envision that fabric nose sniffing you!
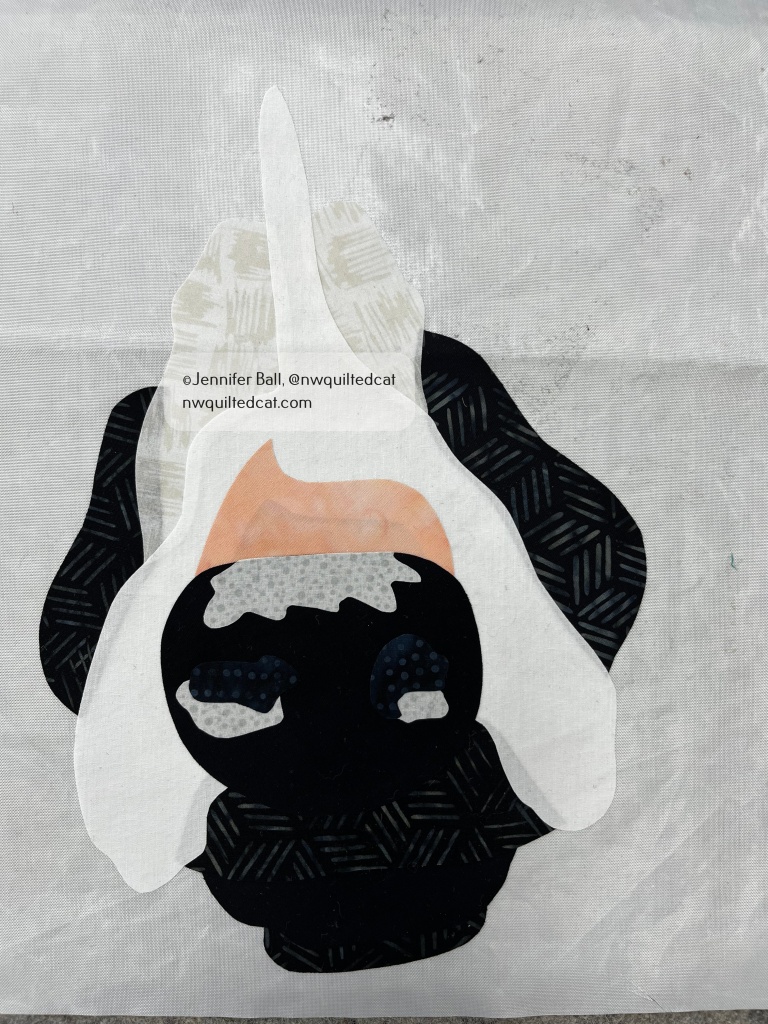
Pepper’s nose takes shape

The fabric layering process continued throughout the class. My pet portrait featured a close-up of Pepper’s face so I didn’t have details such as paws and tails to add. Due to this cropped photo of Pepper, I was able to get my fabric collage completed in the 3-day class. If I had used a full body photograph of her, I probably would have needed a couple of more days at home to finish the portrait. I only used batik fabrics in this quilt because it doesn’t fray like regular quilting cotton fabrics.
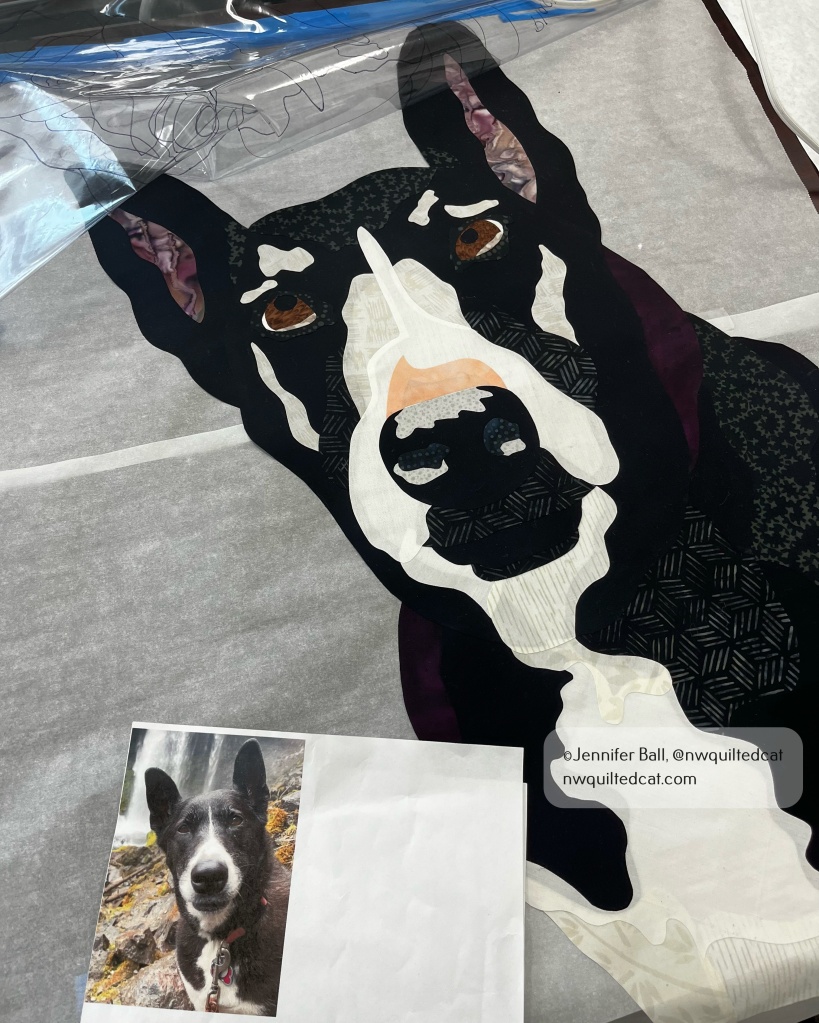
After class, I carefully took my pet portrait home and thought about how to finish it. I added a black border to the long side opposite of Pepper for balance, and a fun cream batik for the bottom border.

I secured the edges of all the appliqued pieces using my regular Bernina and color matched the thread to the fabrics. I stitched in details such as whiskers and added sparkles to her eyes. Once I had finished, I then quilted the background on my HQ Avante using Glide thread in Celery.
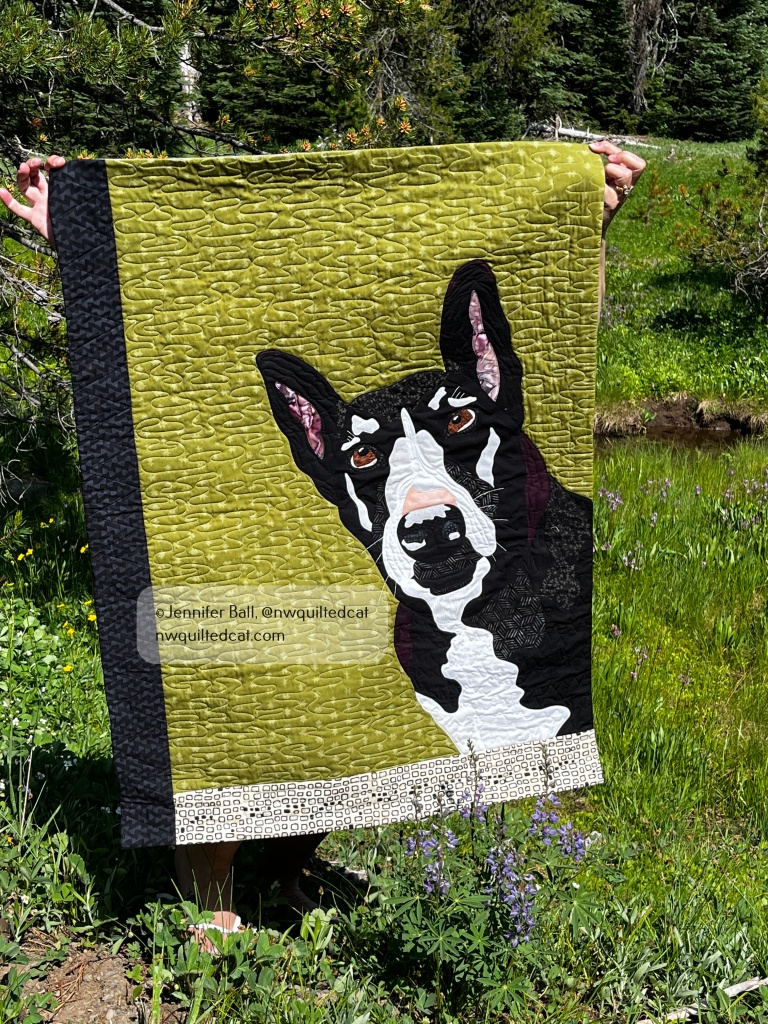
Pepper’s Selfie quilt in the wild!

I really enjoyed making this quilt, and I definitely want to take this class again. There are so many invaluable techniques that June teaches in this class, and I highly recommend it!

Here’s a look at where Pepper’s Selfie quilt hangs in my sewing room. When I sit down to sew, my good girl looks down upon me. Aww, how sweet!
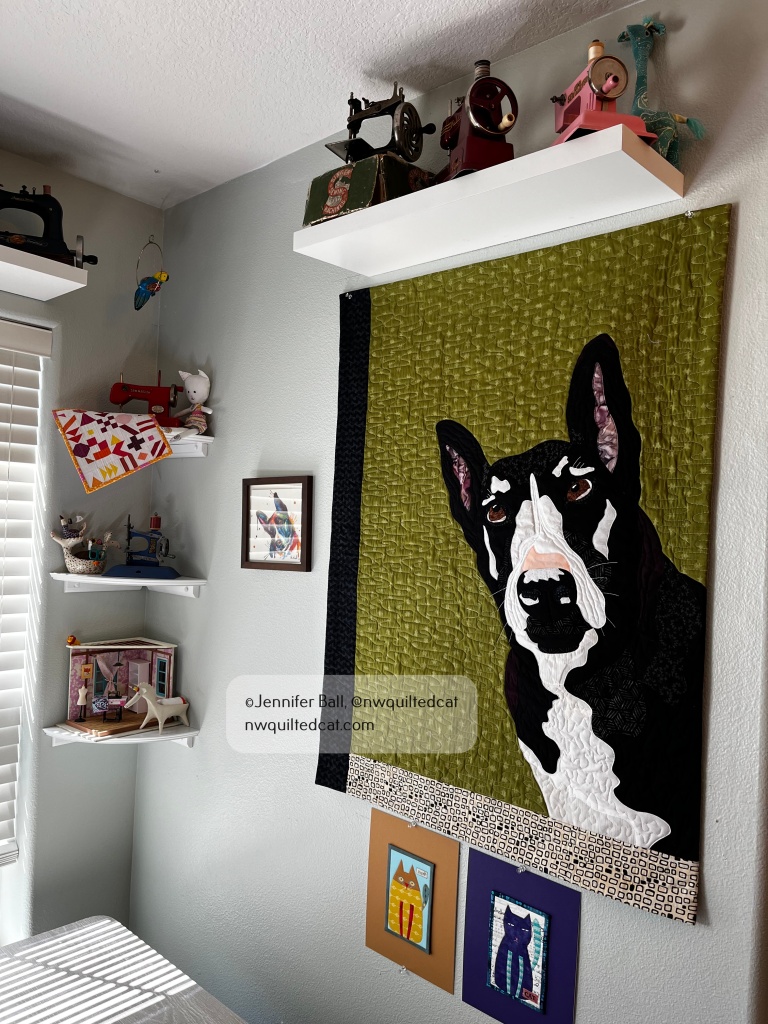
Happy quilting!

-Jen

A Cute Cat Jack O’ Lantern Block for Halloween

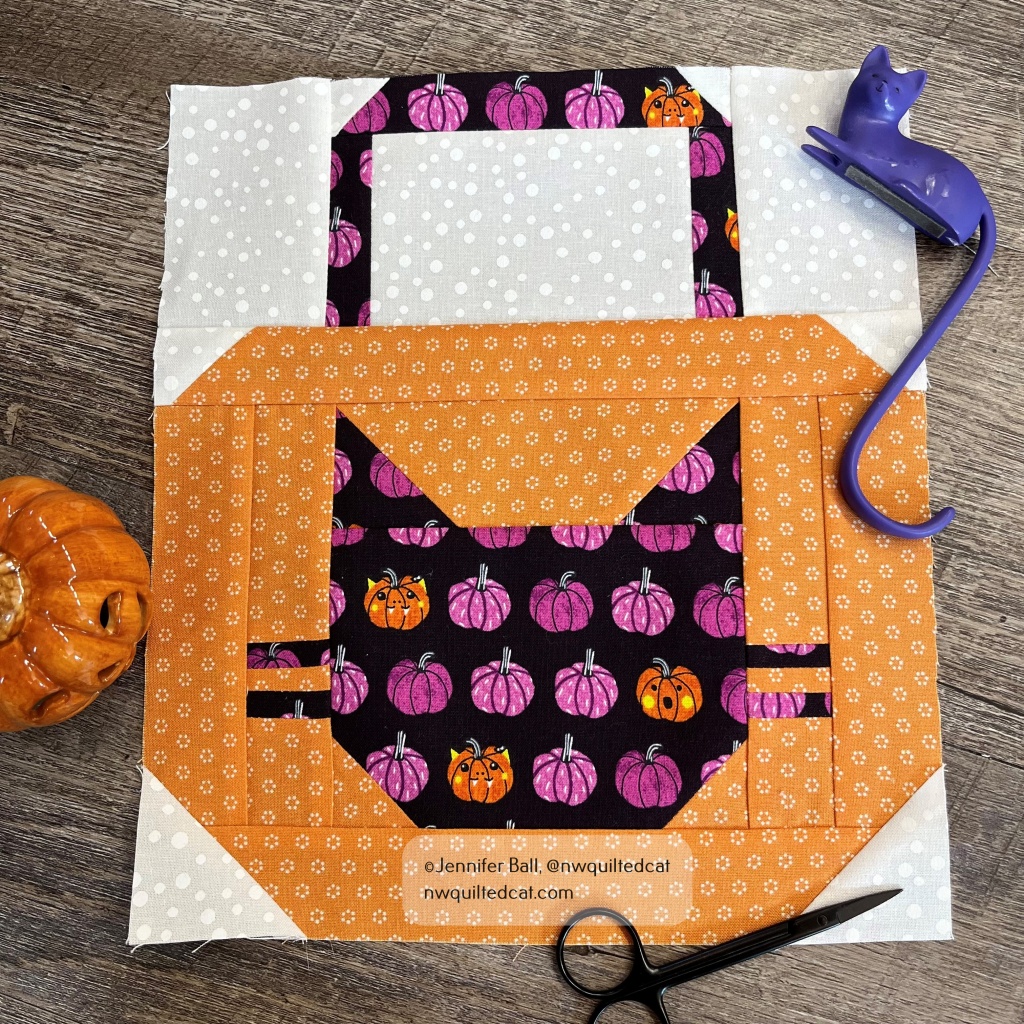
Are you looking for a cute and not scary block for Halloween? How about a cute little cat face on a pumpkin? This adorable block will work on trick-or-treat bags, table runners, mini quilts, and larger quilts.

Pattern

For a limited time, this cute cat jack-o-lantern quilt pattern is on sale in a favorite Halloween craft magazine. You can choose to purchase a hard copy that is mailed to you or a PDF download, which you can download to your computer.

Here’s a look at my block:

I loved using a pumpkin-themed fabric for my cat face! Aren’t those little cat-faced pumpkins with fangs just adorable? I want to make several different fabric combinations using different oranges, blacks, and low-volume backgrounds and create a lap quilt.

For my block, I used the following fabrics:

  • Background fabric: white dotted fabric from “Too Cute to Spook” by Me and My Sisters Designs.
  • Cat and handle fabric: purple/orange pumpkin fabric from “Bring Your Own Boos” by Cotton + Steel
  • Pumpkin fabric: orange fabric from “All Hallow’s Eve” by Fig Tree Quilts

This block is a great stash buster, and you can really have great fun with different fabric combinations. I love seeing a cat face block with the whiskers. It adds a nice element of whimsy to the block.

The quilt pattern in the magazine has a great layout with plus-shaped blocks added between rows of cat jack o’ lanterns and makes a finished quilt at 45″ x 48″.

Time to get started on those Halloween projects!

~Jen

The Beginning of a Stargazing Quilt!

One of the things that I really enjoy doing is stargazing, especially while traveling. I love to go on road trips to some dark sky parks around the west each summer with my husband and teen. We usually just have a blanket, some snacks, and maybe a pair of binoculars.

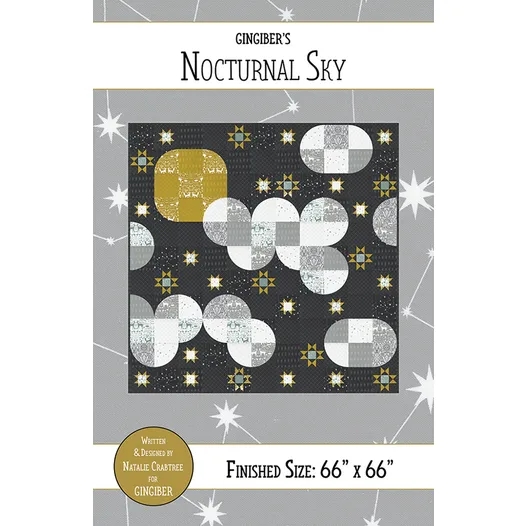
During a recent quilt retreat, I started working on blocks for a stargazing quilt. The pattern is called Nocturnal Sky by Natalie Crabtree for Gingiber. The quilt has a modern feel with curved pieces representing the moon and clouds.

There are two types of traditionally pieced blocks for the stars, and the composition of these blocks in the quilt remind me of looking at twinkling stars at night.

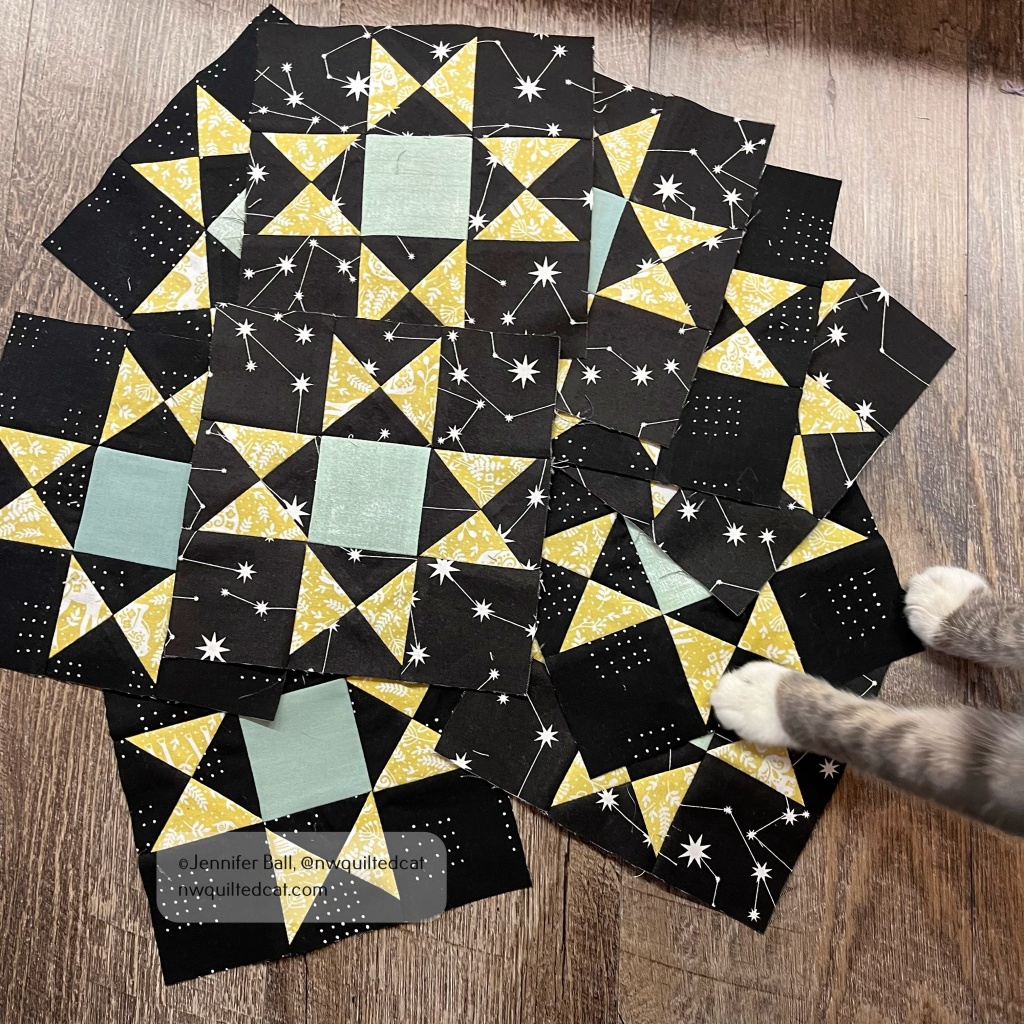
I finished all of my “A” star blocks, and I’ve started working on my “B” star blocks . Some nights after work, I can only manage to sew part of a block and other nights, I can sew two or three blocks. I’m taking this quilt nice and slow, while working on other projects.

Here’s a look at my “A” star blocks all pieced. The inner squares are light green.

My “A” Star Blocks

Do you see my little helper? He couldn’t help inspecting these star blocks as soon as I tried to photograph them.

I’m thinking about backing this quilt in a cozy flannel so that it can be a traveling quilt when we go on a road trip or go stargazing.

Happy quilting!

-Jen

Grinning Cat O’ Lantern Quilt

Have you heard about the Spooky Box from Fat Quarter Shop? Each year, they release a Halloween themed mystery box, filled with quilting goodies including a project with fabric and notions! You can still buy the 2021 box at Fat Quarter Shop with this link.

For last year’s 2020 Spooky Box, the quilt project was a fun Cat O’ Lantern mini quilt. I pieced this quilt last October, but then set it aside in my to-quilt pile. I was inspired to pull it out and quilt it recently as I was decorating my yard for Halloween.

I made a few modifications from the original pattern. I swapped the black and purple fabrics so that I could have black cat popping up from behind the pumpkin. I also changed the shape of the cat’s eyes and nose from squares into diamonds and a triangle. I knew that I’d quilt in more face details such as whiskers and the famous cat grin.

I did all free-motion and hand guided ruler work using Glide thread in Apricot Blush for most of the quilt and Glide thread in Black on the cat.

Here’s a look at a little spider that I added to each of the black triangles at the top and bottom portions of the quilt:

A little quilted spider

In the orange triangles, I quilted little ghost shapes. I did some basic fills in the background portion, and a swirly pumpkin fill in the purple behind the cat.

For the cat face, I added some eyebrows, whiskers, pupils, and grin. I later enhanced the pupils with an outline of black thread.

I gave the cat a little dimension by quilting some swirls on the forehead, checks, paws, and tail. For the pumpkin, I kept it simple with straight-line quilting to keep the emphasis on the sweet cat!

We went to pick pumpkins last weekend, and my son held the quilt up while I snapped a quick picture in between other pumpkin hunters. I love a striped binding so I used this black/gray/white striped fabric in my stash that I think really frames this little Cat O’ Lantern quilt perfectly.

Happy Halloween from the cat at the pumpkin patch!

~Jen

A Not-Too-Sweet Vegan Sourdough Blueberry Muffin Recipe

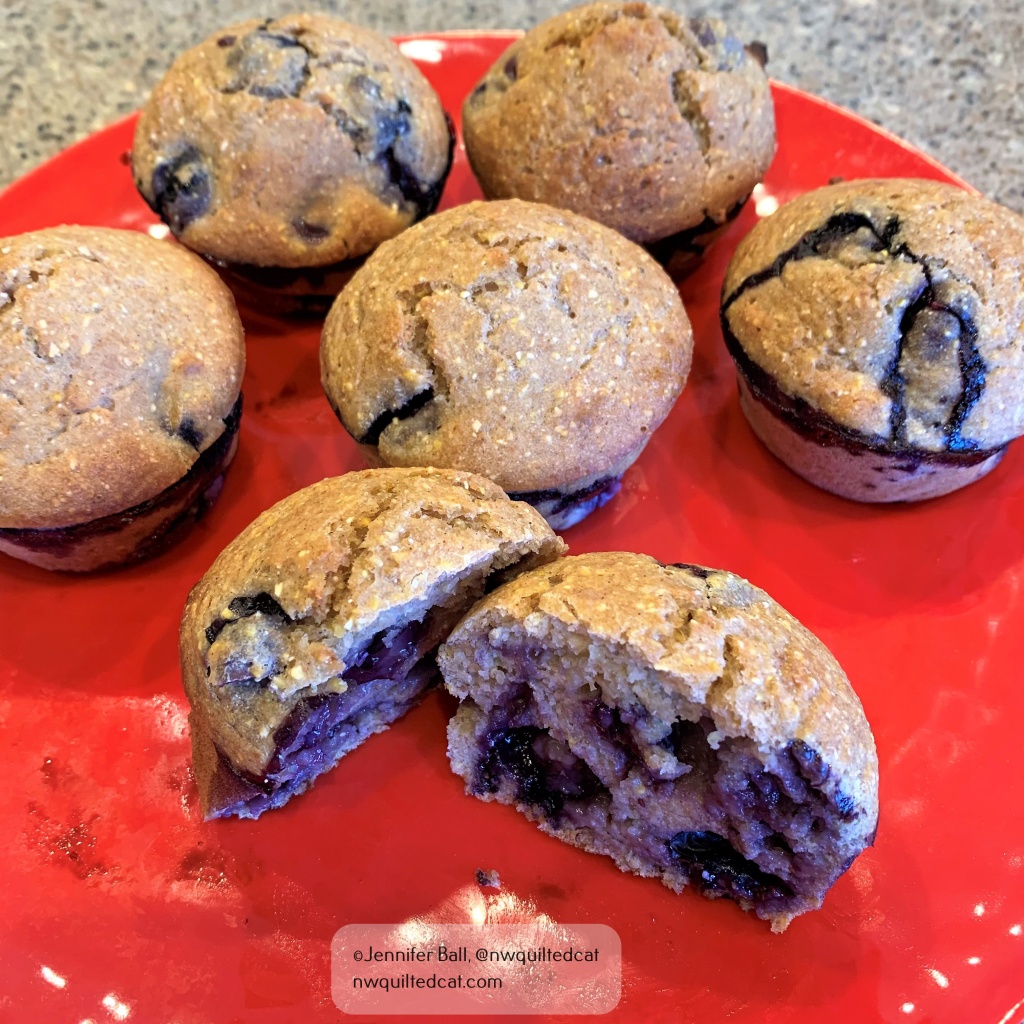
This muffin recipe is quick and easy, and makes for some tasty blueberry muffins. I wanted a recipe to use up some of my sourdough discard, but also wanted one that is healthy and not too sweet.

I use spelt flour in place of whole wheat flour for both its nutritional benefits and because it is not as dense as whole wheat flour.

Vegan sourdough muffins with fresh blueberries

Ingredients

  • 3/4 cup spelt flour
  • 3/4 cup unbleached white flour
  • 1/2 cup cornmeal
  • 1 teaspoon cinnamon
  • 1/2 teaspoon baking soda
  • 1/2 teaspoon salt
  • 1 cup sourdough starter
  • 1/4 cup maple syrup
  • 1/4 cup unsweetened applesauce
  • 1 cup nondairy milk (your favorite)
  • 2 cups fresh blueberries
  • optional sugar to sprinkle on top

Directions

  1. Pre-heat the oven to 450°.
  2. Use non-stick spray on your muffin pans. This recipe yields about 12 regular sized muffins.
  3. Combine the flours, cornmeal, cinnamon, baking soda, and salt in a bowl.
  4. Add the maple syrup, applesauce, milk, and sourdough starter to the dry mixture, and mix together until just combined.
  5. Fold in the blueberries gently.
  6. Scoop into muffin pan.
  7. Bake for about 22-25 minutes, until golden brown.
  8. Enjoy!

Let me know if you make these muffins!

~Jen

Running with Scissors! + More

Hi everyone,

I recently made the Take A Stand bag from ByAnnie patterns, and I blogged about it here. I then decided to create the companion tool organizer called Running with Scissors using similar fabrics from Tula Pink.

Isn’t the name fun? This organizer is really a clever zipped tote that you can use to carry your quilting tools to a class or a retreat or use it at home to save space on your sewing table.

I used Tula Pink’s Pinkerville line with its beautiful unicorn as my front pocket centerpieces. This organizer has 2 large quilted fabric pockets with zippers on the outside. You’ll find smaller inside pockets made out of mesh, vinyl, and quilted fabric, all sized nicely to fit a variety of tools.

Here’s a look at the organizer once I had sewn on the outer pockets and the inner pockets, but before I added the center facing to the inside.

For me, one of the tricky parts is attaching the outer zipper and binding. When you purchase this pattern, it comes with a $5 off coupon for the accompanying video from Annie, making it free. I highly recommend the video, and I watched it while attaching the binding so I could pause and re-watch as needed. I also use Clover Clips rather than pins to avoid poking myself and because they are just so much easier to use.

Attaching the Binding

The inside center facing uses clever elastic loops to hold a variety of items from sewing machine feet to bobbins to thread. I had 2 colors of elastic on hand so I decided to use both colors by alternating them on the facing.

Inside Center Facing

Once I had sewn the inside center facing, then I just needed a few finishing details such as zipper pulls to complete my Running with Scissors tool case!

Here’s a look at the front of the completed case:

Completed Running with Scissors Case

I decided to do a little photo shoot with my 2 new ByAnnie bags, along with my foster kitty, Gracie. She provided excellent inspection services!

In the picture where Gracie is sitting next to the bags, you can see my new Running with Scissors tool case folded over my Take A Stand bag. I’m going to use these 2 bags together at my sewing table to keep frequently used tools close at hand.

Another pic of both bags together;

Take A Stand Bag and Running with Scissors Case

I now have more confidence to tackle a bigger bag project! On my to-do list is the A Place for Everything 2.0 bag from ByAnnie. It’s a great bag to hold English paper piecing projects and supplies. I haven’t decided which fabric to use yet so stay tuned!

Do you follow me on Instagram (@nwquiltedcat)? I’m very close to reaching 2,000 followers. I’m going to do a little giveaway once I reach that milestone, and it will most likely feature Tula Pink products. Come follow me if you don’t already!

Happy quilting!

~Jen

Historic Ice Storm

In Oregon, we had a pretty wild Valentine’s Day weekend with an historic ice storm for some people and snow for others. At my house, we didn’t receive much snow, maybe 1/4 of an inch, but we were hit hard with the ice storm.

We had about 1-1/2 inches of ice accumulating over a short period of time, which caused major power disruptions and tons of damage to trees in the area.

During the ice storm, we heard the cracking, creaking, and falling of tree limbs and whole trees constantly over several days. We saw tree branches explode, just literally fall to pieces in front of us. With other trees, it looked like the ice covered limbs shrank back into themselves before cracking and falling under the weight. The eerie popping noises spooked our dog and kept us nervously looking out the window to see if one of our trees or a neighbor’s tree fell.

We lost 2 large trees in our front yard and one flowering plum tree in the backyard. One of the front yard trees dropped a large limb on our car. Fortunately, the thick ice spared the car major damage, and we saw just minor denting after the ice melted.

Our large maple in the backyard took heavy damage and will need an arborist to remove it later this year. We had a decorative juniper bush, about 20 feet tall, topple over. We cut the top 10 feet off and replanted it, hoping that the roots will take to the earth again.

After a few hours of ice, this is what our front street looked like:

Trees with ice damage

Many of the trees in the photo above took severe damage and either fell over during the storm or had to be removed. One branch fell on the neighbor’s house and punctured the roof.

Ice storm hits these trees hard

In our backyard, my beautiful flowering plum tree took heavy damage. Most of the major limbs snapped and fell during the storm.

Plum tree, mid ice storm

Limbs continued to snap and break for a few days after the freezing rain stopped falling. I will replant something beautiful where the plum once stood.

Plum tree, after (February 2021 ice storm) and before (spring 2020)

The ice was very beautiful, in its own way. It made beautiful patterns and shapes in the bushes, grass, and objects on my patio.

Ice coats a bush in my backyard
Icicles dripping off a hanging basket frame

I wouldn’t want to sit in this chair during my lunch break. Brrrr!!

Ice coats a patio chair

Before the COVID pandemic, my sister gave me a fun garden decoration for Christmas. It is a rooster made from metal scraps. He’s now become the recipient of many jokes and curses in the past year, including this ice storm. Let’s all blame him, ha, ha!

Ice coated “Corona” rooster

I didn’t get any sewing accomplished in the past two weeks, outside from a little English paper piecing. Now that the ice is melted and we’ve cleaned up most of the fallen debris, I plan to get back to some quilting.

Stay safe out there!

~Jen

Welcome 2021!

On New Year’s Eve, my family and I stayed home as we usually do, played board games, and made homemade pizza for dinner. We stayed up until midnight to celebrate the official kicking of 2020 to the curb. We saw fireworks light up the sky as neighbors welcomed the new year. I feel positive that this year will turn things around for everyone, and that we’ll finally see Covid lose its grip as the months go by. I want my son to be able to enjoy some normal high school times and make memories.

I have a few goals for this year, not time-specific. The first is to spend more time in nature. We did quite a bit of hiking last year, and I want to continue doing so.

Here’s a picture from Ecola State Park with Haystack Rock in the background at Cannon Beach (aka “The Goonies” beach) in Oregon just days before the new year. We took the dog and had a lovely short hike and picnic lunch.

My second goal is to release and let go of stuff. I have way too much stuff in the house so I’m committing to reducing and donating items each week.

My third goal is to sew a little each day, even 5 minutes. I want to finish WIPs that have been languishing for far too long! The first one in the queue is to add the binding to my Tula Pink 100 Modern Blocks quilt. The second one is to finish my Seaglass BOM, which I just received the final blocks and setting layout this week.

My word for the year is serenity. I want to live it, breath it, be it.

Do you have any goals, quilting related or otherwise?

Happy quilting,

~Jen

Baskets in the Woods

Remember my post about making fabric baskets? Well, I couldn’t stop with just one, and so I made 4 similar baskets for a group of quilting friends.

I wanted to get a picture of the baskets all together in an outdoor setting. So, my family and I took a weekend drive to a beautiful little lake, with falls colors beginning to emerge.

I placed all 4 baskets into a plastic bag, and I took them with me on the very short hike. It was only 1 mile around the little lake, with a some heavy brush in a few sections.

How cute are these baskets all lined up on a log with the lake in the background?

Fabric baskets on log

We had a great time, having this little lake all to ourselves. It wasn’t chilly, but there was a beautiful cloud hovering over the lake surface and providing a misty backdrop to our time here. The foliage was quite wet, and so our pants became soaked as we walked around the lake, but we didn’t mind at all.

The maples were starting to turn color, with many trees displaying vibrant yellow leaves and a few turning towards orange and red.

Cloud hugging Daly Lake
Wooden bridge
Fall foliage

I hope my friends like their fabric baskets! Getting out in nature is one of my favorite things to do, and it really helps me deal with times of stress. I can’t wait to go again!

Take care,

-Jen

Making a Fabric Basket (or Tub)

Hi everyone!

Recently, I came across a fun sew along on Instagram where the participants were making fabric baskets, also called tubs. I was intrigued by them, by I knew that I didn’t have time to complete one within the sew along timeframe. I purchased the pattern called “Tub Family” from RosieTaylorCrafts on Etsy, and set it aside for a couple of days.

Then, several weekends ago, I had a few hours to try my hand at making one. The pattern comes with 3 sizes of fabric baskets, and I opted to make the largest one. I have some of the beautiful Homemade fabric by Tula Pink, which I think is absolutely perfect to make all sorts of things for my sewing room.

The pattern walks you through the construction steps pretty well, but I have a few pointers if you decide to make one.

Once you have your main basket panel, liner, and foam all ready for quilting, I do recommend using the straight-line quilting as mentioned in the pattern. I tried doing an all over swirly type quilting on my test basket, but I had a much harder time attaching the bottom and getting the basket to sit properly. It’s just kinda floppy!

On my “real” basket, I did straight-line quilting using a beautiful Aurifil bright green thread with a seam guide on my Bernina. In the picture below, you can see my seam guide helped to give me perfect 1-inch quilting lines.

After quilting at 1-inch and .5-inch intervals, I had my finished main panel, ready for my quilt inspector. I used some fun Tula Pink ribbon along either side of the fussy cut sewing machine in the center of the panel. This pattern is so flexible that you could make baskets out of scraps, a single piece of fabric, or several large chunks like I did.

My finished main body panel with quilt inspector

After trimming the main panel to the correct size, I started to attach the base to the body. This step is the hardest part of the whole pattern because the base really needs to be eased in using clips or pins.

I used Clover clips to secure my base rather than pins. No blood! If the base is still too large after easing it, you may need to trim it down slightly.

Using Clover clips to attach the base

The pattern does have you hand stitch the base to the body before using your sewing machine to help with puckers. I highly recommend doing this step. You can remove the clips after hand basting, and then use your machine to slowly and carefully stitch the base to the body.

I did my binding a bit different from the pattern by pressing one side in 1/4-inch so that I’d have a nice finished edge to work with when sewing the second long edge to the inside of the basket.

Getting the binding ready

I did completely machine stitch my binding rather than hand sewing the inside, just for lack of time. I used the same color thread as the quilting, and I think it looks fine.

Here’s a look at my completed fabric basket, filled with some EPP supplies:

My finished basket!

These baskets are addictive to make, and I want to try making the medium and small sized ones soon. Maybe Christmas themed ones as well!

There are many examples of completed baskets using the #tubfamily hashtag on Instagram.

Enjoy and happy sewing!

-Jen