Mini Quilt Reveal for COVID-19

Hi everyone,

Yesterday, I posted about creating a mini quilt to acknowledge this current pandemic. I wanted a project that I could make quickly with supplies on hand.

I finished the quilting and binding last night so that I can share my completed mini quilt with you today. I used my Oliso mini project iron for each step of foundation paper piecing, and I really loved the convenience!

I used my Bernina domestic sewing machine to do some cross-hatch quilting on the toilet paper roll. To get started, I like to use a piece of Washi tape. This tape gives me the placement for my first line of stitching. I then use my presser foot to guide my along that first line to complete the rest of the quilting.

I used Aurifil 50 weight thread in silver white (#2309) for both the piecing and the quilting.

Use Washi tape for cross-hatch quilting

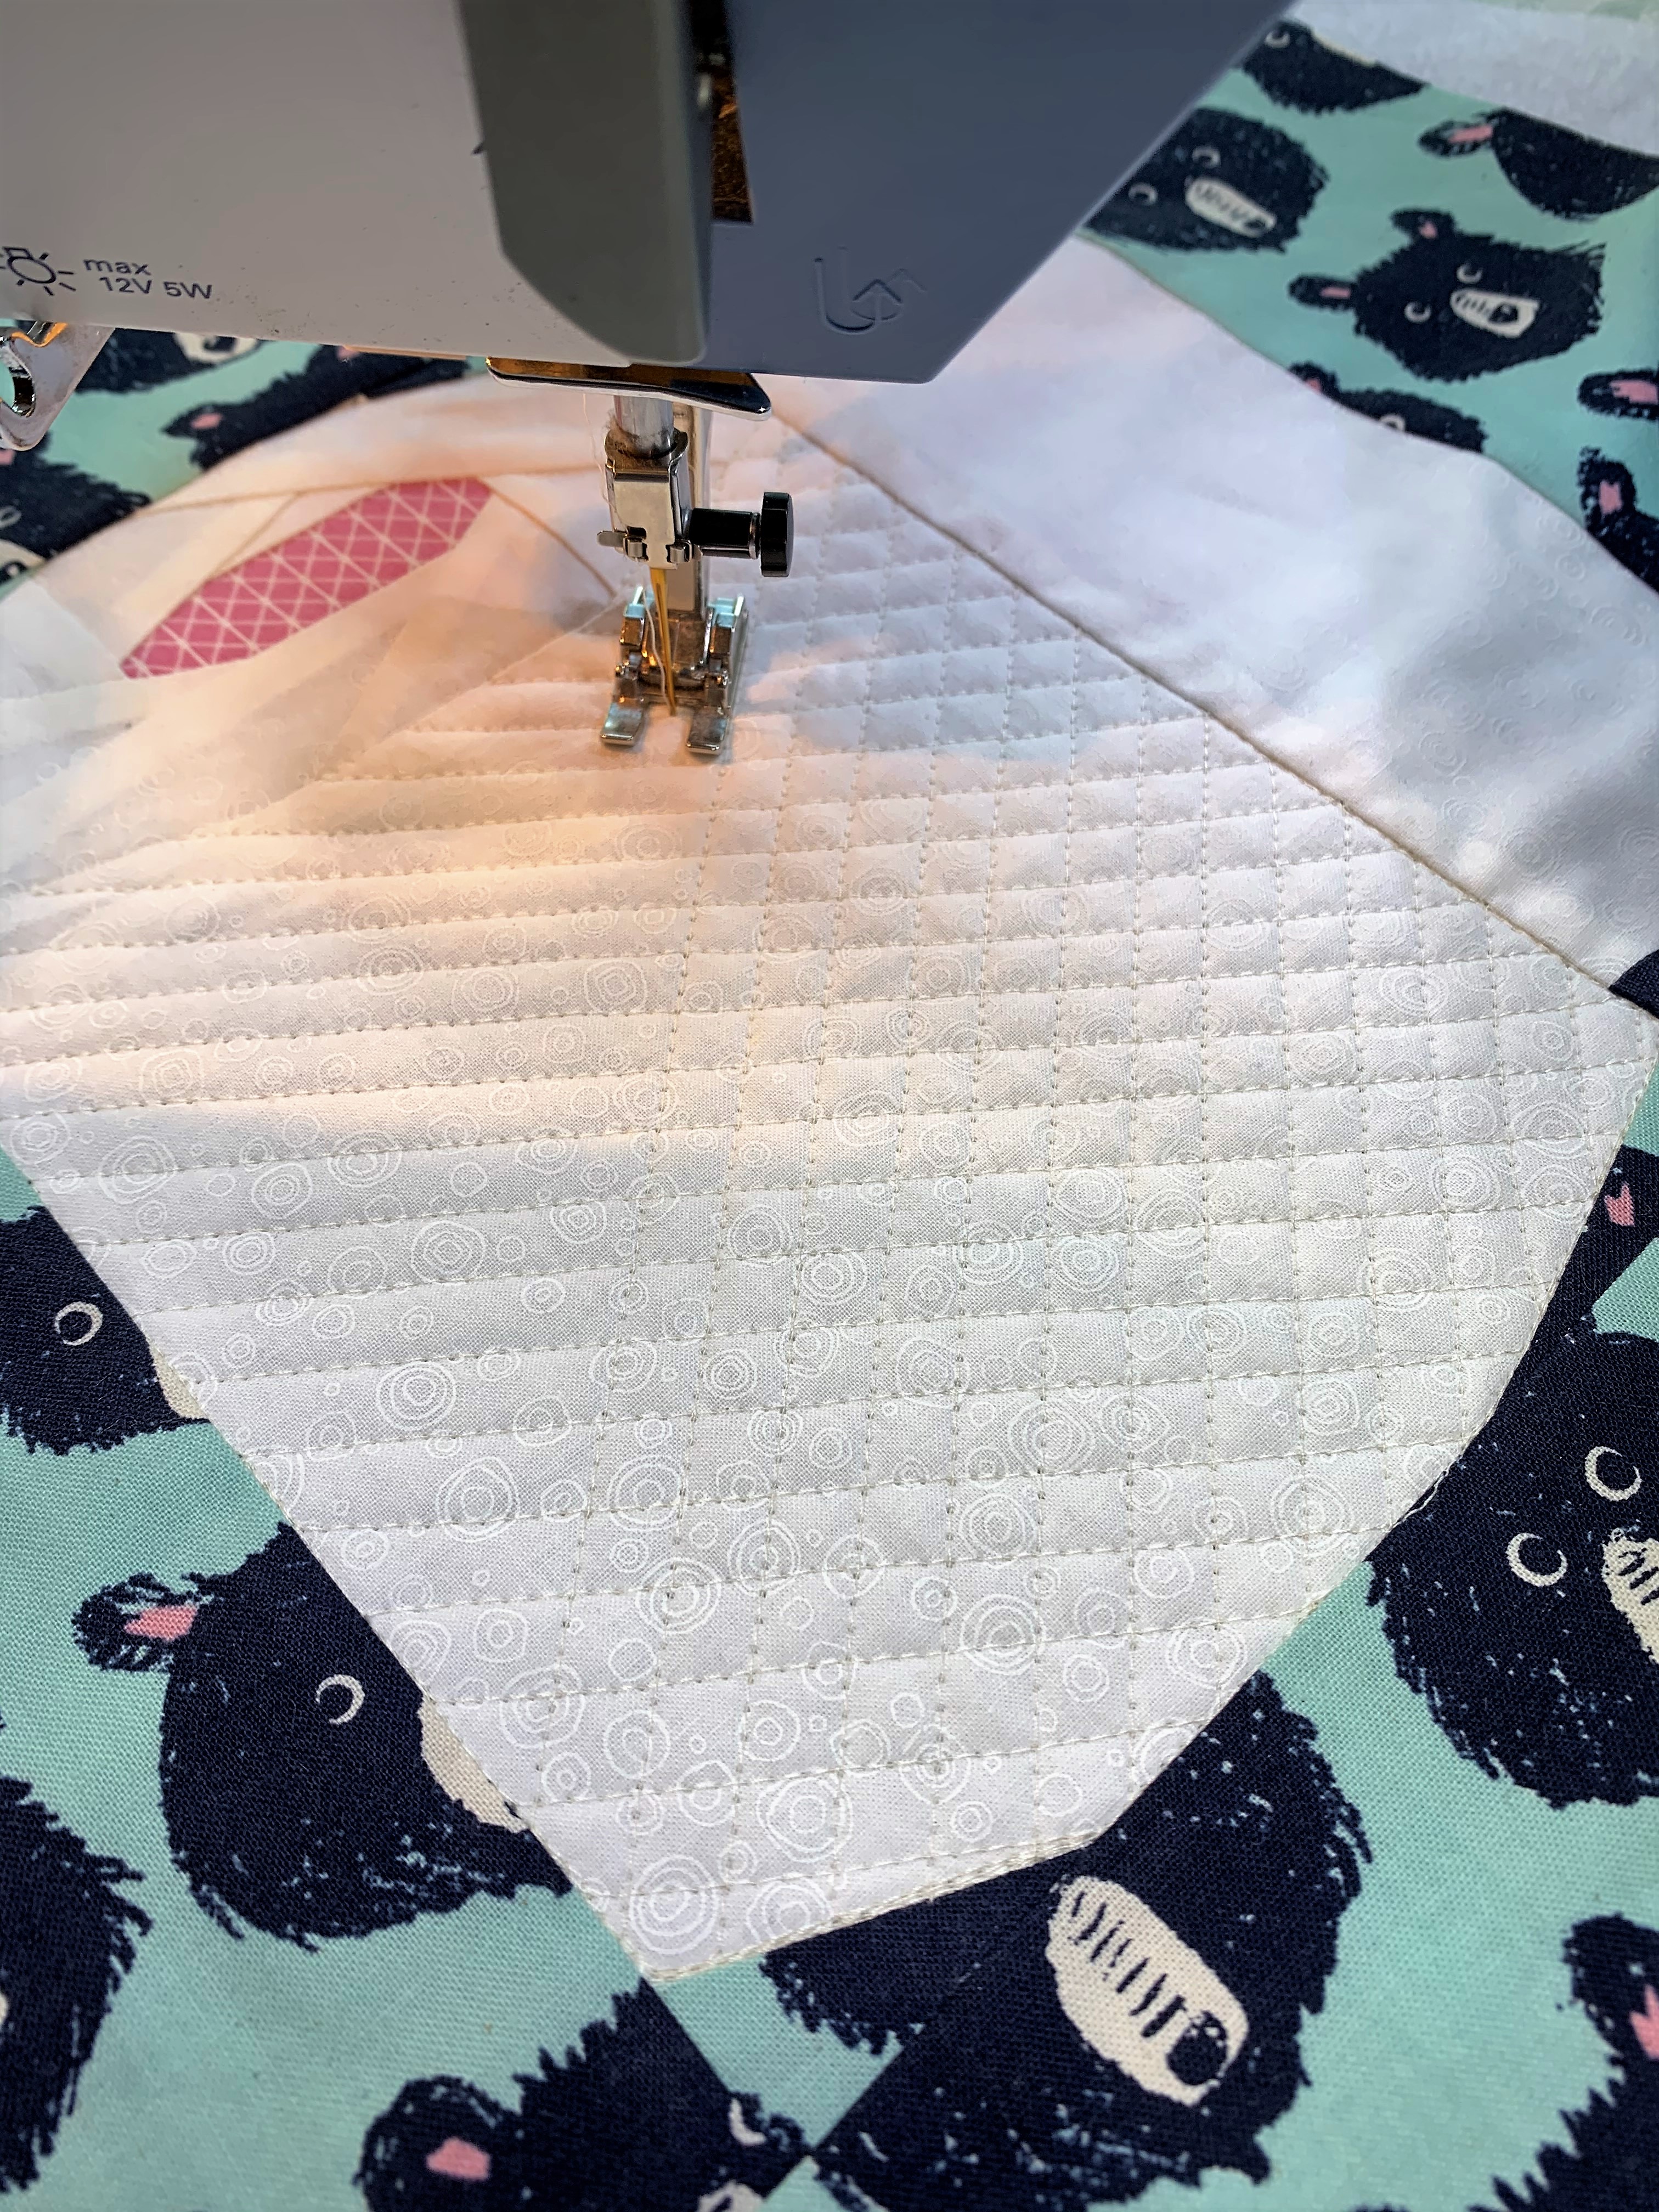
Cross-hatch quilting on my Bernina

I kept most of my quilting to the toilet roll portion of the quilt. On the borders, I did just a couple of lines of straight-line quilting in Aurifil dark pink (#4020). I also used this same dark pink thread to complete my binding entirely by machine.

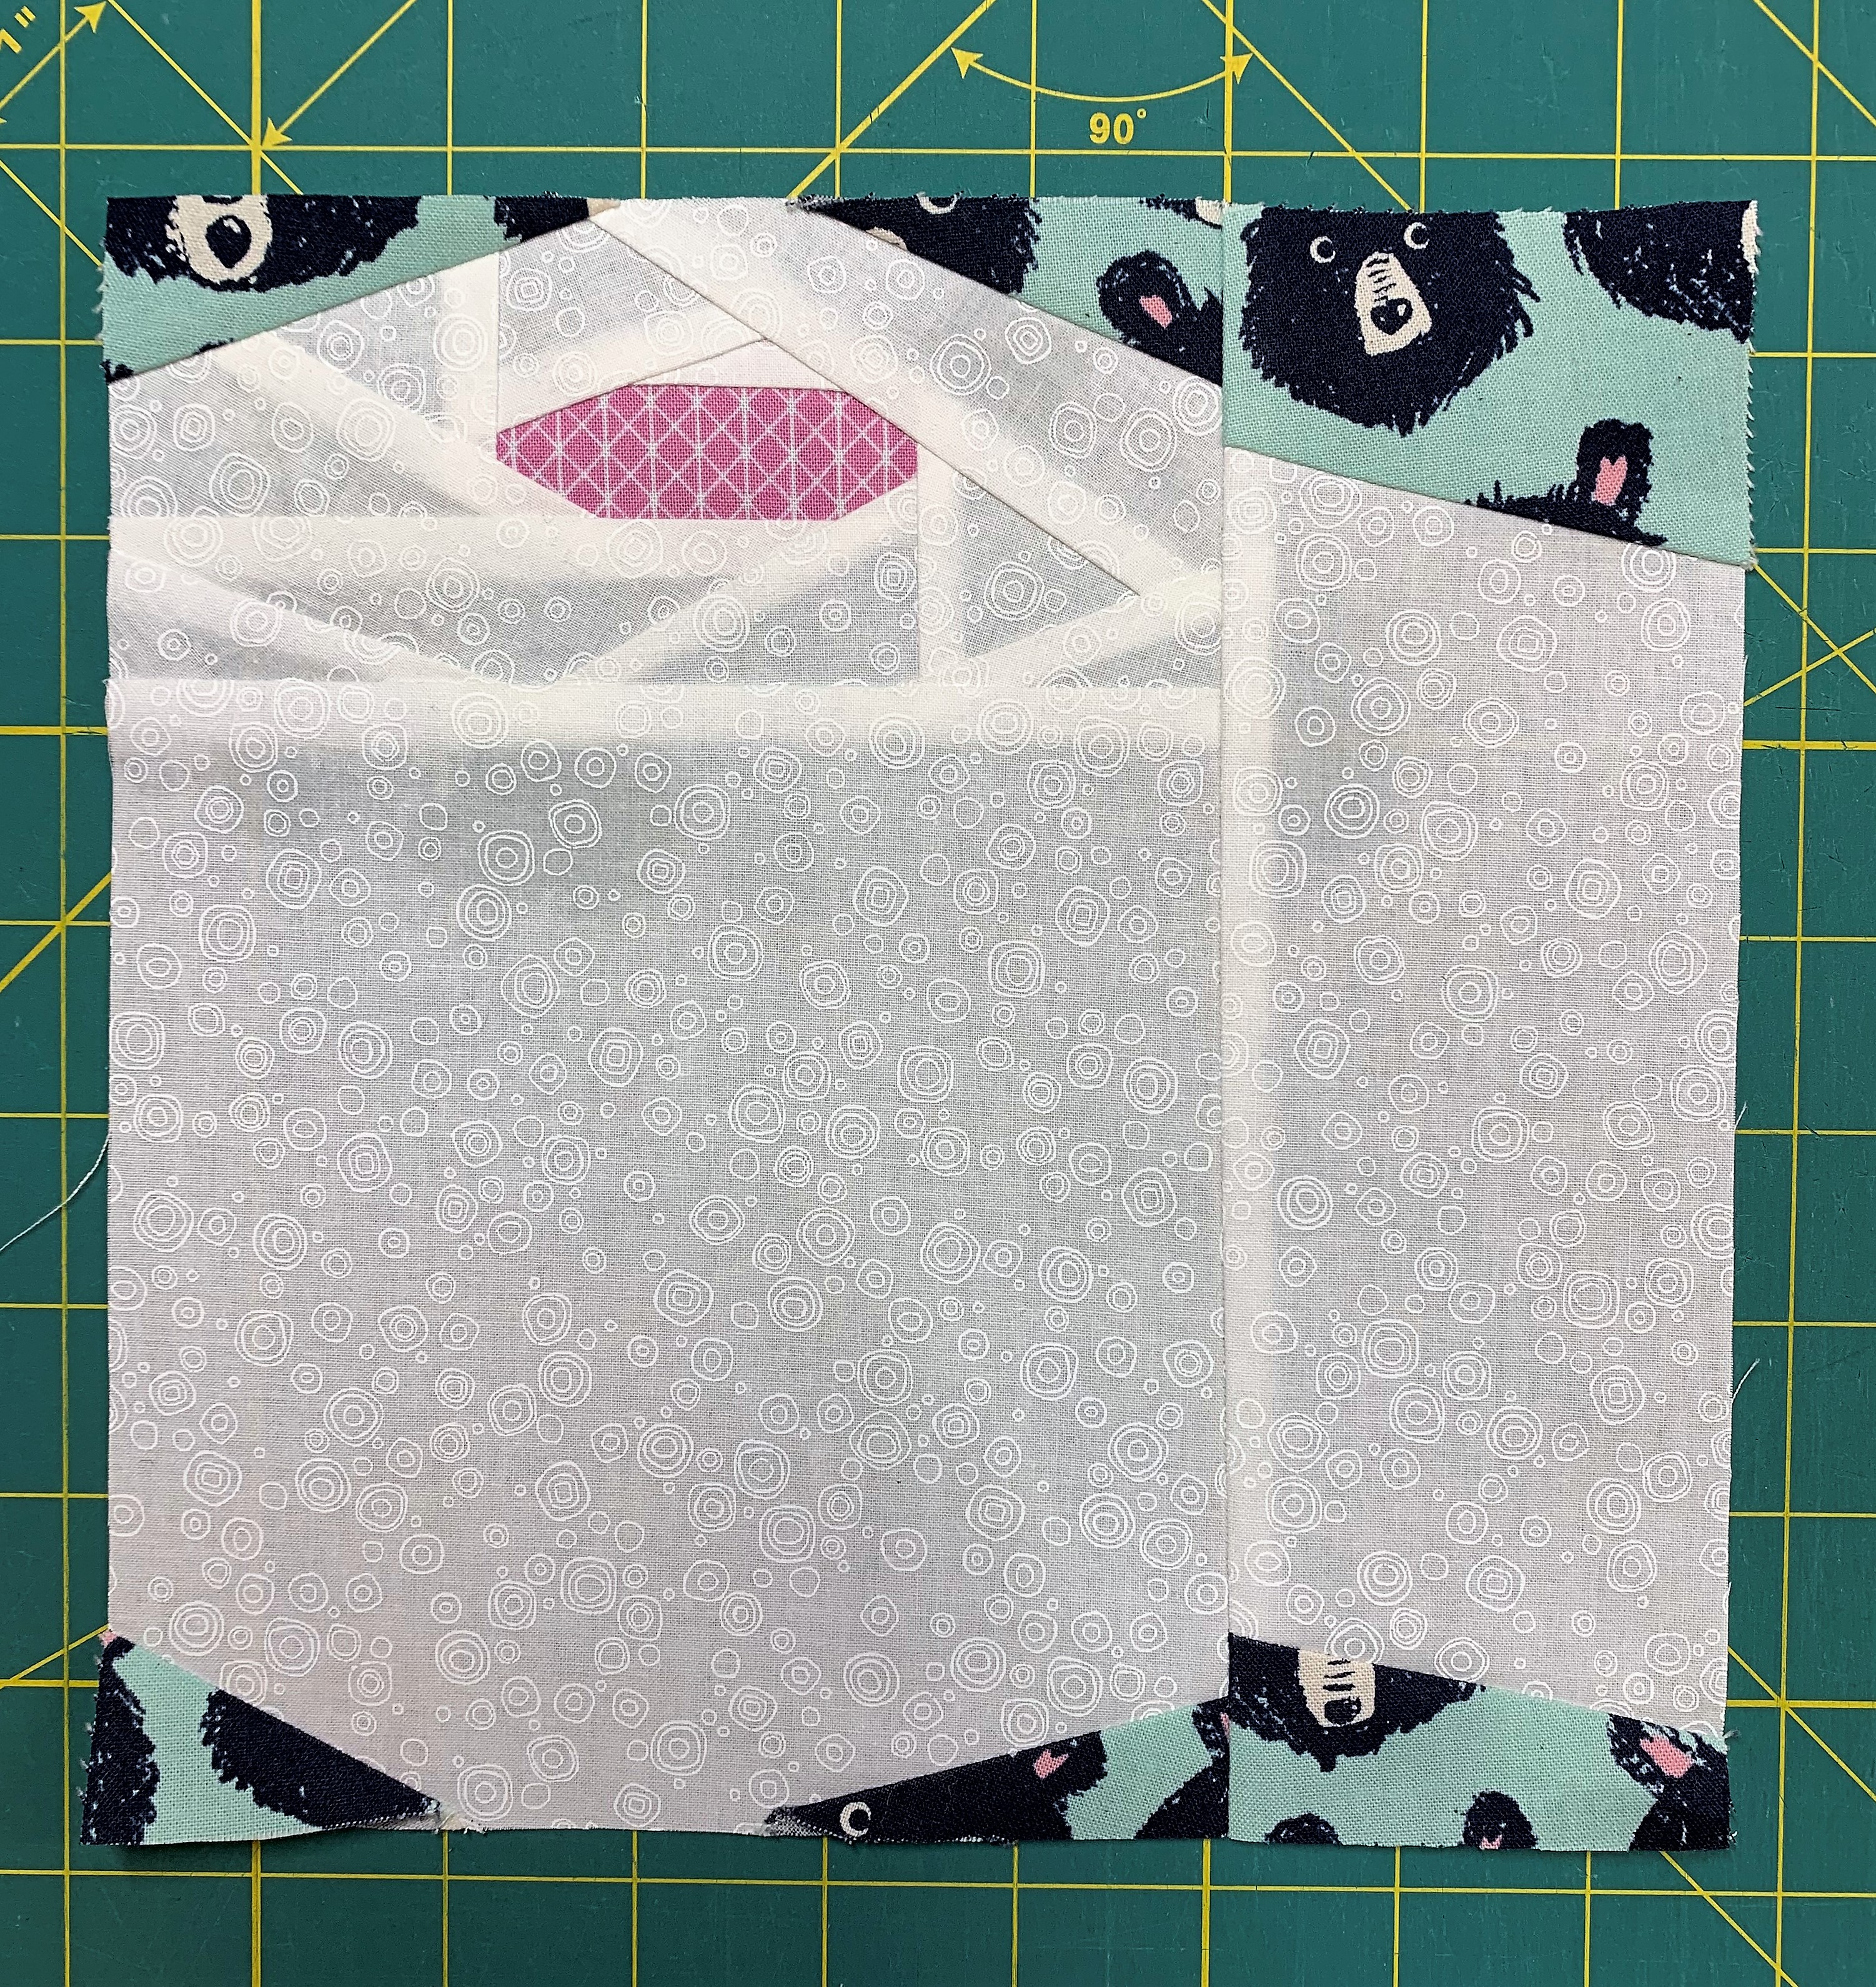
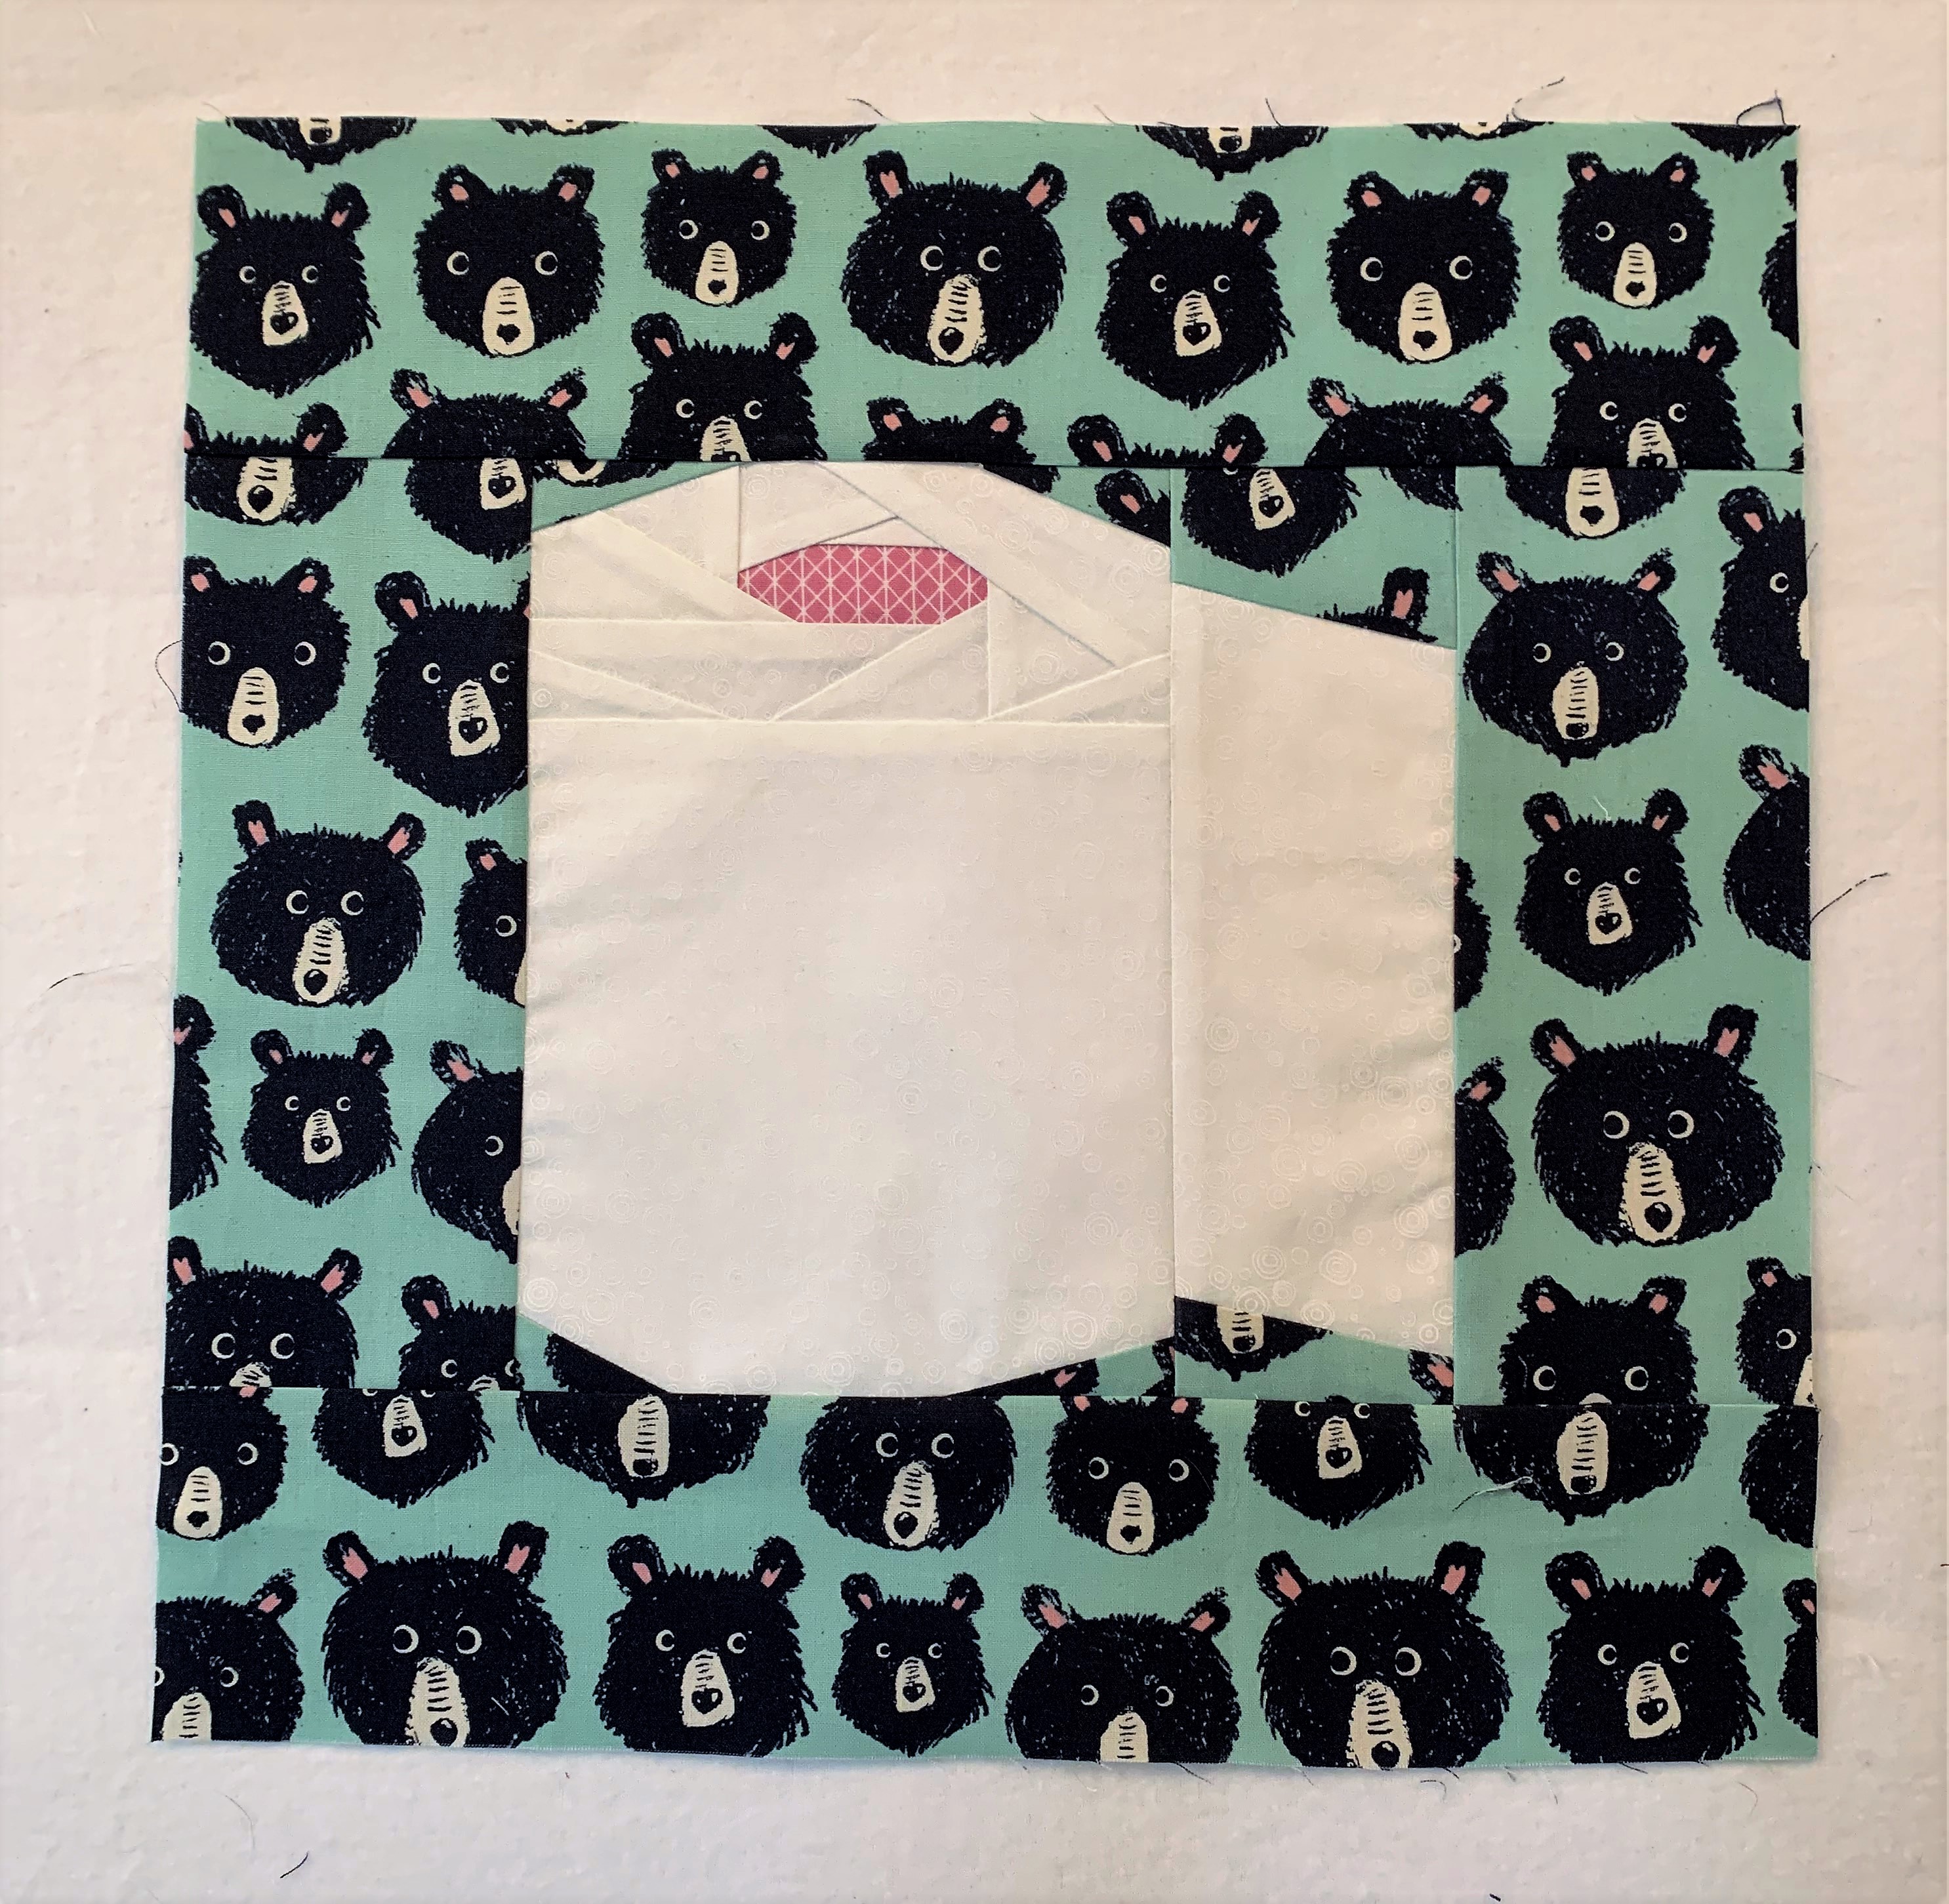
If you missed my post yesterday, this mini quilt is a free pattern by Miso Quilty called Keep Calm and Roll On.

Here are some pictures of my completed mini!

This mini quilt comes together very quickly, especially if you have a little foundation paper piecing experience. I think my total time to complete the quilt was about 3 hours. I did speed up the process by doing machine binding rather than hand binding because I’m just going to display this mini in my guest bathroom.

Happy quilting!

Jen

Using the Oliso Mini Project Iron with Foundation Paper Piecing Projects

Hi everyone,

I started a new mini quilt project yesterday to acknowledge the current pandemic situation. I wanted to make something small and quick, but something a little cheeky to hang in my guest bathroom. Can you guess what it is? Keep reading!

This little mini quilt uses foundation paper piecing, but it is a good pattern for beginners because there are no tiny pieces and only two sections to join together. You can use regular copy paper to print your foundations if you don’t have any “fancy” foundation paper.

I also want to recommend using the new Olison mini project iron for your foundation paper piecing projects. It is small, lightweight, and works great for small projects. I keep my mini project iron next to the left of my sewing machine on a small ironing table. I can flip, press, and trim my foundations without needing to move over to my big ironing station.

These mini irons come in pink or yellow, and Oliso is currently having a sale on them so they are a great deal! You also get a silicone solemate so that you can leave your iron on in the down position. I do get a small percentage of the sale if you purchase through my link, which helps fund the costs of this blog.

Here’s a look at my pink mini iron in action. I do like to use a small wool pressing mat under my irons for crisper seams. Remember, do not use steam when foundation paper piecing because it will shrink your paper!

Oliso mini project iron in pink

This mini quilt is a free pattern available from Mitchie at Miso Quilty called “Keep Calm and Roll On.” She has the block available in 3 sizes, but I selected to make the smallest size at 8-inches by 8-inches before adding borders.

I used fabrics from my stash, digging deep to find just the right background print for maximum cuteness!

  • Ramblings from P&B Textiles for the toilet paper
  • Netorious in Pink from Cotton + Steel for the toilet paper roll hole on the top
  • The Warm Fuzzies by Sarah Watts for Cotton + Steel (2017) for the background/borders
  • Aurifil silver white #2309 for all the piecing

Keep Calm and Roll On block at 8×8 inch size

I cut my bear borders slightly larger at 3-1/4″ so that I could see more of the bears.

Keep Calm and Roll On, toilet paper roll block with borders

Don’t you just love those bear faces? To me, they are saying, “hey, humans, what’s going on with your toilet paper shortage?”

In my next post, I’ll show you how I quilted this fun little mini quilt.

Until then, I hope you have enough toilet paper rolls! 🙂

Happy quilting,

Jen

Sea Glass BOM by Fig Tree, Block 4

Hi everyone,

I had a chance in the past few days to catch up on my Sea Glass BOM by Fig Tree & Co. This is a year long block-of-the-month that started in January.

I worked on the flying geese border units that we were supposed to make with the month 3 blocks, but I didn’t have time in March. We made 27 flying geese units, and we could mix and match the colors in whatever order we wanted.

The block for April is called “Ocean Coral,” and I really love the darker blue aqua print! I believe that print is from the Breeze line of fabrics by Zen Chic. I may have to get some more of this fabric for my stash!

Here’s a look at my 2 blocks this month plus the flying geese from last month:

Sea Glass BOM, Block 4 “Ocean Coral” and flying geese

I always like to take pictures of my blocks outside whenever possible because the lighting brings out the richness of the fabrics. I had the opportunity this morning where the weather was calm.

Ocean Coral blocks

The softness of this color palette is really appealing to me right now during our COVID-19 crisis. As I sew together more blocks, I can see the sea glass emerging! I need to find some real pieces of sea glass the next time I can go to the beach.

Sea Glass BOM, blocks 1-4

Stay safe and imagine soft ocean breezes soothing your worries away!

Happy quilting,

Jen

2020 Mini Series SAL – Week 5

Hi everyone,

Surprisingly, this week is going by fast for me. I’m balancing working from home with helping my teen with his schooling from home, and fitting in some sewing each evening. I’m also trying to keep anxiety feelings at bay with regular exercise, mostly in the form of long walks with my dog.

The block in our sew-along this week is one of my favorites. It is called Stretched Geese. I really like any form of the flying geese block, and this one is really fun!

This is my 4-inch block in progress:

Stretched Geese block during construction

I decided to alter the block slightly by adding little border strips to the sides of the flying geese using my one print fabric from Tula Pink. I’m working in a little bit of this fabric into each block.

Stretched Geese block, slightly modified

I love my growing group of little blocks! The beachy feel of the fabrics is quite soothing.

Mini Series SAL blocks, weeks 1 to 5

We now have 3 official blocks left to make in the SAL, plus I need to make the bonus block.

On one of my dog walks this week, I saw one of my favorite flowers, lupine, starting to bloom. Isn’t it pretty?

I just realized that the colors in my lupine photo below match the fabric colors in my SAL blocks! What a happy coincidence.

Lupine starting to bloom

I hope you are all staying healthy and making a little time to work on sewing projects other than face masks.

Take care!

~Jen

A Very Special “Caticorn” Fabric Postcard

Hi everyone,

I took a little break recently from sewing fabric face masks and working on quilting projects to make a fabric postcard for a special occasion.

A neighbor girl is turning 9 this week, and she had planned on having a kitty cat themed birthday party with her friends. Unfortunately, she cannot have the party now due to COVID-19 so her mom put out the call to friends and family to mail her cat themed birthday cards.

I decided to make her a fabric postcard using a pink “caticorn” from Riley Blake. The pink and yellow solid pieces are from Cherrywood Fabrics and the striped fabric is from a little leftover piece from my Koala quilt swap.

Caticorn Fabric Postcard

I mount my fabric postcards using Heat n’ Bond Lite onto a firm backing such as Pellon Timtex before quilting. I used a light pink Aurifil thread to add some straight-line quilting around the cat. I also used a heart-shaped decorative stitch on my Bernina along the striped outer border.

On the back side of the card, I adhered a piece of a light-colored, solid fabric using Heat n’ Bond lite. I wrote a “meowtastic” little greeting on the back side of the card for the special birthday girl.

To finish the postcard, I used a zig-zag stitch and went around the postcard twice for durability. Even though I could technically mail this postcard as-is, I will place it into an envelope to protect it. I’d hate for the cute caticorn to get marked up in the postal system!

Quilted Caticorn Fabric Postcard for the Birthday Girl!

I’m really hoping that this simple fabric postcard will cheer her up a bit and make her birthday a little more special.

Happy sewing!

~Jen

2020 Mini Series SAL – Week 4

Hi everyone,

The little block for this week is called Hexagon Step. This is another block that took about 2 hours to sew together.

When I first saw the block, it reminded me of radiation danger signs!

Hexagon Step Pattern cover

I decided to change up the look by not alternating my color strips with background strips in each row. Instead, I used full color row around the hexagon shape and then followed it with a full row of the background fabric.

Here’s a look at my Hexagon Step block with one of my antique toy sewing machines. Isn’t the little seahorse cute?

My Hexagon Step block with antique toy sewing machine

I’m enjoying piecing these little blocks each week. There are small but satisfying in these unusual times. We have four more blocks left to sew in the SAL, not counting the bonus block, and then we have a 2 week window to make and finish a project using the blocks.

Here’s a look at my first four blocks together:

Mini Series SAL blocks 1-4

Next week, I’ll post my Stretched Geese block for week 5.

Take care and happy quilting!

~Jen

Sea Glass BOM by Fig Tree, Blocks 1-3

Last year, I signed up for a new 12-month 2020 block-of-the-month (BOM) program with Fig Tree & Co called Sea Glass. This program contains the fabric and instructions to create two blocks each month using soft sea glass colors for a breezy, beachy feel.

The first block packets shipped in January with a block called Sand Dollar. My neighbor’s cat stopped by for a brief inspection. He gives the blocks his approval!

Sea Glass BOM, Month 1, Sand Dollar

In February, we received our second packet with fabrics to create the Starfish blocks. I love all of the aquas and light turquoises, playing together.

Sea Glass BOM, Sand Dollar and Starfish Blocks

Our block for March is called Sea Anemone, and I just finished sewing mine together last weekend. There are some sawtooth border pieces to stitch together for March so I am a little bit behind, but I should catch up this week.

Sea Glass BOM, Sea Anemone Block

I expect to received the fabric and instructions for April any day now. I have seen some sneak peeks of the fabric on Instagram under the #seaglassbom hashtag, and the fabrics look really pretty! I hope to get April’s blocks stitched together this coming weekend.

Here’s a look at the first three blocks together:

Sea Glass BOM, Blocks 1-3

This color palette has me wishing for the Oregon beaches to reopen soon!

Happy quilting!

~Jen

Tula Pink’s 100 Modern Quilt Blocks Project, Part 2

Hi everyone,

If you celebrate Easter, I hope that you had a great day yesterday even if it wasn’t your usual celebration with social distancing practices in place. We had beautiful weather and enjoyed being together and taking the dog for a long walk.

Last week, I blogged about one of my works-in-progress (WIP) started back in 2018.

Today, I’m going to show you my completed Tula Pink 100 modern quilt block finished quilt flimsy! If you haven’t heard of the term “flimsy” before, it is just the completed quilt top before quilting. I pieced the entire quilt using Aurifil 50 weight thread in white.

I added the white block frames to all 100 of my blocks, and then I added the sashing (Kona cotton in Lighthouse) to each row individually. I pieced together the top 5 rows separately from the bottom 5 rows, just so that I didn’t get confused and to help keep the weight of the quilt top less.

When I had the top 5 rows and the bottom 5 rows pieced, I was ready to join them together.

Here’s a look at the two last chunks of the quilt on the floor of my quilting room:

The top 5 rows and the bottom 5 rows, ready to be stitched together

This quilt flimsy is pretty large so I couldn’t get a good picture of it indoors. My husband and I each stood on a chair to hold up the quilt flimsy, and our teen son took the photo in the field behind our house.

Completed Tula Pink 100 Modern Quilt Blocks Quilt Top

It was a very windy afternoon and so we had to take multiple pictures and wait a bit for the breeze to subside. I do think the quilt looks pretty, fluttering in the wind!

Tula Pink’s 100 Modern Quilt Block Quilt Top, fluttering in the wind!

Of course, one of my quilt inspectors strolled by to supervise the photo session. My cat, Cow, is just off to the side of the quilt, rolling in the dirt. He is loving this sunny weather!

Cow, the quilt inspector, loves to roll in the field dirt!

Next, I need to decide how to do the quilting. I want the focus of the quilt to be the beautiful blocks so I’ll likely do just an all-over swirly pattern. I don’t want custom or heavy quilting to distract from the blocks.

I hope to get this quilting and bound by July.

Happy quilting!

~Jen

2020 Mini Series SAL – Week 3

Hi all,

Time sure feels different in this era of “sheltering in place.” I’m happy that, for my job, I’m able to work from home, but I’m missing outdoor activities like hiking and missing friends and family.

The Mini Series SAL, hosted by Alison Glass and Giucy Giuce, is a great help during these times because it is uplifting to be participating in a project with so many other quilters around the world. You can see my week 1 block here and my week 2 block here.

We are now on to week 3 in the SAL with the challenging Pineapple block. This block has many, many pieces, and it took me approximately 2 hours to sew a 4-inch block!!

I’m using a Kona cotton charm square pack called Mermaid Shores for my colors, and a wonderful batik with pebble like shapes for my background. I want to invoke all the beach feelings!

Here’s a look at my Pineapple block in my garden:

Here’s a look at the first 3 blocks all together (Log Cabin, Courthouse Step, Pineapple):

First 3 blocks with a little fairy garden statue

Let me know in the comments if you are participating in the SAL and your Instagram handle so I can give you a follow!

Enjoy!

~Jen

Dachshund Themed Face Mask Using the St. Charles Pattern and Jig

Hi everyone,

I tested out another face mask pattern that has a pocket for an optional filter and a pocket for an optional nose wire published by St. Charles Hospital here in Oregon.

I wanted to test this mask because of the optional filter pocket and because I liked the finished look of it with either elastic or fabric ties.

I decided to use a cute dachshund print from my stash mostly because my sister loves these little dogs. She is a nurse practitioner so I’m making masks for her and other providers at her location.

I also used a cardboard jig from an Eggo box and Halloween-themed duct tape, which I had on hand, to speed up the pleat making process. By using a jig, you get consistent pleats without needing to pin them or iron them.The jig instructions are courtesy of a quilter (bendphoto) in Bend, Oregon, and she has the measurements on her YouTube video so go check it out!

Here’s a look at my mask and cardboard jig:

Dachshund Themed Face Mask and Cardboard Jig

Here’s a look at the filter insert on the bottom of the mask. The wearer can insert a disposable or washable filter of their choosing or not.

Optional Filter Opening

Here’s a look at where the optional inserted wire can create a bend to conform to your nose. There is a little channel at the top, and I just used a pipe cleaner.

Optional Wire Pocket

The finished mask:

Two pleated finished mask, pattern from St. Charles

I’m going to make some more of these masks, both with elastic and fabric ties. I prefer the elastic because it fits my face better, and I have a little bit left. Fabric ties take much longer to make, but many people do prefer them.

Happy quilting!

~Jen