Happy Wednesday everyone!
Dear Stella and Timeless Treasures are hosting a mini quilt challenge called Modern Traditional. The entry quilts must be 20-inches by 20-inches and have to include at least 2 prints from each company and no solids allowed! Entries are due today, April 30th and will be judged by two guest judges, Julie Herman and Katy Jones.
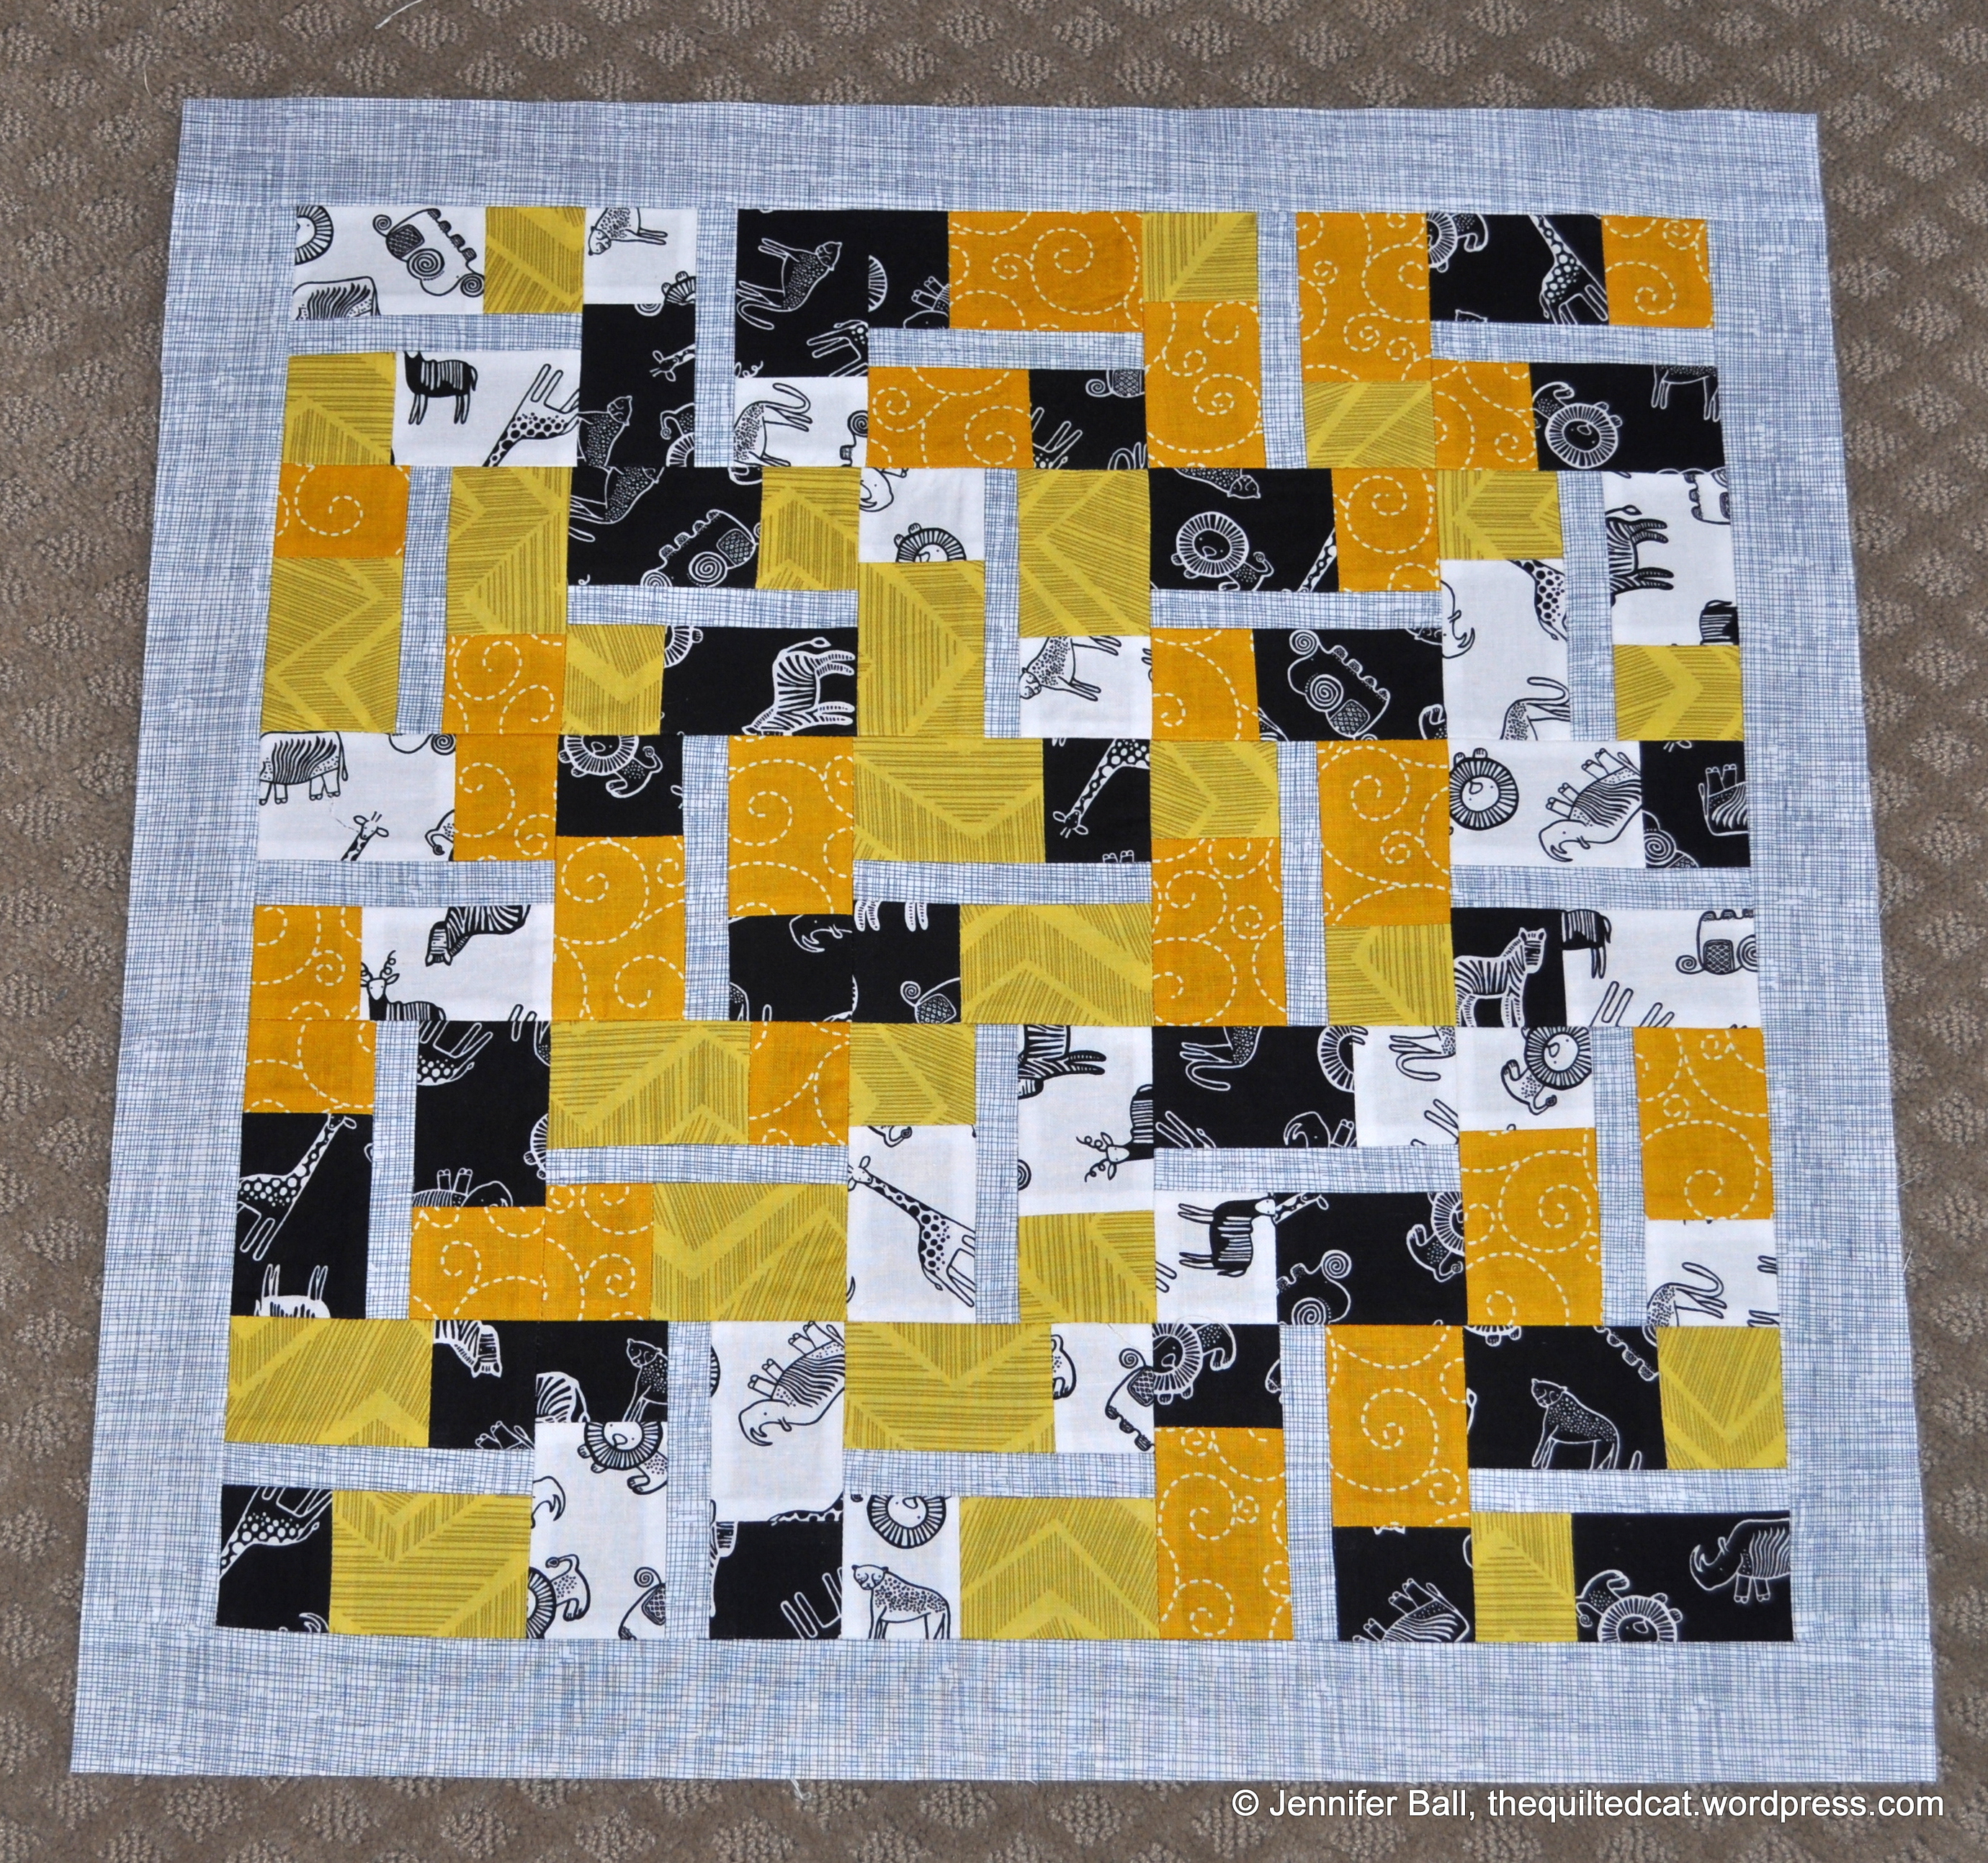
I decided to jump into this challenge with my entry called Sunny Savannah!
The fabrics that I used are:
Wee Gallery, Wild, Safari Animals in White (Dear Stella)
Wee Gallery, Wild, Safari Animals in Black (Dear Stella)
Zig Zag in Black for the binding only (Dear Stella)
Alice Kennedy, Matilda, Chevron in Citron (Timeless Treasures)
Woodstock, Stitched Swirl in Gold (Timeless Treasures)
Crosshatch Sketch in Grey (Timeless Treasures)
Since all the pieces in the quilt are very angular, I wanted the quilting to pop out a bit but still enhance the overall design. I decided to do an off-center swirl pattern in 1/4-inch increments on the entire quilt. I used a yellow Aurifil 40 wt thread for the quilting and Aurifil 50 wt Light Sand for the piecing. The swirl pattern reminds me of the sun shining down on the safari animals and so I decided to call this little quilt, Sunny Savannah. I really love the overall effect!
Here are some photos of the completed mini quilt:

Sunny Savannah, Completed Quilt
The back of the quilt is the Chevron in Citron fabric from Dear Stella with a label. I love the spiral quilting!

Sunny Savannah, Quilt Back
Just for fun, I took some pictures of the quilt flimsy. I thought it might be interesting to show you the backside of the quilt top because of all the neatly pressed rectangle shapes!
Sunny Savannah Quilt Flimsy
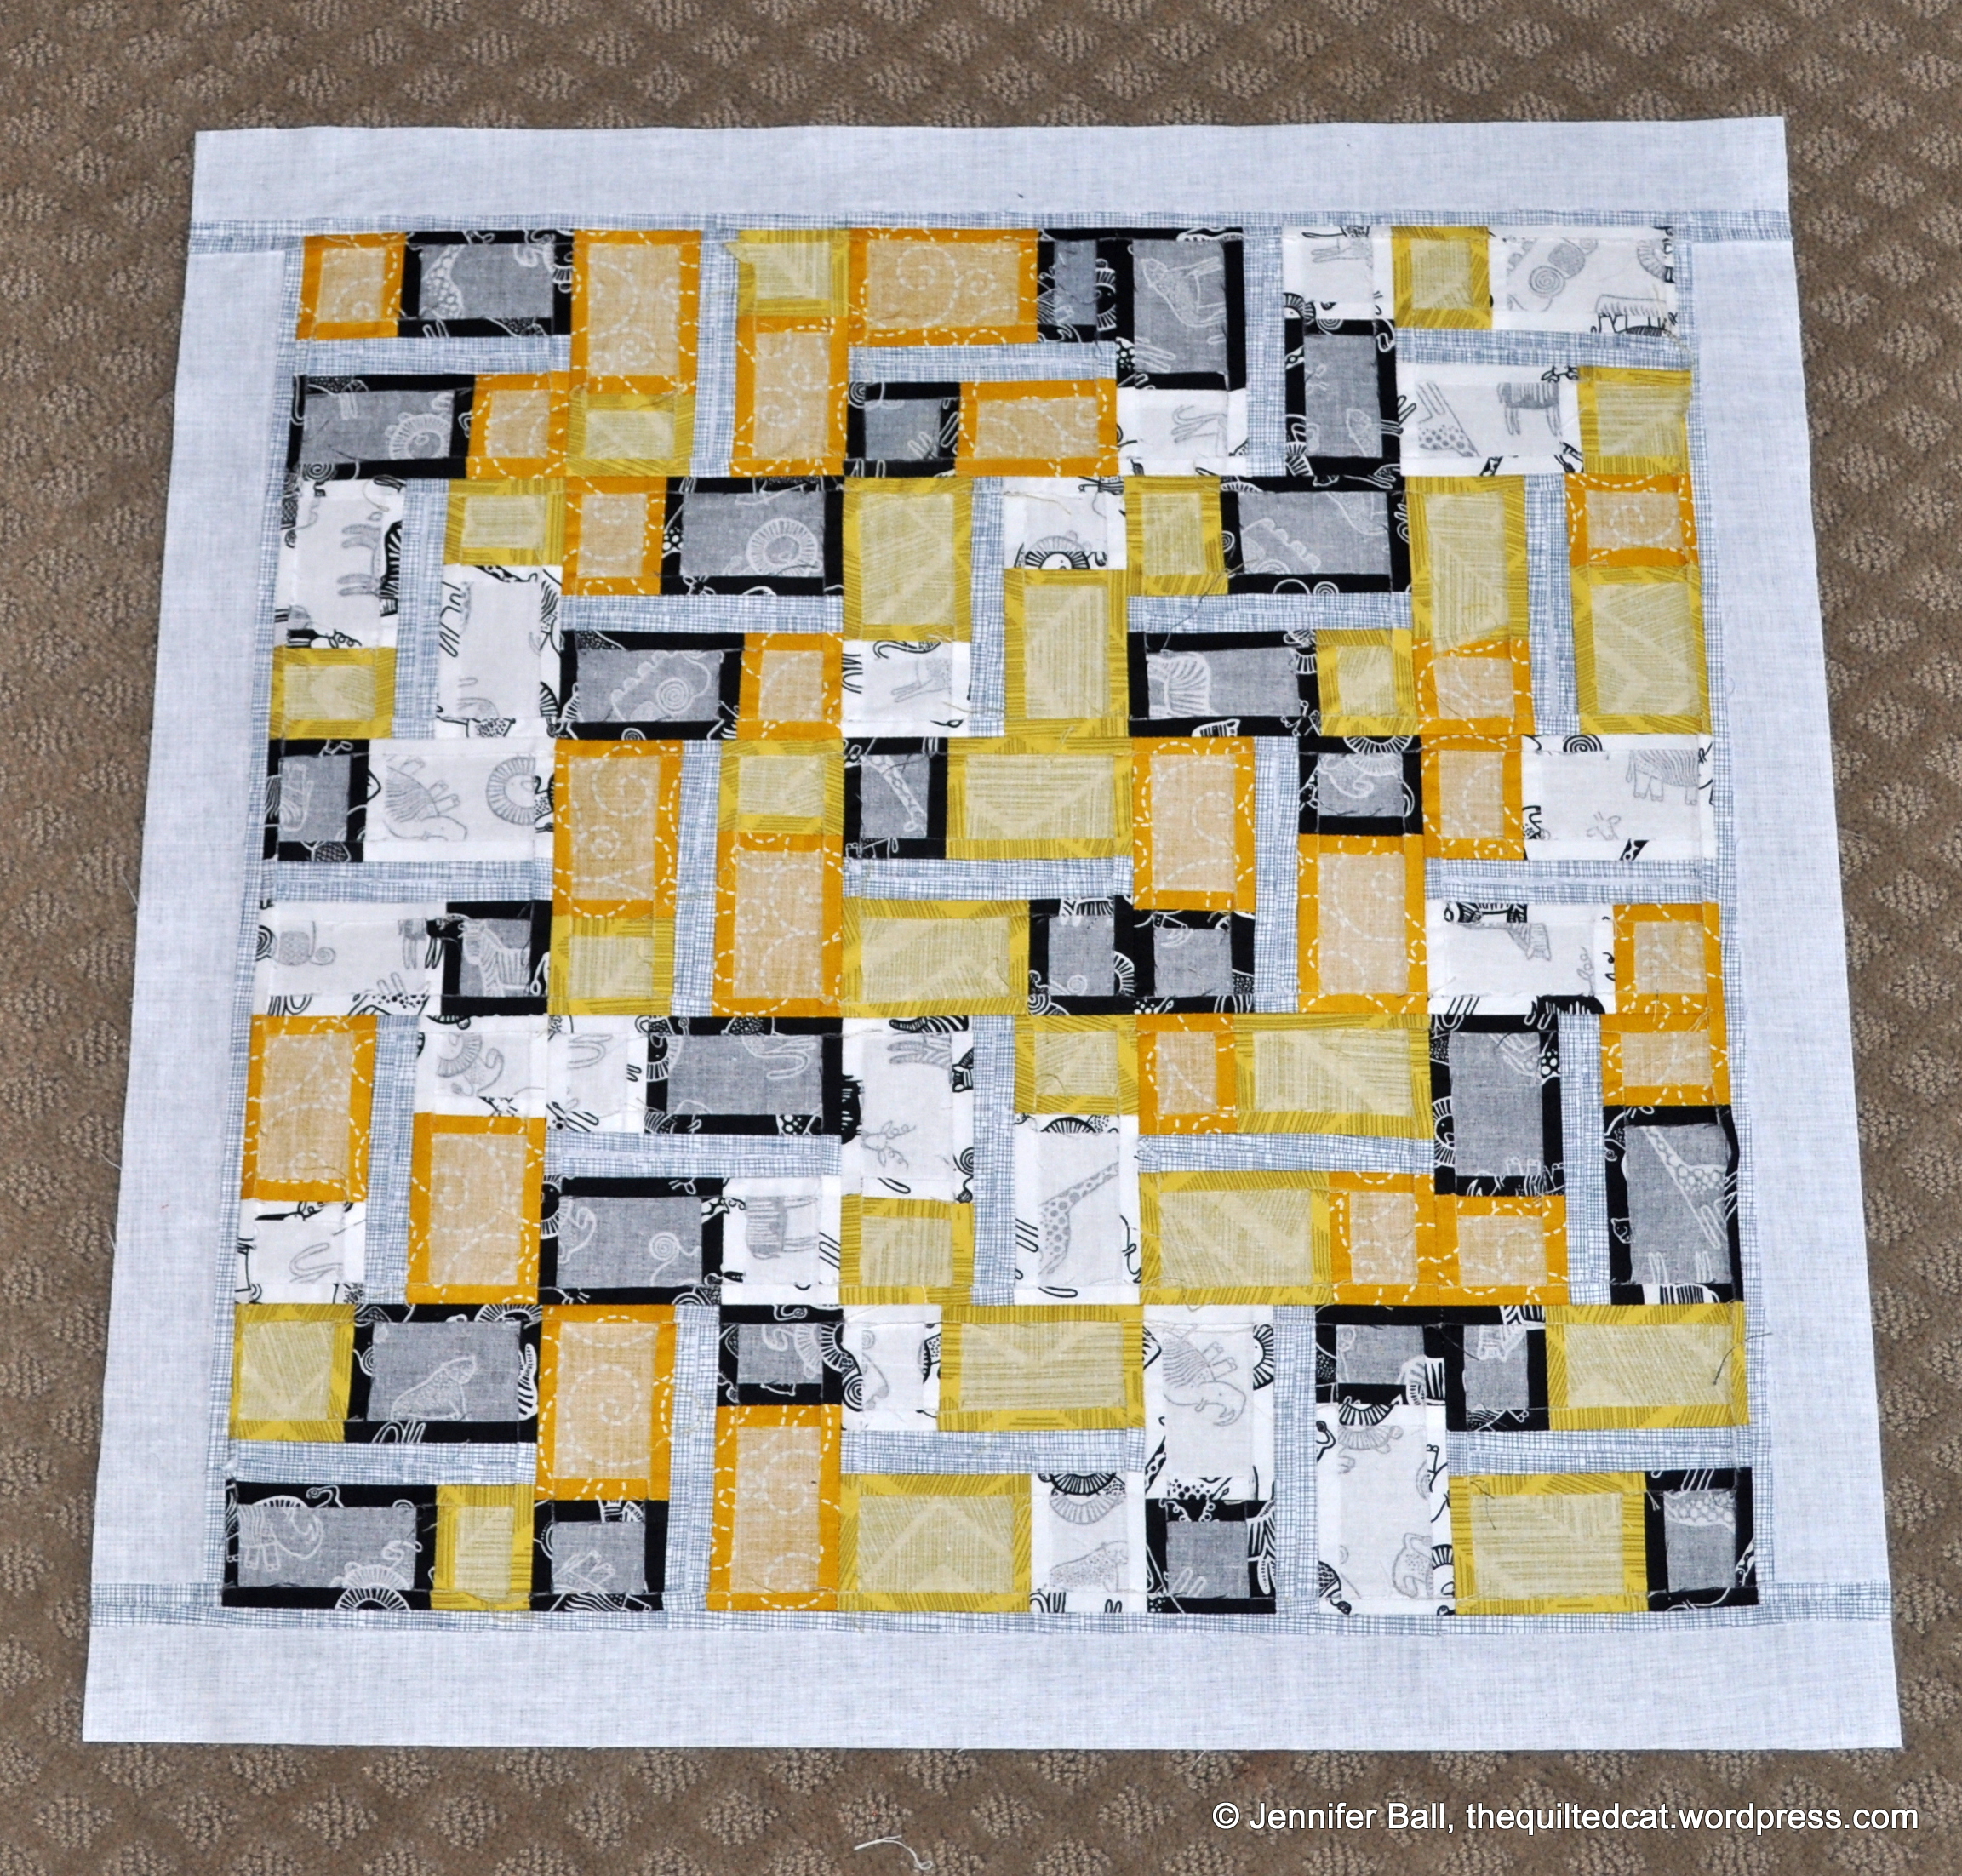
Quilt Top Backside
Some close-ups of the spiral quilting! I spray basted and then went slow and careful on my Bernina.
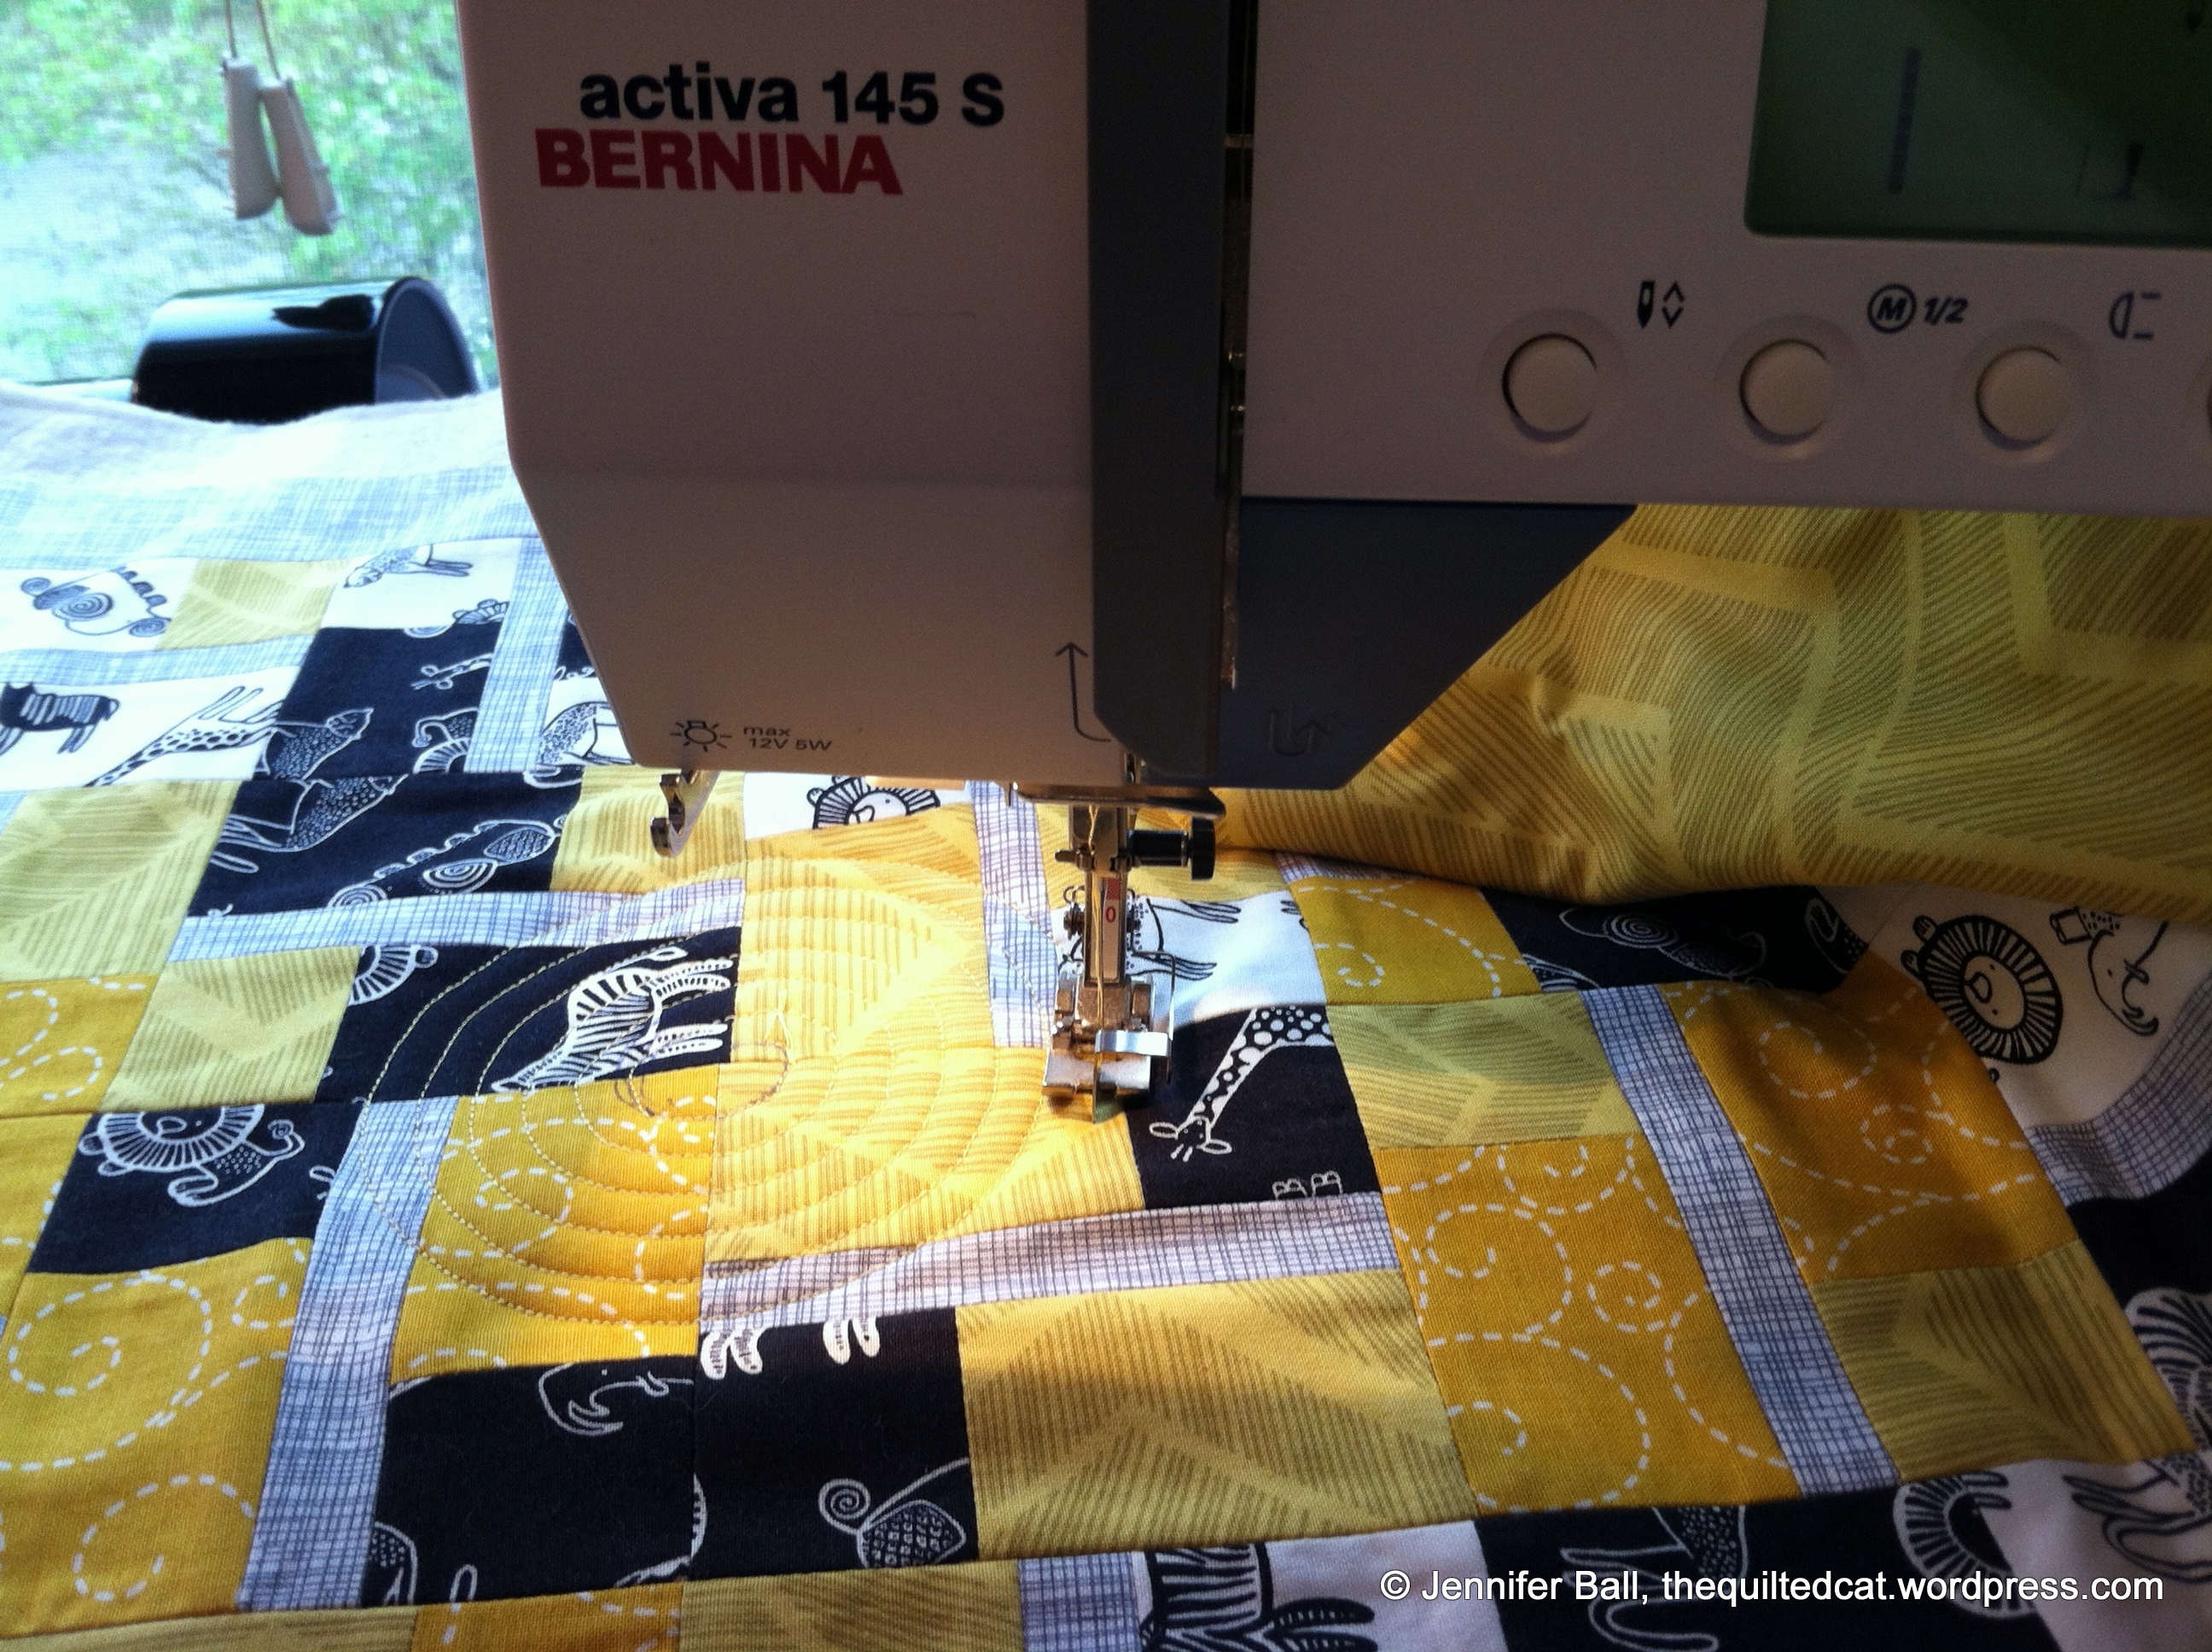
Spiral quilting in process
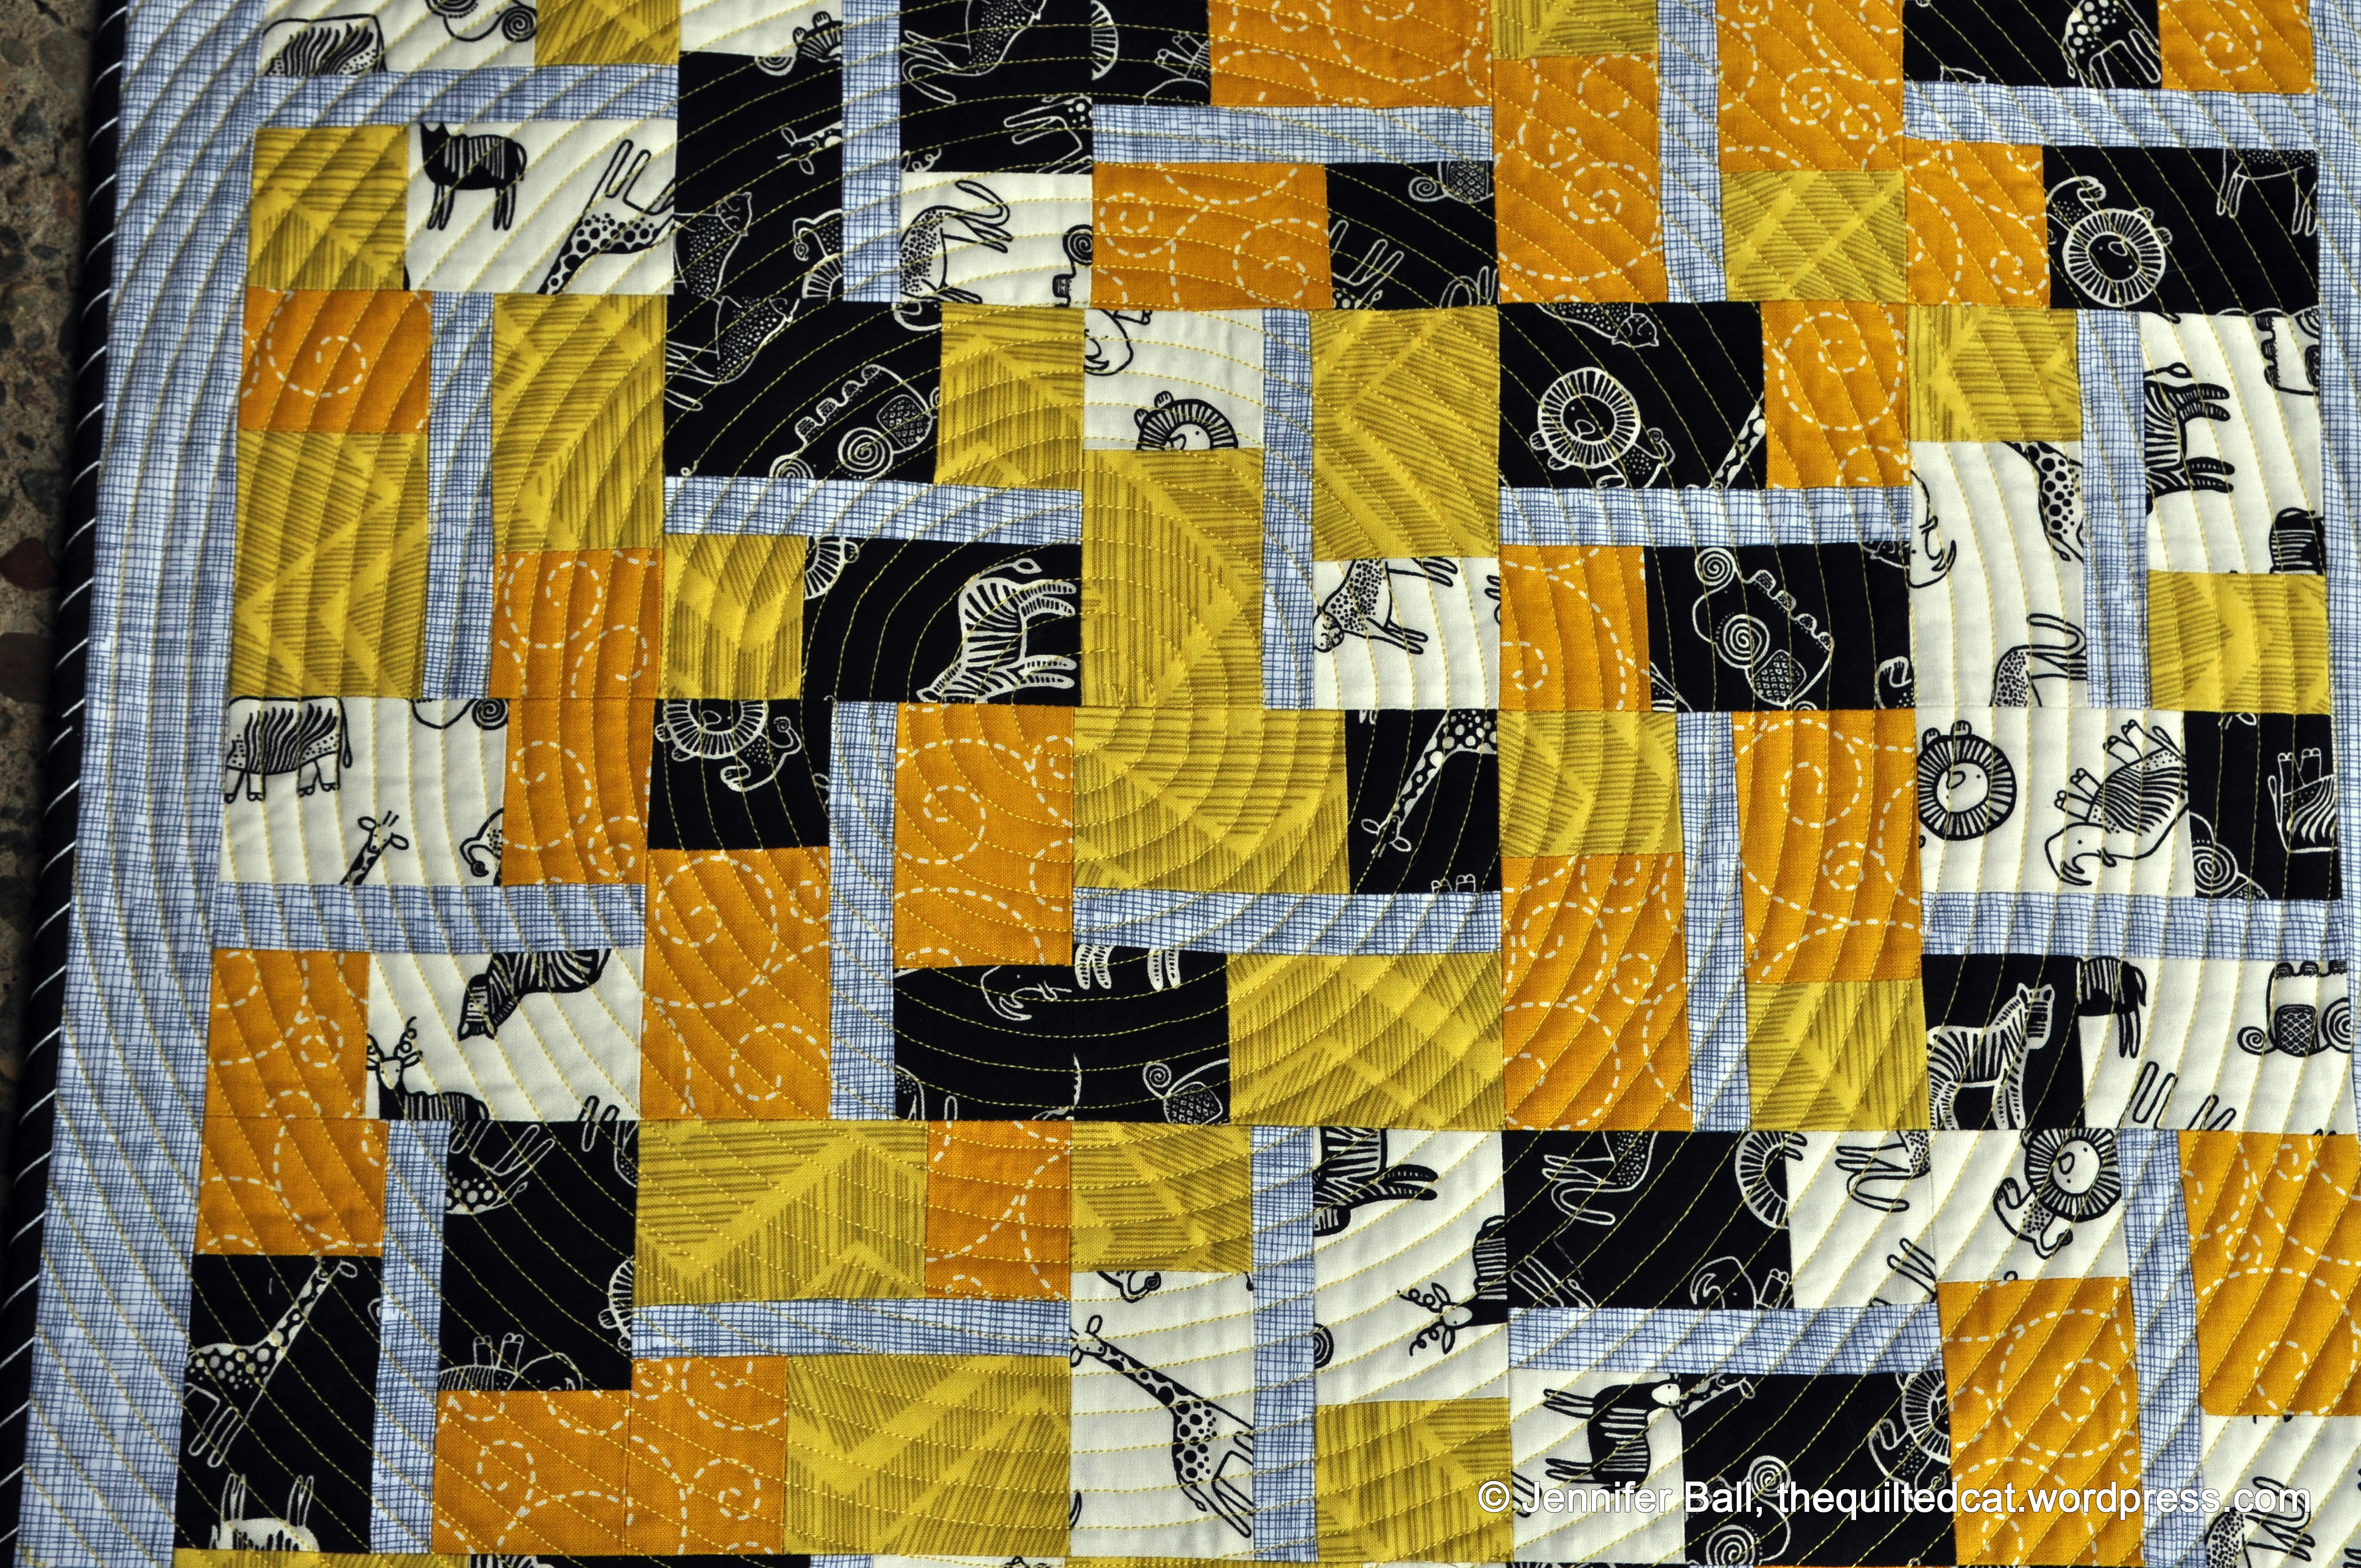
Spiral quilting close-up
I want to give a shout out to Charlie and Lindsay at Hawthorne Threads. Since I wasn’t able to pick up the fabrics from my LQS, I ordered my fabrics from Hawthorne Threads on a Tuesday evening after work and had them in my mailbox on that Friday! Thank you so much for the quick shipping!
I hope you enjoyed looking at my mini quilt for the challenge. If you’re on Instagram, search for #DSTTchallenge to view other entries.
Enjoy!
~Jennifer