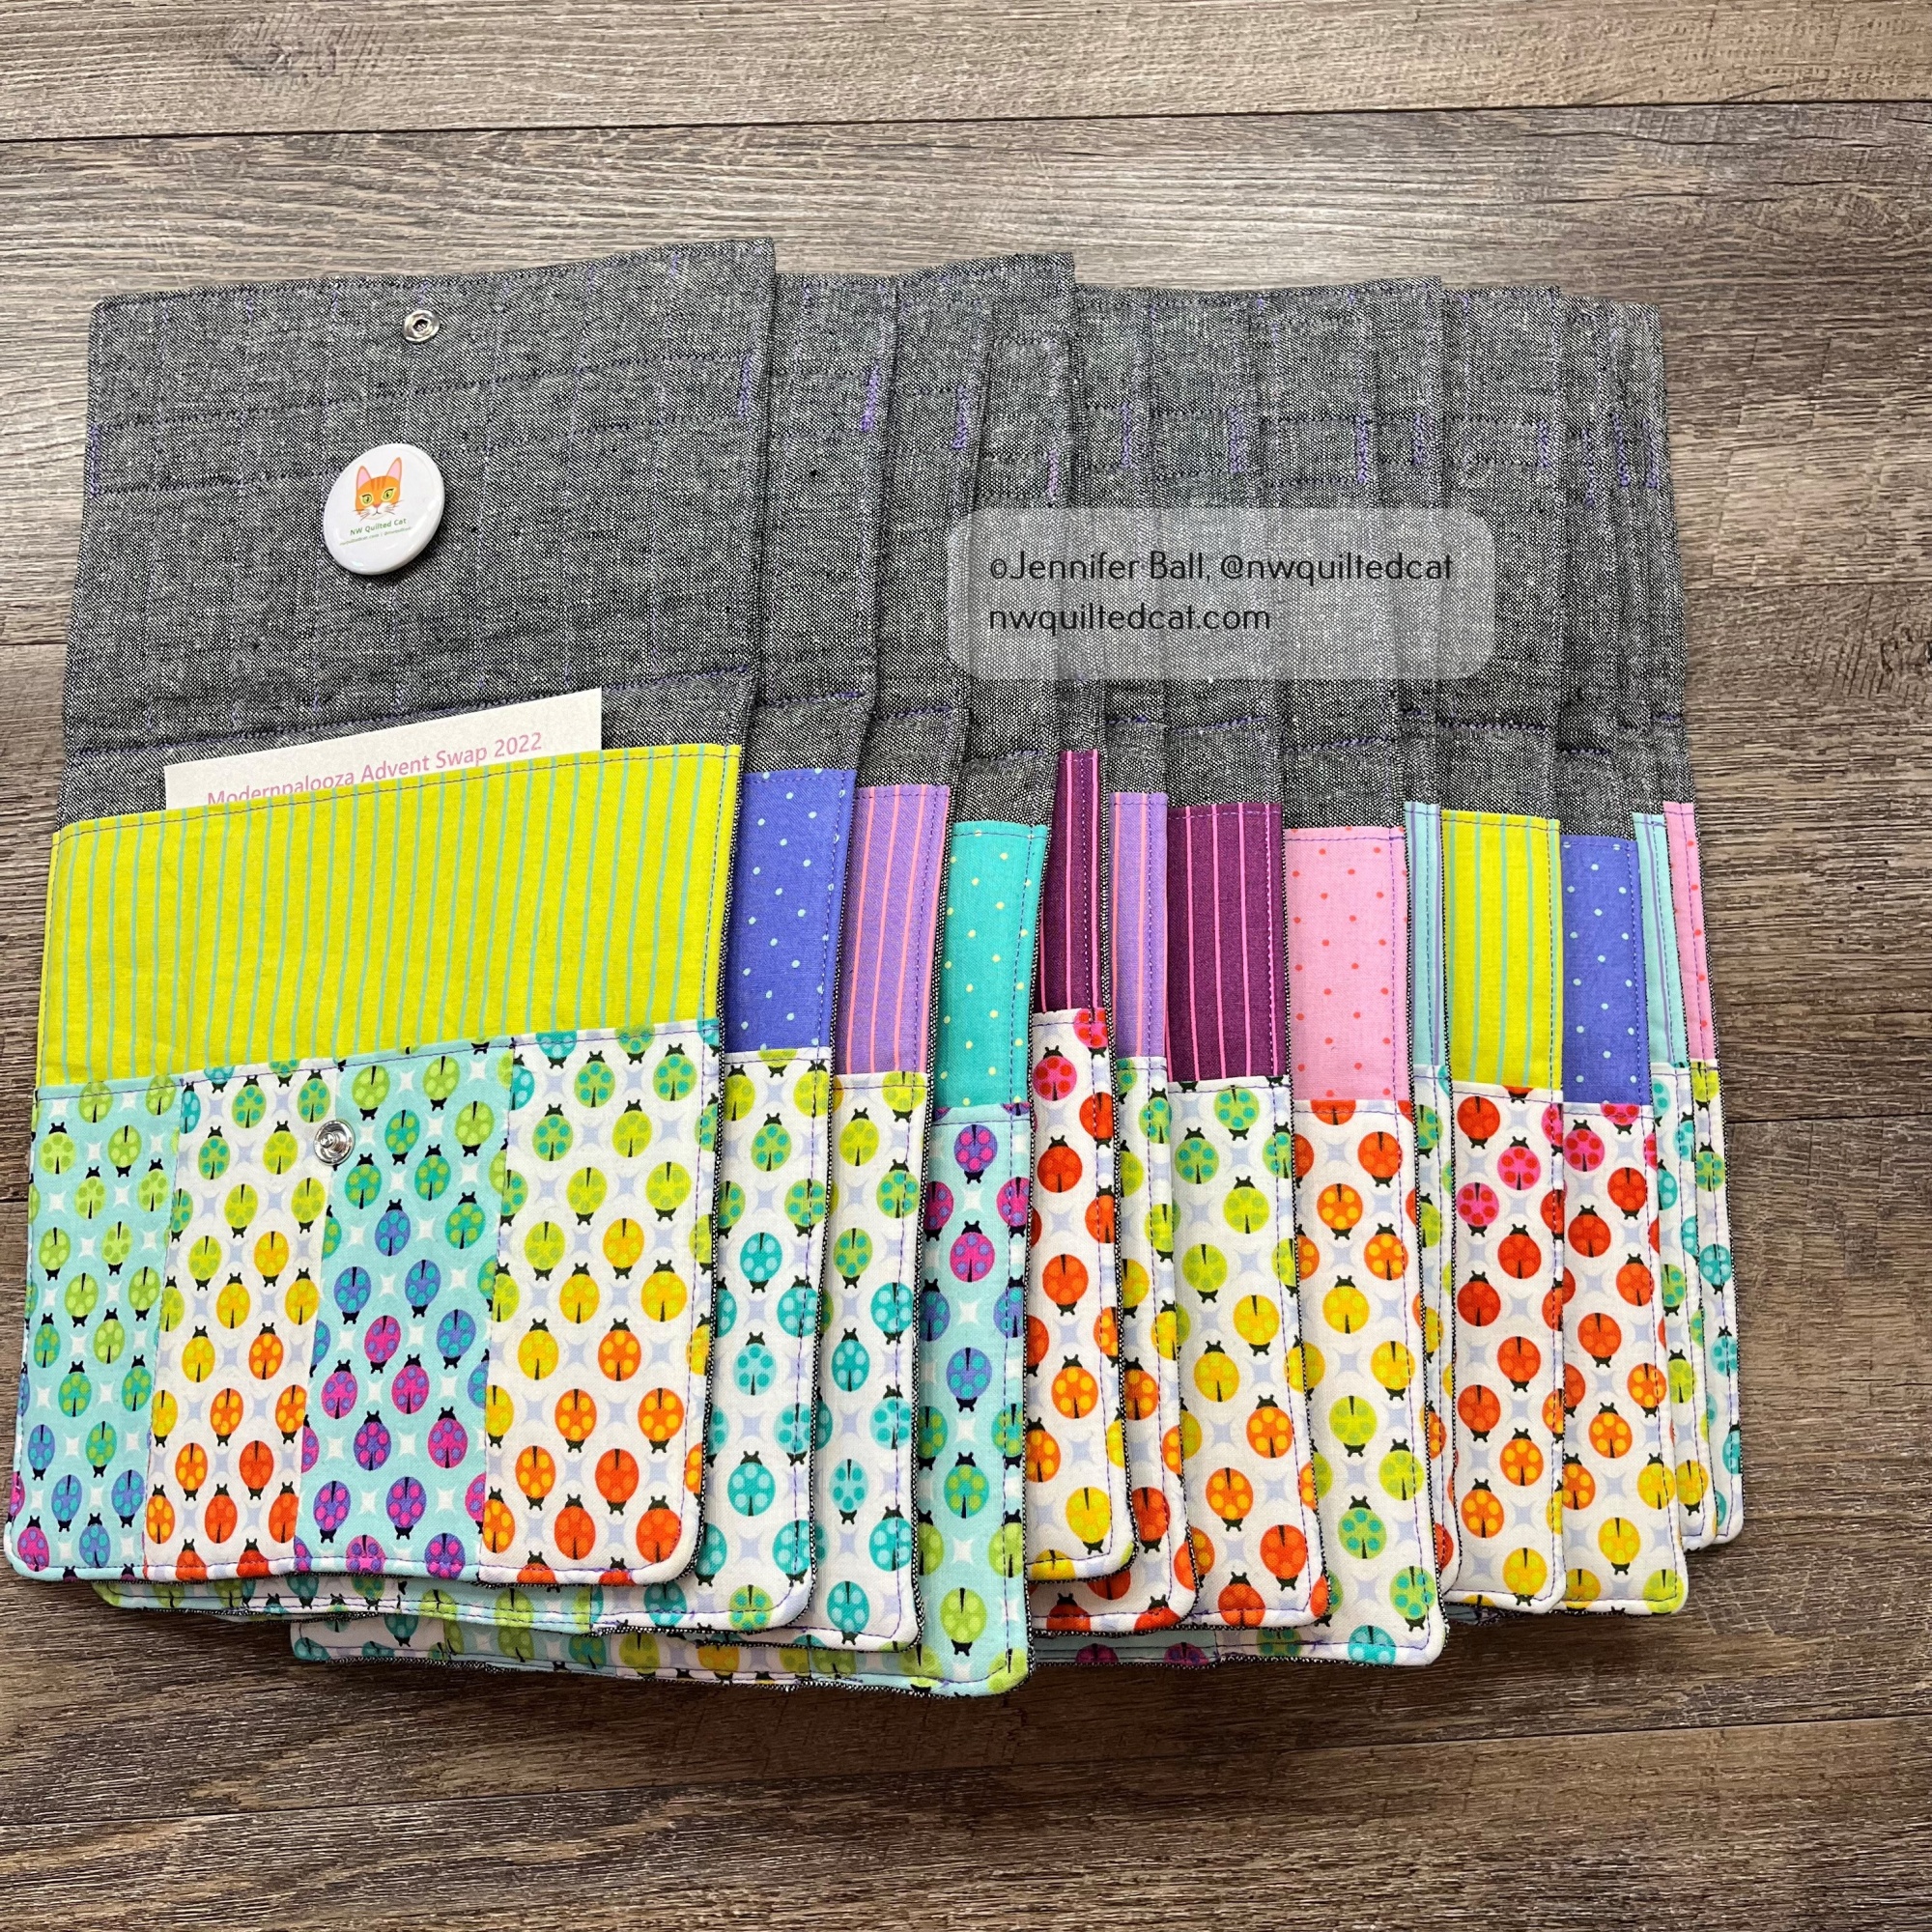
Mini Rotary Mat Holder Project

Happy 2023!

I recently participated in a holiday project swap on Instagram where participants made 13 items using modern fabric. In exchange, we received 12 items from other swappers and the extra items were auctioned off by the organizers.

I decided to make a mini rotary mat holder to use when going to quilt classes or retreats. I really liked the idea of having a little case to hold a small rotary mat and cutter for trimming up little foundation paper pieced blocks.

This project uses a free pattern from American Patchwork & Quilting.

My Supplies

My Custom Tula Pink Mini Rotary Mat Holders!

I altered the pattern slightly by piecing a Deja Vu Parisville cameo into the back of each mat. I really wanted something that could showcase this large scale print, and this little project worked great. I used the Essex Yarn Dyed linen for a little extra structure and stability, and to provide a nice contrast to the bright Tula Pink fabrics.

Here’s a look at the front and back of 2 mini rotary mat holders opened:
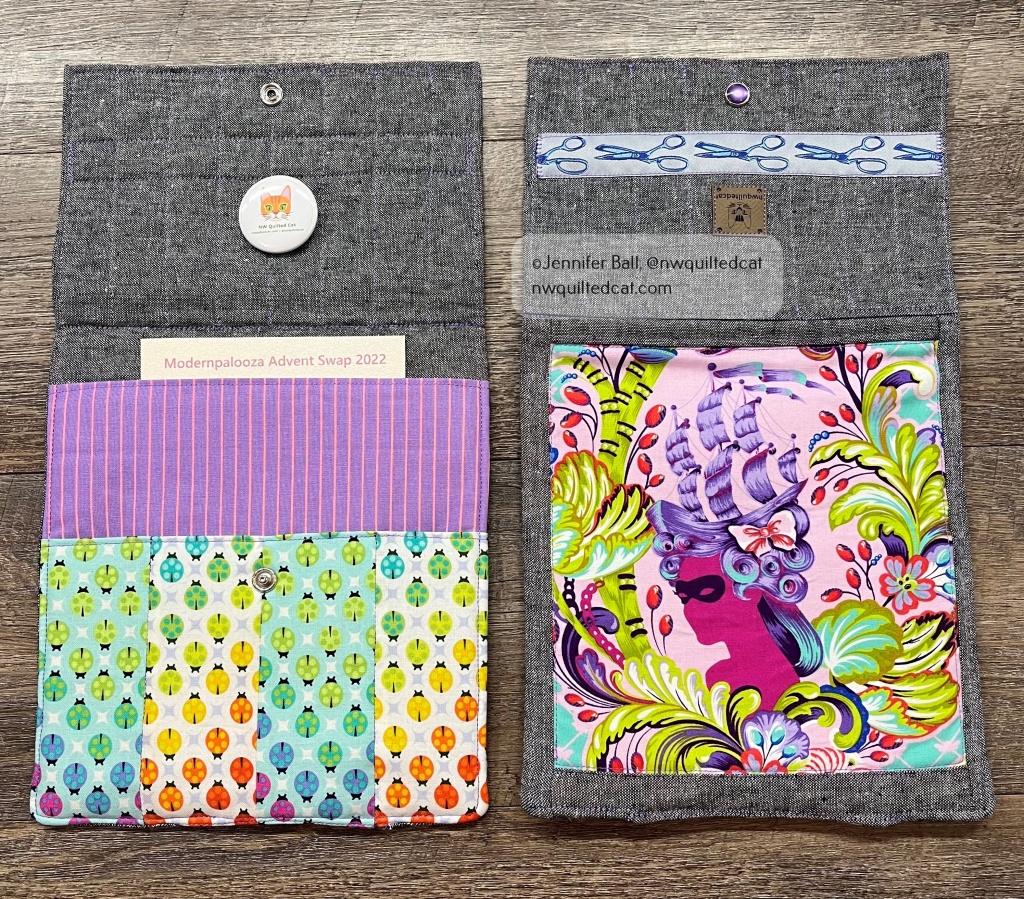
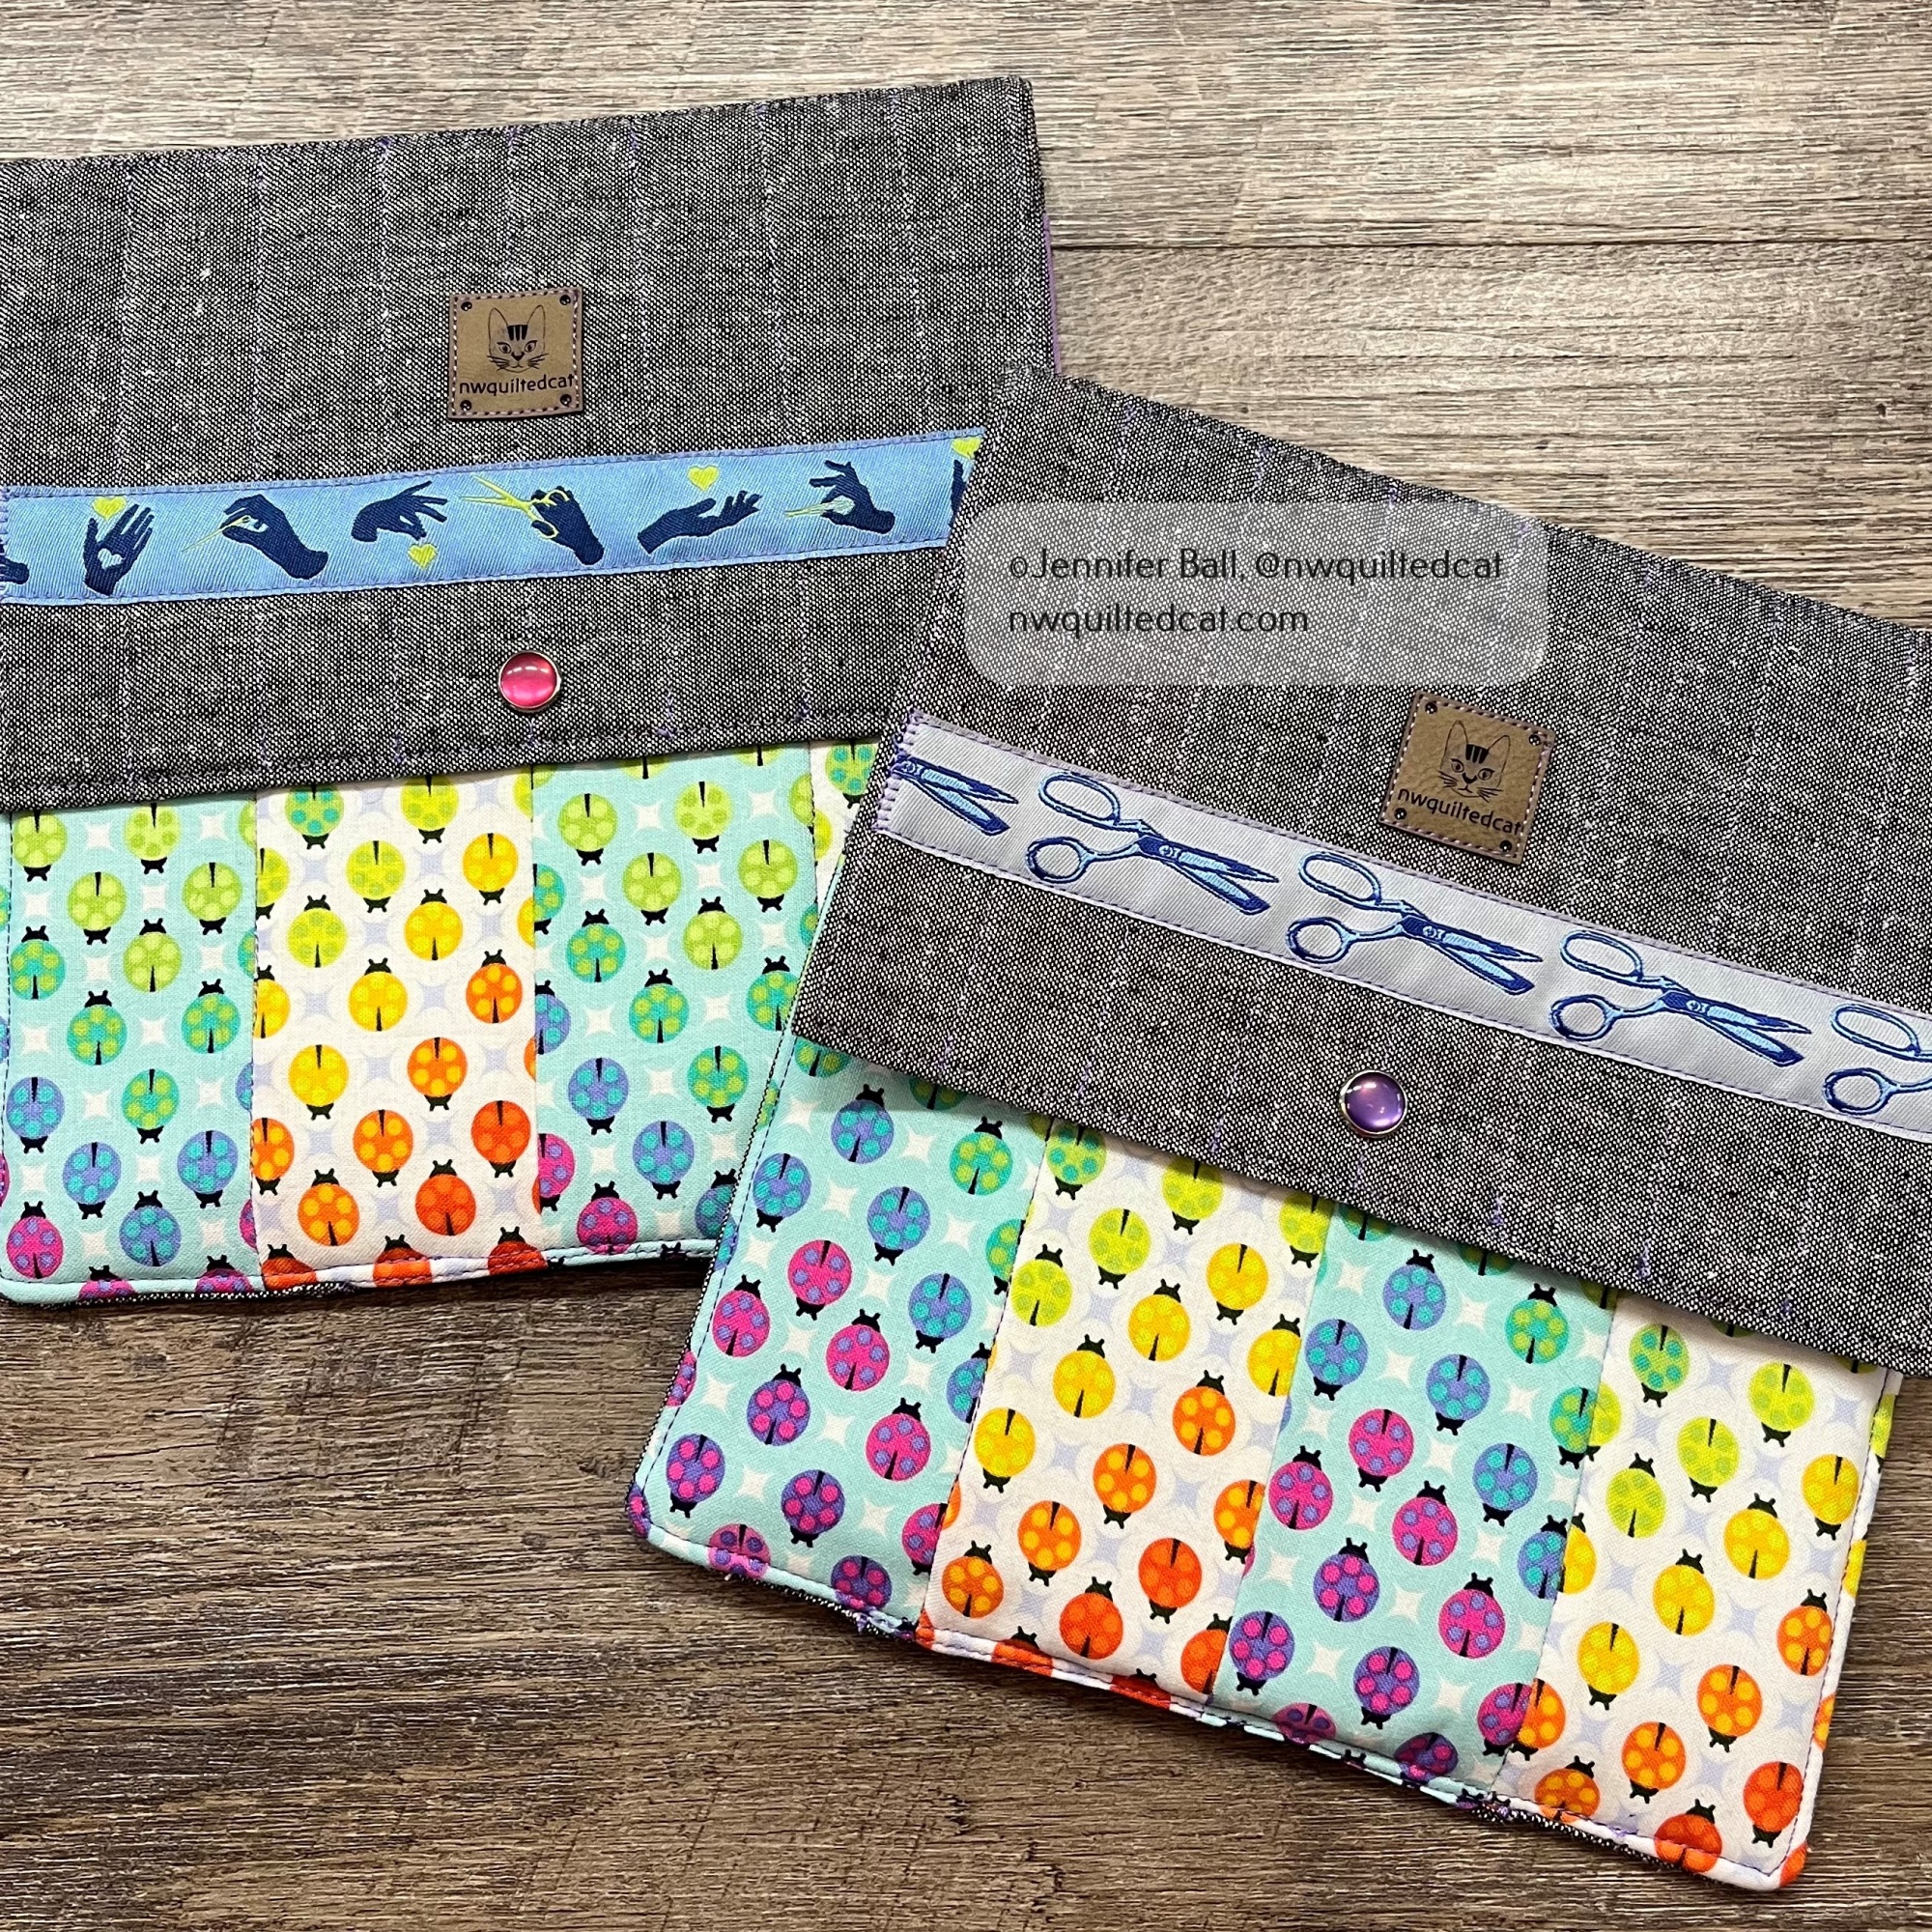
The large pocket holds a 6×8 inch rotary mat. The smaller pocket is divided into 4 sections to hold small tools such as a rotary cutter, scissors, pencils, and more. I added a ribbon to each exterior flap for a cute accent.

Each holder uses the same Painted Ladies fabric in alternating “glow” and “glimmer” colorways. The “glow” colorway is the white background and the “glimmer” colorway is the aqua background. I had a fat quarter stack of the Tiny Dots and Stripes prints so I used a different one for each rotary holder. I really love how colorway these little cases are all together!
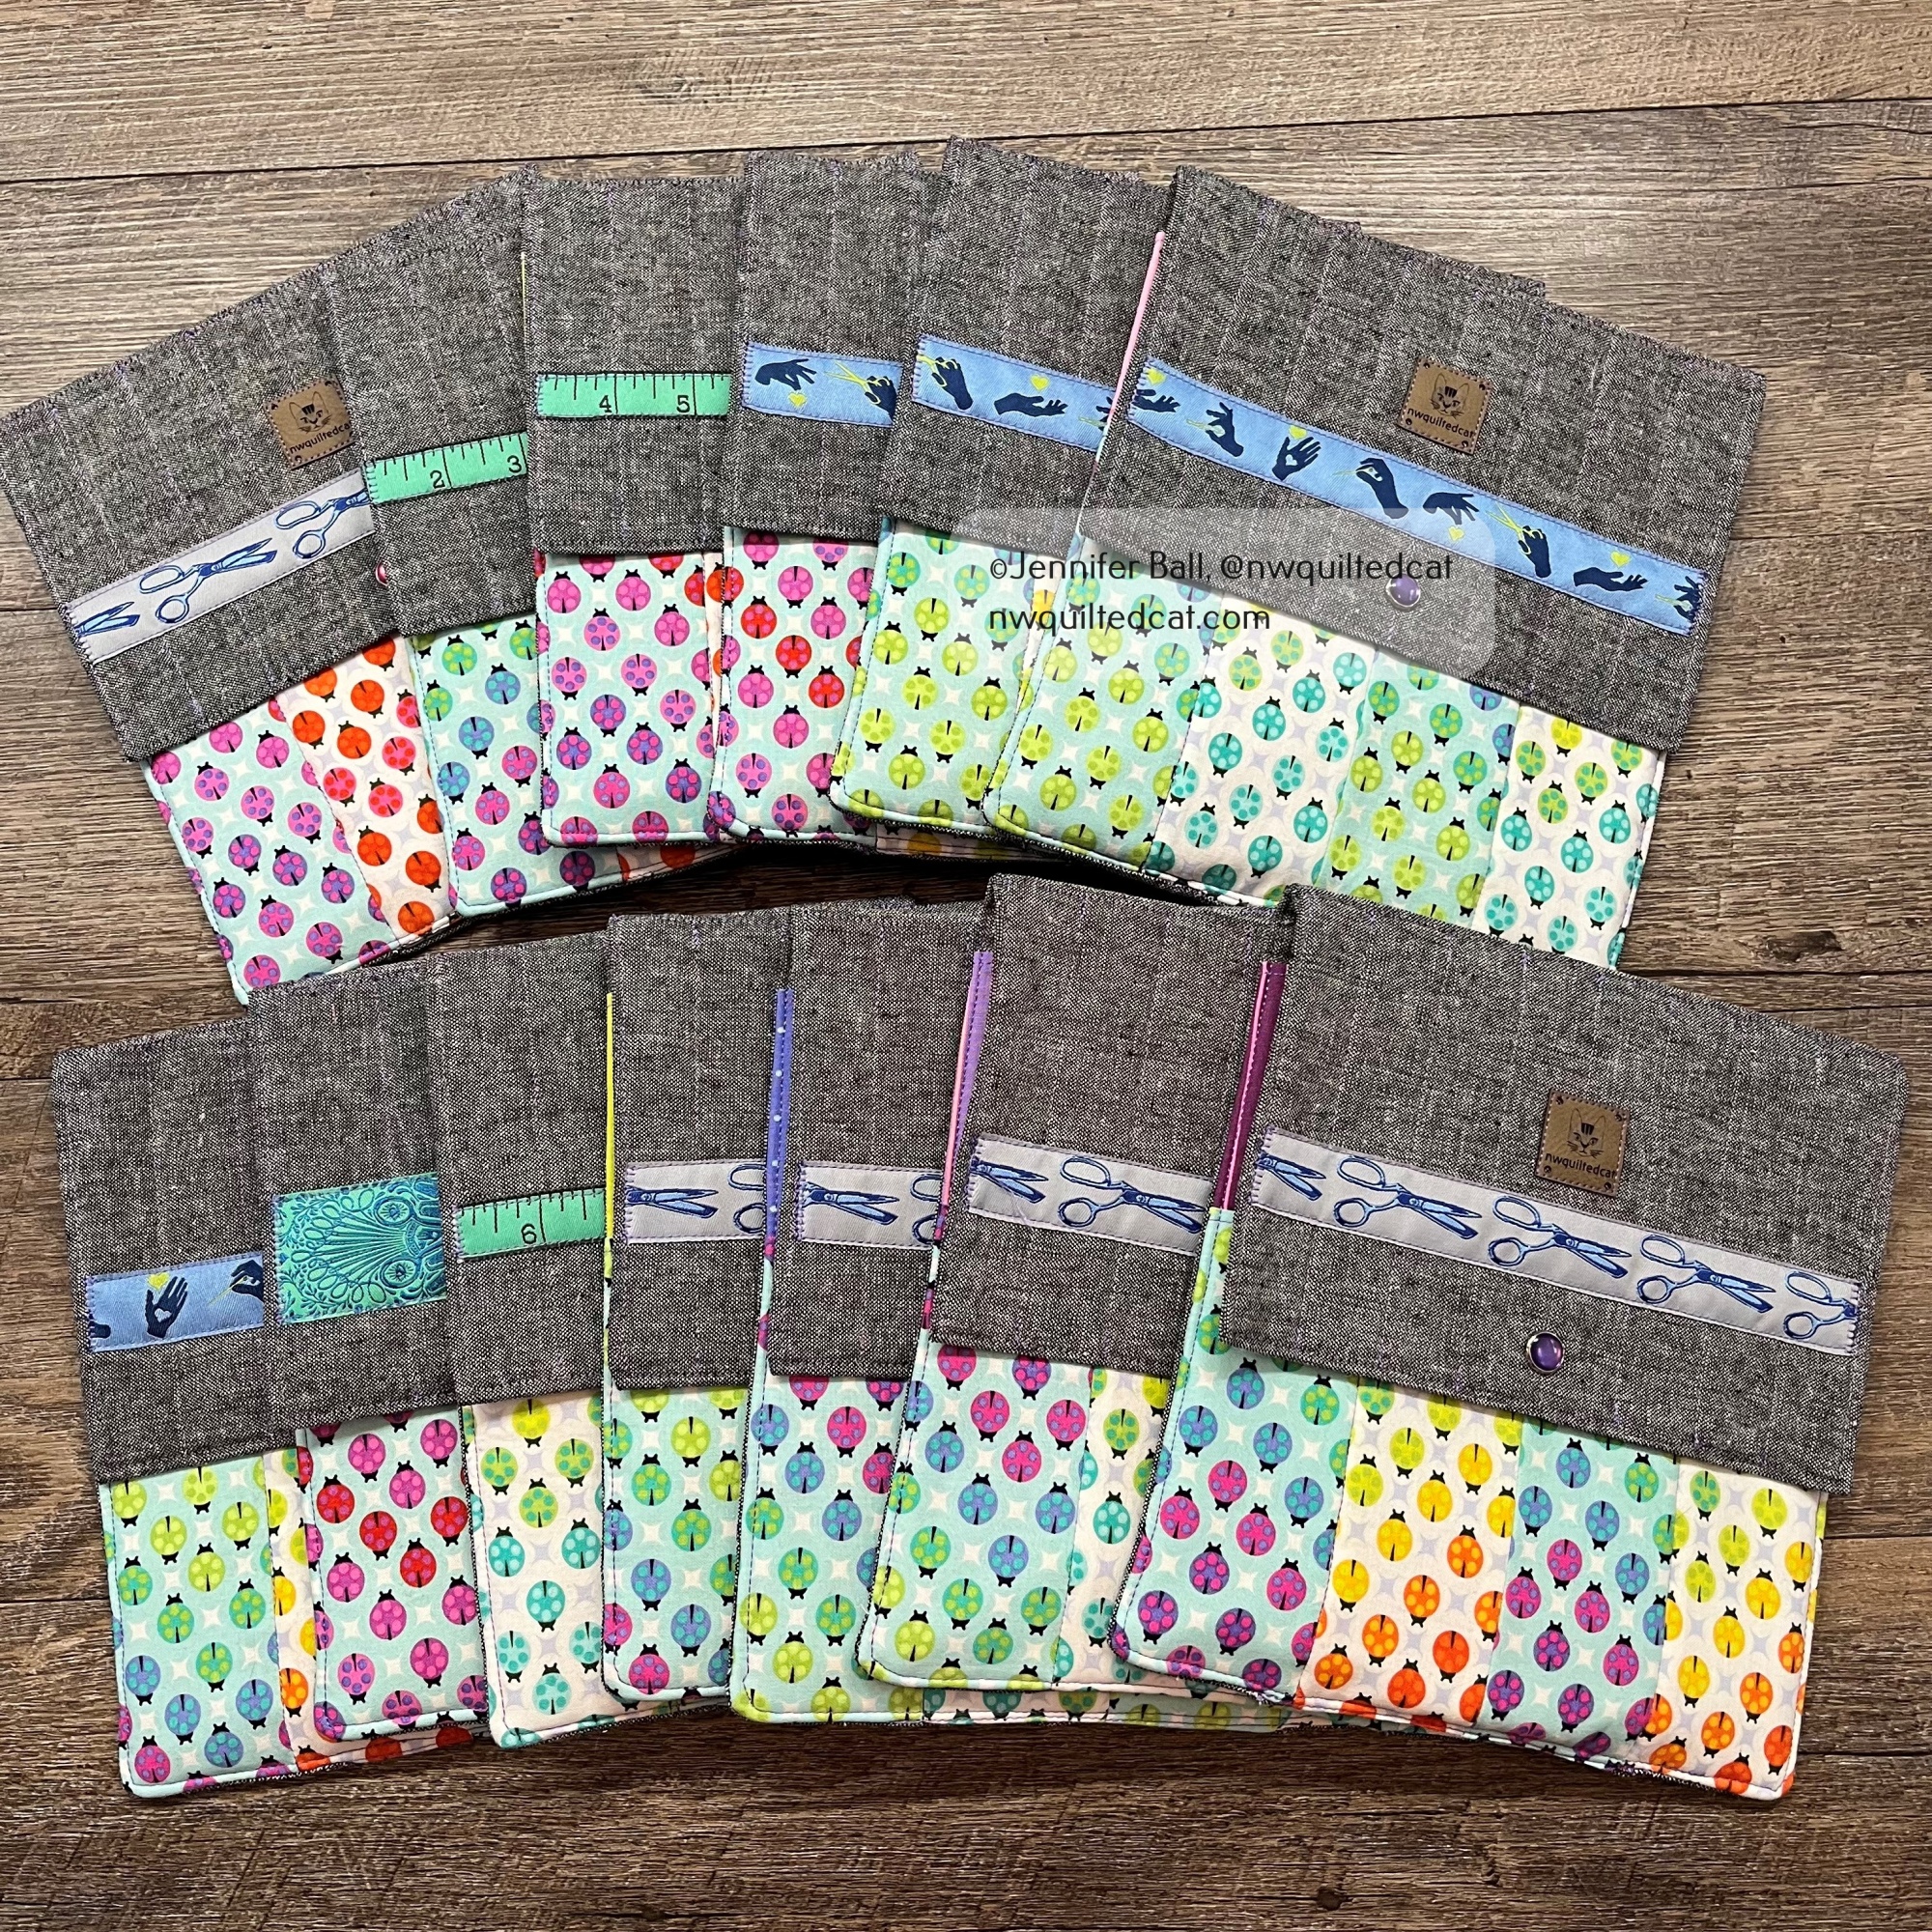
Everyone in the swap wrapped their items so that participants could unwrap one item a day for the 12 days leading up to Christmas.

I wrapped my items in a polka-dot printed paper with a pink ribbon:
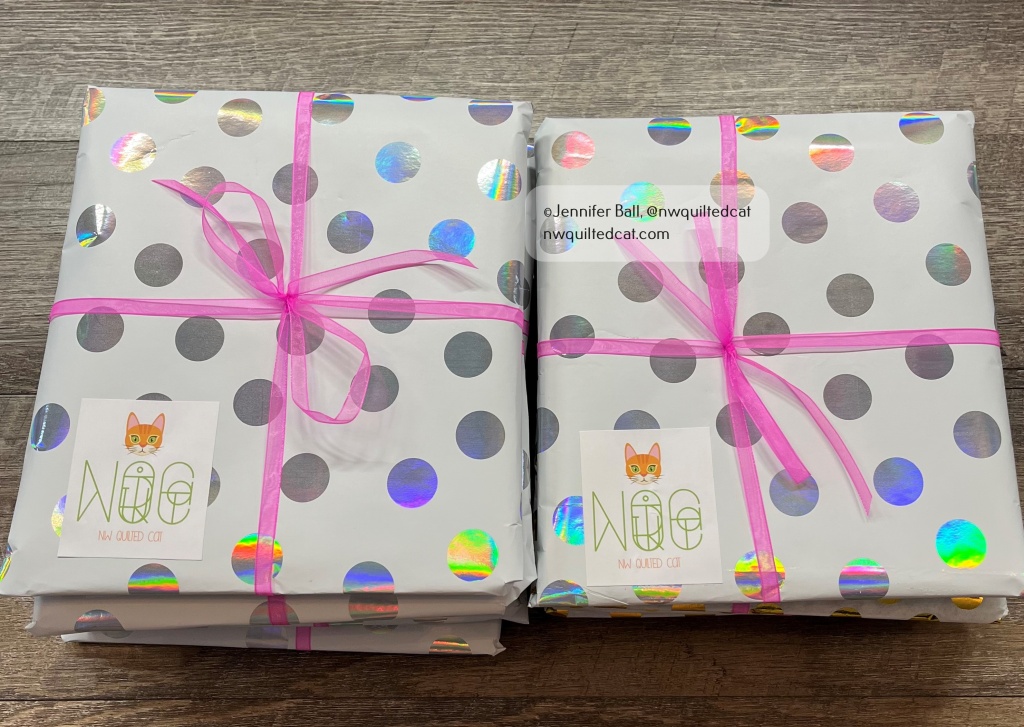
I really enjoyed participating in this swap, and I received some really fun items in return! This project comes together pretty easily if you want to make one for yourself or as a gift for a quilting buddy.

Happy quilting!

Jen

Modern Quilt Guild Mini Quilt Swap 2022

Hi everyone,

Earlier this year, I participated in the annual MQG mini quilt swap. This swap event is an open swap, meaning that you and your partner are making mini quilts for each other. In contrast, most swaps are not open but secret, meaning that the person you are making a mini quilt for is usually not the person who is making a mini quilt for you. It’s a surprise when you get your mini in the mail.

For the MQG swap, many participants plan to attend and swap their mini quilts in person at the annual modern quilt show called QuiltCon. For those who cannot attend, you have the option of swapping with your partner via mail. That’s the option that my partner and I selected this year.

I received my partner’s name and quilt preferences via email from our “Swap Fairy,” who is the person assigned to a group of swappers to ensure that everything is running smoothly. My partner listed her favorite colors, fabric designers, and preferences so I could take those into consideration when making her a fabulous mini quilt.

I decided to do a modern traditional feel for this swap. I designed a mini quilt using the traditional churn dash block, but I made it feel modern by setting it on-point, elongating it slightly, and then added little color accents in each corner. My partner’s favorite colors are jade, green, turquoise, and yellow.

Here’s a look at the finished mini quilt:

Modern Churn Dash mini quilt for the Modern Quilt Guild 2022 swap

I took the mini quilt with me on a short hike to Latourell Falls in the Columbia River Gorge before mailing it to my partner. My teen did the honors of holding it up while I snapped the pic. He’s such a great quilt holder!

I used a variegated Aurifil thread to quilt the spiral on the mini quilt using my domestic sewing machine. The background fabric is a light-colored Spectrastatic print by Giucy Giuce, the churn dash fabrics are Kona cotton solids, and the yellow and green accents are from my scrap bin.

I usually like to make a small extra gift to go along with mini quilt swaps. For my partner, I made a Woppet bucket, pattern by @cleverwoppet.

Woppet Bucket

Isn’t it a cute bucket? I made the little charm pull and added it to the pink handle. You can pull the fabric handles up to carry it like a little bag.

I sent my little mini quilt and bucket off to my partner, and received a package from her in return. She made me this fun rectangular shaped mini quilt with bright colors, a low-volume background, and black and white pinwheel blocks!

Mini quilt that I received in the 2022 swap!

I really enjoyed the mqgswap this year! If you want to see more pics from this swap from other quilters, you can browse Instagram using the tags, #mqgswap2022 or #makeaminimakeafriend .

Happy quilting!

~Jen

Running with Scissors! + More

Hi everyone,

I recently made the Take A Stand bag from ByAnnie patterns, and I blogged about it here. I then decided to create the companion tool organizer called Running with Scissors using similar fabrics from Tula Pink.

Isn’t the name fun? This organizer is really a clever zipped tote that you can use to carry your quilting tools to a class or a retreat or use it at home to save space on your sewing table.

I used Tula Pink’s Pinkerville line with its beautiful unicorn as my front pocket centerpieces. This organizer has 2 large quilted fabric pockets with zippers on the outside. You’ll find smaller inside pockets made out of mesh, vinyl, and quilted fabric, all sized nicely to fit a variety of tools.

Here’s a look at the organizer once I had sewn on the outer pockets and the inner pockets, but before I added the center facing to the inside.

For me, one of the tricky parts is attaching the outer zipper and binding. When you purchase this pattern, it comes with a $5 off coupon for the accompanying video from Annie, making it free. I highly recommend the video, and I watched it while attaching the binding so I could pause and re-watch as needed. I also use Clover Clips rather than pins to avoid poking myself and because they are just so much easier to use.

Attaching the Binding

The inside center facing uses clever elastic loops to hold a variety of items from sewing machine feet to bobbins to thread. I had 2 colors of elastic on hand so I decided to use both colors by alternating them on the facing.

Inside Center Facing

Once I had sewn the inside center facing, then I just needed a few finishing details such as zipper pulls to complete my Running with Scissors tool case!

Here’s a look at the front of the completed case:

Completed Running with Scissors Case

I decided to do a little photo shoot with my 2 new ByAnnie bags, along with my foster kitty, Gracie. She provided excellent inspection services!

In the picture where Gracie is sitting next to the bags, you can see my new Running with Scissors tool case folded over my Take A Stand bag. I’m going to use these 2 bags together at my sewing table to keep frequently used tools close at hand.

Another pic of both bags together;

Take A Stand Bag and Running with Scissors Case

I now have more confidence to tackle a bigger bag project! On my to-do list is the A Place for Everything 2.0 bag from ByAnnie. It’s a great bag to hold English paper piecing projects and supplies. I haven’t decided which fabric to use yet so stay tuned!

Do you follow me on Instagram (@nwquiltedcat)? I’m very close to reaching 2,000 followers. I’m going to do a little giveaway once I reach that milestone, and it will most likely feature Tula Pink products. Come follow me if you don’t already!

Happy quilting!

~Jen

A Ghastlie Reveal!

Hi everyone,

Two years ago, I attended a quilt retreat with my sister and some friends. We decided to do a Ghastlie themed round robin, where we would each create our own center block. We determine a round robin order, and then send our centers to the next person. We had 4 total members and had no restrictions other than using Ghastlies fabrics with blenders.

The Ghastlies is a line of fabric by Alexander Henry, featuring a splendidly creepy family including a cat! It is unusual, whimsical, and funny fabric, and definitely outside of traditional quilting.

For my quilt, I really wanted my theme to be Sebastian, the Ghaslie cat. I used a foundation paper pieced pattern by Linda Hibbert of Silver Linings Originals called Miss Teree. I don’t see the pattern on her website, but you may be able to email her if you are interested in the pattern.

Here’s what my center looked like in December 2018:

Sebastian, my center block

Coincidentally, the other 3 members of our round robin all selected the same Ghastlie fabric for their center block, but added personalized details:

All the Ghastlie center blocks for the round robin

Aren’t they fun? From 2018 to 2020, we added rounds and mailed them to the next person. The last round finished up this September, and we each received our completed tops in October.

Here are the completed Ghastlie quilt flimsies!

Kimberly’s Ghastlie quilt flimsy
Shannon’s Ghastlie quilt flimsy
Jody’s Ghastlie quilt flimsy
Jen’s Ghastlie quilt flimsy

Our plan is to quilt them and enter them into a quilt show in fall 2021,and we’re hoping for the COVID crisis to be lessened by then so that we can have in person quilt shows again.

We had so much fun with this round robin, and we’re planning another one. The next round robin will be different. Instead of complete quilt flimsies, we are thinking about a Ghastlie themed block swap.

Happy quilting!

Jen

How to Make a Trumpet Bell Cover

Recently, my son’s high school band received permission to begin in person outdoor rehearsals. They are limited to 10 students per rehearsal time, and they need to have a bell cover and wear a mask.

I decided to make bell covers for all the trumpets in his group so that they wouldn’t have to wait for an online order, which could take weeks. There are 7 trumpets in his cohort group, and each bell cover takes about 10 minutes to make.

7 trumpet bell covers!

Supplies Needed

  • Stretchy material (polyester/spandex blend). I purchased some athletic apparel fabric from my local fabric store in blue, which matches one of the school’s colors.
  • 3/8″ elastic
  • Safety pin
  • Thread to match
  • Paper and pencil for template
  • Sewing machine and basic sewing supplies

Instructions

  1. Trace the trumpet bell onto a piece of paper.
  2. Enlarge the bell shape by about 1.25 inches to create your pattern. I used a school compass for this step or you could eyeball it. I found that a 1″ enlargement was a bit too small to fit over the bell comfortably. If you use cotton fabric instead of the poly/spandex blend, you’ll likely want to cut it 1.5 inches larger.
  3. Cut (2) circles from the fabric.
  4. Place the circles right sides together (RST), pin or clip together, and stitch using a 1/4″ seam allowance. Be sure to leave a small area open for turning right sides out and backstitch at the start and end of your stitching.

    Sew a 1/4″ seam, leaving an opening for turning

    Opening in the bell cover before turning

  5. Turn right sides out.
  6. Stitch another seam about 5/8″ from the edge of the circle to create the casing for the elastic. Stitch around the entire circle and backstitch. You do not need an opening for this second seam.
  7. Cut a piece of elastic about 11.25 inches long.
  8. Place a safety pin on one of the short edges of the elastic to help you insert the elastic into the casing. Be sure to hang onto the other end so that it doesn’t get sucked into the casing.

    Inserting the elastic into the casing

  9. Overlap both ends of the elastic about 1/2″ and sew together securely. I removed the pin before stitching.

    Overlap the elastic about 1/2-inch and sew

  10. Sew the opening closed.

    Sew the opening

  11. Ease the elastic around the casing so that it is more or less evenly dispersed.

    Inside of trumpet bell cover

  12. Place the bell cover on your trumpet and play!

Trumpet standing with bell cover

Trumpet bell cover

My quilt inspector supervised me very closely during this process. Maybe he thought I was making him a shower cap? Ha, ha!

Is it a cat shower cap?

I hope to make my son a reusable face mask with a little slot or flap for the trumpet mouth piece next. Until then, the band members have to cut a little slot into disposable face masks in order to play. They are also social distancing during practice. 

It’s a strange new world in so many unexpected ways!

Take care and happy sewing!

Jen

Scrappy Summer Sew Along + Update on Pepper

Hi everyone,

I posted about joining a scrappy summer sew along a few weeks ago here. This quilt uses your scrap bin to make a 9-patch blocks for a scrappy finish!

I used a bunch of yellows plus pinks/reds to make a “Raspberry Lemonade” scrappy quilt. I started sewing my 9-patch blocks as leaders/enders while working on other projects. Then, a bunch of crazy life stuff happened, and I had to stop sewing for a couple of weeks.

Here’s a look at some of my 9-patch blocks, with sunlight filtering in through a side window:

Scrappy 9-patch blocks

Sunday was the last day to post our finished top on Instagram as part of the sew along. I pulled out the 9-patch blocks that I had completed, and I had just enough for a baby sized quilt. My quilt inspector helped me to sort the blocks into rows and columns.

Romeo inspects the
9-patch blocks

I enjoyed sewing these little blocks together as a sort of meditative time for myself. We had beautiful weather here yesterday so I was able to get a picture of the quilt flimsy, fluttering in the breeze, on a nearby little bridge.

Scrappy Summer Sew Along Flimsy – Raspberry Lemonade!

I’m going to back this little quilt with some soft, cuddly Minky fabric and likely donate it.

You can find other participants and fun quilts from this sew along by searching on the hashtag #scrappysummersal2020 on Instagram.

One of the life events that happened recently is a major (and expensive) surgery for our girl, Pepper. She had the surgery one week ago today, and she is doing pretty well with her recovery. We’re hoping that she’ll be back to hiking with us later this winter or next spring. She needs a full 8-10 weeks for recovery plus multiple physical therapy sessions.

If you’d like to help, I started a GoFundMe to offset some of the cost of the surgery and physical therapy.

Here’s a look at Pepper post-op with her poor, furless leg and incision:

Pepper, resting after knee surgery

Each day, she is getting stronger! We just have to keep this very active dog from running or jumping for 8 weeks. Whew!

Happy quilting!

Jen

Starting a Tula Nova Quilt + Wildfires

Hi everyone,

We are experiencing devastating wildfires here in Oregon, the worst fires seen in over 100 years. We’re in what is called level 1 evacuation, which means stay alert and be prepared. We do not have to evacuate at this time and most likely will not have to evacuate. However, many people just south of us are in the level 3, immediate “get out” zone so my thoughts and prayers are with them!

The fire makes the skies look apocalyptic. Here’s a look yesterday, when the east winds were still blowing:

Wildfires coloring the sky

This morning, the east winds stopped blowing so we have heavy, stagnate air, filled with particulates. It is very dangerous to be outdoors

Heavy smoke in the air

If you want to help the victims who lost everything in the fires, you can donate to the Red Cross.

In the meantime, I started on my first Tula Nova EPP (English Paper Pieced) project several weeks ago. This technique is entirely hand-pieced so it makes for a great project to do in the evenings while watching shows, to take traveling, or to do while my kiddo is in taekwondo class.

I’m using the Disco Kitty fabric from the Quilty Box as my center. I’m also using various colors of 50 weight Aurifil thread for the piecing.

I took this picture several weeks ago while we tent camped along the Oregon coast.

Tula Nova with a Disco Kitty center

When we got home, my quilt inspector decided to help out. He thoroughly approves of my theme for this quilt!

Romeo helps with my Tula Nova piecing

I’ve just finished adding the fourth round, and I went for a purple/pink Tent Stripe fabric by Tula Pink Don’t you love how the stripes add a secondary star around the solid lavender?

Tula Nova – adding stripes

The next round has 10 star points plus 10 diamond shapes to connect the stars. Each round will take longer and longer, but I am enjoying the process and it helps alleviate stress in these crazy times.

Have you made a Tula Nova quilt? I’d love to see it!

Happy quilting and stay safe!

Jen

Finished Catalina Stars Quilt

Hi everyone,

I’m happy to share my completed Catalina Stars quilt with you. In my last post, I talked about receiving this project in my first Little Box of Figs subscription, and I showed my quilt flimsy.

I decided to keep the quilting simple on this project. I free-motion quilted a flower and swirly pattern using Glide thread in white.

Finished quilting the Catalina Stars quilt

I auditioned several choices for binding, but I kept coming back to a red striped fabric. I wanted to accent the reds in the quilt, and this binding helped to pull it all together. Yes, I do wind up my completed binding strips onto an Aurifil thread spool. I add the binding spool to my extra spool holder on my machine, and it slowly unwinds as I stitch.

Because I’m going to use this quilt as a lap quilt and a picnic quilt, I decided to complete my entire binding by machine. This not only saves time, but it holds up better with repeated machine washings.

Here is my finished Catalina Stars quilt next to a rose hedge in my yard. My trusty quilt inspector, Cow, came over right away to give it a thorough test. We had lunch together on the quilt in the sunshine!

I really love how quick and easy this quilt is to make! You can purchase a copy of this pattern from the Fat Quarter Shop. I’m thinking about making another version of it to give to a friend who is expecting a baby boy this summer.

Happy quilting!

~Jen

Little Box of Figs, Catalina Stars Quilt Project

Happy Monday, everyone!

Last fall, I subscribed for the first time to a quarterly fabric subscription box called “Little Box of Figs” created by Fig Tree & Co. The subscriptions open up each fall, and they are limited so if you don’t sign up quickly, then it fills up. I first noticed this subscription on Instagram when some quilters had posted pictures of a cute fall pumpkin mini quilt, and I thought I’d try it out!

I received my first quarterly box a few weeks ago, appropriately themed for one season ahead so participants have time to finish the project.

Here’s what my box looked like:

We received a very cute tote bag, a mini cutting mat, notepad, folding scissors, supplies to make a key fob, plus the fabric and pattern for a quilt called Catalina Stars. The fabric and charm packs were packaged in the adorable green box.

The quilt is a nice lap size, approximately 44.5 inches by 52.5 inches. I decided to get started on it right away so that I could use it for a picnic quilt this summer. The pattern goes together very quickly, with the 10 star blocks taking the most time. I pieced the entire quilt using Aurifil 50 weight thread.

Here’s a look at my completed star blocks with dog running around in the background:

Star blocks

The fabric line, Catalina, is light, cheery, and summery! The remaining blocks are comprised of 2 squares and 1 rectangle so you can chain piece them together.

I took my quilt flimsy with us out on a recent family hike, along a section of the Pacific Crest Trail. We did run into snow about an hour into our hike, but we were able to pick out the trail here and there until we made it to a stunning view of Three Fingered Jack. We had a picnic lunch here, and my hubby took a picture of me holding the quilt top. It was quite windy!!

Catalina Stars quilt flimsy along the Pacific Crest Trail, with Three Fingered Jack in the background

I love both hiking and quilting so I try to take pics of quilts “in the wild” whenever I can! In total, we hiked about 5-6 miles that day, but the snow made it a little slow going. However, the scenery and fresh air was just incredible, and we had the trail mostly to ourselves.

In my next post, I’ll show you how I quilted and bound my Catalina Stars quilt.

Happy quilting!

~Jen

A Finished Tula Pink Jelly Roll Rug!

Hi everyone,

In my post yesterday, I talked about making my first jelly roll rug using the HomeMade fabric line by Tula Pink.

I finished the rug over the weekend, and we had a little bit of sunshine yesterday so I could get some outdoor pictures at lunch.

I absolutely love how this rug turned out! I didn’t experience any waviness or warping that can happen with this rug. I think it may be because my Bernina sits in a cabinet so I have a large, flat surface to support the weight of the rug as I stitch the rope coil rows together. I stitched slowly and carefully, using my widest zigzag stitch with Aurifil 50 weight thread.

I didn’t do any regular pressing, except for pressing each of the beginning tight corners. Those early tight corners were the hardest part for me! I did get a slight bit of puckering, but the pattern did indicate to expect that to happen.

Here’s a look at the finished rug!


My completed Tula Pink jelly roll rug!

Of course, as I was taking this picture, my quilt inspector, Cow, came sauntering out from under a bush where he had been napping. He gave the rug a thorough cat scan!

Cow gives the jelly roll rug a cat scan!

I brought the rug back inside where my best girl, Pepper, sat on it. She is a 65-pound mixed shepherd breed dog for scale.

Pepper likes the rug!

I now have the rug in my quilting room. I need to clean up some of my sewing chaos before taking a picture!

I hope that you all have a great day!

Happy quilting,

Jen