A Frostman and Santa Bottle Wraps

We’ve been experiencing colder than normal temps for the past week or so like much of the country. This morning while walking my son to school through a frozen fog wonderland, we noticed many beautiful ice formations by Jack Frost. However, we also came across a kid-made formation that we decided to call a “frostman” since it was made by scooping up the frozen fog ice crystals from the ground rather than snow.

He’s a tiny little frostman!

A little frostman!

A little frostman!

I’ve been working on some quick and easy quilty projects to give as Christmas gifts. I recently completed 3 Santa bottle wraps that will add a festive touch to a table setting or any holiday display. The pattern can be found in the book Cottage Charms by Art to Heart. These are Nancy Halvorsen designs so you may recognize her styling in the Santa faces.
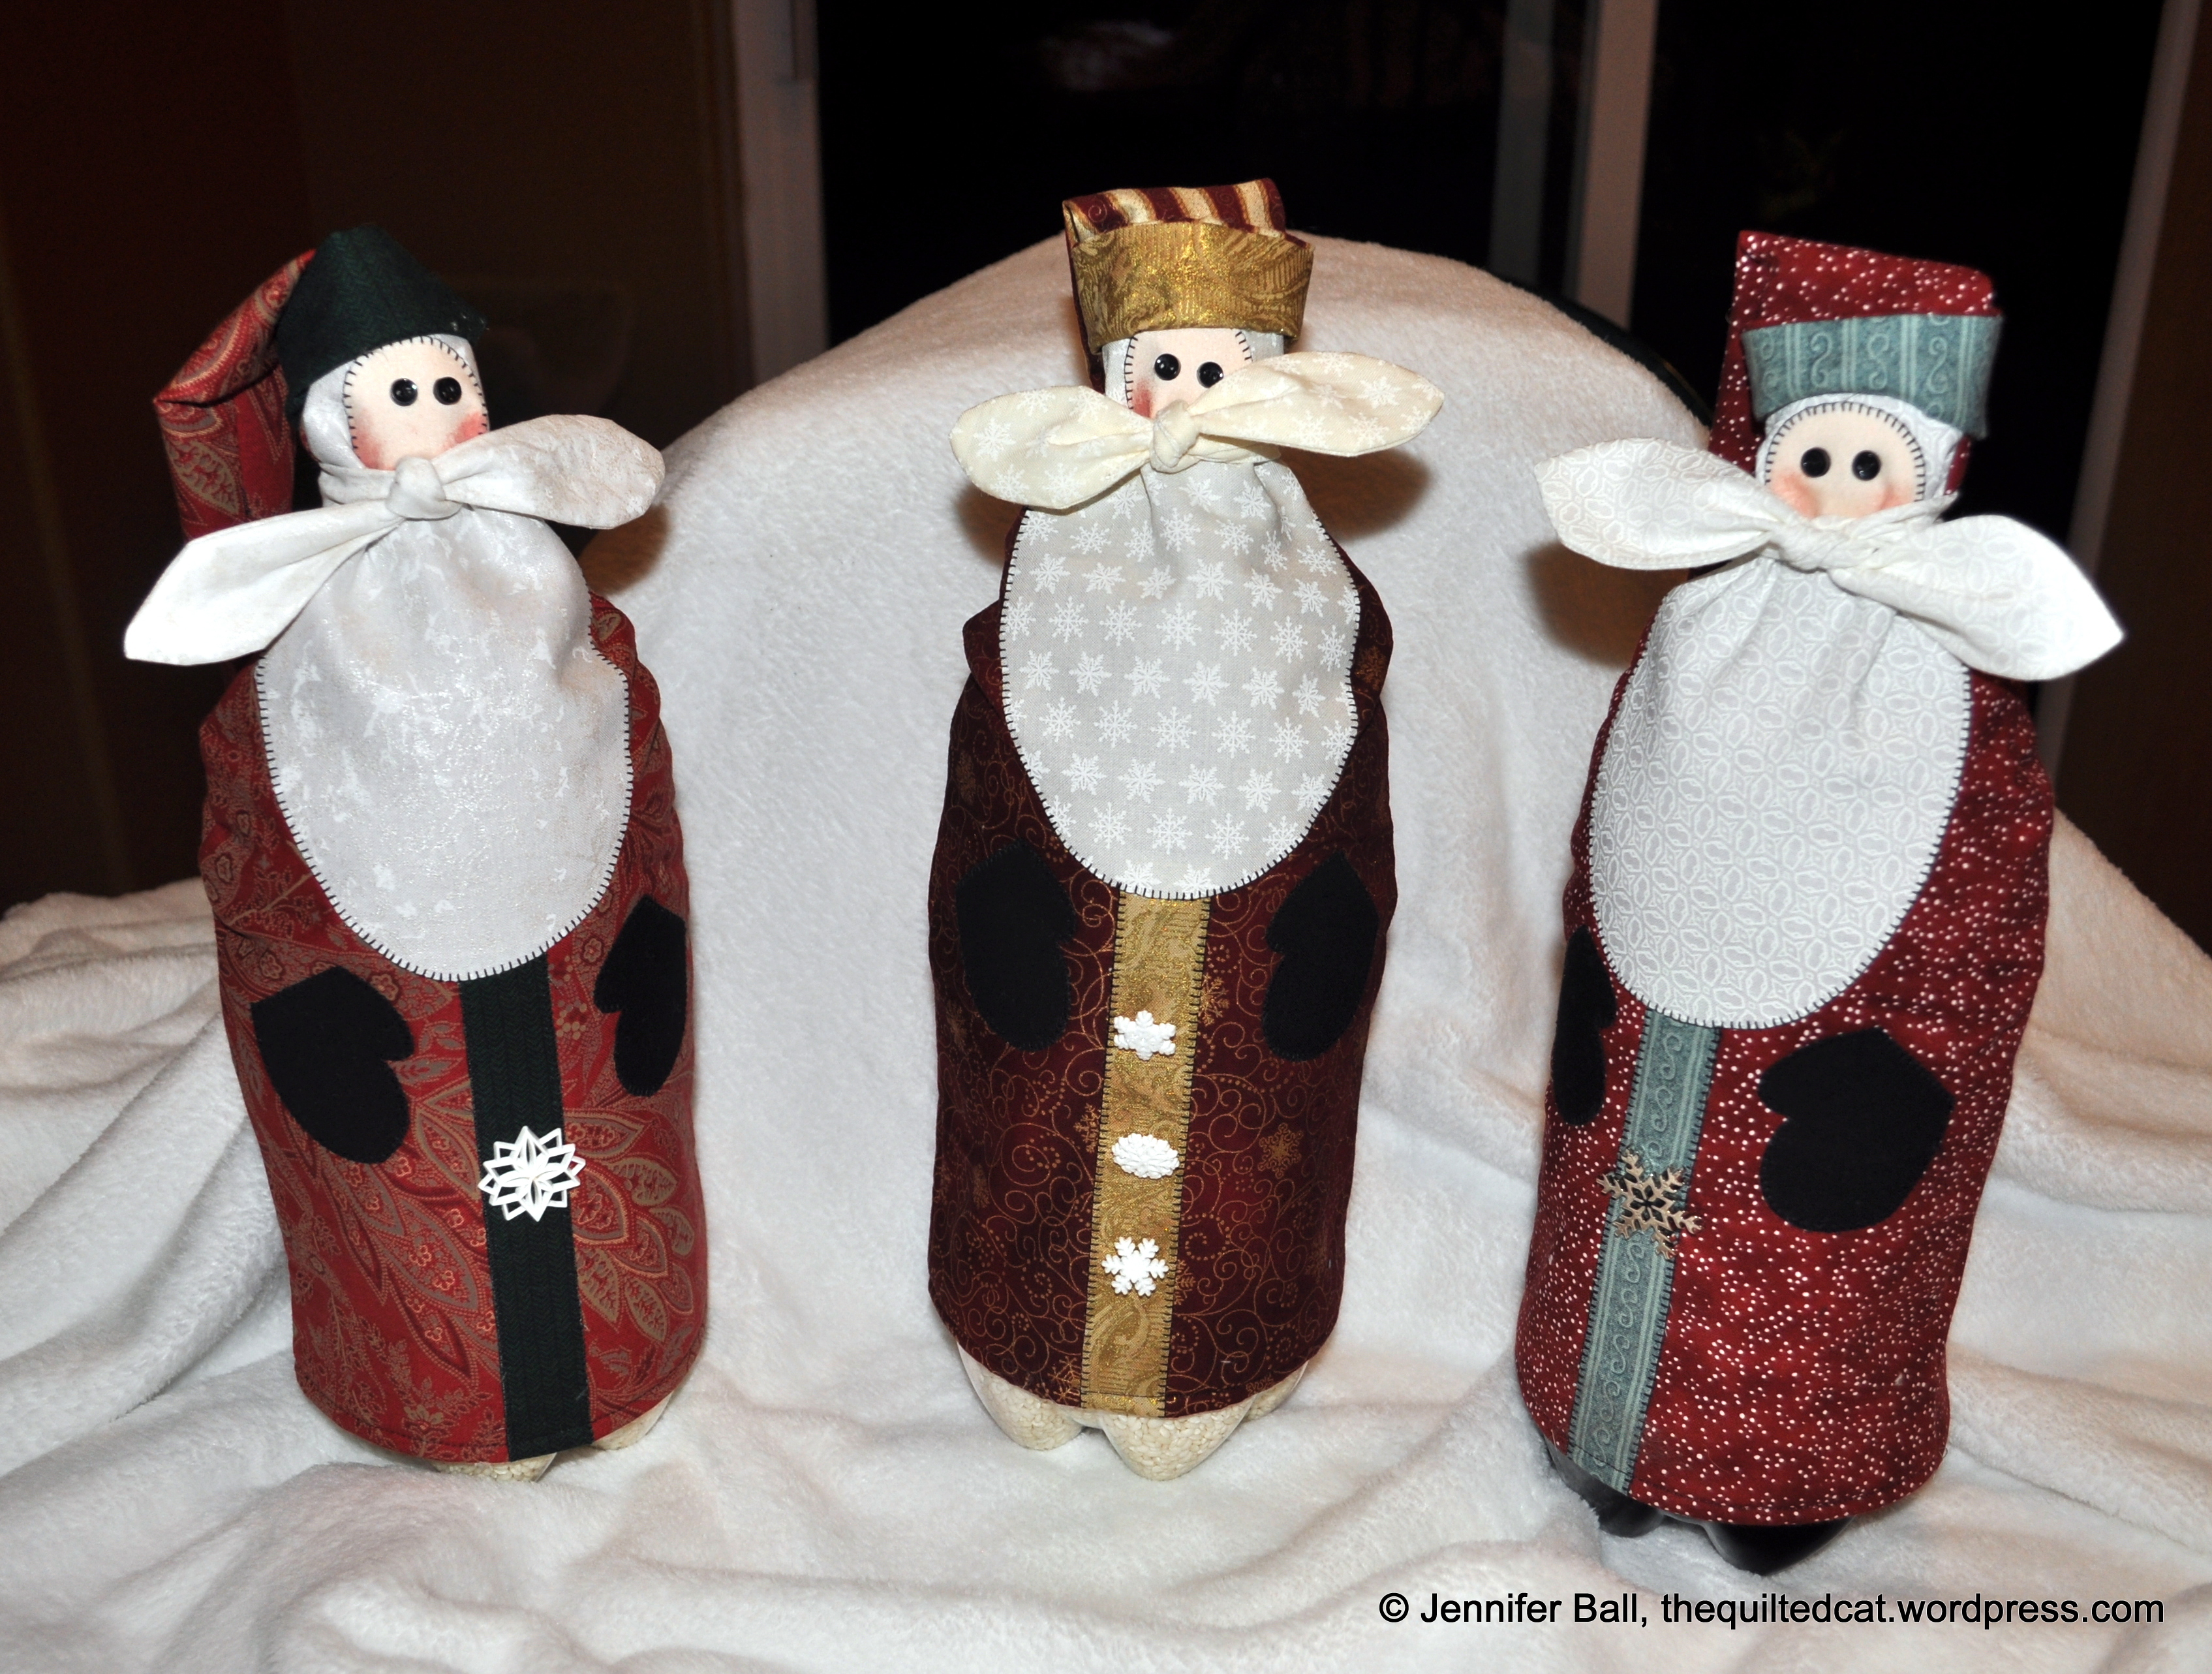
Santa Bottle Wraps

Santa Bottle Wraps

Aren’t they cute?

I placed my Santa wraps onto clean, dry 2 liter Coca-Cola bottles. I added a cup or so of dried rice to the bottom of each bottle for a little balance. The mustache is tied around Santa’s head to anchor the wrap to the bottle. These Santas bottle wraps are a great way to use some of your holiday fabric stash and come together in about an hour or so, depending on how much extra detailing you want to add.

Hope you are staying warm!
~Jennifer

Little Bird!

I saw the cutest little stuffed bird pattern called Friends of a Feather by Indygo Junction recently and just knew that I had to make it!

This little bird can sit in the palm of my hand very easily so it is the perfect size to perch upon my computer while I work. I used a Kaffe Fassett fabric for the bird body and tail. The pink fabric is something that I pulled out of my stash so I do not know the fabric line, but I think it pops nicely against the body.

For the eyes, I used mini turquoise buttons and attached them with embroidery floss. I didn’t have the proper gauge of wire on hand as the pattern recommended, but I did have some thinner crafting wire in a pretty turquoise color that complements the eyes and the body fabric.

Here are some picks of my new little bird friend. Click on the pictures to see a larger image:

I’m definitely going to make some more of these little birdie friends to give as gifts! The pattern is quick and easy to follow and the birds require minimal supplies that I usually have on hand.

Tweet, tweet!
~Jennifer

Fabric Postcards for Sisters Outdoor Quilt Show

The Sisters Outdoor Quilt Show occurs on the 2nd Saturday in July each summer in the beautiful high-desert town of Sisters, Oregon. I try to attend every couple of years since the drive over is very pretty from the Portland area.

The show is having a fabric postcard contest called “Wish Upon a Card.” The postcards will be sold via silent auction and proceeds benefit local cancer patients. I decided to enter some cards and finished them up several weekends ago. Participants are required to use a 4-inch by 6-inch size for each postcard and must use Michael Miller’s Tiki Winki fabric to be eligible for prizes. Any postcards that do not use the fabric can still be sold for the charity, but they won’t be entered into the prize bucket.

Here are the 2 Michael Miller Tiki Winki colorways:

Michael Miller Tiki Winki Fabric

Michael Miller Tiki Winki Fabric

Both colorways are fun so I decided to use both! I used the brown/black colorway to make 2 postcards. For the first postcard, I wanted to use a Hawaiian beach theme. I found some great fabrics in my stash to complement the tikis so I could build a little coconut tiki hut on a beach. The surprise bonus is the little koa wood turtle coming up to the beach from the ocean.

Tiki Hut Tropical Beach Postcard

Tiki Hut Tropical Beach Postcard

For the second card using the brown/black colorway, I decided to go “out of this world” by creating a tiki bar stop in space for a little alien! The alien’s spaceship has 5 hotfix crystals to add a little bling.

Space Tiki Ba

Space Tiki Ba

My final postcard uses the pink/blue colorway. After recently seeing the movie Hop with my 7-year-old, I thought a bunny on Easter Island would be the perfect use of the tiki heads!

Easter Island Postcard

Easter Island Postcard

These fabric postcards are fun and quick to make. I will make some more in the future to send to friends and family, although I’ll probably send them in a protective mailer so that they do not get damaged in transit.

If you’re traveling to the Sisters Outdoor Quilt Show this summer, do stop by the fabric postcard silent auction. Maybe I’ll see you there!

Enjoy,
~Jennifer

Create Custom Quilt Labels with Spoonflower

One of the great things that happens at quilt conferences, classes or events is learning about new techniques from other quilters. Several weekends ago when I attended Quiltmaker’s Block Party, I learned a new way to create custom quilt labels from Julie Herman of Jaybird Quilts.

In the past, I’ve either made an embroidered quilt label, printed one at home using fabric paper, or hand written one using a fabric marker. I would then hand sew the label to the quilt after completing quilting and binding. That is, if I remembered the label at all!! The problem with this method is that hand sewn labels are not very secure. The stitching could eventually become weakened and the label may fall off (or the label could even be removed at some point). Another issue that I had with home printed labels is that I could never be sure that the printed images would be archival.

Spoonflower to the rescue! What is Spoonflower? It’s an online store where you can create your own custom fabric or purchase custom fabric designs from other people. The beauty of this service is that you can create a simple quilt label as your custom fabric design and upload it to Spoonflower. Your design is then printed on the fabric of your choice and shipped to you.

I created a simple quilt label that is approximately 4 inches by 6 inches using a graphic program on my computer. I used PaintShop Pro, but you can use any graphic program. At the top, I used my initials as well as my name and location. I left the middle of the label blank so I could use a fabric marker to write in the quilt name, date, or any other important details about individual projects. At the bottom, I listed my blog address as well as my blog’s avatar for easy identification. I then drew a grey line for seam allowance around the label.

I got 60 labels printed onto 1 yard of basic white combed cotton for $15.75 plus $3.00 shipping. I got a 10% discount for using my own design.

Here’s a look at the whole yard:

Spoonflower - 1 yd - quilt labels

Spoonflower – 1 yd – quilt labels

And here’s a look at 1 label with quilt details added:

Spoonflower Label

Spoonflower Label

My goal with these labels is to piece them directly into quilt backs and quilt through them. The stitching will secure the label permanently to the quilt.

I hope this post inspires you to label your own quilts and maybe try your hand at creating custom labels.

Enjoy!
~Jennifer

“So Tweet” Bird Test Block for Guild Exchange

My sister recently invited me to make 6 blocks for an exchange with her quilt guild. There are 3 basic rules:

  • must be 12.5 x 12.5 inches unfinished
  • must use bright primary colors
  • must have a bird on the block

I made up a test block using both piecing and applique techniques. This is block #555 (So Tweet) by Paula Stoddard from the Quiltmaker’s 100 Blocks collector’s edition, volume 6.

I went with some birchy/aspen type fabric for the tree trunk. Instead of using green leaves, I keep with the primary color theme and used yellow tone leaves to suggest an aspen tree in the fall. While I do like the tree fabric, I think I may jazz it up on the next block and use a bolder fabric.

I machine-appliqued the bird and leaves to the pieced background and then added some fun thread accents by using Ricky Tims’ Razzle Dazzle thread #266 with a bobbin technique. I think it adds a nice touch of color and sparkle to the stitching.

The bird’s eye is a button which I did not sew down in case the block goes on a long-arm. I’ll probably include the buttons separately with the blocks so they can be added after quilting is completed.

Here’s a look at the block:

So Tweet Test Block

So Tweet Test Block


So Tweet Thread Close-Up

So Tweet Thread Close-Up

What do you think of the test block? A bird themed quilt seems like a fun spring or summer project.

Enjoy!
~Jennifer

Mini Santa Blocks for Exchange

I’m participating in a mini block exchange for the holidays. I’ve come down to the wire as the blocks are due to the swap hostess next week! I managed to carve out a little bit of time after work this week to make 4 mini Santa blocks. These are different Santas than shown in my earlier post here.

Carol Doak designed these as well and just posted them as Christmas Ornament blocks for her Yahoo group.

Here are the 4 blocks together:

Mini Santa Blocks

These blocks actually have a 1/2 inch seam allowance so the can easily be used in these keepsake frame cards:

Santa Card

The Santa faces looked a little blank so I added small brown eyes using embroidery thread. I’ll leave any other embellishments up to the individual receivers. But, wouldn’t the Santa look cute with a miniature white pom-pom at the top of the hat?

Mini Santa Closeup

Since these blocks are pretty quick to come together, I’m sure that I’ll sew a few more before Christmas.

I think they would make adorable holiday gift tags as well.

Happy piecing!
~Jennifer

Saturday Snowmen and Santas, Part I

This past Saturday, I spent an enjoyable afternoon paper piecing little snowmen and Santa blocks. I have a idea for a mini quilt for some of the blocks; for others, I may use them in a holiday swap. The blocks will be 3 inches finished once they are sewn together.

Here’s a little grouping of snowmen:

Snowmen Blocks

I really love the contrast between the dark blue sky print and the snowman. Plus, both fabrics appear to have snowflakes falling so I think it looks pretty cute together.

Here’s a closeup:

Snowman Closeup

I used small pieces of orange wool felt for the noses and appliqued them to the snowmen. The eyes and other details will be added after quilting is completed.

This block is designed by Carol Doak and is currently available in the Free Patterns section of her website!!

I made 6 snowmen, but I was only able to finish 2 Santa blocks. I will work on more a little later. These blocks also turned out pretty darned cute!

Santa Blocks

The Santa block is from Carol’s book, Easy Paper-Pieced Keepsake Quilts. I believe she also just designed another Santa block for those of us on her Yahoo Group so go check it out!

My plan is to work on my Snowman and Santa mini wall hanging idea this week so hopefully I’ll have more pictures to share with you soon.

Happy quilting!
~Jennifer

Finished Christmas Tree and Presents Mini Wall Hanging

In my last post, I talked about making a little quilted wall hanging by using small blocks designed by Carol Doak.

The wall hanging turned out so cute! I used just 3 blocks, plus inner and outer borders to make the entire project. The finished wall hanging is approximately 14 inches tall by 10.5 inches wide. I used some pearly white snowflake buttons as accents, added some reindeer ribbon trim as hangers, and used a branch off my plum tree for the mini quilt rack. The end result is a rustic little Christmas Tree and Presents mini wall hanging that I will use as part of my holiday decorations this year.

Finished Christmas Tree and Presents Mini Wall Hanging

I did very minimal quilting using my regular sewing machine. The presents are the exact same size, but I used a dark brown print for a border around one present and a tan around the other. If I make this project again, I’d probably choose a different border for the first present to give it more contrast against the black outer border.

Little Reindeer Gifts

A few years ago, I found this fun reindeer printed ribbon at a local craft store. I thought that it would accent the little reindeer gifts pretty well.

Reindeer Ribbon

I found it pretty enjoyable to work on a mini project that I could finish in just a few hours! This project is a great one to use up some of my scraps.

Enjoy!
~Jennifer~

Little Honu (Turtle) Quilted Bag

In September, I visited the NW Quilting Expo in Portland. I found some gorgeous turtle batik fabric that I just knew I needed to have!!! The vendor for the turtle batik is Quilt Passions and you can buy the fabric online.

While continuing to browse the expo, I came across another vendor who had a bunch of cute bag patterns that only require 6 fat quarters and some fusible fleece to make. After pondering the bag patterns, I selected the Half Moon Bay one because I thought I could modify it to use my turtle batik fabric.

Honu Batik Fabric and Bag Pattern

This past week, I had the chance to make the bag. I fussy-cut the larger squares in the pattern to feature a turtle from the batik print. I also used a lovely batik that looked like water for the background and handles. The accent fabrics are a dark blue batik, a dark green print batik with a slight turtle pattern, and a light green batik.

As accent items, I purchased some little honu (turtle) charms cut from koa wood from Etsy. I hand sewed 1 honu charm to each light green batik squre and sewed additional charms along the top portion of the finished bag.

Honu Charms from Koa Wood

Here are some pics of the completed project:

Completed Little Honu Bag (Inside)


Completed Little Honu Bag

Since I did modify the pattern a bit, I used more than 1 fat quarter of the turtle batik fabric to fuzzy cut the squares and to use it for my lining. I used 2 fat quarters of the batik water print, 2 fat quarters of the dark blue batik, and portions of 1 fat quarter each of the dark green batik and light green batik.

This little honu bag brings a smile to my face!

Enjoy!
~Jennifer~

Halloween Fabric Stash

Halloween is one of my favorite holidays. I love the traditions and fun associated with kids trick-or-treating and the crispness of the autumn air. I love carved pumpkins sitting on porches and the colored leaves as they blow across lawns.

I really love Halloween fabrics. There are so many cute designs that I just cannot resist adding a fat quarter here and a 1/2 yard there to my stash.

I looked at my Halloween stash recently and decided it was overflowing, and I need to pick a project already!

Part of My Halloween Fabric Stash

Hmmm, are you wondering what I’ll pick? It is a delightful pattern full of whimsy and mischief from one of my favorite designers. I’ve been working on the first block this week and will post a picture of it when I’ve completed it.

Here’s a hint . . . it’s the same designer who created this crazy cat quilt pattern set that I did a few years ago and is now hanging in my sewing room.

Happy guessing!

~Jennifer~