Thread Catcher Baskets!

I needed a fun and useable container to place all those little threads and small fabric clippings that seem to pile up while sewing. Fortunately, I happened to come across a swap for a quilt-as-you-go thread catcher on Instagram recently with a fun group of quilters called @modernpalooza.

For this swap, each person created a thread catcher using a free pattern by The Sewing Chick. The swap organizers matched us up with a secret partner, and sent us some hints as to their fabric likes and dislikes.

I decided to pull some Libs Elliott fabrics from my stash as my modern, bright fabrics to use for the patchwork scraps. I changed up the pattern slightly by deciding to add a black and white border to the top and lower edges of my colorful patchwork strip. I then added a smaller width of a dotted gray fabric for contrast.

I also didn’t have duck canvas on hand as called for in the pattern. Instead, I fused some Pellon Shape Flex to my lining fabric before adding the quilt-as-you-go fabric pieces.

For the binding, I used the same black and white fabric to echo the borders. I took my little completed thread catcher basket on a hike to central Oregon, and I think it looks great resting on this old juniper tree.
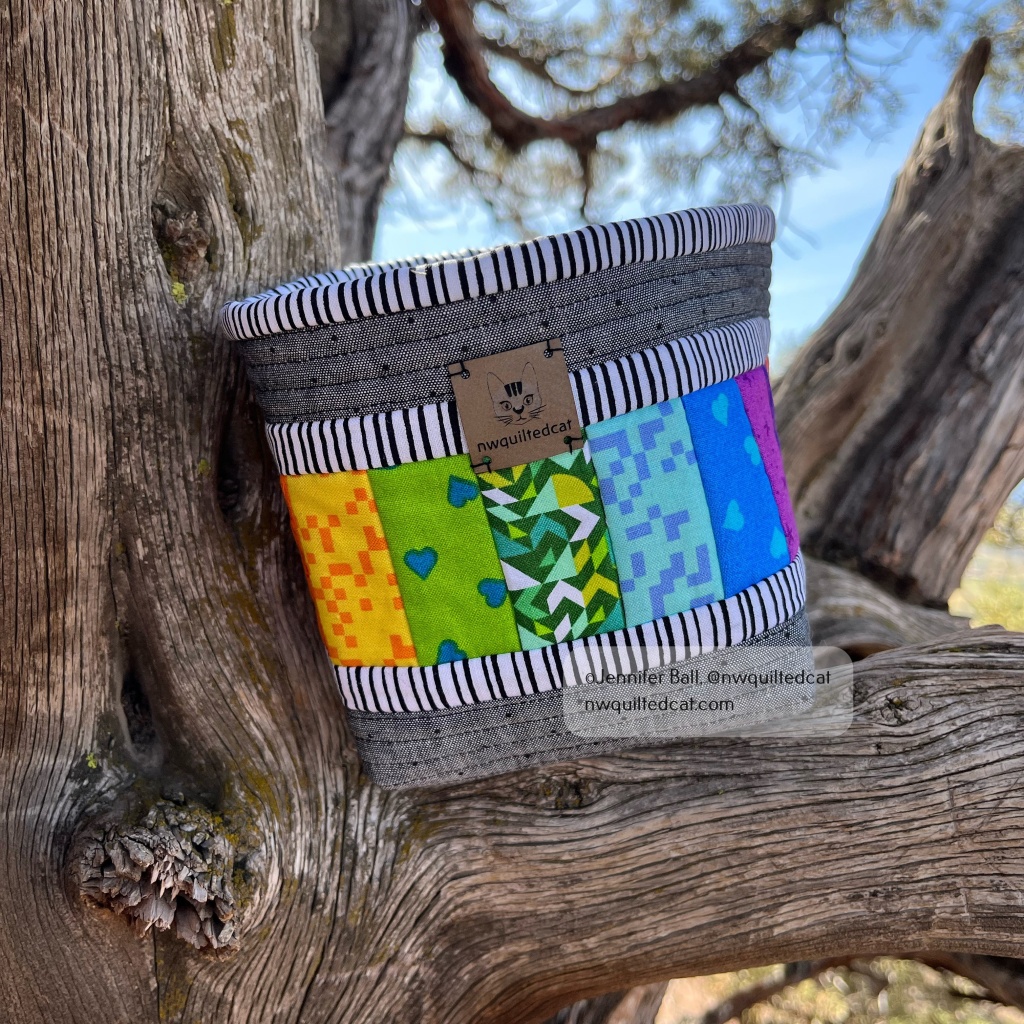
Thread catcher basket that I made for my partner

We were also asked to send a favorite treat or snack along with the bucket. I sent some Moonstruck chocolate made by an Oregon company along with some fabric and other little goodies. I didn’t think to take a picture of the complete package before I mailed it.

In return, I received a wonderful thread catcher basket from my partner!
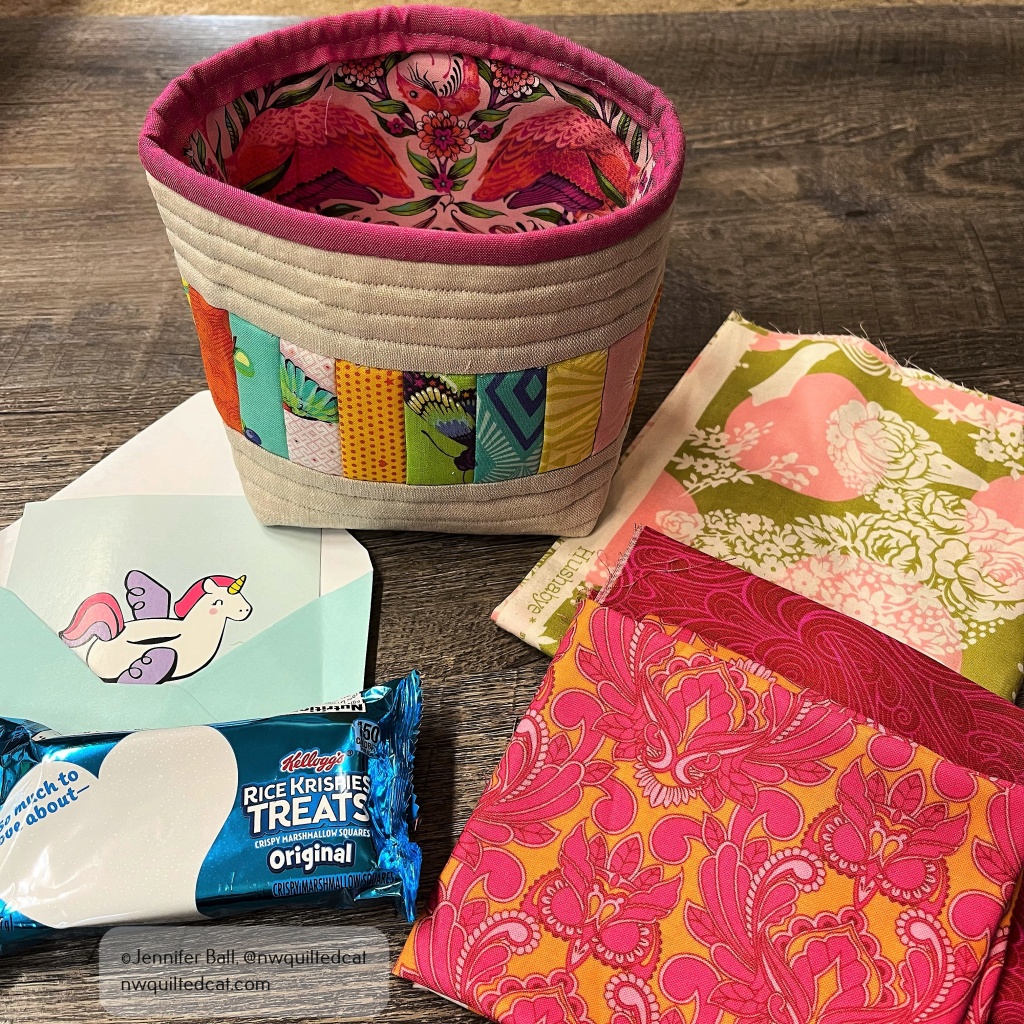
Thread catcher basket that I received

My partner made me this super cute basket using Tula Pink’s Daydreamer fabric! Isn’t it bright and cheerful? She also very thoughtfully included some super rare out-of-print Tula Pink fabrics that I do not own. I’m very excited to use them in a future project just for me.

What I really loved about this little thread catcher basket swap is that the project was pretty small and not too time consuming. Sometimes, swaps can be overwhelming for people because they try to make something too complicated or underestimate how long it might take to make a larger item like a mini quilt. I do enjoy swaps because it gives me a chance to try new projects, learn new skills, and make new friends!

Happy sewing!

-Jen

Painted Quilt Blocks

I usually talk about sewing quilt blocks on my blog, but I recently did a project where I painted quilt blocks. Painted? Yes! Much like painted barn blocks are used to embellish buildings, you can embellish furniture with painted blocks.

In August, I got my son a different computer desk and so his old desk needed a new purpose. It is about 10 years old and was banged up quite a bit from years of kid, and then teenage, use. I cleaned up the desk, tightened up the screws, and repainted it glossy white. Pepper kindly guarded my work area from squirrel invaders!

Desk freshly painted white while Pepper watches in the background

I decided to paint 2 classic quilt block shapes on the left-hand side of the desk top: the churn dash block and the 9-patch block.

I used FrogTape to mask off the far left side of the table and the initial parts of the churn dash blocks. I used regular craft acrylic paints. Here’s what the first part of the churn dash blocks looked like after they were dried and I removed the tape:

The beginning of painted churn dash blocks with Gracie helpfully supervising

For each section of the painted quilt blocks, I carefully used the tape to mask off sections where I didn’t want the back. I completed the churn dash blocks first before working on the 9-patch block. I applied 2-3 coats of each color so this process took about a week with drying time.

FrogTape works really well to keep the painted edges sharp

Once I finished painting my blocks, I let the paint dry overnight. I used a glossy crystal clear spray paint to finish the project and to protect the painted blocks.

Here’s a look at the freshly painted desk:

My newly painted quick blocks with dry September grass, lol

With some help from my teen, we transported this newly painted table into my sewing room. I thought my little Singer Featherweight would look cute on it!

My newly painted quick block desk with a Singer Featherweight

I now have a fun table with brightly painted quilt blocks that I can use for years to come!

Happy quilting!

-Jen

Running with Scissors! + More

Hi everyone,

I recently made the Take A Stand bag from ByAnnie patterns, and I blogged about it here. I then decided to create the companion tool organizer called Running with Scissors using similar fabrics from Tula Pink.

Isn’t the name fun? This organizer is really a clever zipped tote that you can use to carry your quilting tools to a class or a retreat or use it at home to save space on your sewing table.

I used Tula Pink’s Pinkerville line with its beautiful unicorn as my front pocket centerpieces. This organizer has 2 large quilted fabric pockets with zippers on the outside. You’ll find smaller inside pockets made out of mesh, vinyl, and quilted fabric, all sized nicely to fit a variety of tools.

Here’s a look at the organizer once I had sewn on the outer pockets and the inner pockets, but before I added the center facing to the inside.

For me, one of the tricky parts is attaching the outer zipper and binding. When you purchase this pattern, it comes with a $5 off coupon for the accompanying video from Annie, making it free. I highly recommend the video, and I watched it while attaching the binding so I could pause and re-watch as needed. I also use Clover Clips rather than pins to avoid poking myself and because they are just so much easier to use.

Attaching the Binding

The inside center facing uses clever elastic loops to hold a variety of items from sewing machine feet to bobbins to thread. I had 2 colors of elastic on hand so I decided to use both colors by alternating them on the facing.

Inside Center Facing

Once I had sewn the inside center facing, then I just needed a few finishing details such as zipper pulls to complete my Running with Scissors tool case!

Here’s a look at the front of the completed case:

Completed Running with Scissors Case

I decided to do a little photo shoot with my 2 new ByAnnie bags, along with my foster kitty, Gracie. She provided excellent inspection services!

In the picture where Gracie is sitting next to the bags, you can see my new Running with Scissors tool case folded over my Take A Stand bag. I’m going to use these 2 bags together at my sewing table to keep frequently used tools close at hand.

Another pic of both bags together;

Take A Stand Bag and Running with Scissors Case

I now have more confidence to tackle a bigger bag project! On my to-do list is the A Place for Everything 2.0 bag from ByAnnie. It’s a great bag to hold English paper piecing projects and supplies. I haven’t decided which fabric to use yet so stay tuned!

Do you follow me on Instagram (@nwquiltedcat)? I’m very close to reaching 2,000 followers. I’m going to do a little giveaway once I reach that milestone, and it will most likely feature Tula Pink products. Come follow me if you don’t already!

Happy quilting!

~Jen

Baskets in the Woods

Remember my post about making fabric baskets? Well, I couldn’t stop with just one, and so I made 4 similar baskets for a group of quilting friends.

I wanted to get a picture of the baskets all together in an outdoor setting. So, my family and I took a weekend drive to a beautiful little lake, with falls colors beginning to emerge.

I placed all 4 baskets into a plastic bag, and I took them with me on the very short hike. It was only 1 mile around the little lake, with a some heavy brush in a few sections.

How cute are these baskets all lined up on a log with the lake in the background?

Fabric baskets on log

We had a great time, having this little lake all to ourselves. It wasn’t chilly, but there was a beautiful cloud hovering over the lake surface and providing a misty backdrop to our time here. The foliage was quite wet, and so our pants became soaked as we walked around the lake, but we didn’t mind at all.

The maples were starting to turn color, with many trees displaying vibrant yellow leaves and a few turning towards orange and red.

Cloud hugging Daly Lake
Wooden bridge
Fall foliage

I hope my friends like their fabric baskets! Getting out in nature is one of my favorite things to do, and it really helps me deal with times of stress. I can’t wait to go again!

Take care,

-Jen

Making a Fabric Basket (or Tub)

Hi everyone!

Recently, I came across a fun sew along on Instagram where the participants were making fabric baskets, also called tubs. I was intrigued by them, by I knew that I didn’t have time to complete one within the sew along timeframe. I purchased the pattern called “Tub Family” from RosieTaylorCrafts on Etsy, and set it aside for a couple of days.

Then, several weekends ago, I had a few hours to try my hand at making one. The pattern comes with 3 sizes of fabric baskets, and I opted to make the largest one. I have some of the beautiful Homemade fabric by Tula Pink, which I think is absolutely perfect to make all sorts of things for my sewing room.

The pattern walks you through the construction steps pretty well, but I have a few pointers if you decide to make one.

Once you have your main basket panel, liner, and foam all ready for quilting, I do recommend using the straight-line quilting as mentioned in the pattern. I tried doing an all over swirly type quilting on my test basket, but I had a much harder time attaching the bottom and getting the basket to sit properly. It’s just kinda floppy!

On my “real” basket, I did straight-line quilting using a beautiful Aurifil bright green thread with a seam guide on my Bernina. In the picture below, you can see my seam guide helped to give me perfect 1-inch quilting lines.

After quilting at 1-inch and .5-inch intervals, I had my finished main panel, ready for my quilt inspector. I used some fun Tula Pink ribbon along either side of the fussy cut sewing machine in the center of the panel. This pattern is so flexible that you could make baskets out of scraps, a single piece of fabric, or several large chunks like I did.

My finished main body panel with quilt inspector

After trimming the main panel to the correct size, I started to attach the base to the body. This step is the hardest part of the whole pattern because the base really needs to be eased in using clips or pins.

I used Clover clips to secure my base rather than pins. No blood! If the base is still too large after easing it, you may need to trim it down slightly.

Using Clover clips to attach the base

The pattern does have you hand stitch the base to the body before using your sewing machine to help with puckers. I highly recommend doing this step. You can remove the clips after hand basting, and then use your machine to slowly and carefully stitch the base to the body.

I did my binding a bit different from the pattern by pressing one side in 1/4-inch so that I’d have a nice finished edge to work with when sewing the second long edge to the inside of the basket.

Getting the binding ready

I did completely machine stitch my binding rather than hand sewing the inside, just for lack of time. I used the same color thread as the quilting, and I think it looks fine.

Here’s a look at my completed fabric basket, filled with some EPP supplies:

My finished basket!

These baskets are addictive to make, and I want to try making the medium and small sized ones soon. Maybe Christmas themed ones as well!

There are many examples of completed baskets using the #tubfamily hashtag on Instagram.

Enjoy and happy sewing!

-Jen

Quilted Zip It Up Project Bags

Hi everyone,

Recently, I decided to tackle my first pattern from ByAnnie, the Zip It Up large organizer. I almost only do quilting projects so anything with a zipper seemed to be a good challenge. So instead of making just one organizer, I decided to make two!!

I made one for me using the HomeMade fabric line by Tula Pink. I just love the sewing machines and notions in this line so I thought that it would be perfect for a sewing project bag.

The pattern calls for quilting together the bag outside, Soft and Stable (the material inside that gives the bag its shape), and the bag liner. At first, I thought about quilting it on my domestic sewing machine, but then I thought why not try and quilt it using my HQ Avante? I wasn’t sure how my longarm would like the Soft and Stable project, but it quilting like a dream.

I used Glide thread in Cool Mint, and did some pretty floral swirls.

For the second organizer, I decided to use llama/alpaca themed fabric for my sister. I did straight-line quilting on her bag.

I surprised her with this organizer several weeks ago when we had a mini sewing retreat together.

Here’s a look at her completed organizer, with some alpacas giving it an inspection:

Alpacas inspect a Zip It Up organizer

Inside the organizers, there are 2 separate zippered pouches. One is a clear vinyl pouch, and the other one is a mesh mesh. There is also a second zipped pouch on the outside back of the bag (the pattern has it on the front but I decided to add them to the back instead).

I added some fun goodies to the inside of the organizers including a little cutting mat, stickers, pencils, a notepad, and some Tula Pink ribbon. The zipper pull is a cute fluffy llama that I found at a local craft store.

Zip It Up organizers, a look at the inside

Finished Zip It Up Organizers

I really like how these Zip It Up organizers turned out. These are the large size finishing at about 11.5 inches by 14 inches, which is perfect for taking a little sewing project with me while traveling.

Happy quilting!

Jen

A New Quilted Bag

Happy Monday!

I’ve been using a small, store-bought purse for my day-to-day needs, but decided that I really need to make my own.

I fell in love with the new Elementary fabric collection by Sweetwater and recently picked up a charm pack and some coordinating half-yard pieces. I love how the colors look together in this collection and the back-to-school theme is perfect for fall.

I used a bag pattern called the Oak Park Bag by Loft Creations.

For the base, I wanted a heavier material than cotton, but still something that would look nice with the Sweetwater fabric. I picked up a gorgeous piece of espresso-colored faux leather. I think the leather really adds some character and style to the finished bag!

I used Aurifil 50 wt in brown (#2372) for the piecing and straight-line quilting. The lining is fusible fleece, but I really want to try Annie’s Soft and Stable when I make this bag again. The fleece will work fine, especially once the bag has a few items inside it. But, I saw the Soft and Stable product at a quilt show recently and now really want to try it out!

I did use a leather foot and a leather needle. I stitched really slowly on my Bernina since the leather, especially on the handles, was so thick. I did break 2 needles in the process so I probably will not use the faux leather on the handles again. However, on the base, the faux leather worked fine since it was just 1 layer.

The finished bag measures approximately 13-inches wide by 19-inches high. The inside is lined with the Elementary fabric as well and has 1 pocket.

Here’s a look at the finished bag, hanging in the gorgeous 80 degree weather that we had this weeekend:
Oak Park Bag Closeup

Oak Park Bag

I have only made a few bags so this project really help me improve some skills. I hope to make it again since it came together pretty quickly.

Enjoy!
~Jennifer

A Cute Little Basket

I picked up a cute pattern recently for a fabric basket called Banded Baskets by Indygo Junction. The pattern actually contains 3 sizes of nesting baskets.

I decided to make the small basket and fill it with little fabric treasures for a special someone! It’s the perfect size for carrying a small project or storing fat quarters.

Small Banded Basket

Small Banded Basket

For the outside, I used a pretty little fabric on the bottom portion called Chickadee (# A-7029-LC) by Andover Fabrics.

The dark brown leaf print on the top portion is from P&B Textiles line called Bear Essentials 2 (#ESS2 569S).

For the piping, I used Essex Yarn Dyed in Flax for sturdiness. The lining and handles are made from a solid blue from my stash. I used Aurifil Light Sand #2000 for the stitching.

Once I finished the basket, I added a little bird charm keychain and some fat quarters. I plan to make a nesting set of 3 baskets for my sewing room as a pretty way to store my quilty projects in-process.

Enjoy!
~Jennifer

Sewing Cabinet Find and Celtic Solstice, Part 2!

Happy Monday, quilters!

I’ve been perusing the local Craigslist ad for months, just waiting for a sewing cabinet to replace the tiny table that I have been using. This weekend, a nice cabinet appeared in the listing with a 1980s-era Singer sewing machine.

The cabinet does have a few scratches and dings, but my Bernina (mostly) fits into the cut-out space. On my old little table, it just sat on top and didn’t fit flush with the table surface. As a bonus, it has 7 drawers!! My husband helped me pick up the machine and haul it up our stairs. Then, I spent a good chunk of Sunday organizing the space. That it still a work in progress!

Here are some pictures of the new-to-me sewing cabinet in my spare bedroom (aka my sewing studio).

Used Sewing Cabinet

Used Sewing Cabinet

A few small scratches on the sewing cabinet surface

A few small scratches on the sewing cabinet surface

Sewing Room, Right Side

Sewing Room, Right Side

Sewing Room, Left Side

Sewing Room, Left Side

Oh my, looking at those photos, I see that still need to organize some of my fabric that is on the floor!

I also worked a bit more on my Celtic Solstice quilt top. This is a Bonnie Hunter mystery quilt from last fall, but I’m very behind many of the quilters who have already completed their tops! You can see my part one of this project here.

For part two, I needed to make 100 chevron units for the small-sized version of the quilt. Each chevron uses 6 pieces of fabric for a total of 600 pieces on this step! This was my first time making chevrons, and they went together pretty well by following Bonnie’s instructions.

Here they are after a press and trim:

Celtic Solstice Chevrons

Celtic Solstice Chevrons

I have added the chevrons to my units from part one, and they are living together in this little basket:

Celtic Solstice, Parts 1 and 2

Celtic Solstice, Parts 1 and 2

I’ve started part three for this project, and I think it will go a bit faster than the chevron units. You can still get the instructions for free on Bonnie’s site until June!

Hope you enjoyed the look at my sewing space!

Happy quilting,
~Jennifer

Star Light Star Bright QAL, Half Square Triangles

Happy Monday!

This weekend, I found time to work on my project for the Star Light Star Bright QAL hosted and designed by Melissa. There is still time to join the fun so pop on over to her blog to check out all the details!

Our assignment this week was to create our half square triangles. I’m making the 9-block baby size quilt so I had quite a few HST’s to sew and trim!

The sewing part went pretty fast as I chain-stitched each grouping. The important part of this step was to keep our groupings separate so we don’t confuse the half square triangles between groups. I labeled each group with a sticky note and only sewed one group at a time.

Next, we trimmed our little HST’s! This part makes me happy to sew all those perfectly square little blocks, but I definitely get a sore left forearm. I cut with my right hand, but seem to hold onto my squaring ruler pretty tightly with my left hand so that the fabric doesn’t wiggle. This seems to lead to soreness the next day when I do lots of trimming.

Here’s a look at my little mountain of trimmed edges:

HST Trimmings

HST Trimmings

I’ll use these trimmings to make more cat nip presents for my quilt inspectors.

Here’s a look at all my half square triangles, neatly trimmed. I have group 1 spread out on my cutting table next to groups 2 through 9.

Half Square Triangles for Star Light Star Bright QAL

Half Square Triangles for Star Light Star Bright QAL

And here’s a look at all my HST’s and flying geese bundled up together in a little tray:

Organizing Tray for Star Light Star Bright QAL

Organizing Tray for Star Light Star Bright QAL

Stay tuned for next week’s post where I will show you my block centers for this QAL.

I also had the opportunity to attend a Downton Abbey tea party hosted by Andover Fabrics on Saturday. I even won a prize – eek! I’ll upload my photos from this wonderful event to an upcoming post so stay tuned!

Enjoy!
~Jennifer