Black Diamonds Quilt

Hi everyone,

I completed a new quilt called Black Diamonds from the Fat Quarter Shop. This quilt features a new ruler called the half triangle trimmer, which helps you to create perfect 2″ x 4″ half rectangle blocks.

If you purchase the supplies for this quilt using the links in my post, I get a small percentage of the sale to help offset the costs of running this blog. I appreciate any and all purchases via my affiliate links!!

Quilt Kit and Pattern Available Soon!

The Fat Quarter Shop will be announcing this new quilt pattern and quilt kit later in August or early September so watch for an announcement on their social media. The quilt kit will feature a fabric line called “Create” by Alli K Designs.

The half triangle trimmer is now available to purchase.

Let’s Take a Look at My Project!

For my version of the quilt, I used the Too Cute to Spook line by Me and My Sister Designs. I thought this pattern would make a really cute Halloween themed quilt.
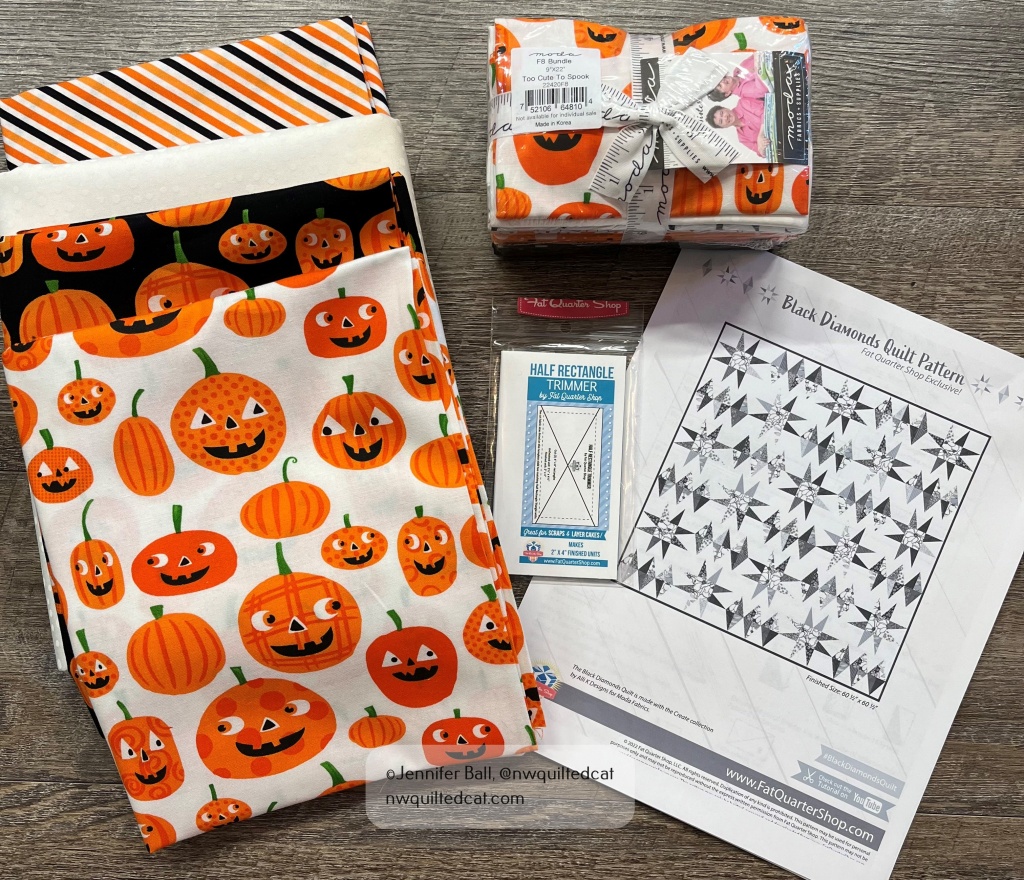
Supplies for my Black Diamonds quilt: Too Cute to Spook Fat Eighth bundle, background fabric, pumpkin fabric for center blocks, binding fabric, half rectangle trimmer, and pattern

This pattern is really simple to make because it only contains 2 blocks: a star block and a diamond block. Both blocks use the half rectangle trimmer. I decided to make a test block before cutting out all the pieces and chain piecing.

Here’s my test star block:
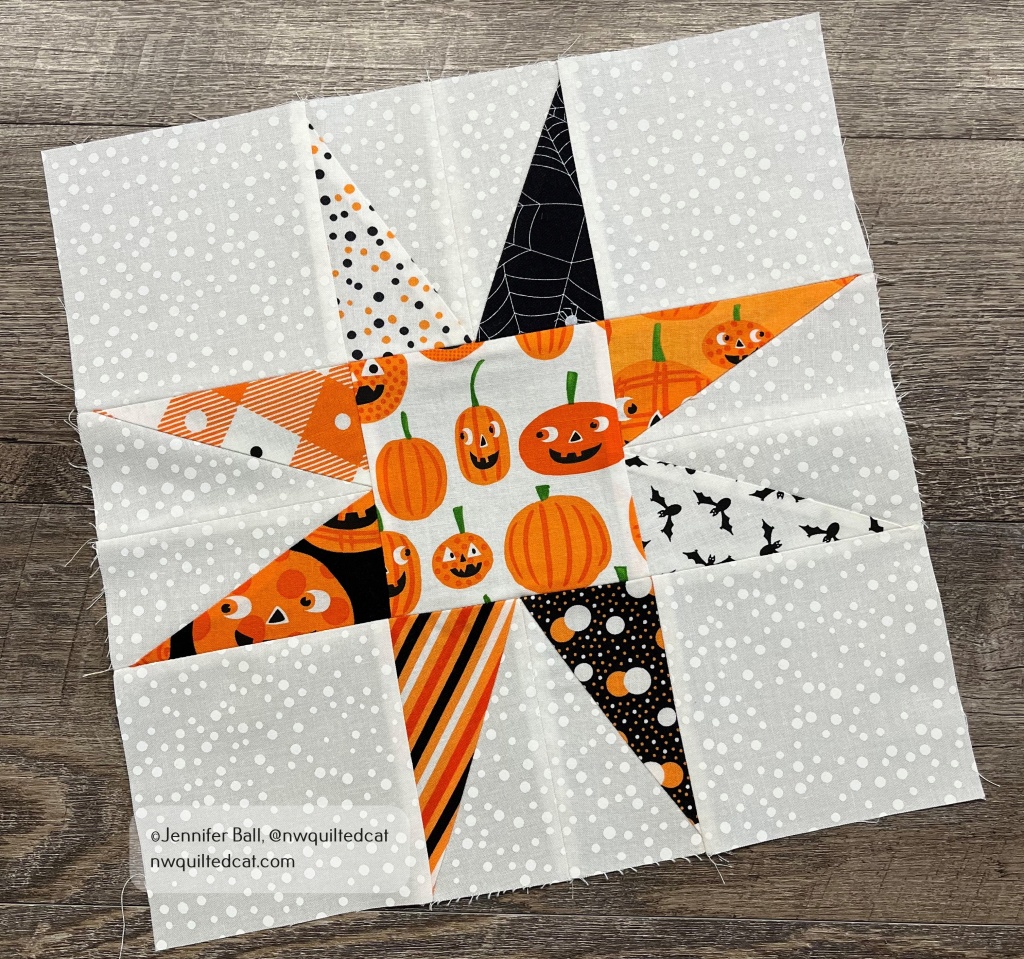
Black Diamonds quilt: a test star block

Usually, star blocks are made with half square triangles so I really like the look of this elongated star using the half triangle trimmer tool. It’s a really fun shape! I also made a test diamond block, which went together perfectly.

I decided to go for it and cut out all of my fabric pieces according to the directions. For my center squares in my star blocks, I used the same fabric for consistency. If you decide to go this route, then you’ll need a 1/2 yard of fabric. If you go scrappy, then you could use fat eighths or fat quarters.

TIP: A Stripology ruler saves you so much time and effort when cutting out strips of fabric.

I chain-pieced the star block units first and then the diamond block units. In this pattern, pay special attention to directions because you need to make right-side facing units and left-side facing units.

TIP: Use a Sue Daley rotating cutting mat when trimming your half rectangle units. As a bonus, I also use this mat to cut out pieces for English paper piecing.

Here’s a look at all my completed star blocks and diamond blocks:
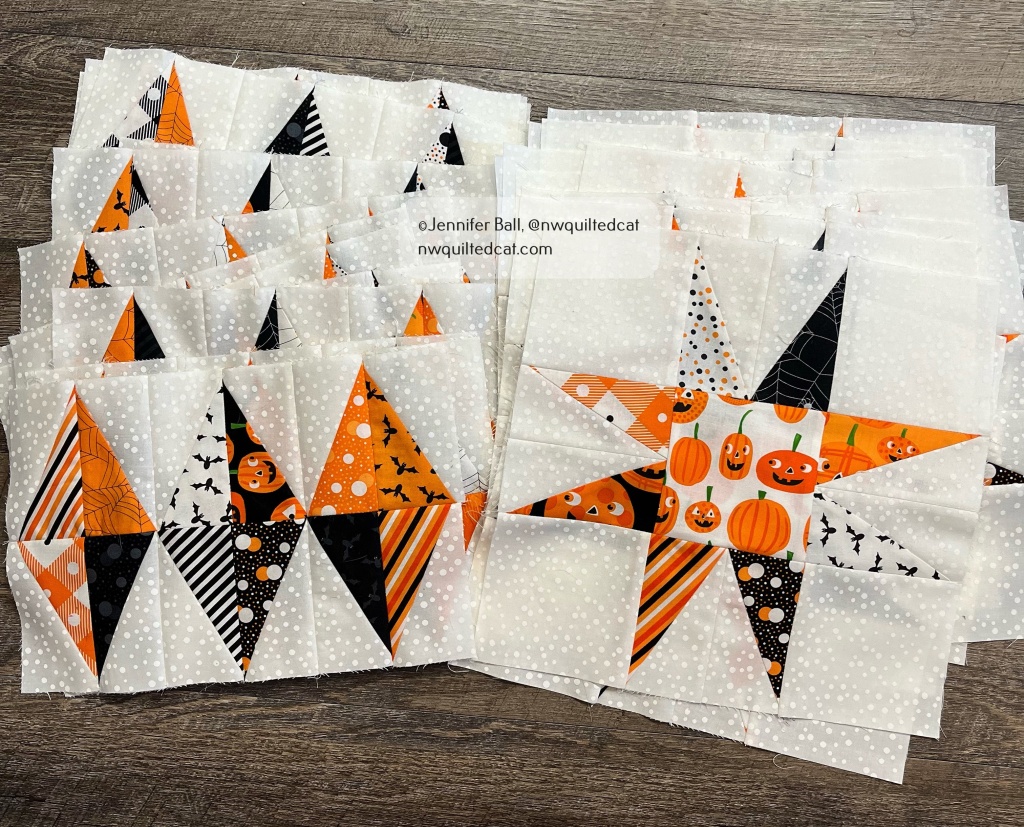
Completed blocks for the Black Diamonds quilt

Aren’t they cute? When I pieced the units together, I didn’t worry about having 2 of the same fabrics touching each other. There is so much movement in the finished quilt that no one will notice!

After I had completed all these blocks, I laid them out on the floor with the help of my quilt assistant. As a way to check my placement, I usually take a picture with my cell phone. This picture helps to identify any block placement mistakes, and it also helps me to remember what order I need to sew the blocks.
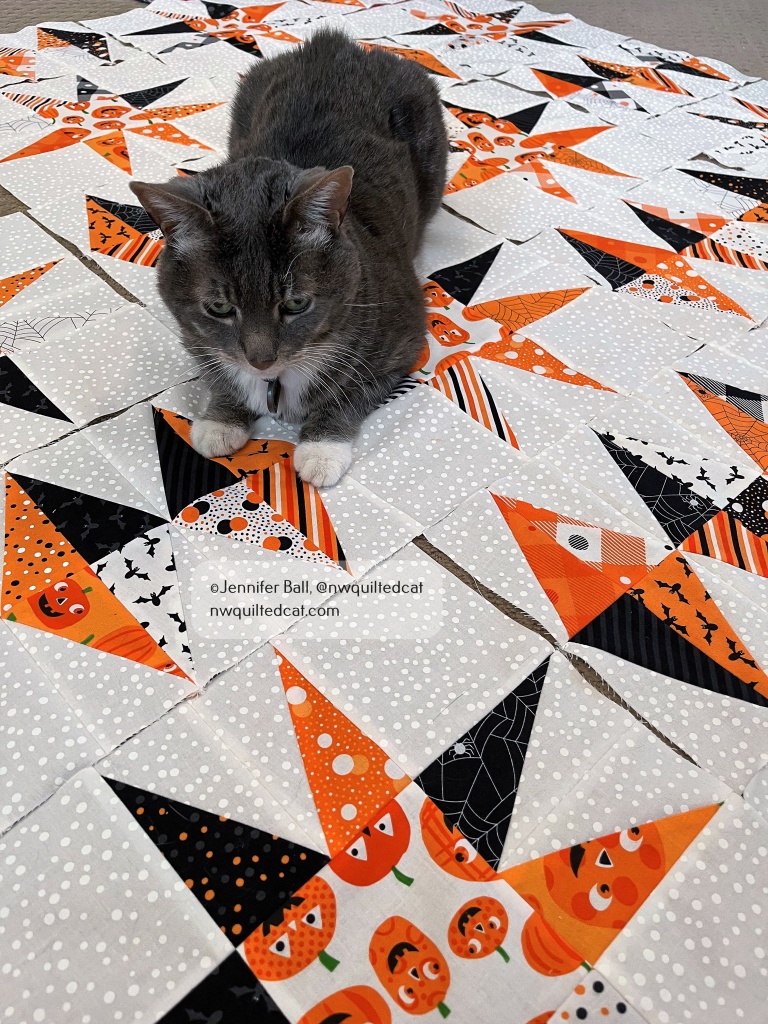
My quilt inspector checks my block placement!

My quilt inspector sometimes likes to rearrange things when I’m not looking! I sewed the rows together and finished the quilt flimsy in time to take on a little mom and son hiking trip. My son was a good sport and held up the quilt top while I took a quick picture.
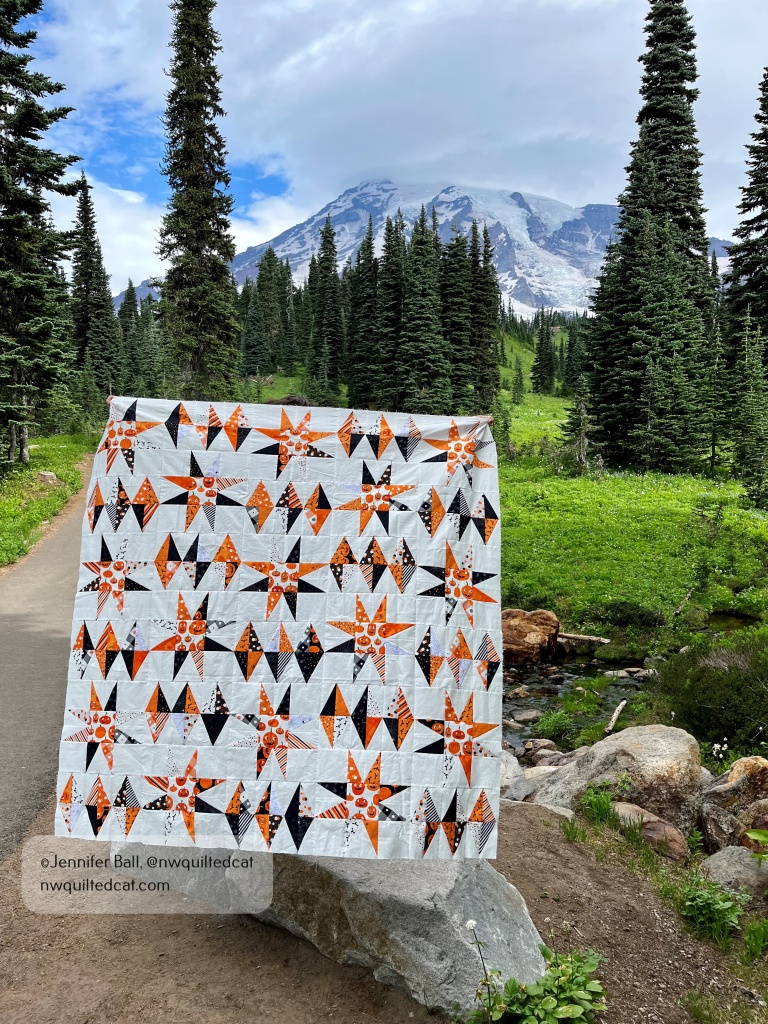
Black Diamonds quilt flimsy

Once home from our short adventure, I decided to quilt it with an open free-motion stipple pattern using white thread. For the binding, I used a striped fabric from the Too Cute to Spook line, which I think is the perfect finishing touch for this quilt!

Here’s a look at my completed Black Diamonds quilt, Halloween style!!

Completed Black Diamonds quilt

This quilt finishes at 60.5″ x 60.5″ so it’s a perfect lap size. You can easily enlarge it by making more blocks to expand it, and be sure to watch the Fat Quarter Shop for a blog post announcing the pattern and quilt kit plus a look at all the sample quilts. Watch for a live tutorial by the Fat Quarter Shop launching on September 8th.

Enjoy!

~Jen

We Support You blog hop!

Hi everyone,

Welcome to my blog where I’m happy to be participating in the We Support You blog hop to encourage, support, and inspire all those who have been touched by cancer, particularly breast cancer. My mother-in-law passed away several years ago from complications due to breast cancer so I definitely know this cancer touches so many lives.

Thanks to Madame Samm of Sew We Quilt for encouraging us to make something cheerful and beautiful in this hop using her pattern and to Pat, our wonderful cheerleader for this hop. You can purchase the “We Support You” friendship pattern for $12 from Madame Samm directly by emailing her at madamesamm@me.com.

I’ve been participating in quite a few Instagram mini swaps lately, and all the beautiful rainbow colored quilts inspired me in my project for this hop.

I started by selecting a text print for the block backgrounds. This text print has encouraging phrases such as “No regret” and “Dream big.” Next, I made 3 little bras in colorful print fabrics to applique to the text backgrounds. The bra straps and hangers are hand embroidered using DMC black embroidery floss.

Next, I pulled some Kona cotton solids in various rainbow hues to create the borders and bound the whole mini using black weave print. I used a Superior variegated thread to do the quilting, alternating wavy horizontal and vertical lines.

I had this really cute little wire heart hanger so I added a sleeve to the back for a perfectly finished little project!

We Support You Rainbow Mini Quilt (Outdoors)

We Support You Rainbow Mini Quilt (Outdoors)

I now have this little mini hanging in my sewing room, above a project table for inspiration.

We Support You Rainbow Mini Quilt (Indoors)

We Support You Rainbow Mini Quilt (Indoors)

Here’s a close-up photo of a block so you can see the text print background:

We Support You Close-Up

We Support You Close-Up

Please hop on over and visit the other ladies with projects today:

I hope my little mini quilt inspires you today! As a Gen-X’er, I encourage all my 30 and 40 something quilting buddies to get mammograms too!

Take care,
~Jennifer

Sew Mama Sew Giveaway Week!

Hi everyone!

It’s that fabulous time of year again – Giveaway Week at Sew Mama Sew.

For the giveaway, I’m offering 2 Moda mini charm packs of “Holiday In the Pines” plus a spool of 50 weight Essential cotton thread by Connecting Threads in Caramel.

Sew Mama Sew Giveaway

Sew Mama Sew Giveaway

I will ship internationally!

You can enter twice by:
1. Leave a comment on this post telling me how you would use the mini charm packs. I love hearing about your projects!

2. Follow me either here on my blog or on Instagram (nwquiltedcat) and then leave a second comment on this blog post letting me know that you follow me.

The contest ends this Friday, December 12th at midnight Pacific Standard Time. I’ll draw a name over the weekend and contact the winner and post here on my blog.

That’s it! Hop on over to Sew Mama Sew to view all the other fabulous entries!

Good luck!

~Jennifer

Butterfly Block for Quiltmaker’s 100 Blocks, Vol10 + Giveaway

Hi everyone,

I’m so excited to share with you my first block published in Quiltmaker’s 100 Blocks magazine. My block is #958 and it appears in volume 10 which arrives at retailers this month.

My block was inspired by my son and his love of butterflies. The block has a modern twist to it because I decided to use plenty of negative space and a block (pixel style) design.

While visiting the Victoria Butterfly Gardens earlier this year on vacation, we saw this beautiful Blue Morpho butterfly.

Blue Morpho Butterfly

Blue Morpho Butterfly

Soon after, this other butterfly decided to crawl up my son’s arm much to our surprise!

I started drafting my butterfly block by sketching it out on paper and then did my fabric calculations.

Next, I cut some squares from various blue fabrics and some strips from white fabric:

Butterfly Block Components

Butterfly Block Components

I made a blue version and a pink/purple version. The blue version appears in Quiltmaker’s 100 Blocks, volume 10 and I kept the pink version.

Butterfly Block in Quiltmaker's 100 Blocks, Volume 10

Butterfly Block in Quiltmaker’s 100 Blocks, Volume 10

Here are the two blocks together:

Blue and Pink Butterfly Blocks

Blue and Pink Butterfly Blocks

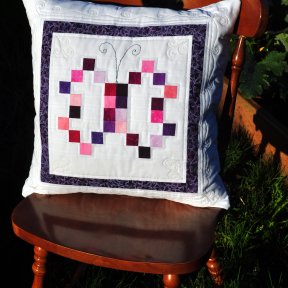
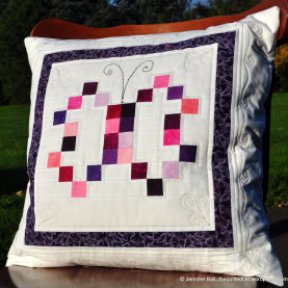
This block is very versatile and you could use it to make quilts, table runners, or pillows. I decided that I needed a cute butterfly pillow for my office so I used my pink block, some extra Kona Snow fabric, and some silver metallic thread by Superior to make an adorable pillow.

Yes, I did use metallic thread on the free-motion quilting using my domestic machine, and it turned out wonderfully.

Ready for a giveaway?
Quiltmaker is giving away 1 free copy of Volume 10 to one of my blog readers, and I’m giving away a second copy! To enter, just leave me a comment, and I will pick a winner using a random number generator at the end of the blog tour. Please leave me a way to contact you. Sometimes Blogger and WordPress do not communicate very well.

I hope that you are enjoying Quiltmaker’s 100 blocks blog tour and that you find inspiration in the many wonderful blocks!

Enjoy!
~Jennifer

Quiltmaker’s Blog Hop Starts Today!

Happy Monday, everyone!

Quiltmaker’s blog hop tour for volume 10 of the fabulous 100 Blocks issue starts today! My blog date is tomorrow where I will feature my block and have a giveaway.

For today, I want to show you what I made for this issue as a block tester. In all, I tested a dozen blocks over the course of a few months. I then had the opportunity to make a sample quilt using 3 different blocks. I called my quilt “Bali Posies” and it appears in the Block Tester’s Gallery section on page 95 in the magazine.

If you happen to be in the Golden, Colorado area between December 2014 and February 2015, all the block tester quilts are on display at Quiltmaker’s office. Wish I could go see them in person! If you do go, I’d love to see a picture.

I used 3 different blocks in the layout:
#947, Nine-Patch Posies by Kay Mackenzie
#989, French Twist by Celine Perkins
#999, Diamonds are Forever by Susan Work

The fabrics are Bali Paradise and Bali Batiks from Hoffman California Fabrics.

Here’s a look at Bali Posies:

Bali Posies Quilt Front

Bali Posies Quilt Front


Bali Posies Quilt Back

Bali Posies Quilt Back

I added some interest to the center block (#947) by applying some crystals to the center of each flower and along each leaf.

Here’s a close-up of the center block:

Bali Posies Center Block

Bali Posies Center Block

I did free-motion quilting using Aurifil 50 wt. cream thread with an all-over pattern over most of the quilt. I did some echo-quilting in the posies petals, circles in the posie centers, and some other detailed stitching in the leaves and flower pot.

I was also excited to see that Sandy George, another block tester, made a quilt using my Butterfly block (#958). Her quilt is called “Butterfly Kisses” and you can see it in the Block Tester’s Gallery on page 94 in the magazine.

Come back tomorrow and see the inspiration behind my Butterfly block and for your chance to win a copy of the magazine!

Enjoy,
~Jennifer

Forest Abstractions Bunny + Giveaway Winner

Happy Halloween, everyone!

My little guy is getting excited for trick-or-treating tonight, and I’m excited to get some more sewing time in this weekend. We carved some jack-o-lanterns last night:

Jack-o-Lanterns!

Jack-o-Lanterns!

Recently, I had the great pleasure of meeting Violet Craft in person at an open house at a local quilt shop called the Pine Needle. I’ve been eyeing her paper pieced Forest Abstractions pattern for a while so I went ahead and purchased it. I love paper piecing, but haven’t done much of it during the past year. I’m going slow and easy, working in the blocks in between other quilt projects.

I decided to use a variety of low-volume prints for the backgrounds instead of using solids. I picked up a fat quarter stack of lovely fabric from a quilt shop in Spokane called Charming Lulu when I met my sister there for a little shop hop several weekends ago. They carry a wonderful selection of modern fabrics, and I hope to visit next time I’m in Spokane.

I haven’t found a website for Charming Lulu, but they are on Facebook.

For the bunny, I chose some wonderful purple and magenta fabrics that I picked up at a quilt show last year. I’m pretty sure that I’ll use different colors for each critter in the quilt, but we’ll see.

Forest Abstractions Pattern and Fabrics

Forest Abstractions Pattern and Fabrics

Here’s a look at my completed bunny block:

Forest Abstractions Bunny

Forest Abstractions Bunny

I hope to make another block from this pattern soon.

If you participated in the Black Cat Crossing blog hop, I offered a giveaway on my post here. I used a random number generator and the lucky winner is . . . .

Carole (her blog is From My Carolina Home).

Carole, I will be emailing you today to make the arrangements.

Thanks to everyone who participated in the blog hop. I do hope that you enjoyed all the wonderful Halloween creations.

Stay tuned because I’m participating in Quiltmaker’s 100 Blocks Blog Tour in November. I have a block published in the next issue, and I can’t wait to show it to you!

Enjoy!
~Jennifer

Black Cat Crossing Blog Hop + Giveaway

Greeeeeetings, my dears! Today is my day to share with you the creations that I stitched up in my cauldron for the Black Cat Crossing blog hop. Many thanks go to Madame Samm of Sew We Quilt for encouraging people of all skill levels to brew up something to share with us. I also want to thank our fabulous cheerleader, Wendy of Why Knot Kwilt, for organizing this blog hop!

I picked up some of the Black Cat Crossing fabric by Maywood Studios at a local quilt shop that recently opened in town. I love supporting my local shops!

For my first project, I decided to do a wool felt project with just an accent of cotton fabric. One can never have too many pin cushions, right? Sew off I went to stitch up a little witch hat to keep me company in my sewing room. The hat band uses a strip of fabric from Black Cat Crossing. I used black Aurifil thread for the piecing and midnight glitter hologram thread by Superior to add some sparkle to the brim. The finished pin cushion is about 4.5 inches tall.

This pin cushion is designed by Jennifer Clemen of Cottonwood Creations.

My stitching assistants ensured the quality of this little pin cushion:

Tiger likes the witch hat

Tiger likes the witch hat

Cow is planning his revenge

Cow is planning his revenge


Witch Hat Pin Cushion

Now that I had a pin cushion ready to go, I stoked up my cauldron and set to brewing up a special creation using only Black Cat Crossing fabric!

For this project, I stretched my skill levels by creating a mini quilt and by practicing some heavy free motion quilting. I used an Aurifil cream thread for all the piecing and quilting. The pattern is Mini Swoon by Thimble Blossoms.

I modified the pattern slightly so that I could add the Black Cat Crossing border fabric in between the swoon blocks. I’m calling my finished mini quilt, “Black Cat Swoon!”

Black Cat Swoon Getting Inspected!

Black Cat Swoon

Black Cat Swoon and Mini Pumpkins

Black Cat Swoon at the Pumpkin Patch

For the backing, I used left over pieces plus my label:
Black Cat Swoon Back

I just love how this mini quilt looks, and I can easily display it in various locations around the house during the fall season.

For more inspiration, please visit my fellow Black Cat Crossing participants today:
Creatin’ in the Sticks
Living With Purpose
Moose Stash Quilting
The Quilted Cat (you are here)
Lines, Colors, and Art

For my giveaway, I’m offering up 2 fat quarters from Black Cat Crossing. Just leave me a comment on this post for an entry. You get a bonus entry if you tell me how you follow my blog, and I’ll draw a random winner from all comments on Halloween, October 31st. I’m willing to ship internationally. Sometimes WordPress and Blogger do not communicate well together so make sure that I have a way to contact you!

Black Cat Crossing Giveaway

Black Cat Crossing Giveaway

I hope you enjoyed my Black Cat Crossing projects, and that they inspire you to make something beautiful!

Happy quilting,
~Jennifer

Test Block Maker for Quiltmaker’s 100 Blocks, Vol 9

Hi everyone,

For the past 6 months or so, I’ve been a test block maker for Quiltmaker’s 100 Blocks magazine, volume 9. This issue will be available at retailers soon and contains some really fun blocks!

I can now show you the blocks that I tested and hope they inspire you to try something new! I had fun making these blocks while improving my piecing skills at the same time.

In total, I made 12 test blocks using traditional piecing, paper piecing, and applique (depending on the block). The blocks are all 12.5 x 12.5 inches unfinished.

Block #807, Spring Tulips by Nancy Mahoney

Spring Tulips designed by Nancy Mahoney

Spring Tulips designed by Nancy Mahoney

Block #808, Greetings Earthling by Sue Marsh

Greetings Earthling designed by Sue Marsh

Greetings Earthling designed by Sue Marsh

Block #810, Felicity by Ellen Murphy

Felicity designed by Ellen Murphy

Felicity designed by Ellen Murphy

Block #827, Flying Dutchman by Doris Rice

Flying Dutchman designed by Doris Rice

Flying Dutchman designed by Doris Rice

Block #844, Plant Perfect by Amanda Murphy

Plant Perfect designed by Amanda Murphy

Plant Perfect designed by Amanda Murphy

Block #845, Tweet-ness by Heidi Pridemore

Tweet-ness designed by Heidi Pridemore

Tweet-ness designed by Heidi Pridemore

Block #849, Tribal Crossing by Anita Grossman Solomon

Tribal Crossing designed by Anita Grossman Solomon

Tribal Crossing designed by Anita Grossman Solomon

Block #865, Spin Cycle by Gudrun Erla

Spin Cycle by Gudrun Erla

Spin Cycle by Gudrun Erla

Block #873, Hovering Stars by Bonnie Hunter

Hovering Stars designed by Bonnie Hunter

Hovering Stars designed by Bonnie Hunter

Block #875, Robo-Bop by Kimberly Jolly

Robo-Bop designed by Kimberly Jolly

Robo-Bop designed by Kimberly Jolly

Block #892, Love Letters by Amy Rullkoetter

Love Letters designed by Amy Rullkoetter

Love Letters designed by Amy Rullkoetter

Block #898, Two Tulips by Margie Ullery

Two Tulips designed by Margie Ullery

Two Tulips designed by Margie Ullery

I’m continuing to be a test block maker for volume 10, which will be published later this year.

Quiltmaker is sponsoring a blog hop to celebrate the publication of volume 9 so check it out!

Enjoy!
~Jennifer

Giveaway Winner and Aurifil January BOM Block

Hi everyone,

I drew a random number from all the comments on my Wake Up to Kona blog post . . . drum roll please . . .

The winner is Diane from my studioQ. Congratulations! I have sent you an email and will be mailing your 4 Kona fat quarters soon.

I hope everyone enjoyed the blog hop and a big thank you to Madame Samm and Carol, our cheerleader!

I’m participating in several BOMs this year, one of which is the Aurifil BOM starting this month! I use Aurifil cotton 50 wt thread exclusively for all of my piecing because of the high quality and consistency of the thread. It sews like a dream in my Bernina!

January’s block is designed by Brigitte Heitland of Zen Chic.

I had a nice piece of Kona Cotton Shadow in my stash that I originally had planned to use on another project. I’ve moved onto a different background piece (which I’ll post about soon), so decided to use this lovely light gray for this BOM. The red and black fabrics are pulled from my stash and come from different fabric lines. I really love how the black and red pop against the gray background.

Aurifil January BOM

Aurifil January BOM

To get the pattern and to learn more about the Aurifil BOM, please visit their blog here.

Happy quilting and hope you get a chance to sew this weekend!
~Jennifer

Wake Up to Kona on the Beach + Giveaway!

Happy Monday, everyone!

Today is my day to share the project that I made for the Wake Up to Kona blog hop, and I’m so excited! I’d like to give a big thanks to Madame Samm, our wonderful hostess and supporter of all things quilty and our great cheerleader, Carol, who inspires us all.

We have great sponsors for this blog hop – Amanda Murphy (author of Quilt Essentials), Robert Kaufman (all those delicious Kona solids), and Aurifil threads that keep us in stitches!

For my project, I started with Kona black as my background color and added this delicious grouping of colors:

Beautiful Kona solids!

Beautiful Kona solids!


The colors are: #110 Peony, #141 Carnation, #1062 Candy Pink, #1066 Cerise, #24 Petunia, #1484 Lupine, #1383 Violet, #188 Hibiscus, #1005 Aqua, #1009 Azure, #442 Capri, and #1064 Caribbean.

Next, I selected the Night Sky pattern by Jaybird Quilts for its striking beauty! This quilt uses her sidekick ruler to create the triangle and diamond shapes that are used in the construction of the quilt. Each starbust (or starfish?) has 4 different shades of a color group.

I pieced the entire quilt top using Aurifil threads, 50 wt (#2000 light sand color and #2692 black color).

I used Superior Threads So Fine #50 in Genoa Gray because I really wanted the quilting to stand out against the black background.

We took the finished quilt to the beautiful Oregon Coast this weekend to take some photographs. I had my hubby and son be my scouting location/photography assistants, and I think they did a wonderful job.

Since my cats aren’t too keen on traveling, my dog (and best hiking buddy) became my cat quilt inspector stunt-double. (Yes, he earned extra dog cookies for his hard work!).

Here are some pictures of my finished Night Sky quilt using Kona cotton solids:

Me and Hubby Holding Night Sky (dog legs too)

Me and Hubby Holding Night Sky (dog legs too)

Night Sky with My Dog (cat quilt inspector stunt-double)

Night Sky with My Dog (cat quilt inspector stunt-double)

Me holding the quilt in the wind!

Me holding the quilt in the wind!

Night Sky Quilt - starbursts resemble starfish!

Night Sky Quilt – starbursts resemble starfish!

Night Sky Quilt - backside

Night Sky Quilt – backside

These last two pictures show the free-motion quilting that I did using the Genoa Gray thread. The quilting alone took me 12 hours! I did a swirly pattern in the black background and did some straight-edge echo quilting in the colored starbursts.

While I was doing the quilting, I ran out of thread – yikes! I called local quilt stores within an hour of my house, but no one had the same thread in stock. Fortunately, I was able to order the thread from Superior Threads directly via 2-day shipping and completed it in time.

I really love how the free-motion swirls accent the Night Sky stars:

Night Sky Quilting Detail

Night Sky Quilting Detail

Closeup of the quilting

Closeup of the quilting

I hope you enjoyed my project and please check out the other bloggers on the last 2 days of the hop!
January 20th
More Stars in Comanche
Buzzing and Bumbling
Quilting Quietly
Grammie Q’s
The Quilted Cat (you are here!)
The Quilting Queen Online
Lauraluvsloons
Sew Incredibly Crazy

January 21st
Just Sew Sue
Pigtales and Quilts
Miss Priss Quilts
Charlottes Creation
Childlike Fascination
Renee Luvs Quilting
Cherry Blossoms
Sew We Quilt

I am giving away 4 Kona cotton solid fat quarters! Just leave me a comment to enter. If you follow my blog, let me know how you follow for a second entry. I will ship internationally.

Wake Up to Kona Giveaway

Wake Up to Kona Giveaway

Happy quilting!
~Jennifer