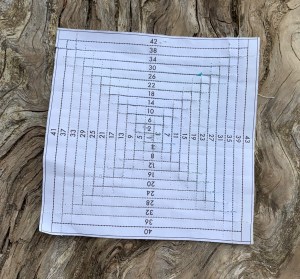
I started working on hand piecing my Tula Nova quilt during summer of 2020 and just finished the binding in October 2021. I’m going to call my quilt “Tabby Nova” because I used a great deal of Tabby Road fabric by Tula Pink (now out-of-print).
This quilt is entirely hand pieced using a method called English Paper Piecing or EPP for short. In EPP, you use paper templates and baste them to fabric, using either thread basting or glue basting. I use the glue basting method because it is much faster. I used Aurifil 50 weight threads for the piecing, in colors to match the fabrics.
Once the pieces are sewn together and stable, you remove the paper backings. The advantage to EPP over machine sewing is that this method is portable so you can take your sewing with you. I often stitch while waiting for my son at sports or other appointments. I even stitched the initial center block while camping last August.
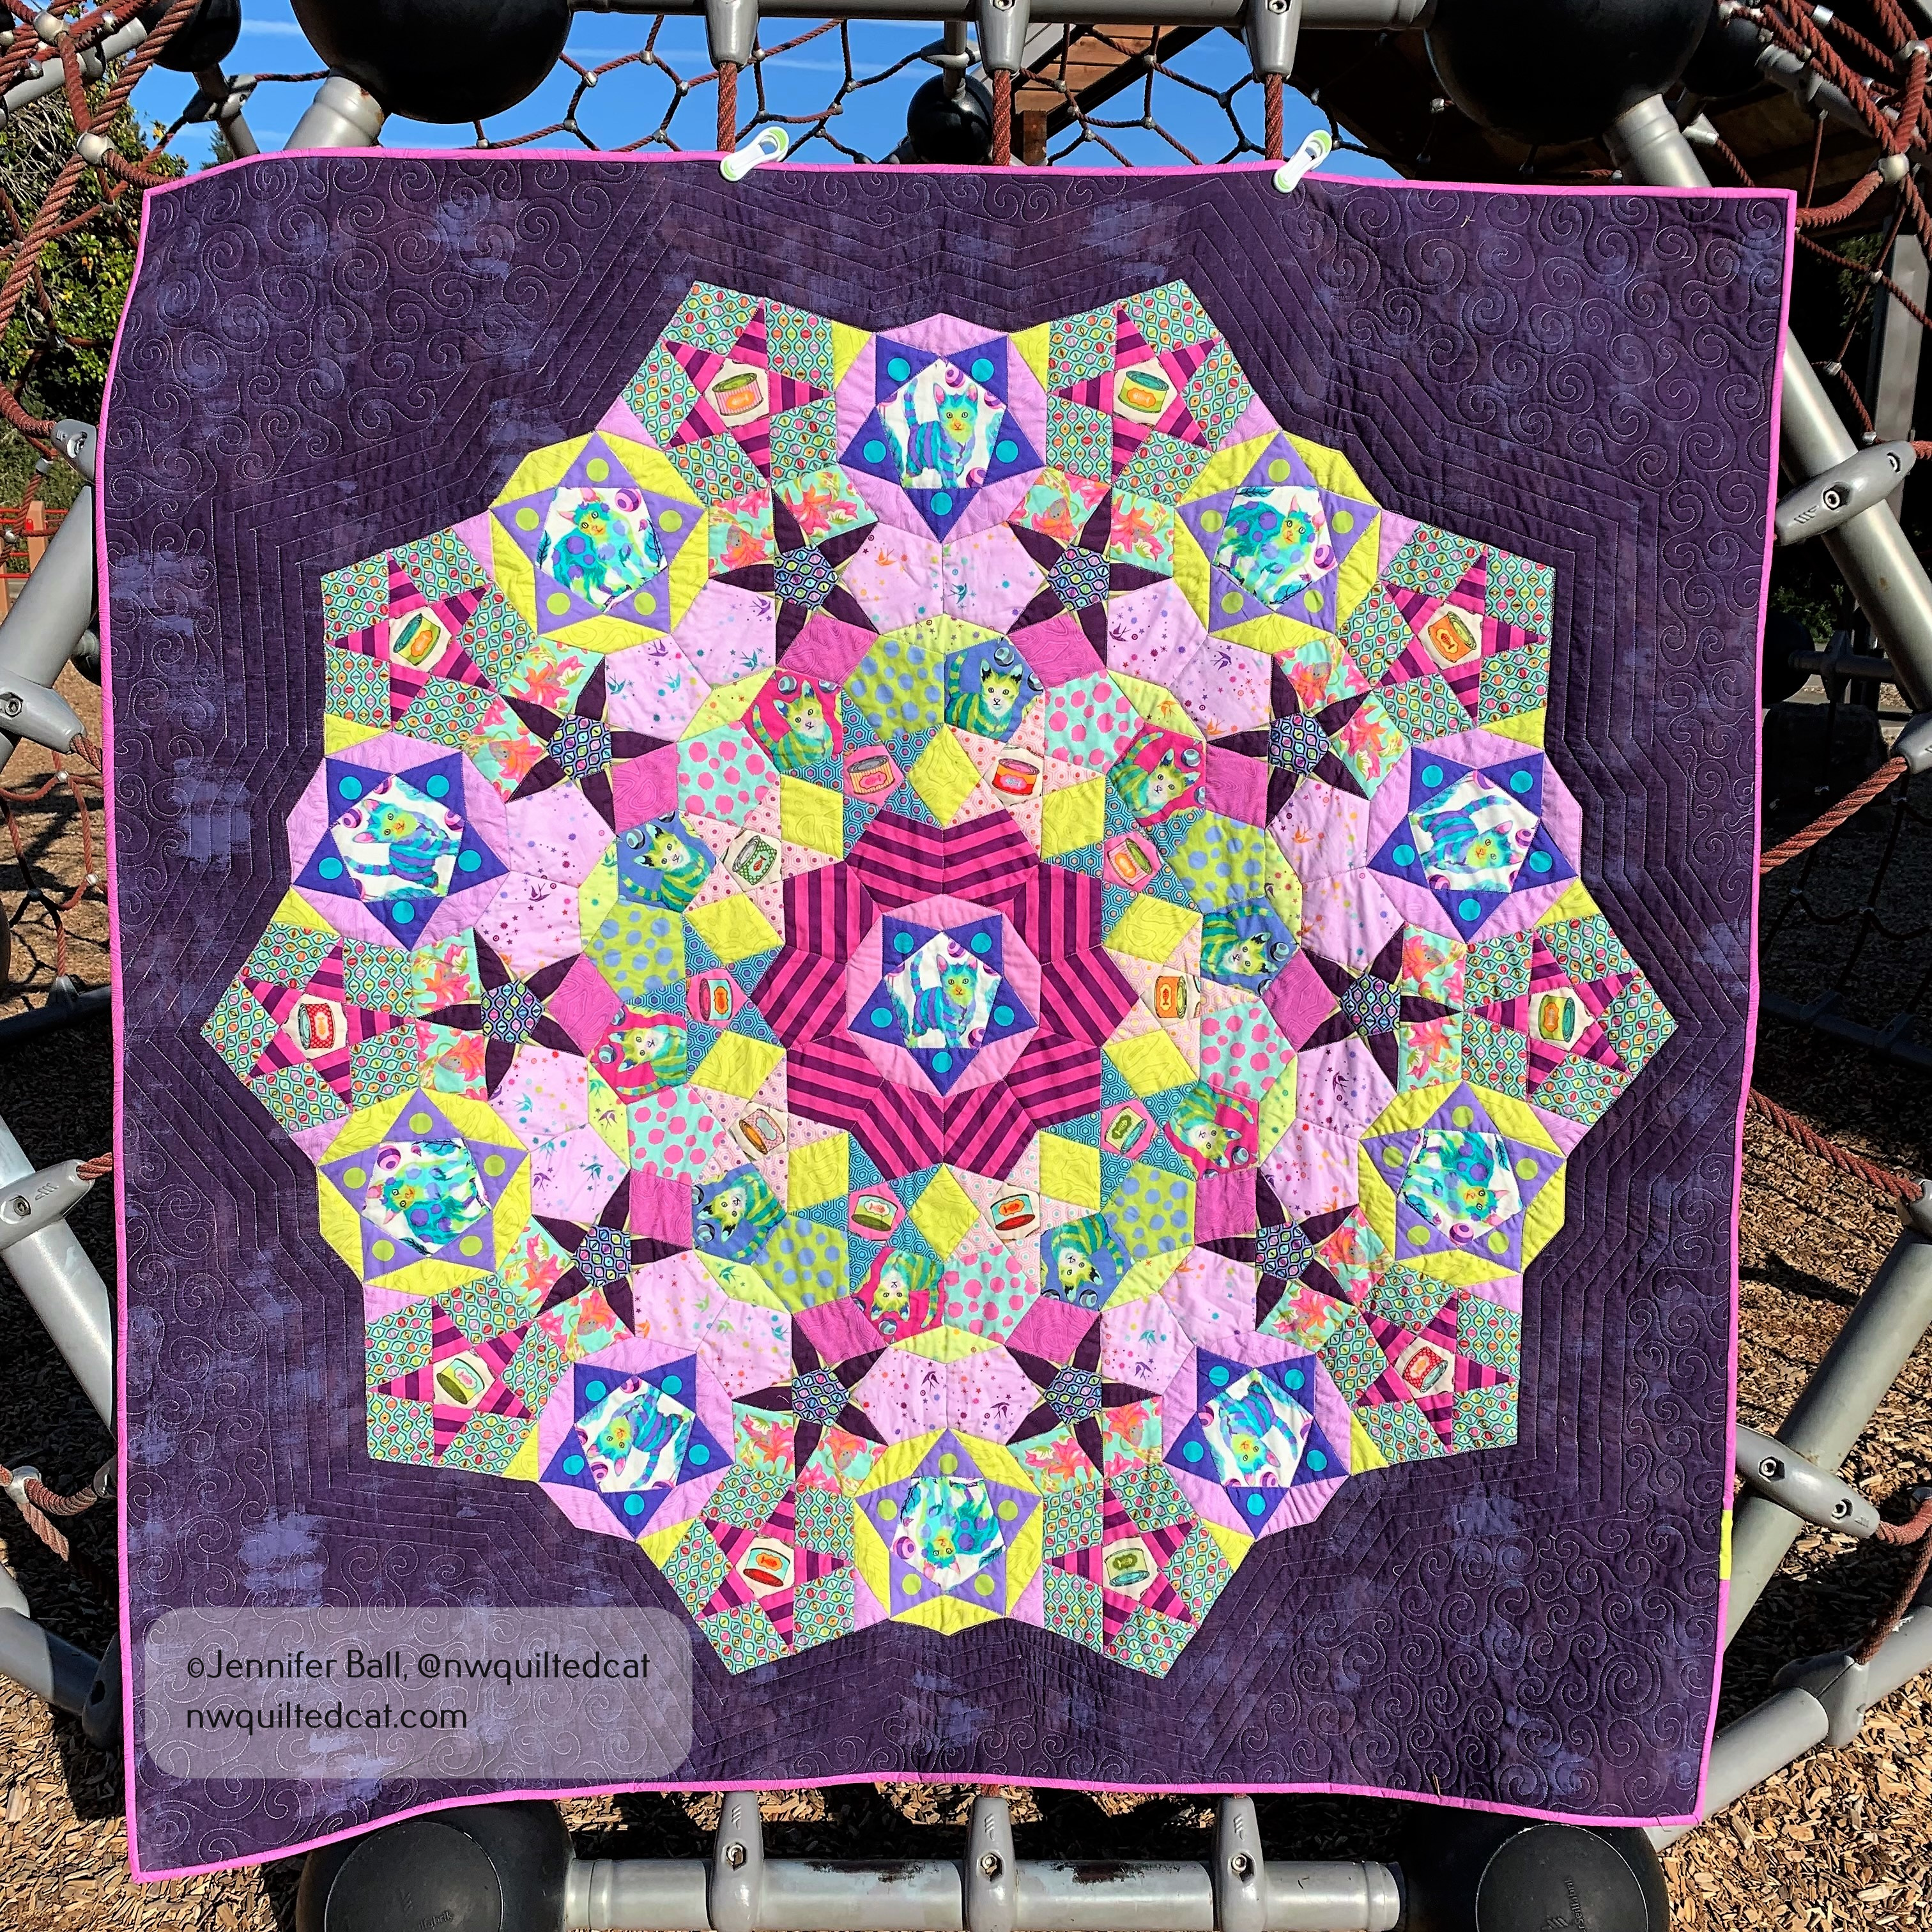
I decided to quilt my Tabby Nova using a combination of ruler work and some free-motion swirls. I used straight lines to echo the pieced shape out into the background 5 times. Then, I quilted swirls in the remaining spaces. I used a Rainbow thread called “Lilac Bouquet” by Superior Threads, which is variegated and beautifully accents the colorful fabric.
My backing is another out-of-print wide back fabric by Tula Pink called Free Fall with large dots and birds. I had this small piece in my stash for a few years, and I thought it went pretty well with the quilt top. The backing fabric is a purple Moda grunge, and I used Tula’s True Colors in Tourmaline Mineral for the binding with a small color burst of Citrine Mineral on the lower right-hand side.
Are you ready to see this quilted explosion of color?? Here are a few pictures that I took this weekend, with the help of some very special quilting inspectors and assistants.
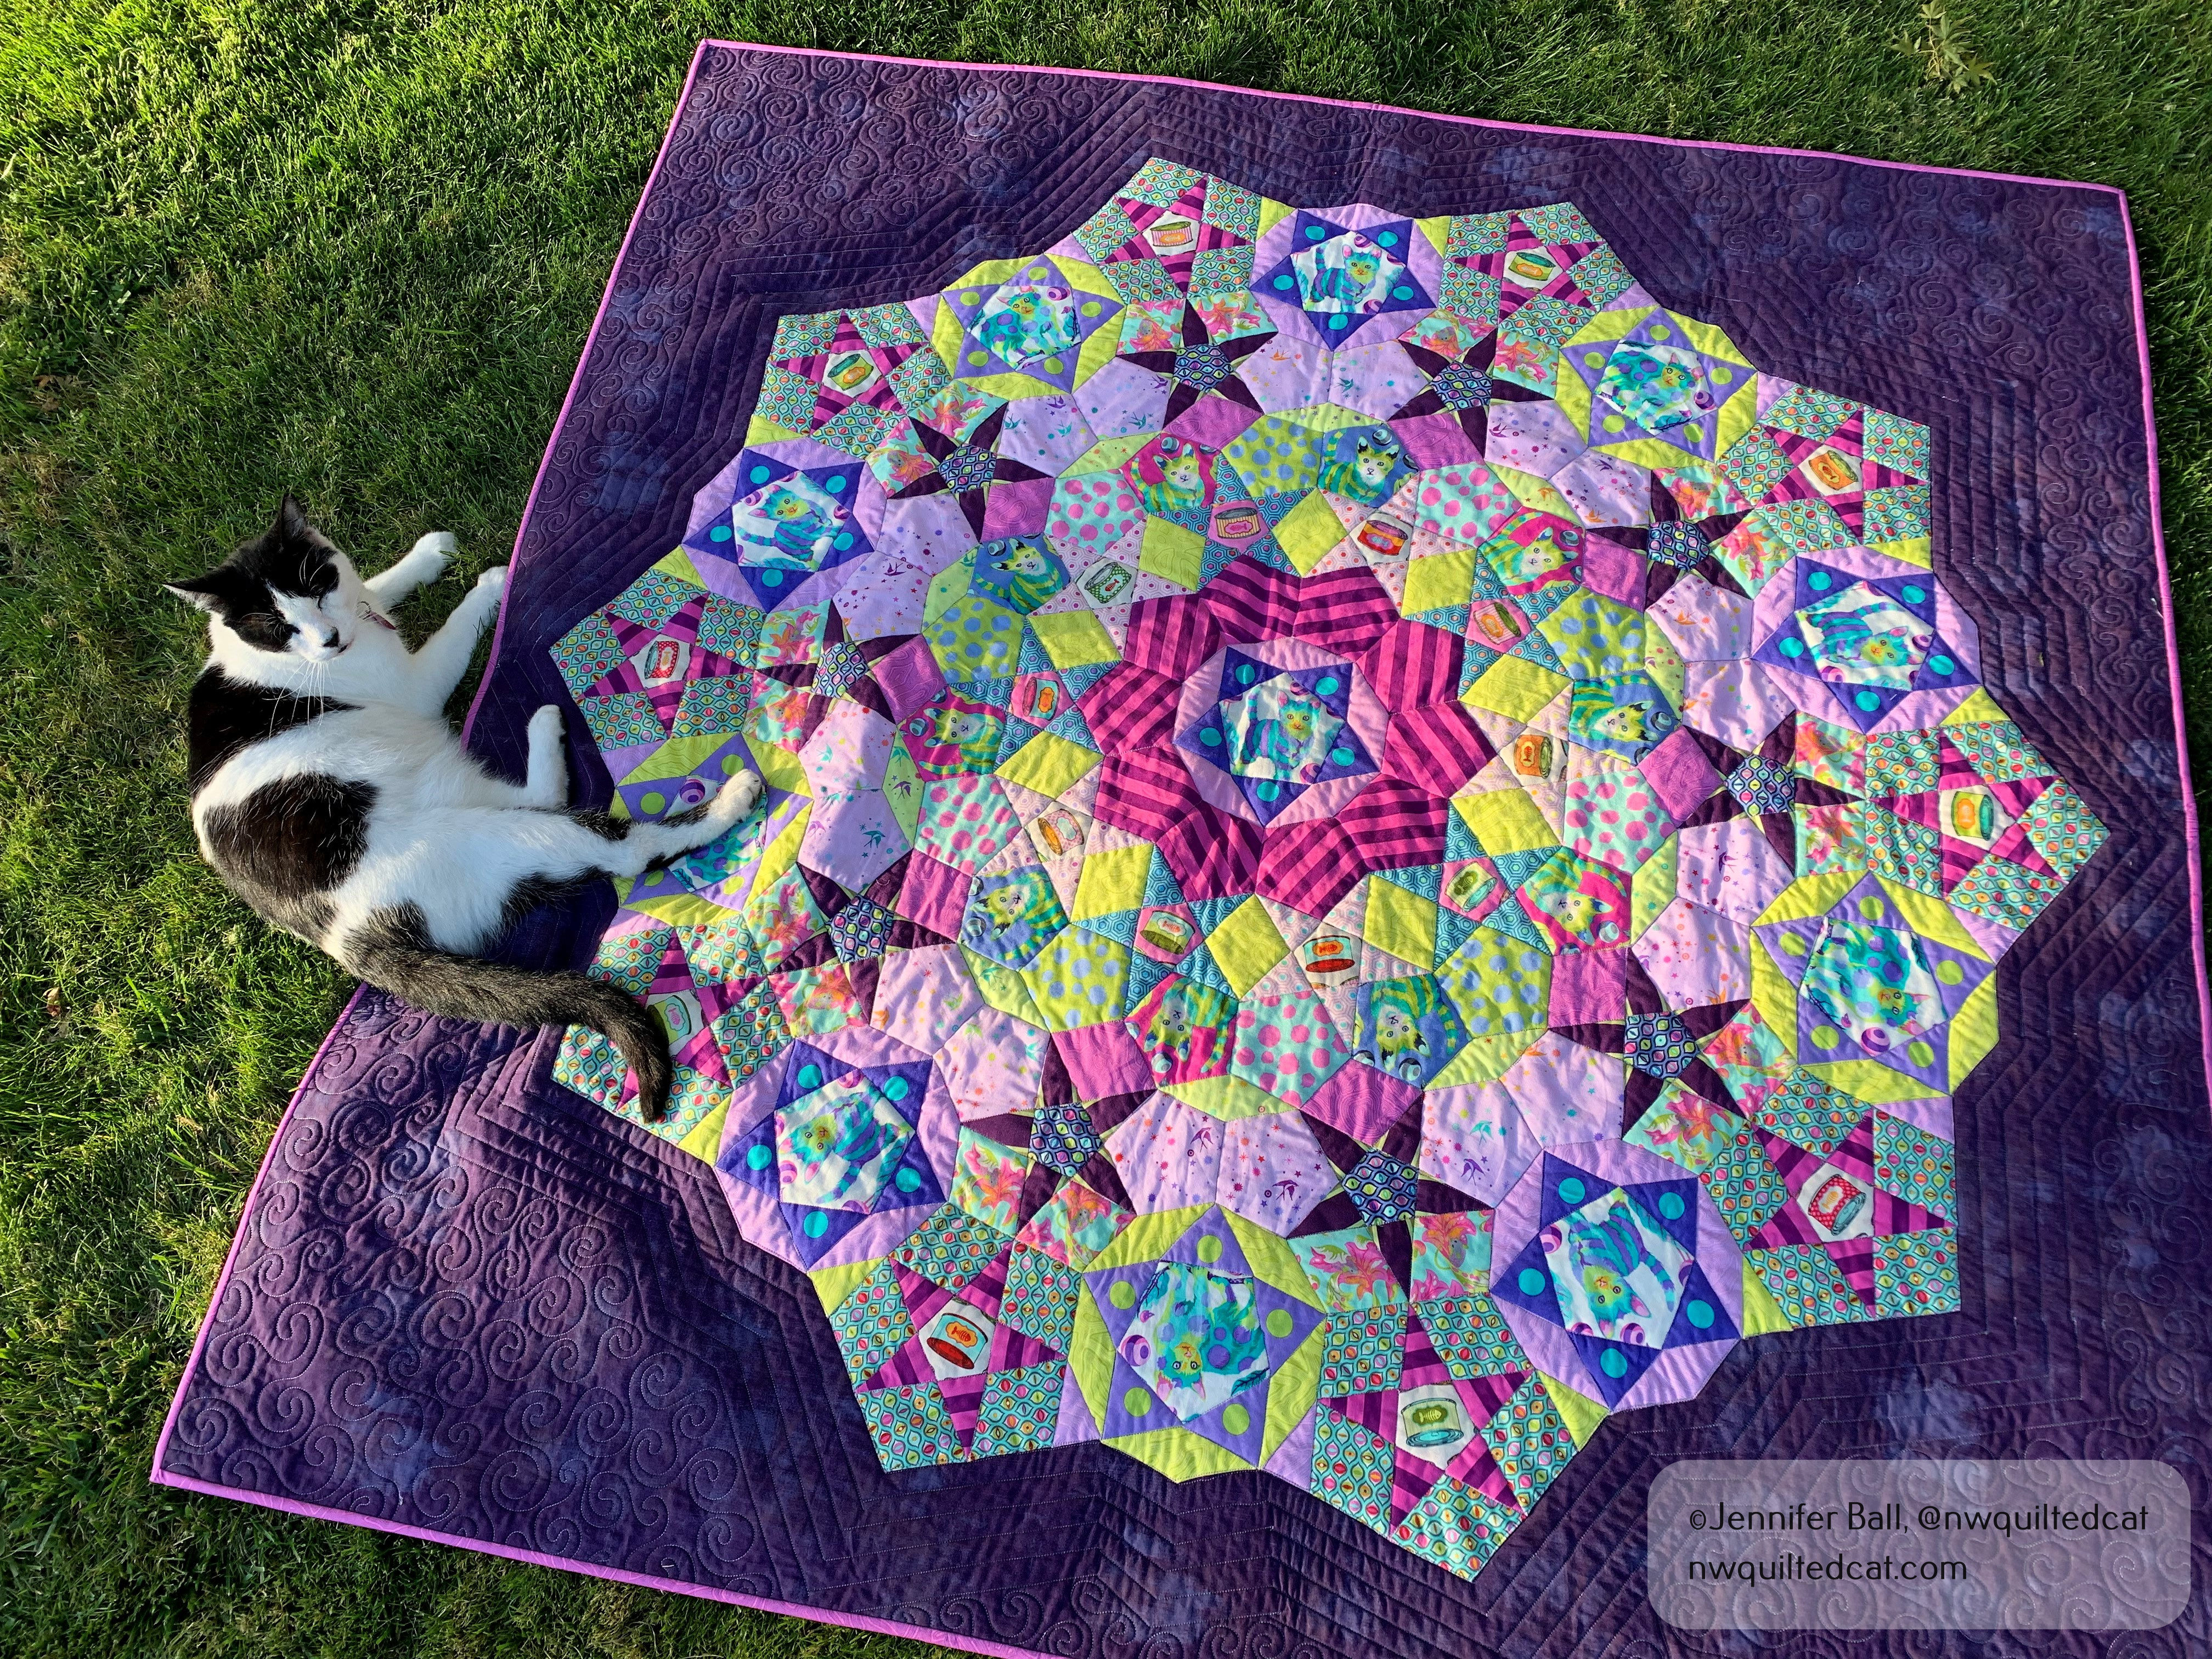
My “Tabby Nova” with the fall leaves and my husband’s feet!“Tabby Nova” on a play structure at a local park“Tabby Nova” back“Tabby Nova” getting a quality cat scan from Cow in the dappled sunlight“Tabby Nova” getting a second inspection by our neighbor’s cat. Do you see him?
I really enjoyed making this Tula Nova quilt. It is my first completed quilt using EPP. I have since started a second quilt called La Passacaglia using Tula Pink fabrics. This one is going to be huge and take more than a year to complete.
I haven’t blogged much this summer, but I have been doing a little sewing, a little gardening, and a little hiking. I will share some of these experiences over the next few posts.
One project that I did complete is the hand-piecing of my Tula Nova quilt. This quilt is an English Paper Pieced (EPP) design, meaning that all sections are individually stitched together by hand rather than by machine. Hand piecing does take much longer than machine piecing, but EPP projects are portable. I enjoyed being able to work on this project while traveling, camping, sitting in the backyard, or watching TV.
I worked on my last block while in my backyard, with my dog sitting lazily in the grass and my cat snoozing in the chair beside me. Here’s a look at my last block:
Last Tula Nova block!
Yep, that light blue print is really little cat eyes and the white center is a tin of cat food! I decided to do a cat theme for my Tula Nova by using many prints from her Tabby Road line (now out-of-print) that I had in my stash.
Once I stitched in my final block, the main body of my quilt was completed. I took it with me for some photographs while hiking earlier this summer.
My Tabby Road themed Tula Nova quilt at Fort Rock, Oregon (before basting to a background fabric)
See those feet in the photo? I asked my husband and son to hold up the quilt so I could get a picture of it with the rock formations in the background. With a few eye rolls, they agreed.
To finish the quilt flimsy, the pattern instructs you to applique the blocks to a background. I auditioned 5 or 6 different fabrics, but settled on a deep purple Grunge background. I first spray basted the top to the backing, and then machine basted using a very long stitch. I didn’t want the top to shift while I hand-appliqued the blocks.
What you don’t see in the picture below is my cat, Romeo, sitting under the quilt and “helping” me!
Hand-appliquing the top to the background
After I finished the applique work, I removed all of the machine basting stitches. Here’s a look at the completed quilt flimsy:
Tula Nova appliqued to the Grunge background
I really love how this deep purple background accents this quilt overall and pulls out the deep purple stars in the flimsy.
Next, I carefully cut a circle on the backside of the background, about an inch or so inside the applique stitching line. This step is not only to remove the excess background fabric, but also to remove the EPP papers from the last round. Here’s a look at the backside of the quilt flimsy with all the papers removed:
I have not yet quilted my Tula Nova, but this quilt flimsy is first in my to-quilt pile this fall. I will show you pictures when I finish the quilting!
If you want to piece your own Tula Nova quilt, you can purchase the pattern, paper templates, and acrylic templates from the Fat Quarter Shop. I highly recommend purchasing the acrylic templates because they include the seam allowance and make it so much easier to cut out the pieces.
I recently made the Take A Stand bag from ByAnnie patterns, and I blogged about it here. I then decided to create the companion tool organizer called Running with Scissors using similar fabrics from Tula Pink.
Isn’t the name fun? This organizer is really a clever zipped tote that you can use to carry your quilting tools to a class or a retreat or use it at home to save space on your sewing table.
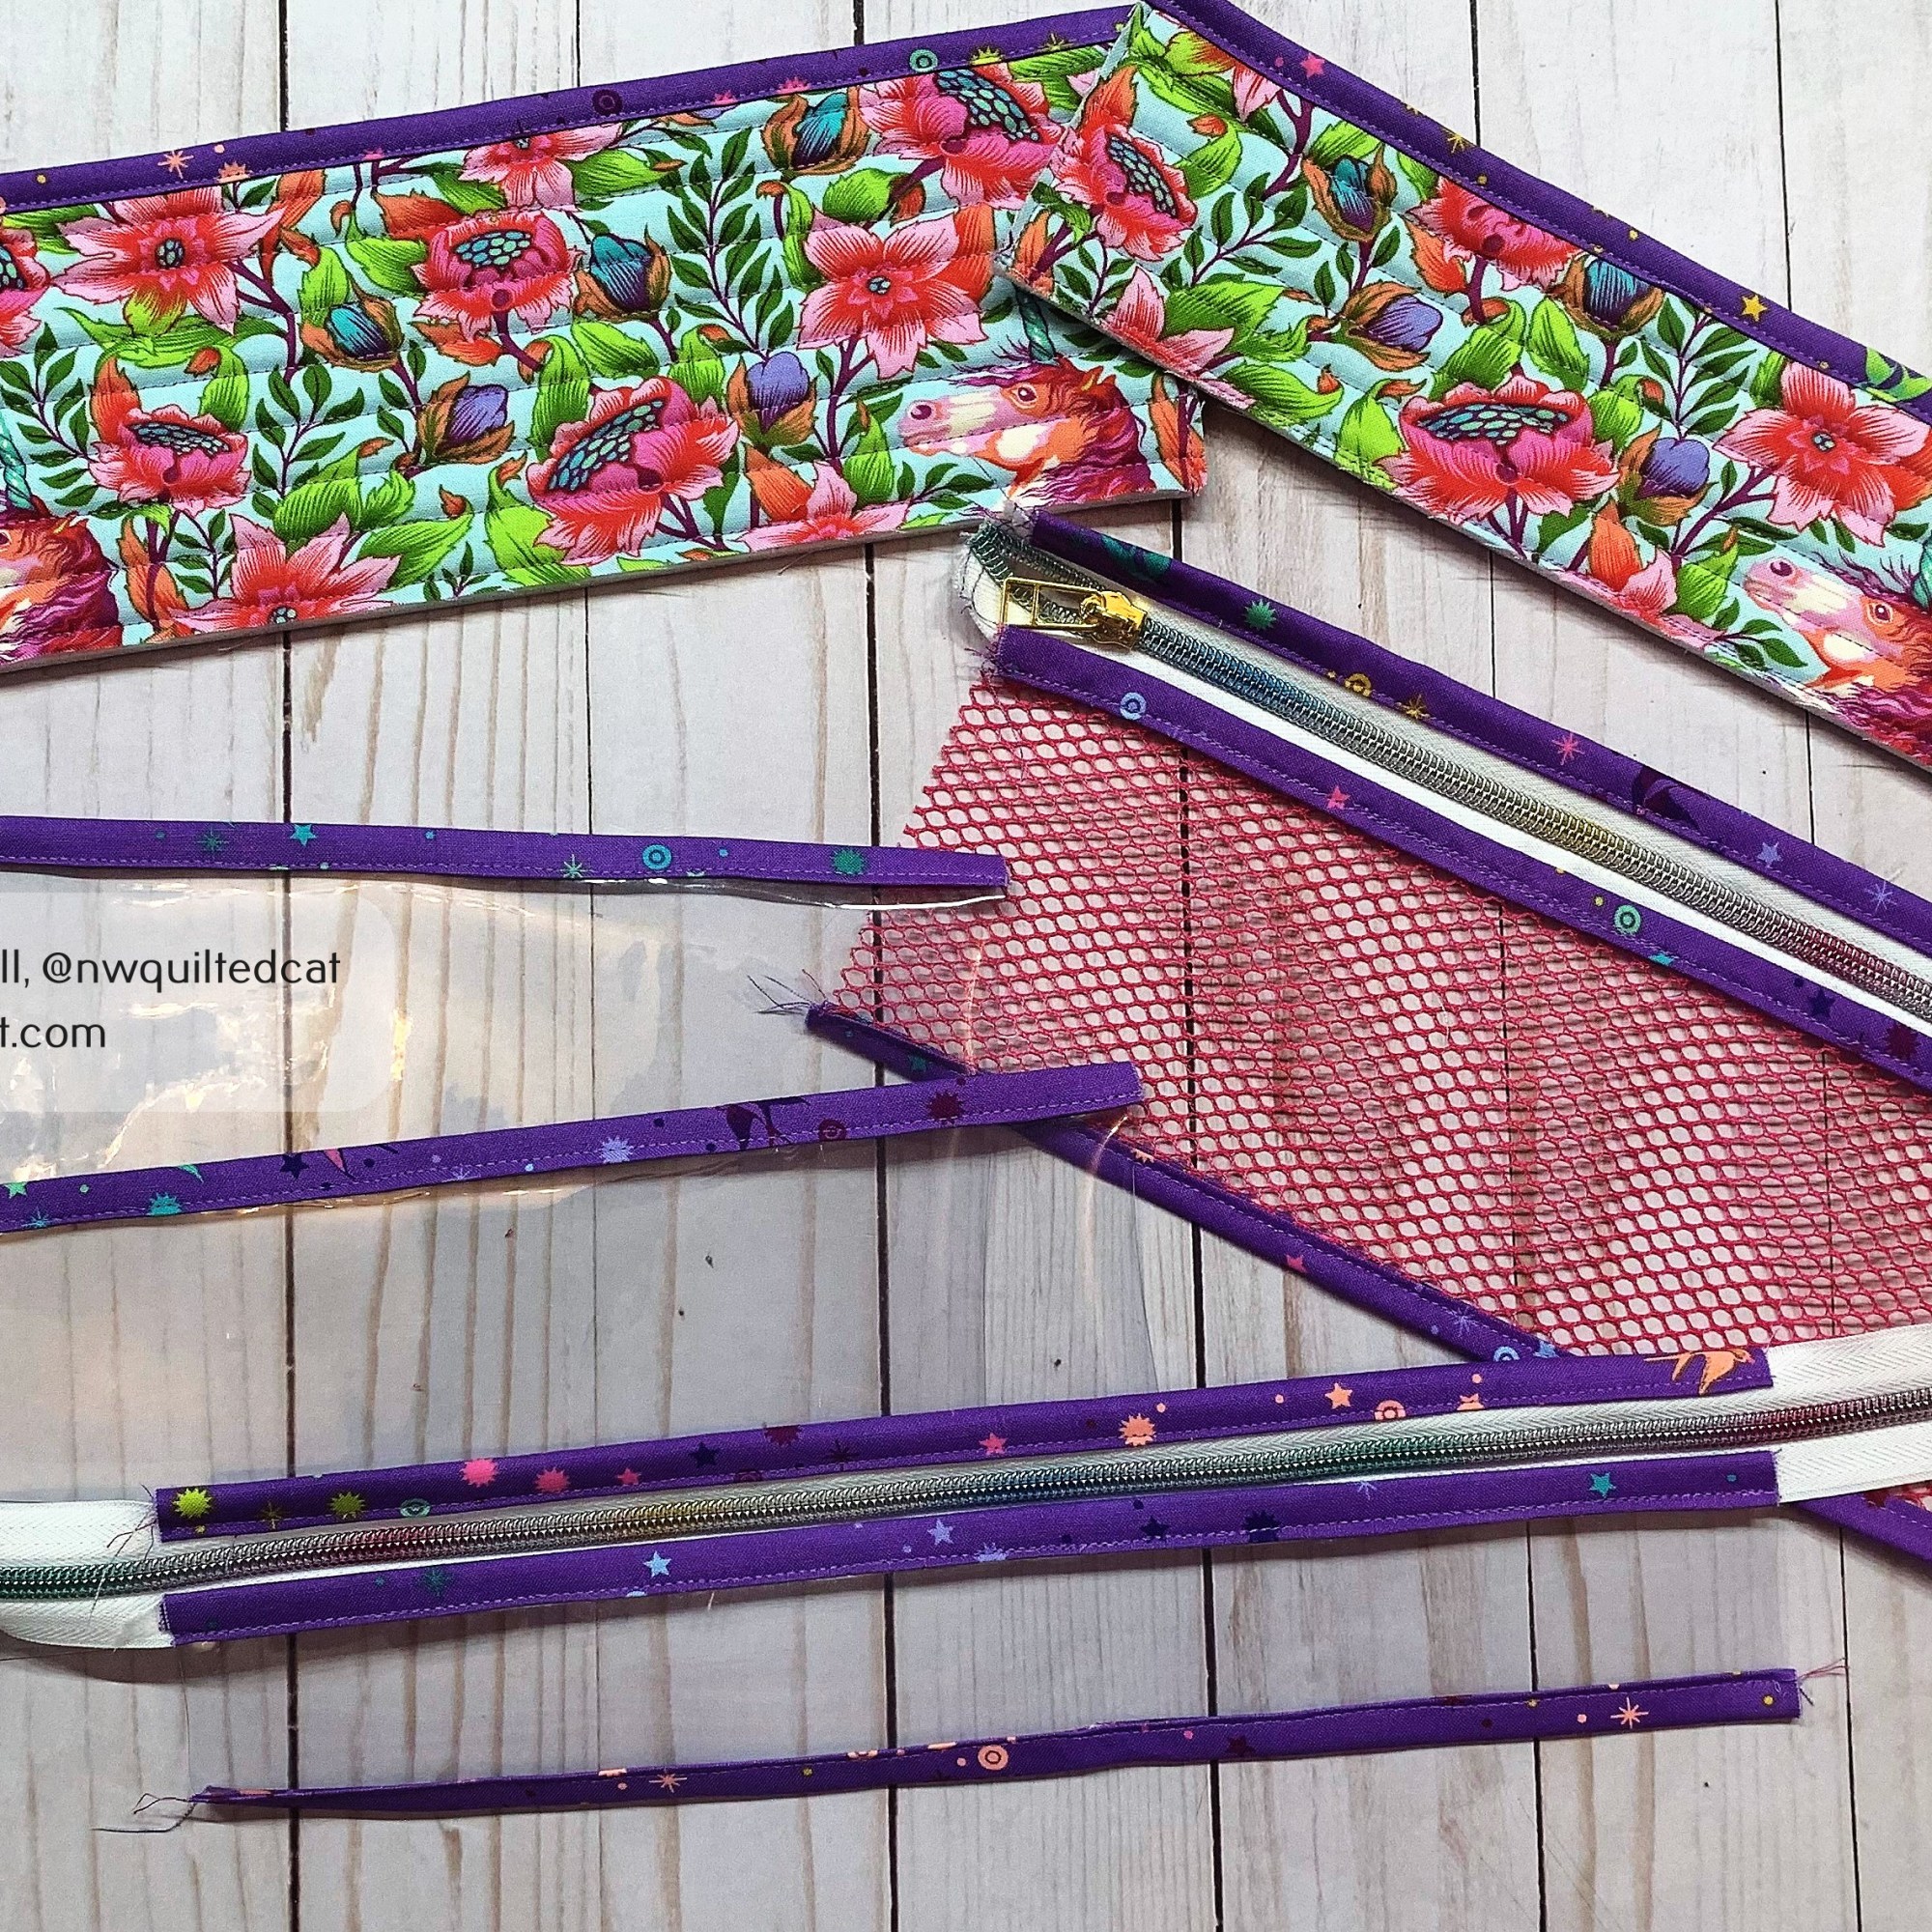
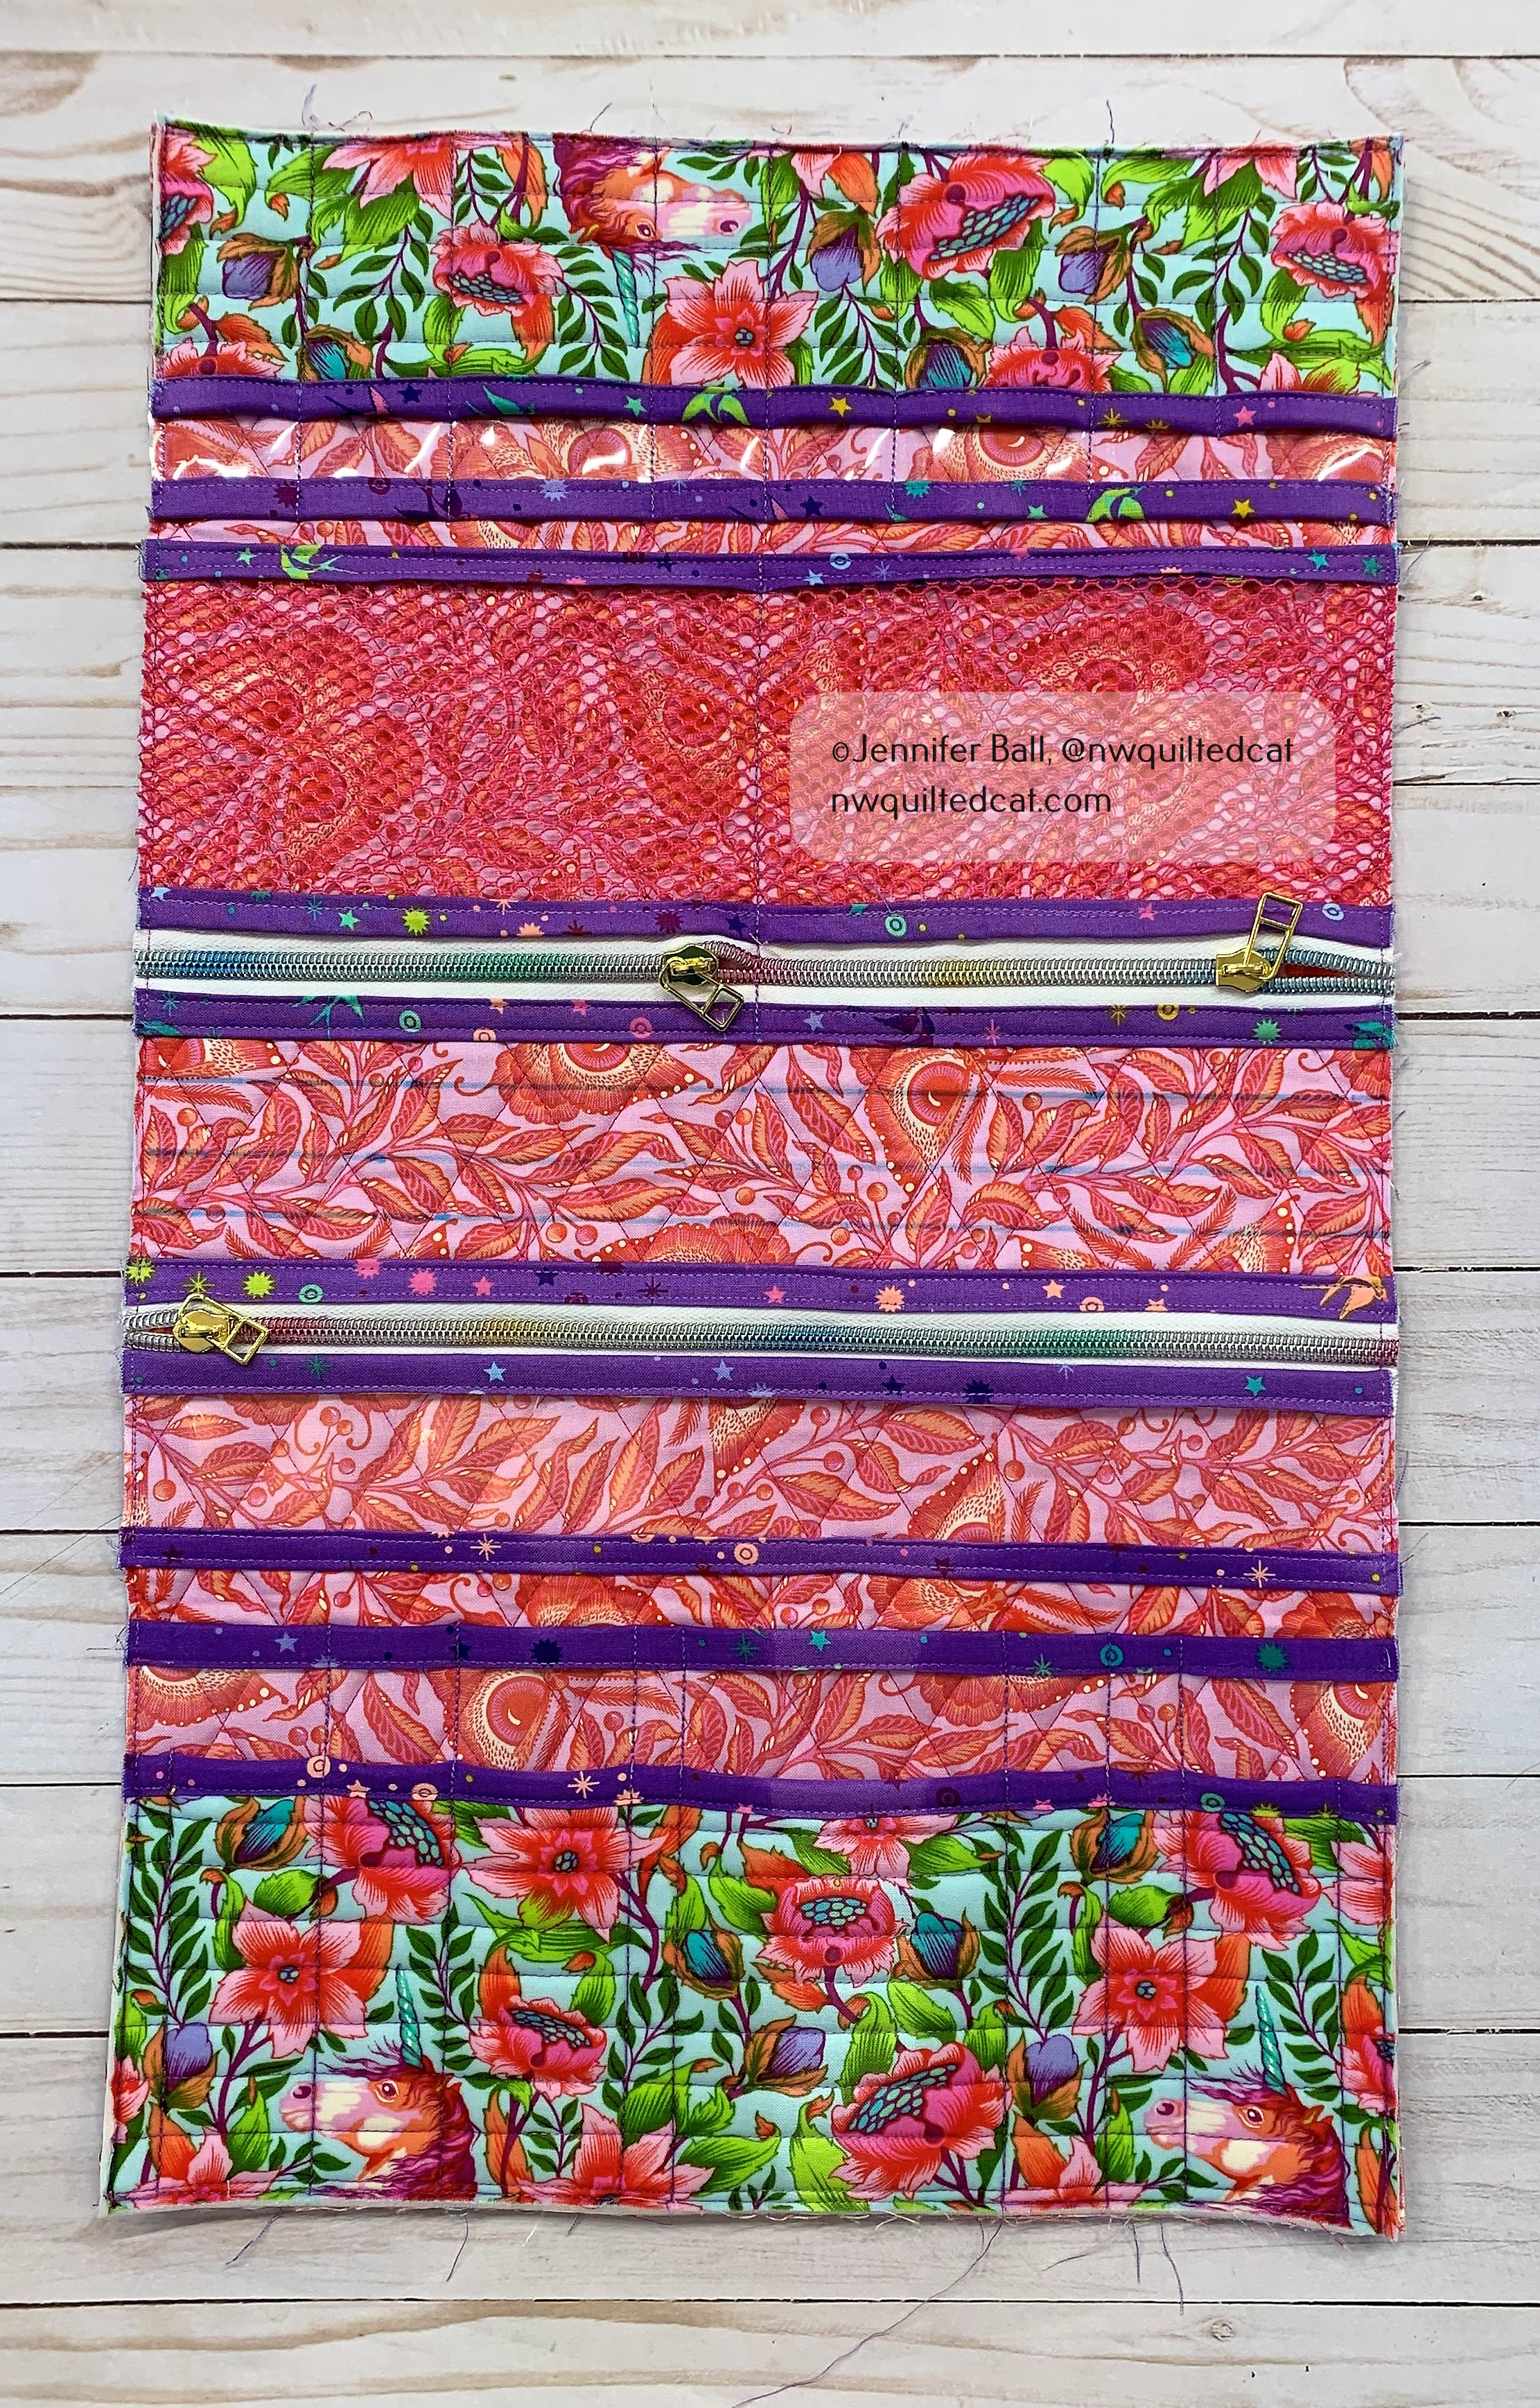
I used Tula Pink’s Pinkerville line with its beautiful unicorn as my front pocket centerpieces. This organizer has 2 large quilted fabric pockets with zippers on the outside. You’ll find smaller inside pockets made out of mesh, vinyl, and quilted fabric, all sized nicely to fit a variety of tools.
Here’s a look at the organizer once I had sewn on the outer pockets and the inner pockets, but before I added the center facing to the inside.
For me, one of the tricky parts is attaching the outer zipper and binding. When you purchase this pattern, it comes with a $5 off coupon for the accompanying video from Annie, making it free. I highly recommend the video, and I watched it while attaching the binding so I could pause and re-watch as needed. I also use Clover Clips rather than pins to avoid poking myself and because they are just so much easier to use.
Attaching the Binding
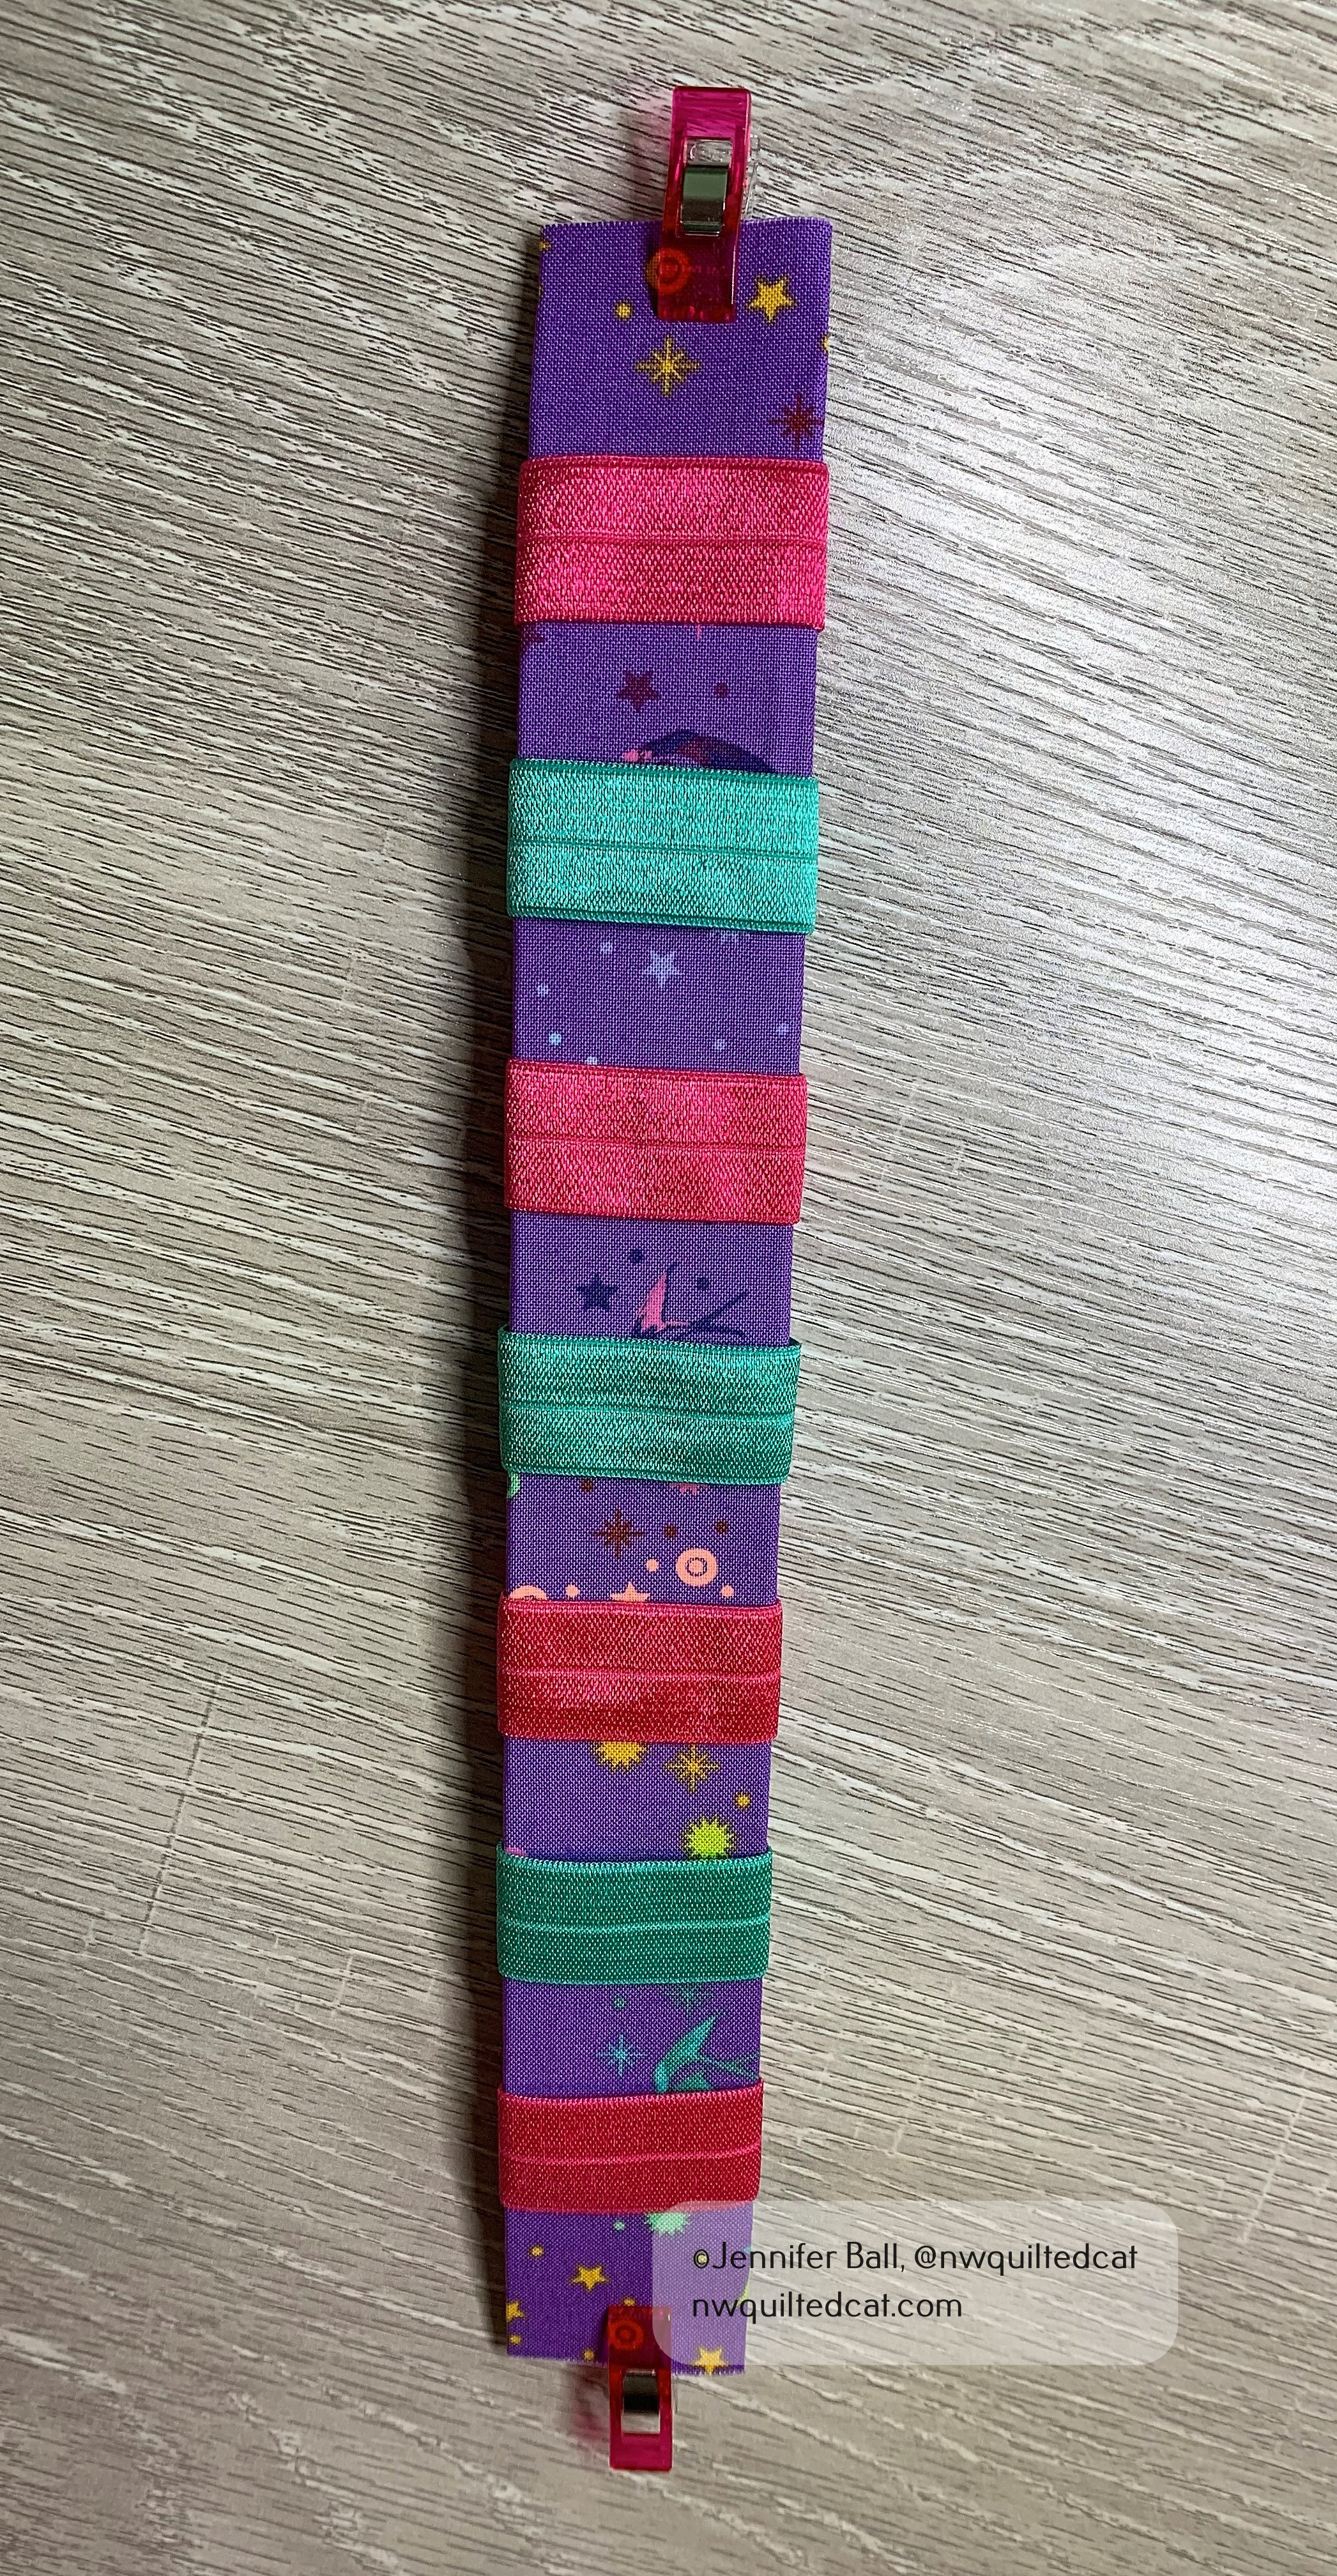
The inside center facing uses clever elastic loops to hold a variety of items from sewing machine feet to bobbins to thread. I had 2 colors of elastic on hand so I decided to use both colors by alternating them on the facing.
Inside Center Facing
Once I had sewn the inside center facing, then I just needed a few finishing details such as zipper pulls to complete my Running with Scissors tool case!
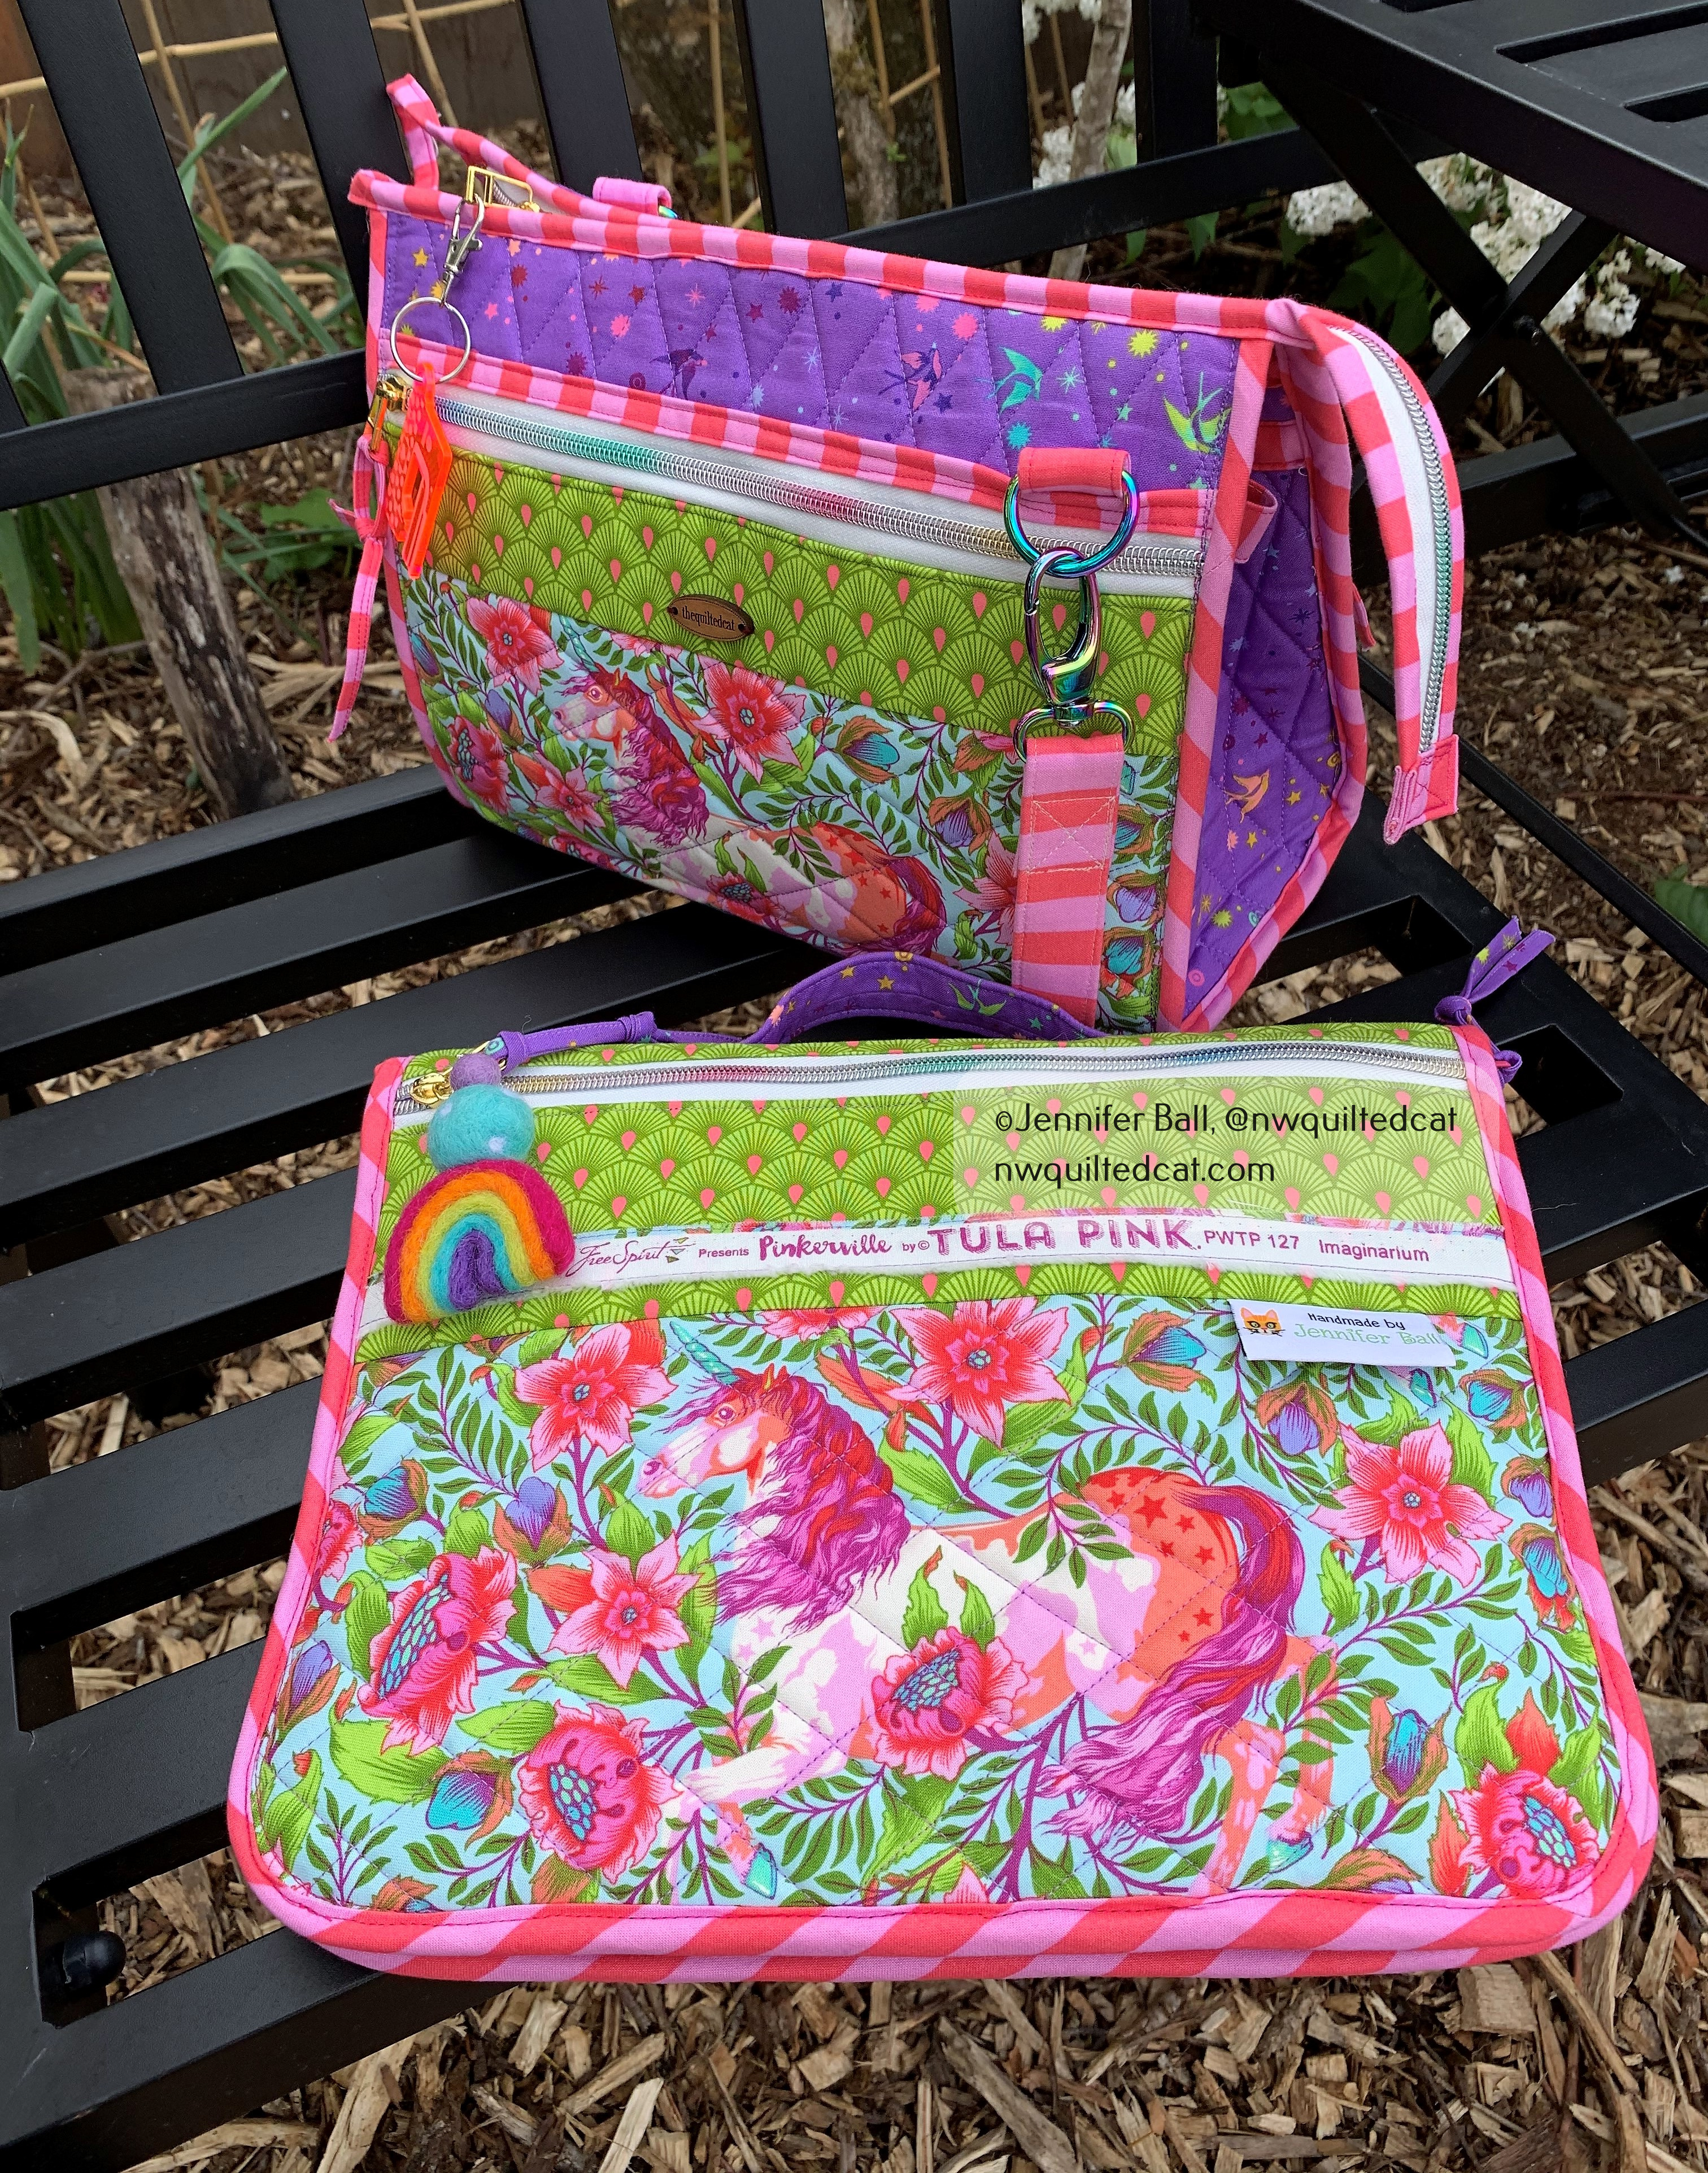
Here’s a look at the front of the completed case:
Completed Running with Scissors Case
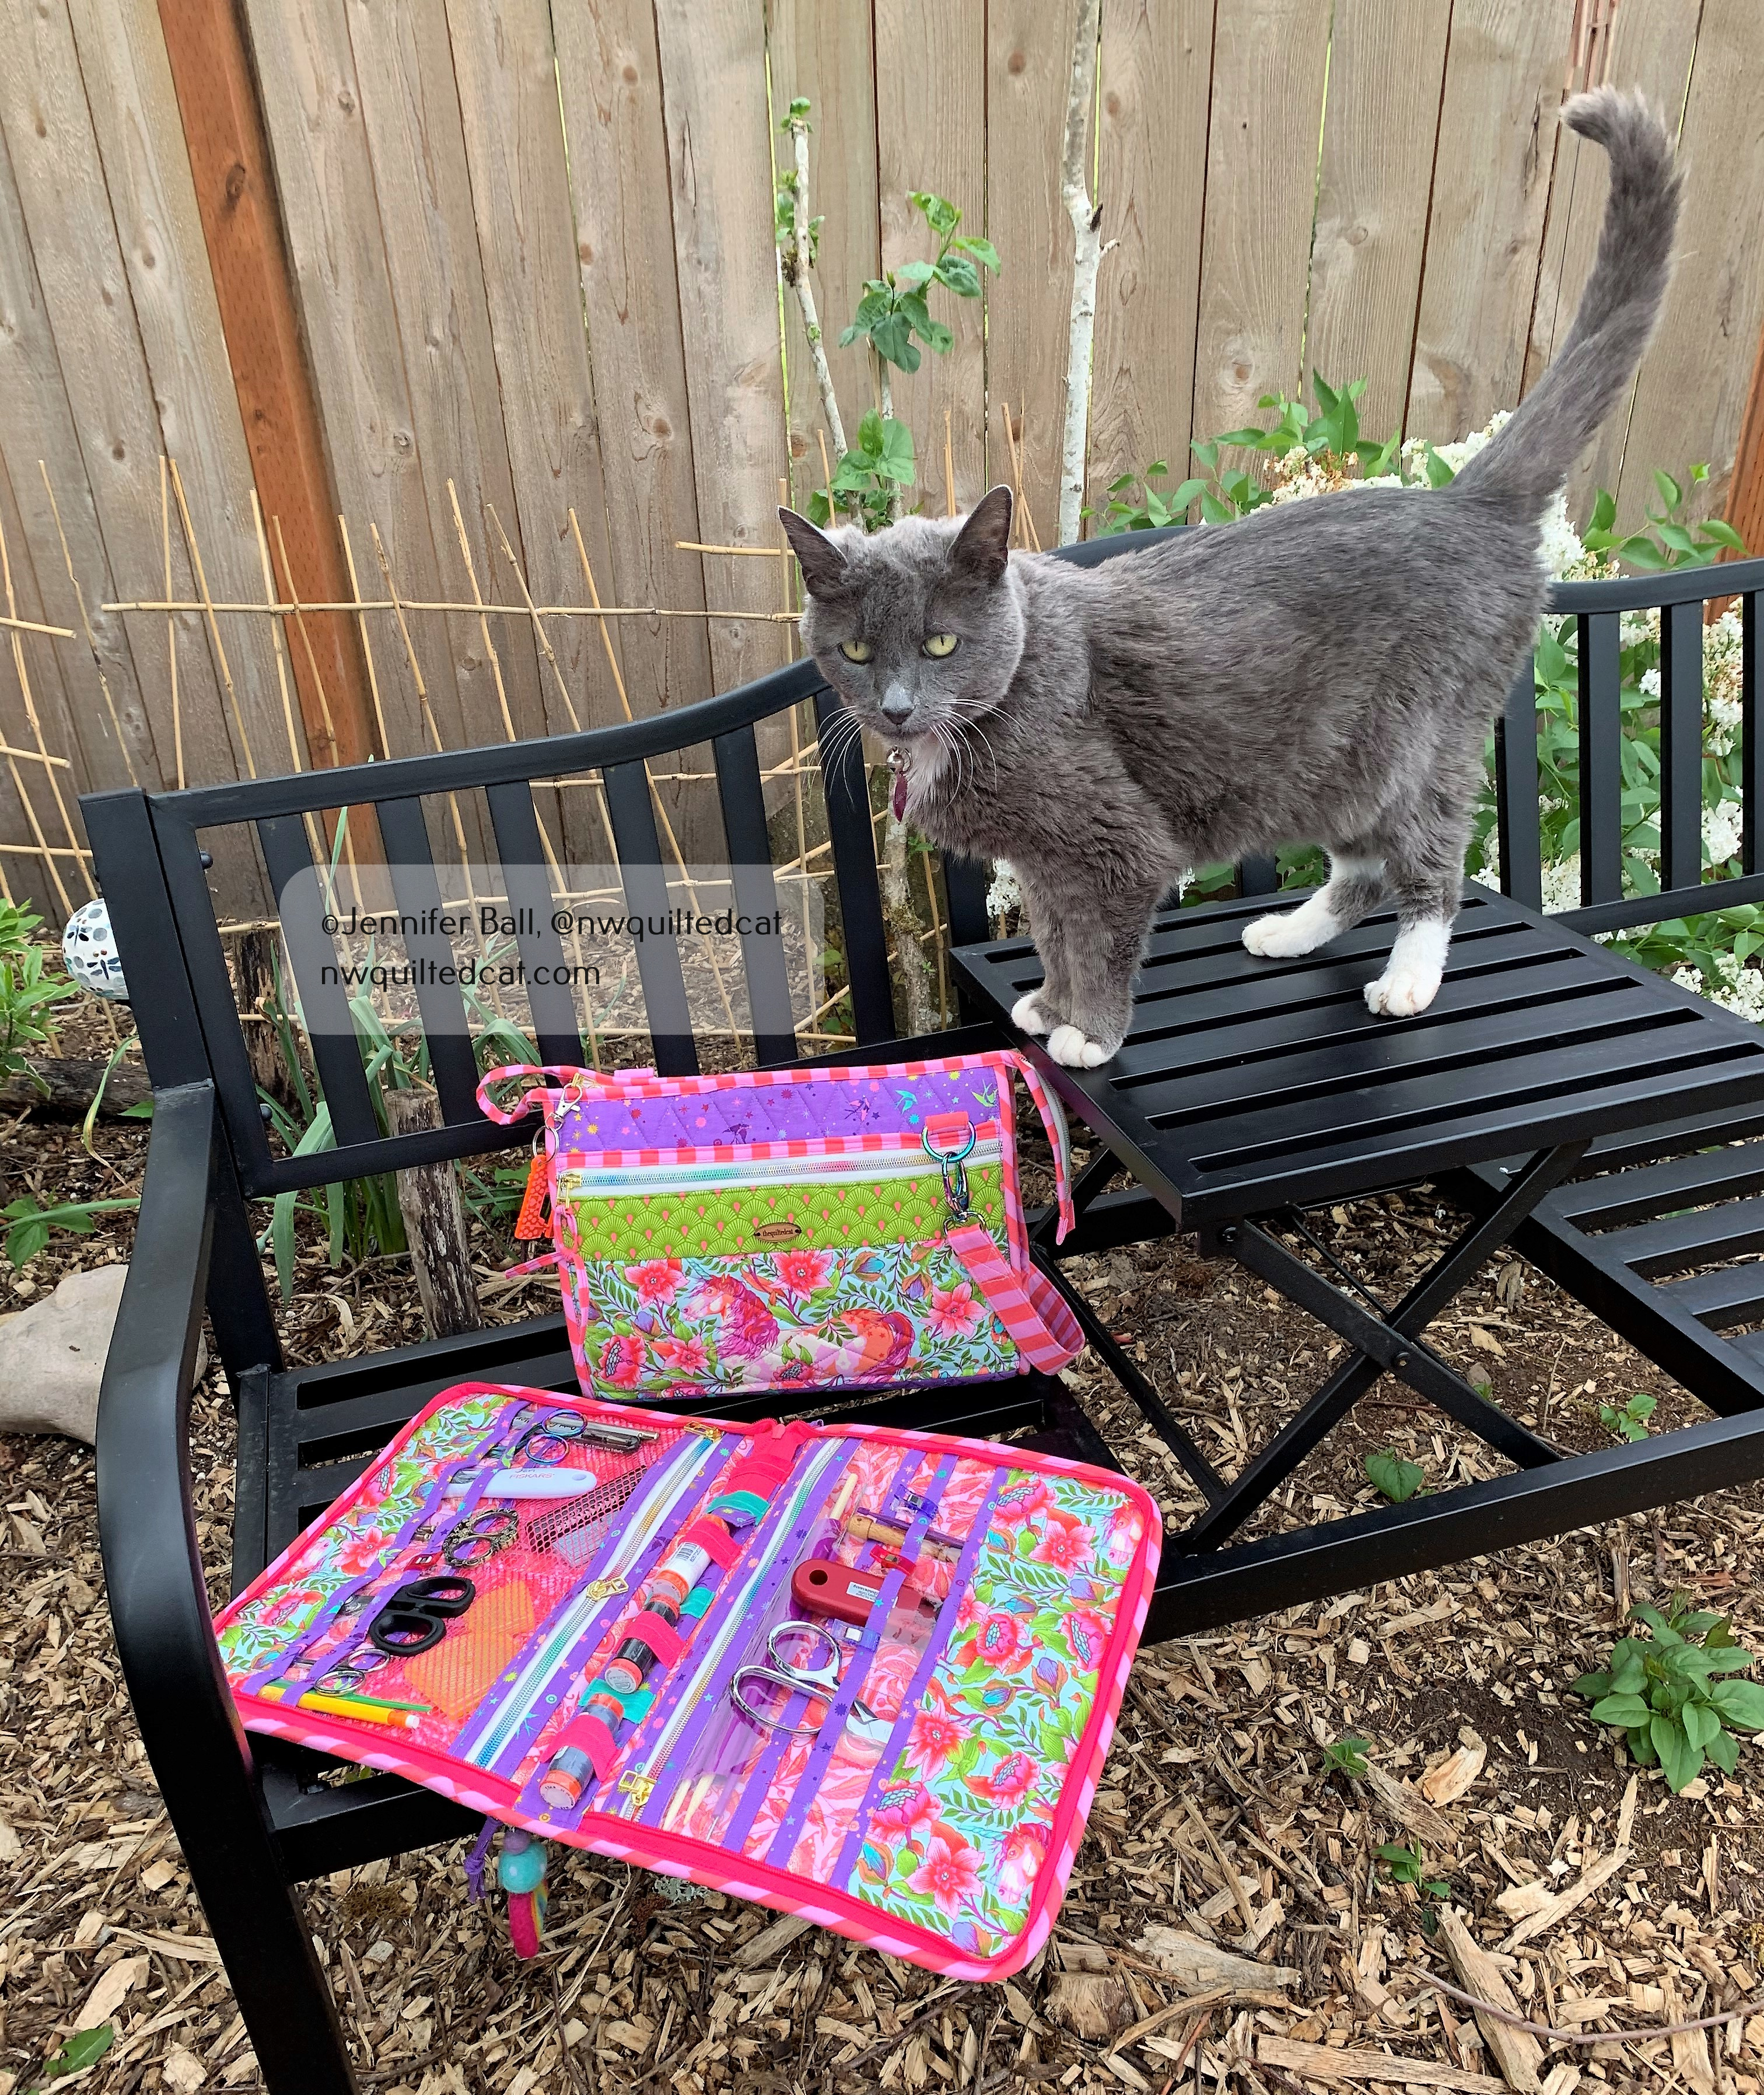
I decided to do a little photo shoot with my 2 new ByAnnie bags, along with my foster kitty, Gracie. She provided excellent inspection services!
In the picture where Gracie is sitting next to the bags, you can see my new Running with Scissors tool case folded over my Take A Stand bag. I’m going to use these 2 bags together at my sewing table to keep frequently used tools close at hand.
Another pic of both bags together;
Take A Stand Bag and Running with Scissors Case
I now have more confidence to tackle a bigger bag project! On my to-do list is the A Place for Everything 2.0 bag from ByAnnie. It’s a great bag to hold English paper piecing projects and supplies. I haven’t decided which fabric to use yet so stay tuned!
Do you follow me on Instagram (@nwquiltedcat)? I’m very close to reaching 2,000 followers. I’m going to do a little giveaway once I reach that milestone, and it will most likely feature Tula Pink products. Come follow me if you don’t already!
Grab a cup of coffee because this post will be longer than usual with a few more pictures! I’m so happy to cross off my first official quilty finish of 2021 by completing a WIP that started its journey in 2018.
In 2018, I signed up to do a 100 blocks in 100 days project, hosted by @gnomeangel on Instagram. The goal was to make each block from the book, Tula Pink’s City Sampler Book: 100 Modern Quilt Blocks. Each day, starting in July 2018, and for 100 days in a row, we posted the designated block for that day. We could make the blocks in advance, but we had to post the blocks in order on the specified day.
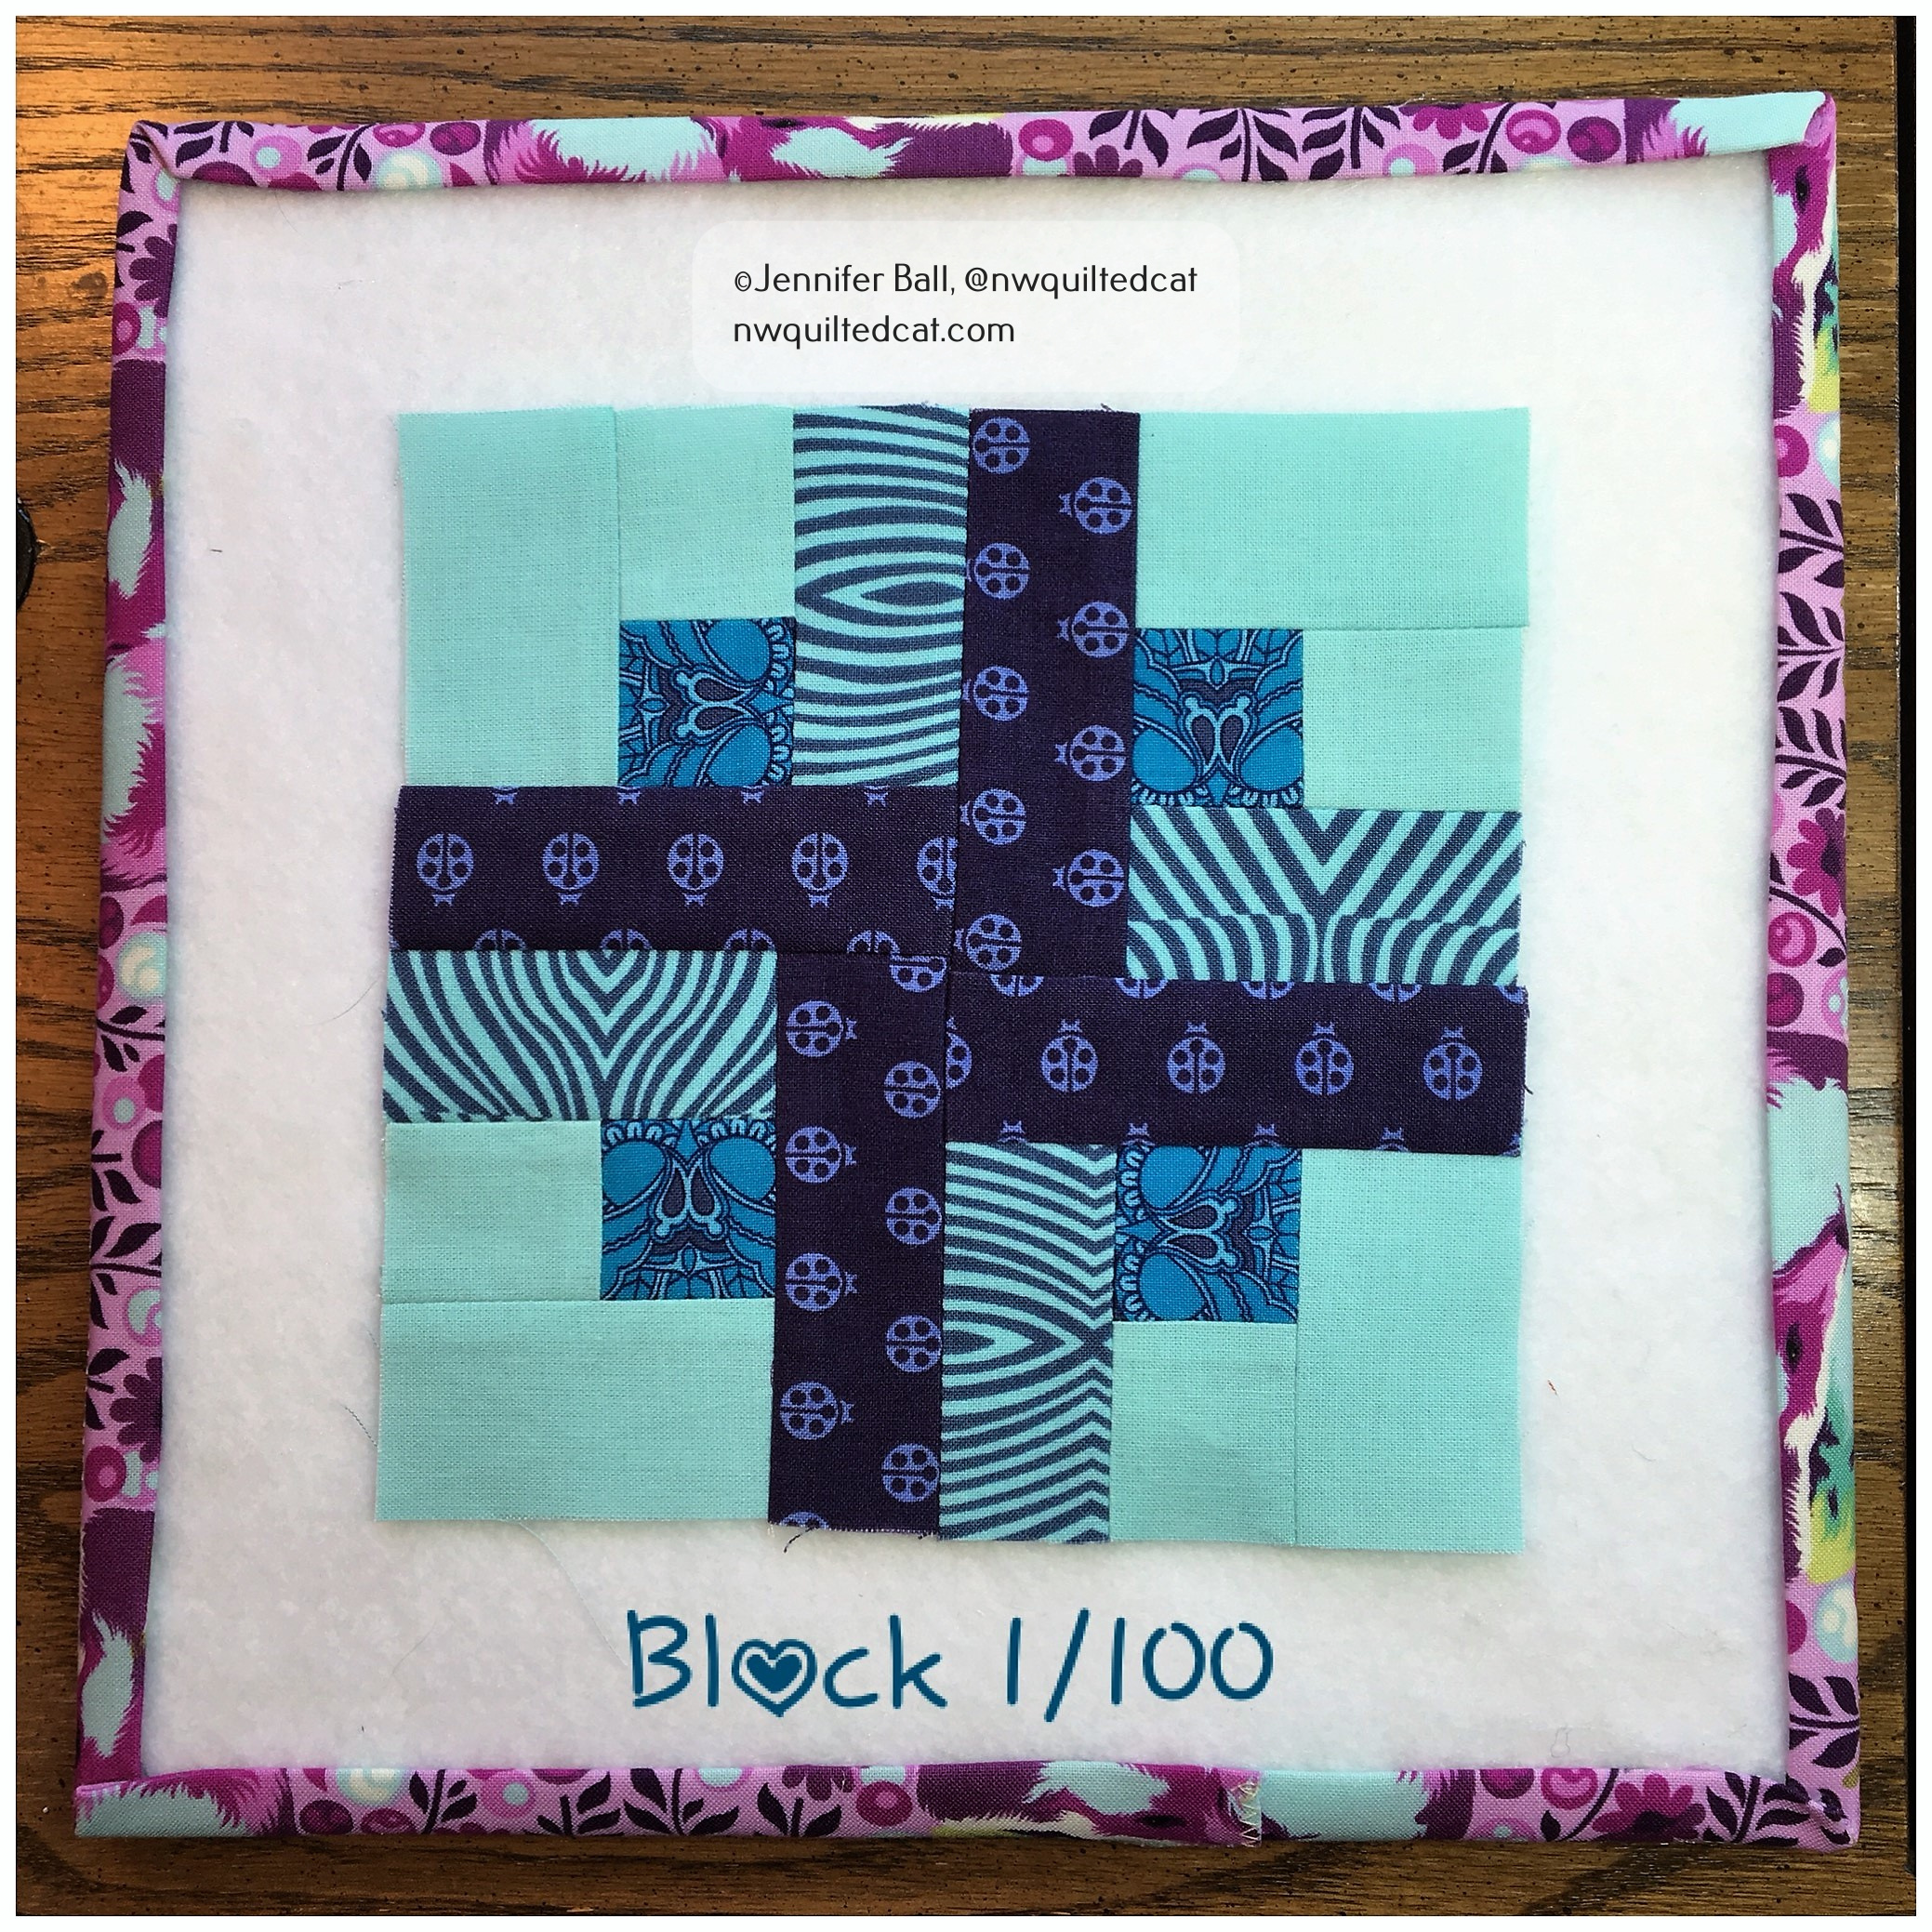
Here’s a look at my first and last blocks (on little design boards). You can find all my blocks by searching the hashtag #nwquiltedcat100blocks on Instagram.
Once I finished all 100 blocks, I put the project aside for awhile. In January 2020, I was lucky enough to secure a spot in a Tula Pink class set for July of 2020 at the Quilter’s Affair event, which takes place the week before the Sisters Outdoor Quilt Show. Little did we know that a pandemic was looming!
In February 2020, I decided to pull out all the blocks, arrange them, and decide on a setting layout.
Each of my blocks stuffed into the book!
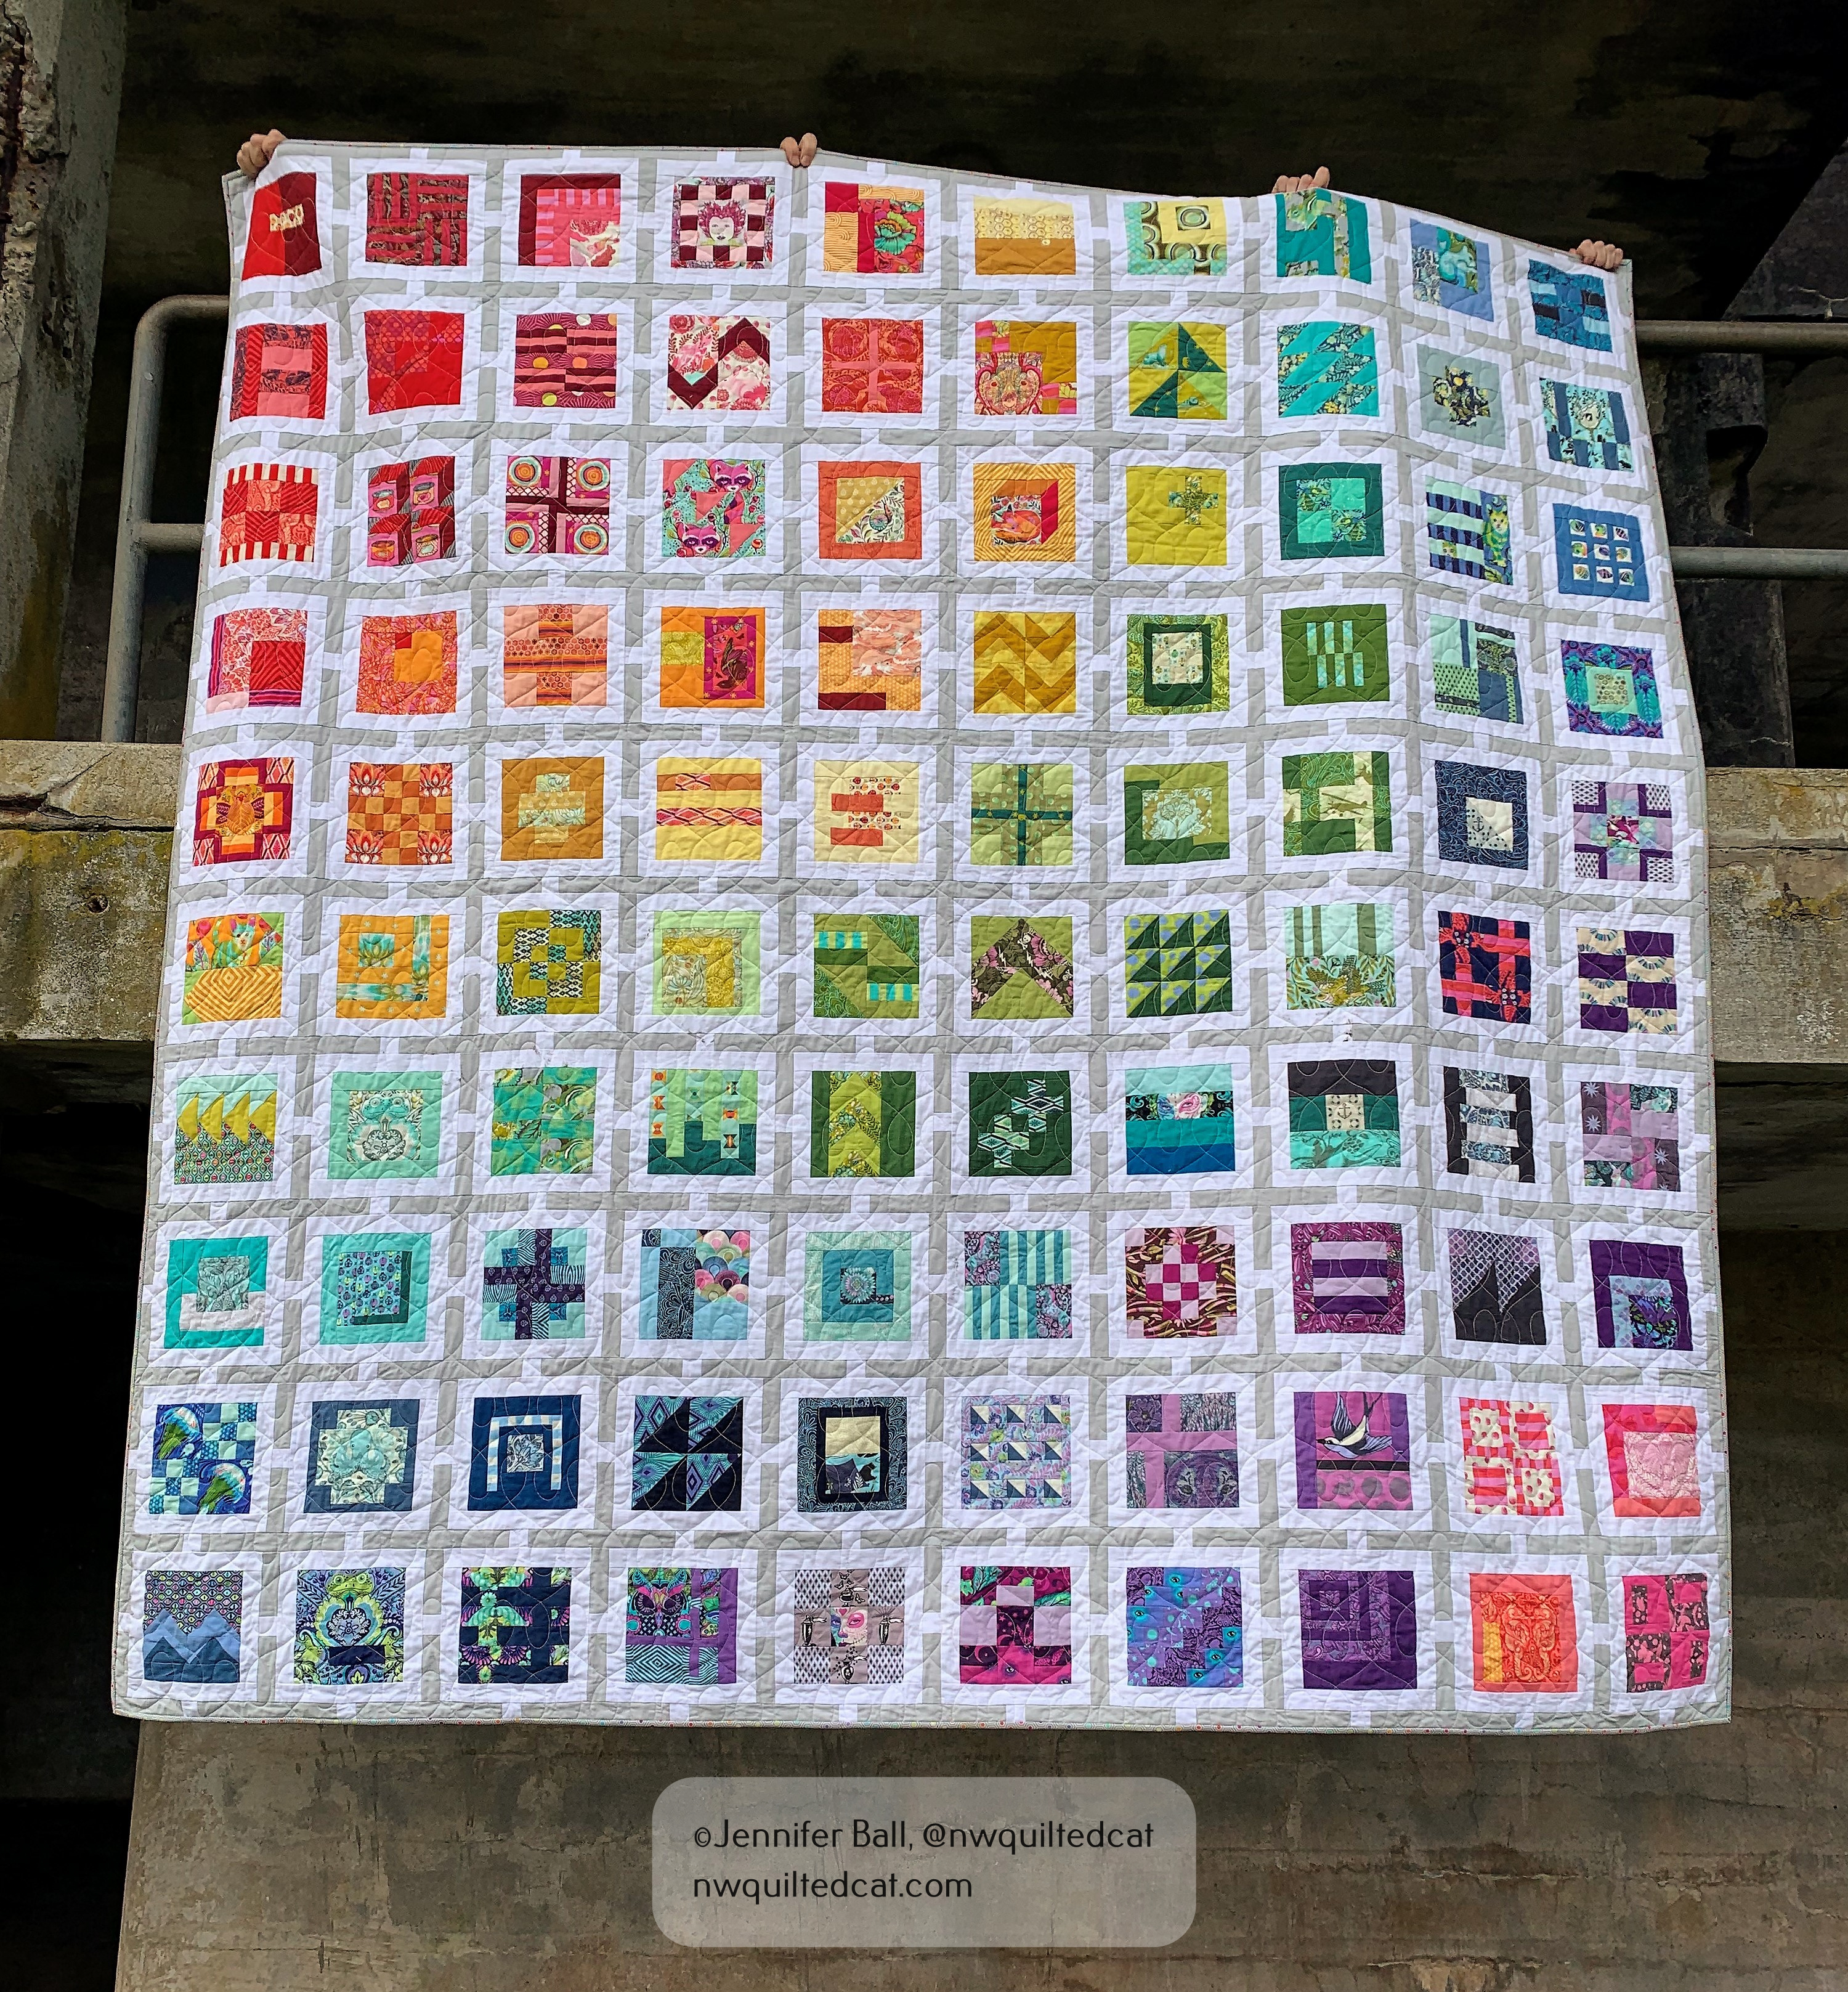
I decided to use all 100 blocks with Kona White and Kona Lighthouse for the sashing. I started piecing in March 2020 and finished in April 2020, still with the hope that I would be attending Tula’s class in July.
100 Modern Quilt blocks layout, light gray and white sashing with quilt inspector, Romeo100 Modern Quilt Blocks, the quilt grows while quilt inspector, Romeo, approves!
Of course, we all know that all quilting shows and events did get canceled for the rest of 2020. Once I had finished piecing the top, I lost my enthusiasm for the project as I knew I wouldn’t be able to ask Tula to sign my quilt in July. However, most of the instructors, including Tula, agreed to postpone their classes for July 2021! Yeah, hope renewed my ambition to get this quilt finished.
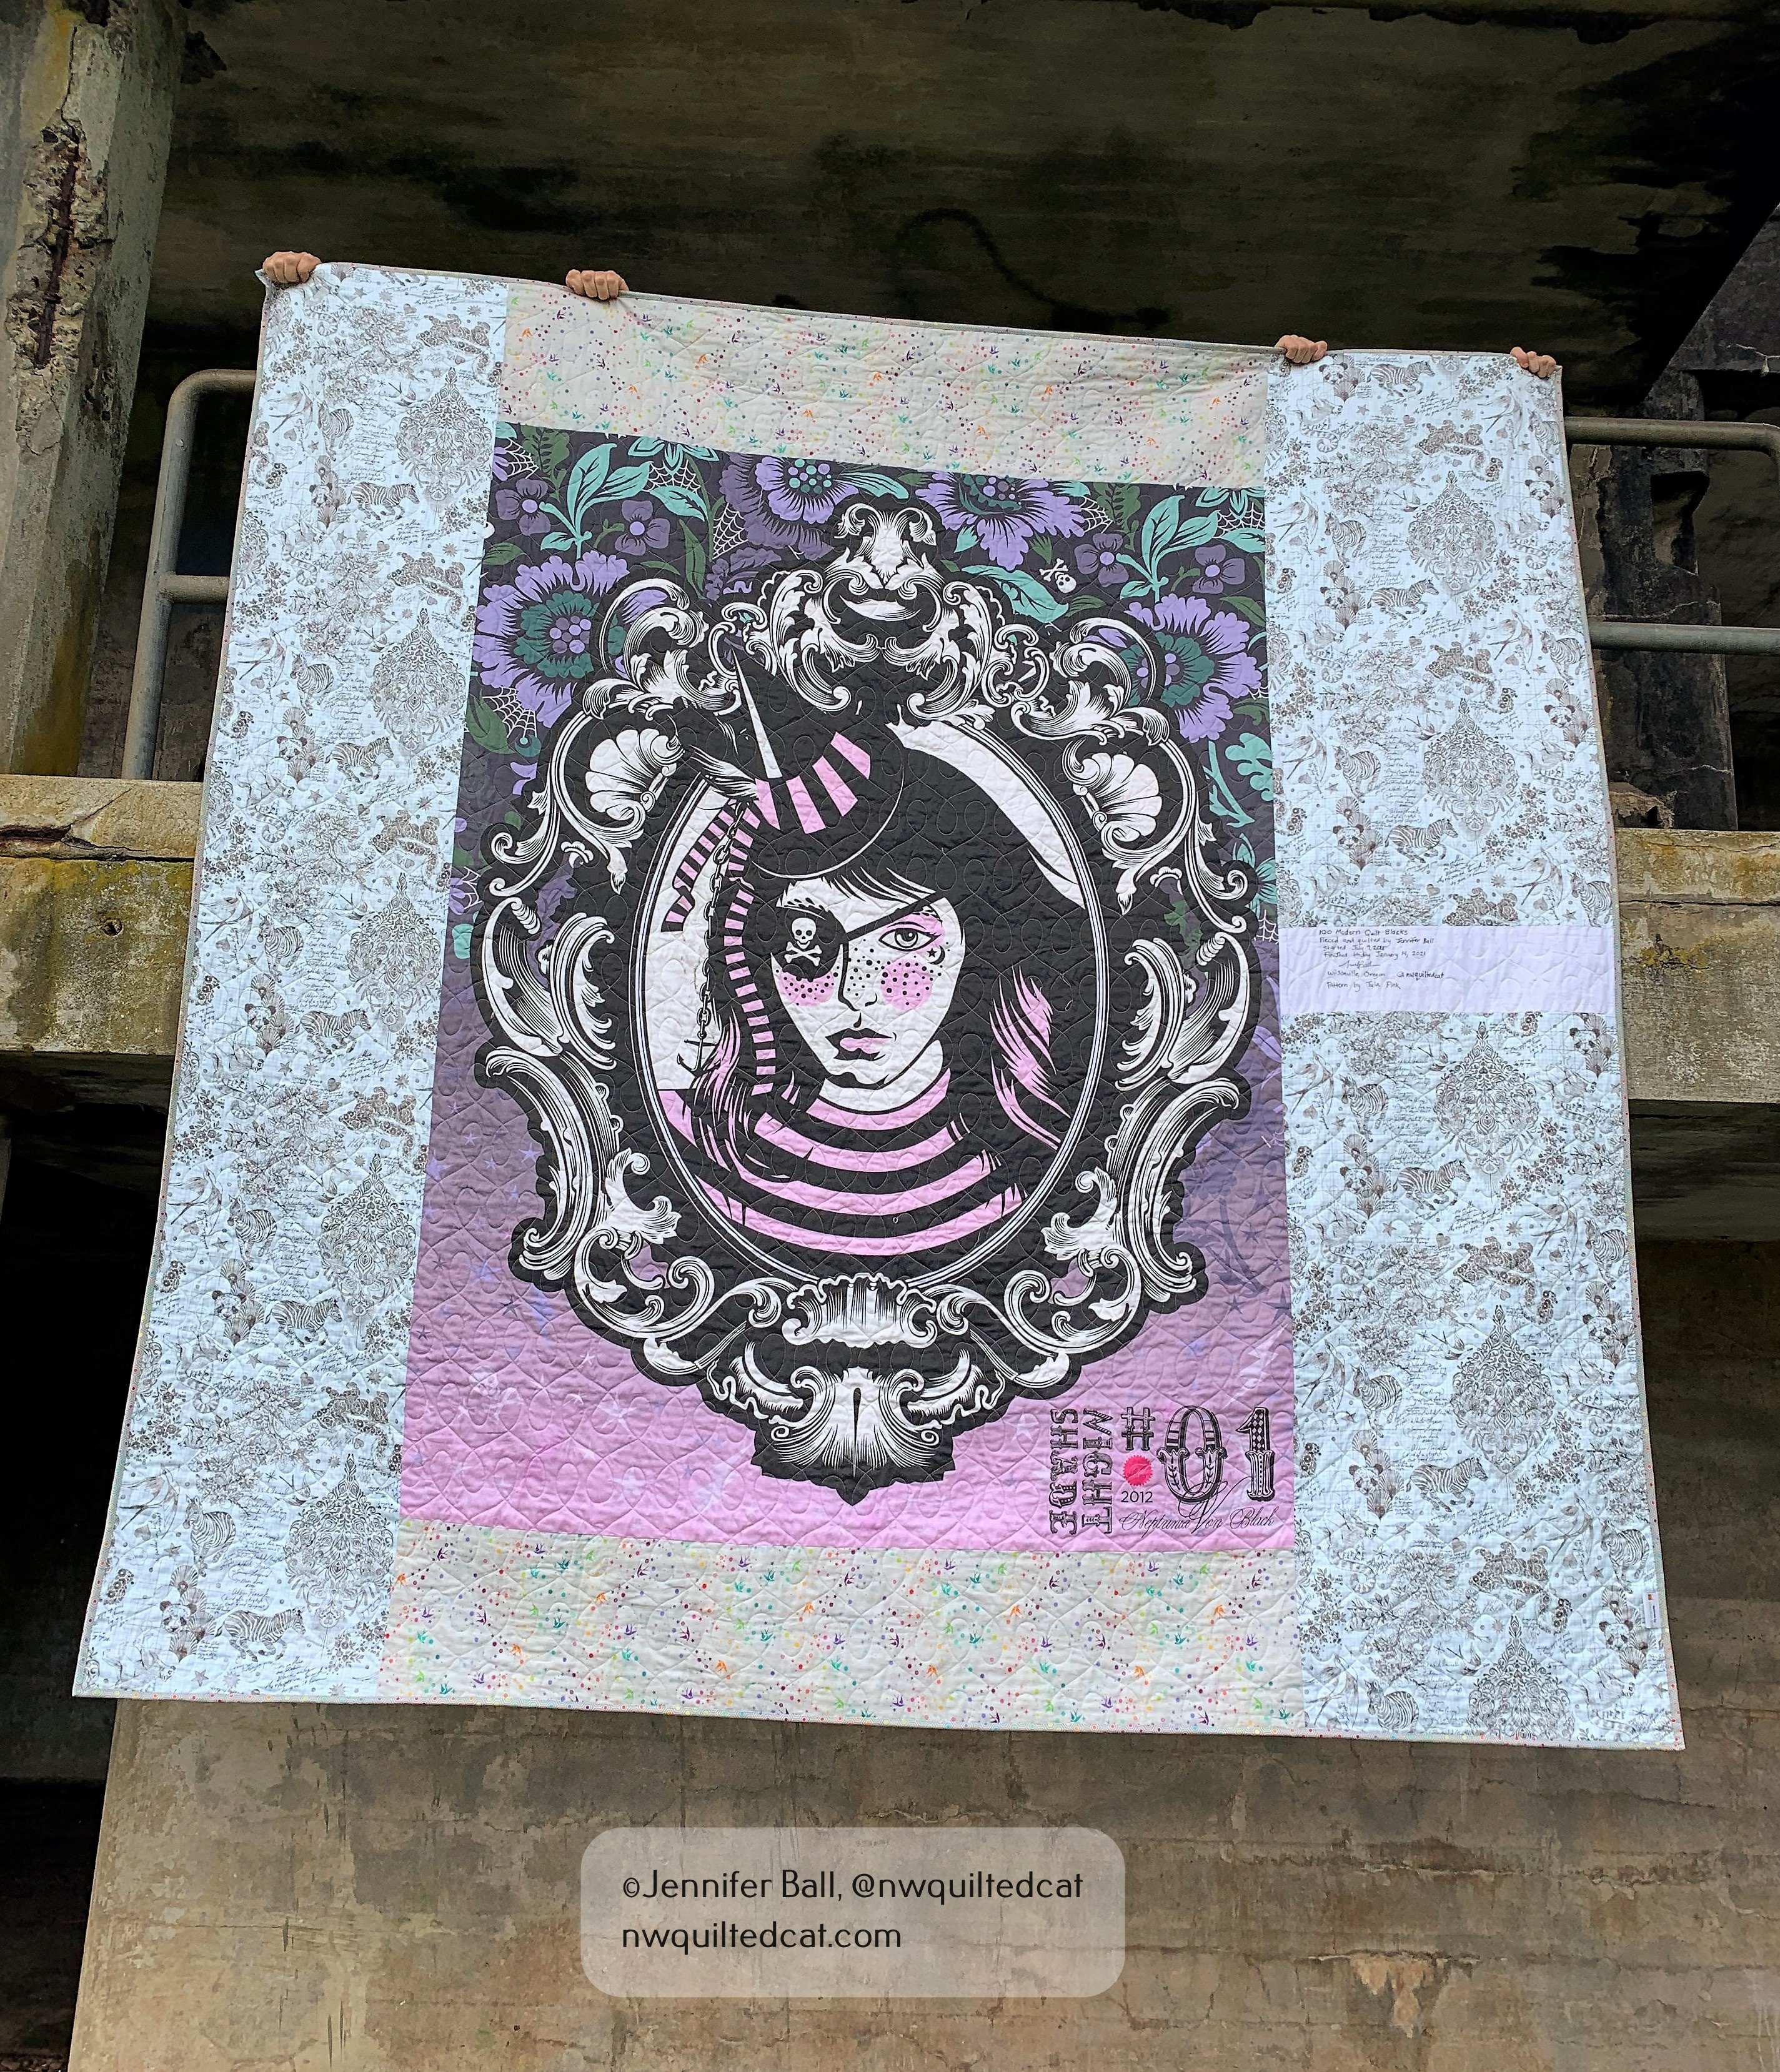
This is a large quilt, maybe queen size plus, but not quite king size. I had to piece the backing so I used a beautiful Neptunia Von Black portrait (from the Nightshade line) backing from I Heart Tula Pink at 54″ x 72″. I then added some of Tula’s 108″ backing from her Linework line called Sketchyer Paper along with some Fairy Dust in Whisper from her True Colors line. My label is a scrap of Kona White fabric, pieced directly into the backing. I left a large open space on the label where I hope to get Tula’s autograph eventually.
In December of 2020, I decided to quilt it using Glide thread in Bone and a hand-guided pantograph called Modern Twist by Urban Elementz on my HQ Avante. I selected this simple panto to keep the quilting in the background and the focus on the blocks.
Finally, I was ready to bind this giant quilt! I went with the same Fairy Dust in Whisper that I used on the backing. It picks up all the colors in the quilt without detracting from any of the blocks.
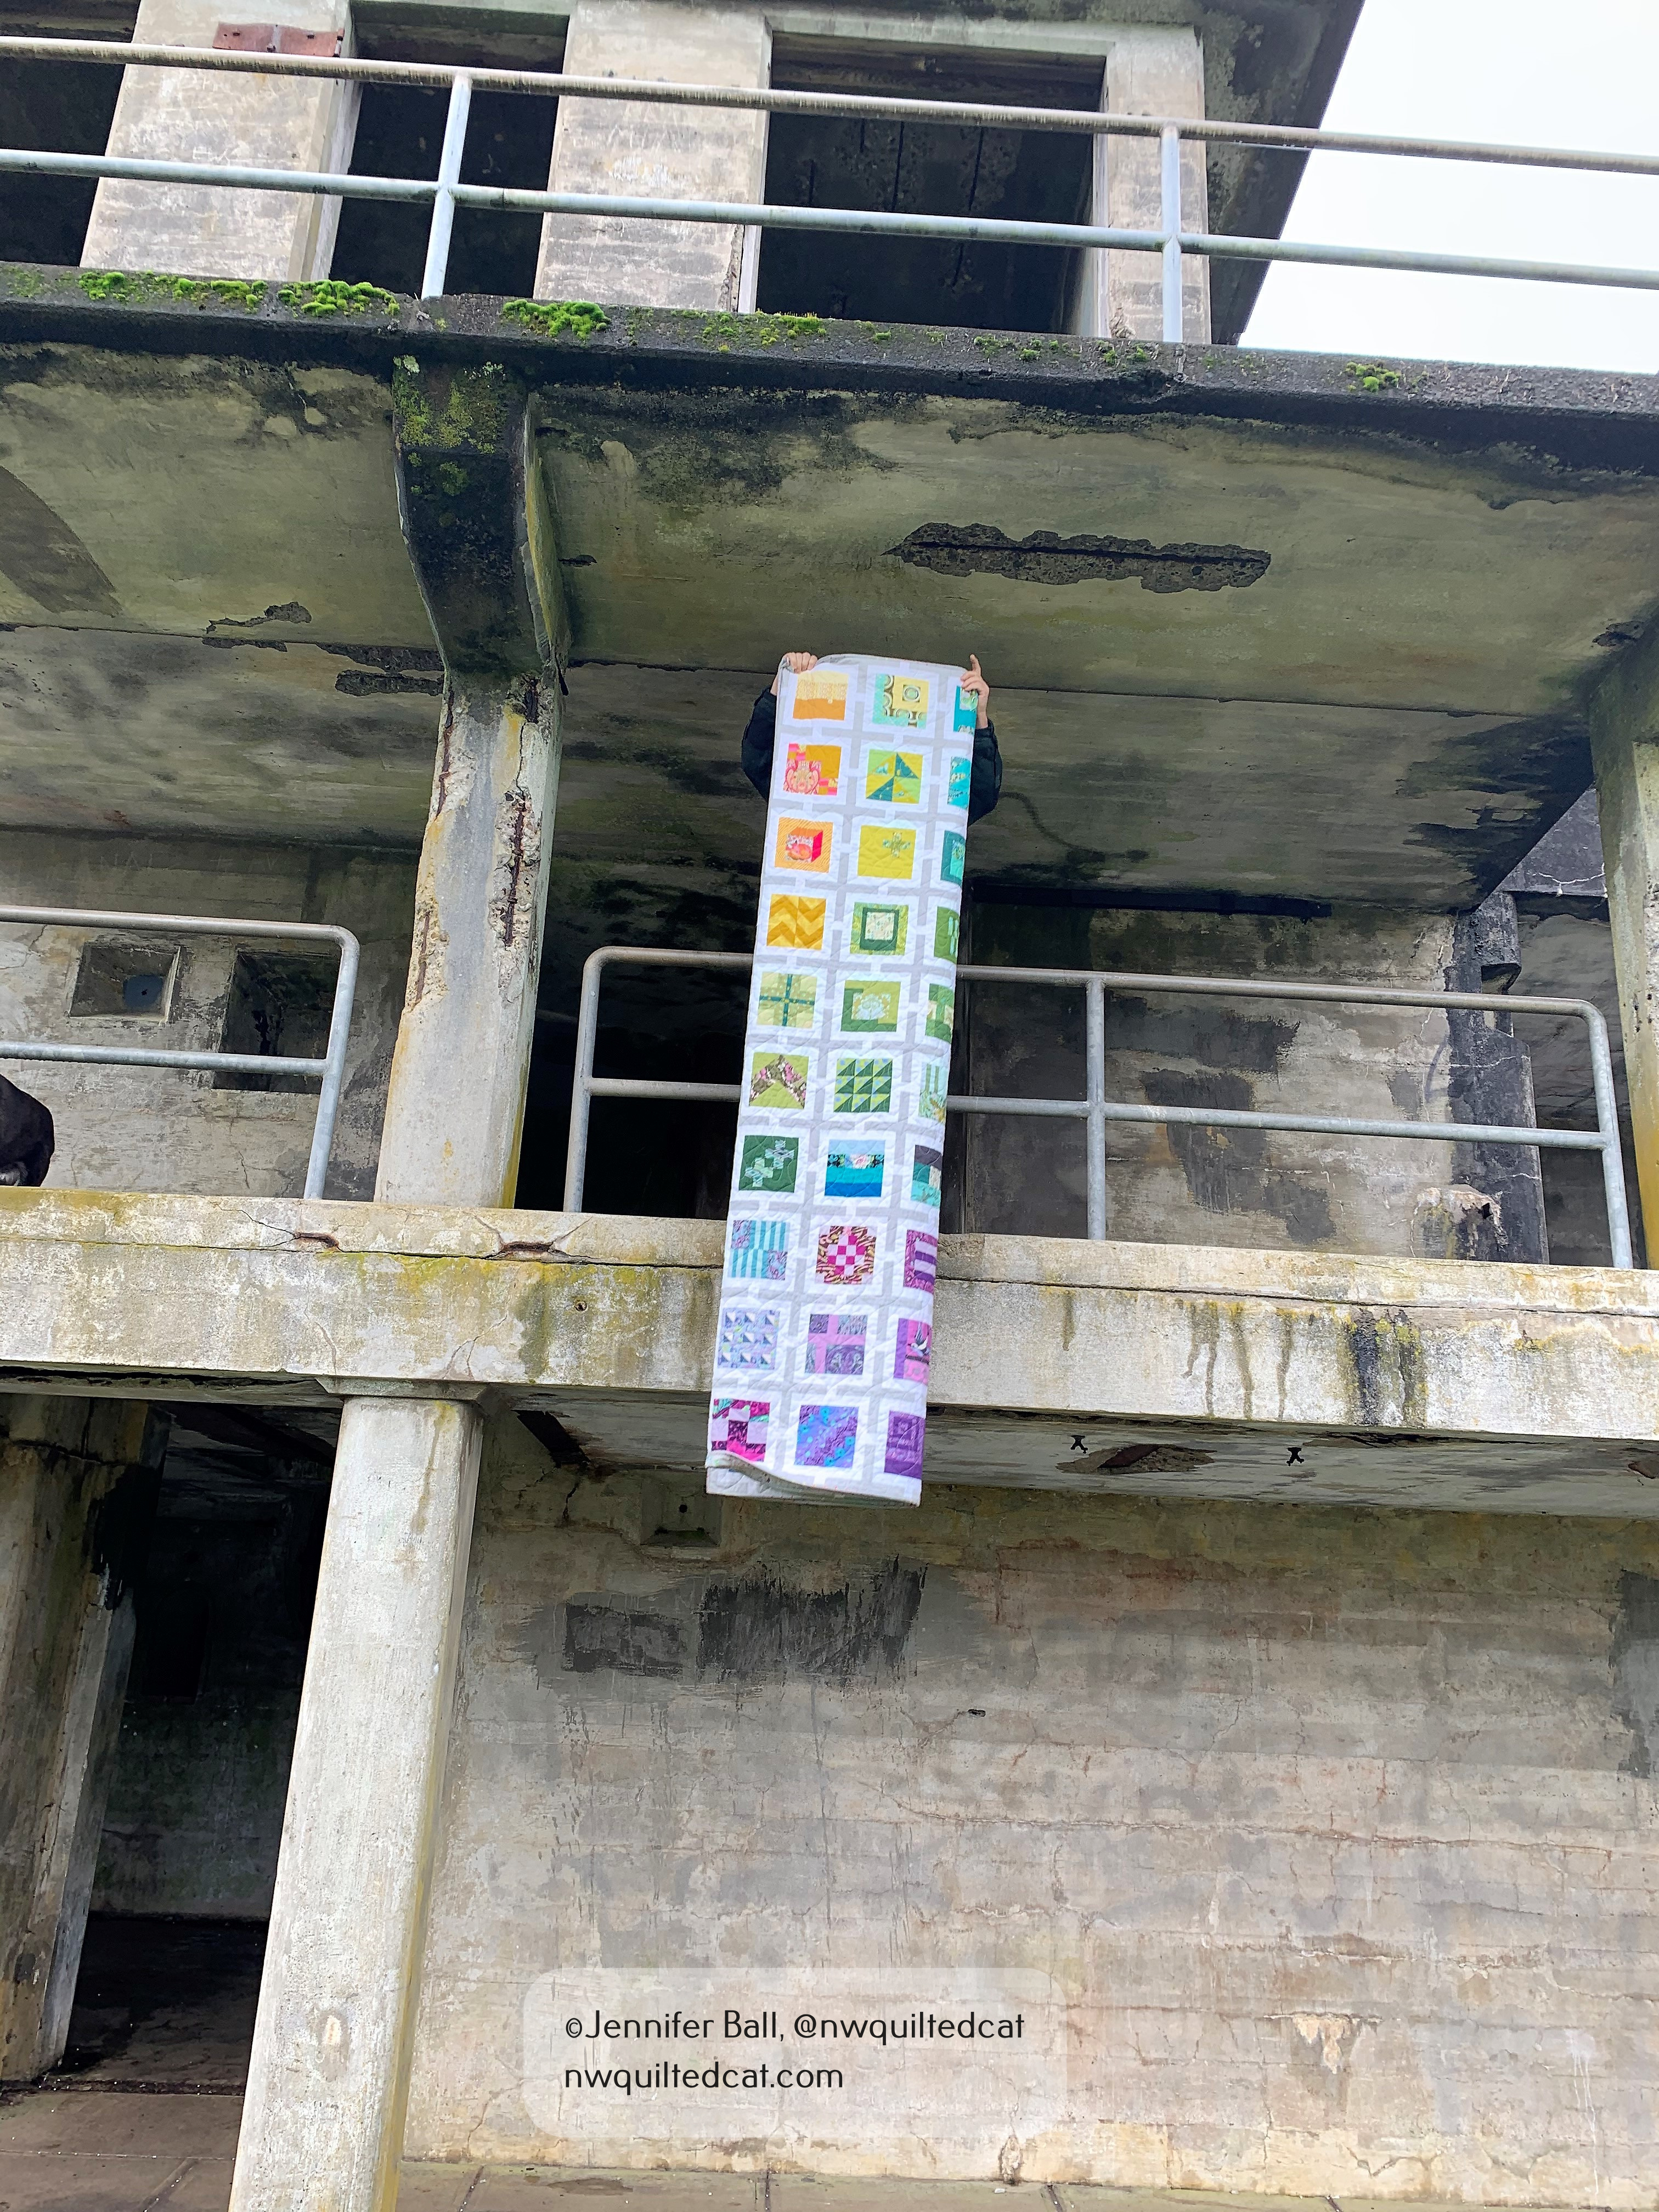
This past weekend, we took the completed quilt for a little photoshoot to Battery Russell at Ft. Stevens State Park at the Oregon coast. My hubby and son held the quilt while I took the photos. Our dog, Pepper, helped too!
Unfolding the quilt for pictures, January 2021100 Modern Quilt Blocks quilt front at Battery Russell, January 2021100 Modern Quilts Blocks back at Battery Russell, January 2021A close-up view of my 100 Modern Quilt Blocks quilt at Battery Russell, January 2021A close-up view of my pieced backing at Battery Russell, January 2021
I love this quilt! It is so bright and cheerful, and the backing is just as fun as the front. With a little luck, we’ll be able to have in-person quilt events this summer, and I just might get to take my class with Tula and show her this completed quilt.
I’ll leave you with one last picture from our day trip. We also stop to visit the Peter Iredale shipwreck when we visit Ft. Stevens. It is ever so slowly eroding away and, with this visit, we really noticed that a larger piece of the bow had disappeared since our last visit. I really need to dig up some of the pictures of this ship when I visited as a little kid to compare the differences.
Now I’m on to my next WIP, which is my Sea Glass BOM by Fig Tree. I will post an update soon!
This summer, I started an English paper piecing (EPP) project so I could have some handwork to do while waiting in parking lots due to Covid restrictions. I blogged about starting the Tula Nova quilt here.
I’ve had a bunch of time in the past few weeks due to my son’s taekwondo classes and surgery follow-up appointments for my dog. We used to be able to go inside, now we must wait in the car. I’m not sure what will happen will we start getting below freezing, lol!
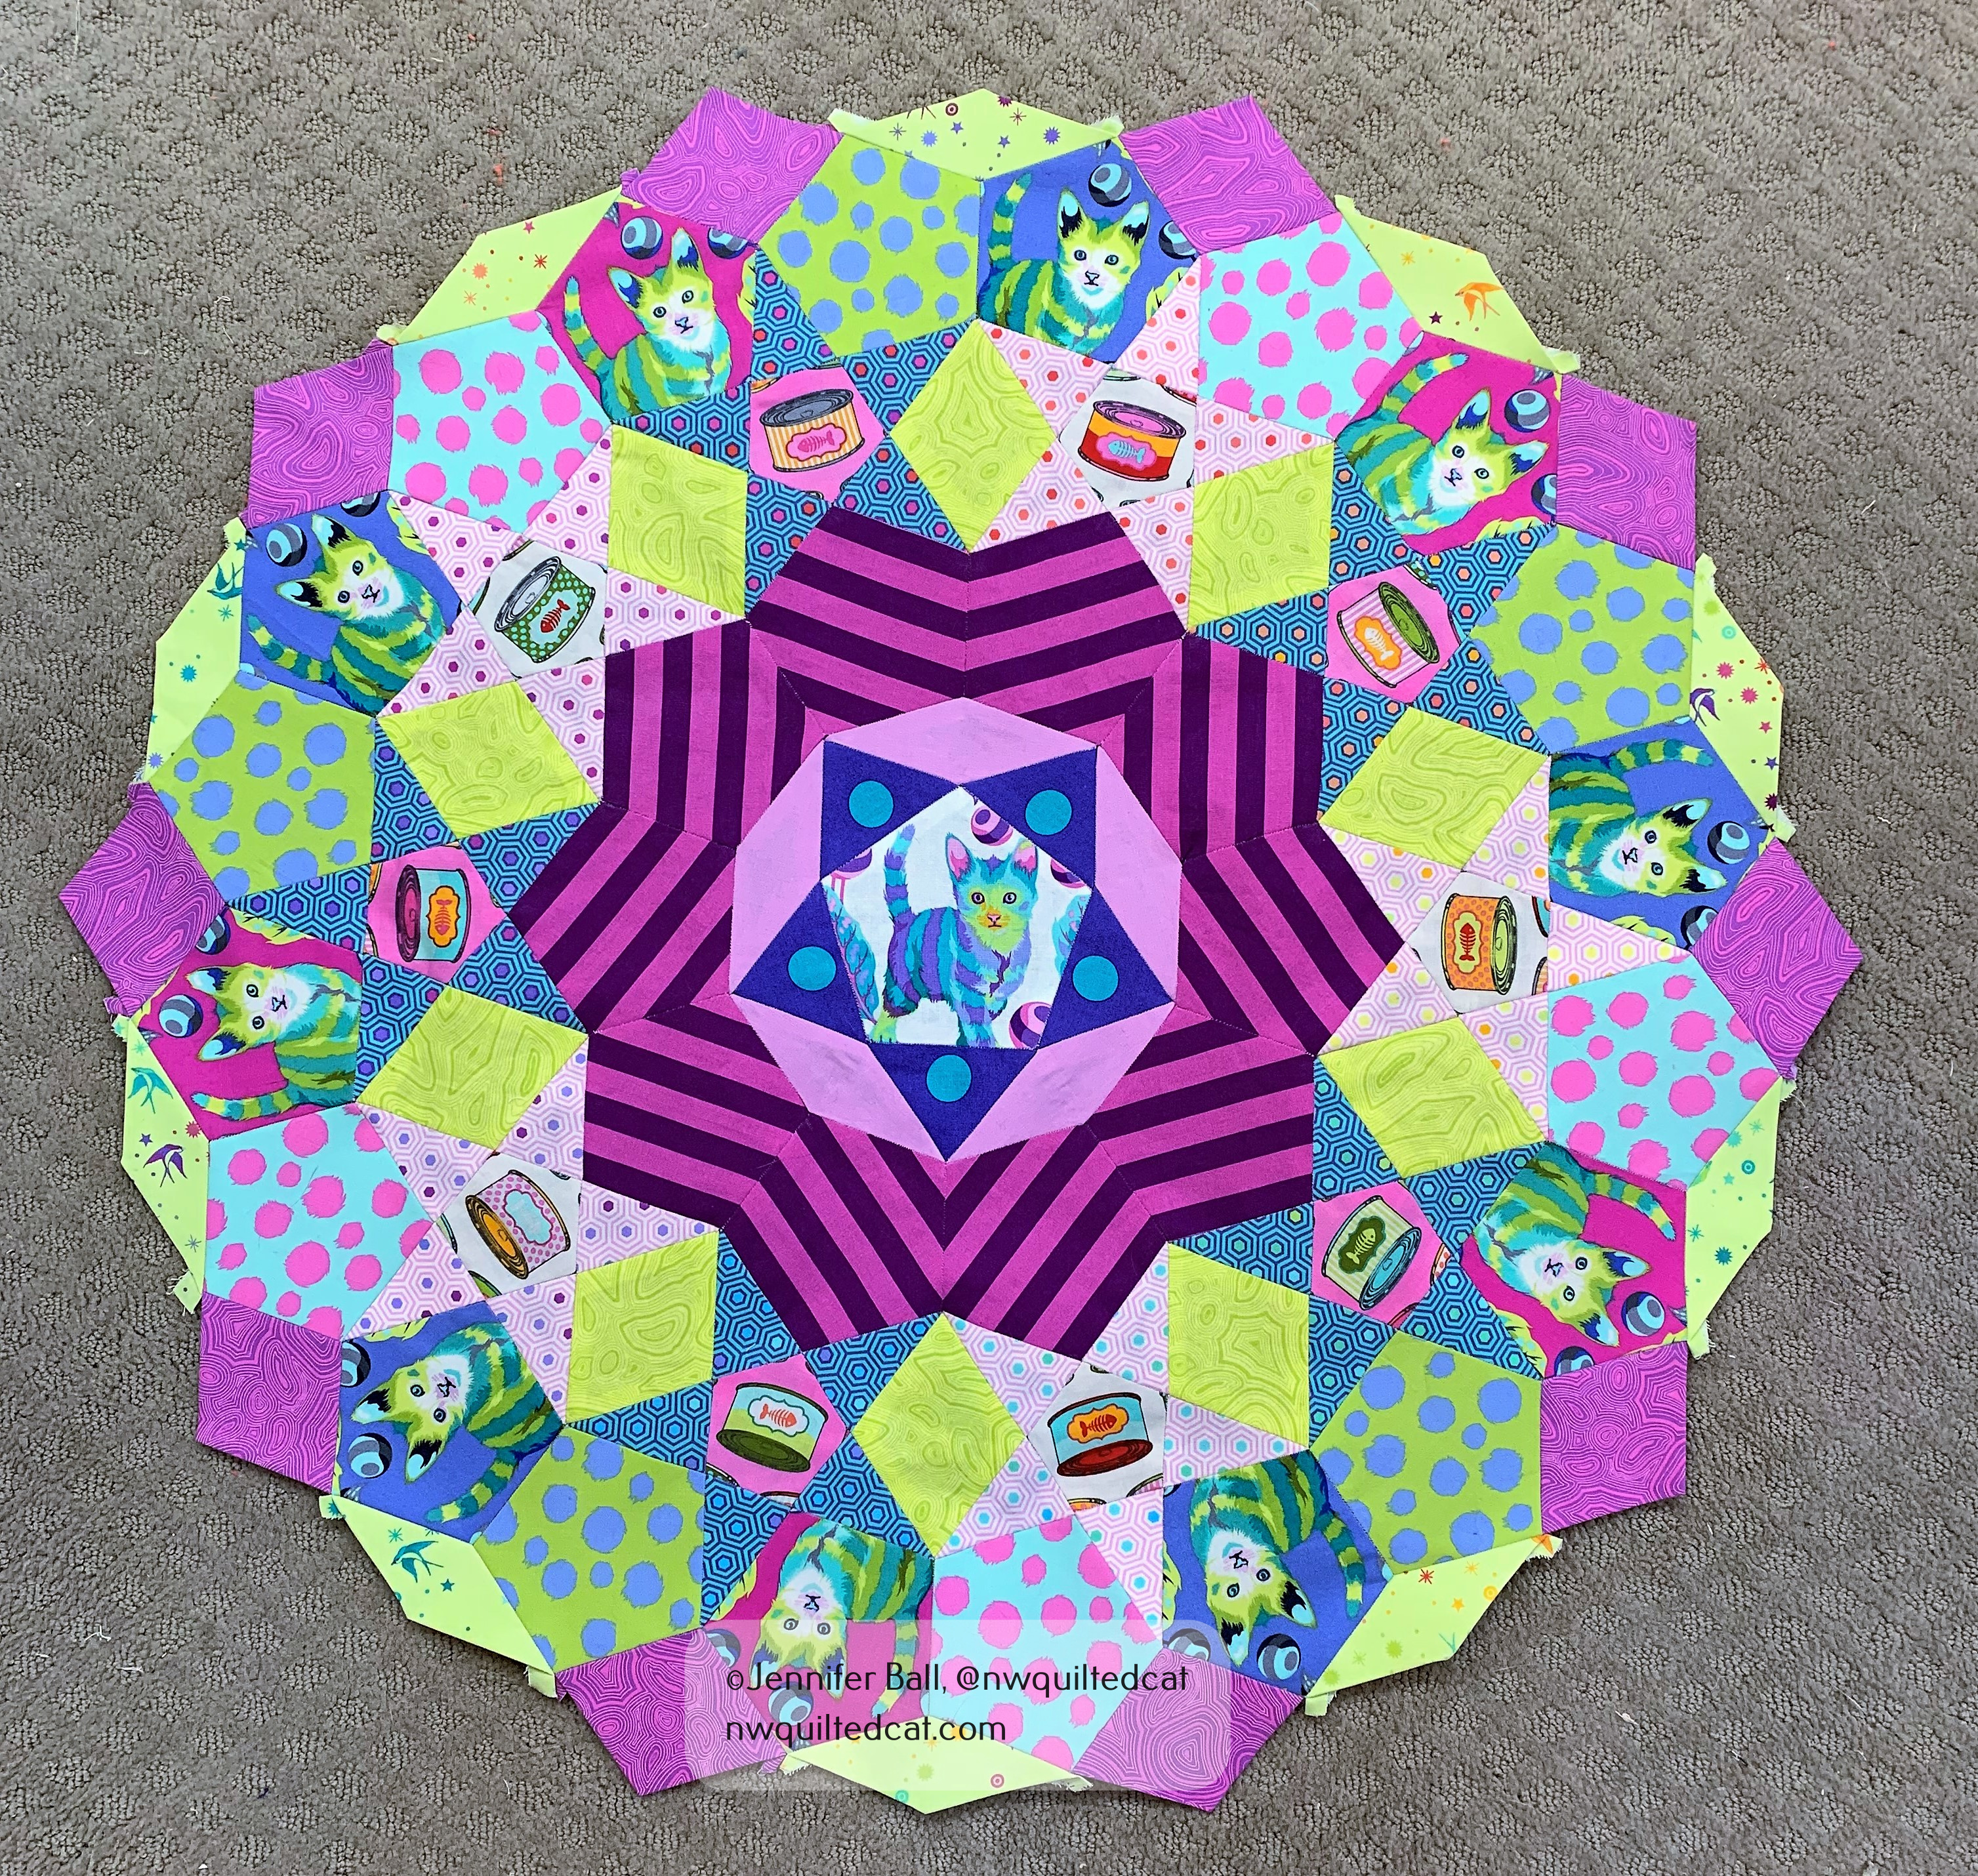
I’ve added some more rounds to my cat themed Tula Nova. I’m using as much of the “Tabby Road” line as possible, but I don’t have many of the coordinating prints so I’ve been trading with people on Instagram for different pieces. I’m also using fabrics from the True Colors line, such as the mineral prints, hexy rainbows, and fairy dust.
Do you see the cute cans of cat food in the star blocks?
Once I complete each round, I audition fabrics from my stash. It’s quite a messy process! I have fat quarters and half yards scattered about the room, until I decide on something.
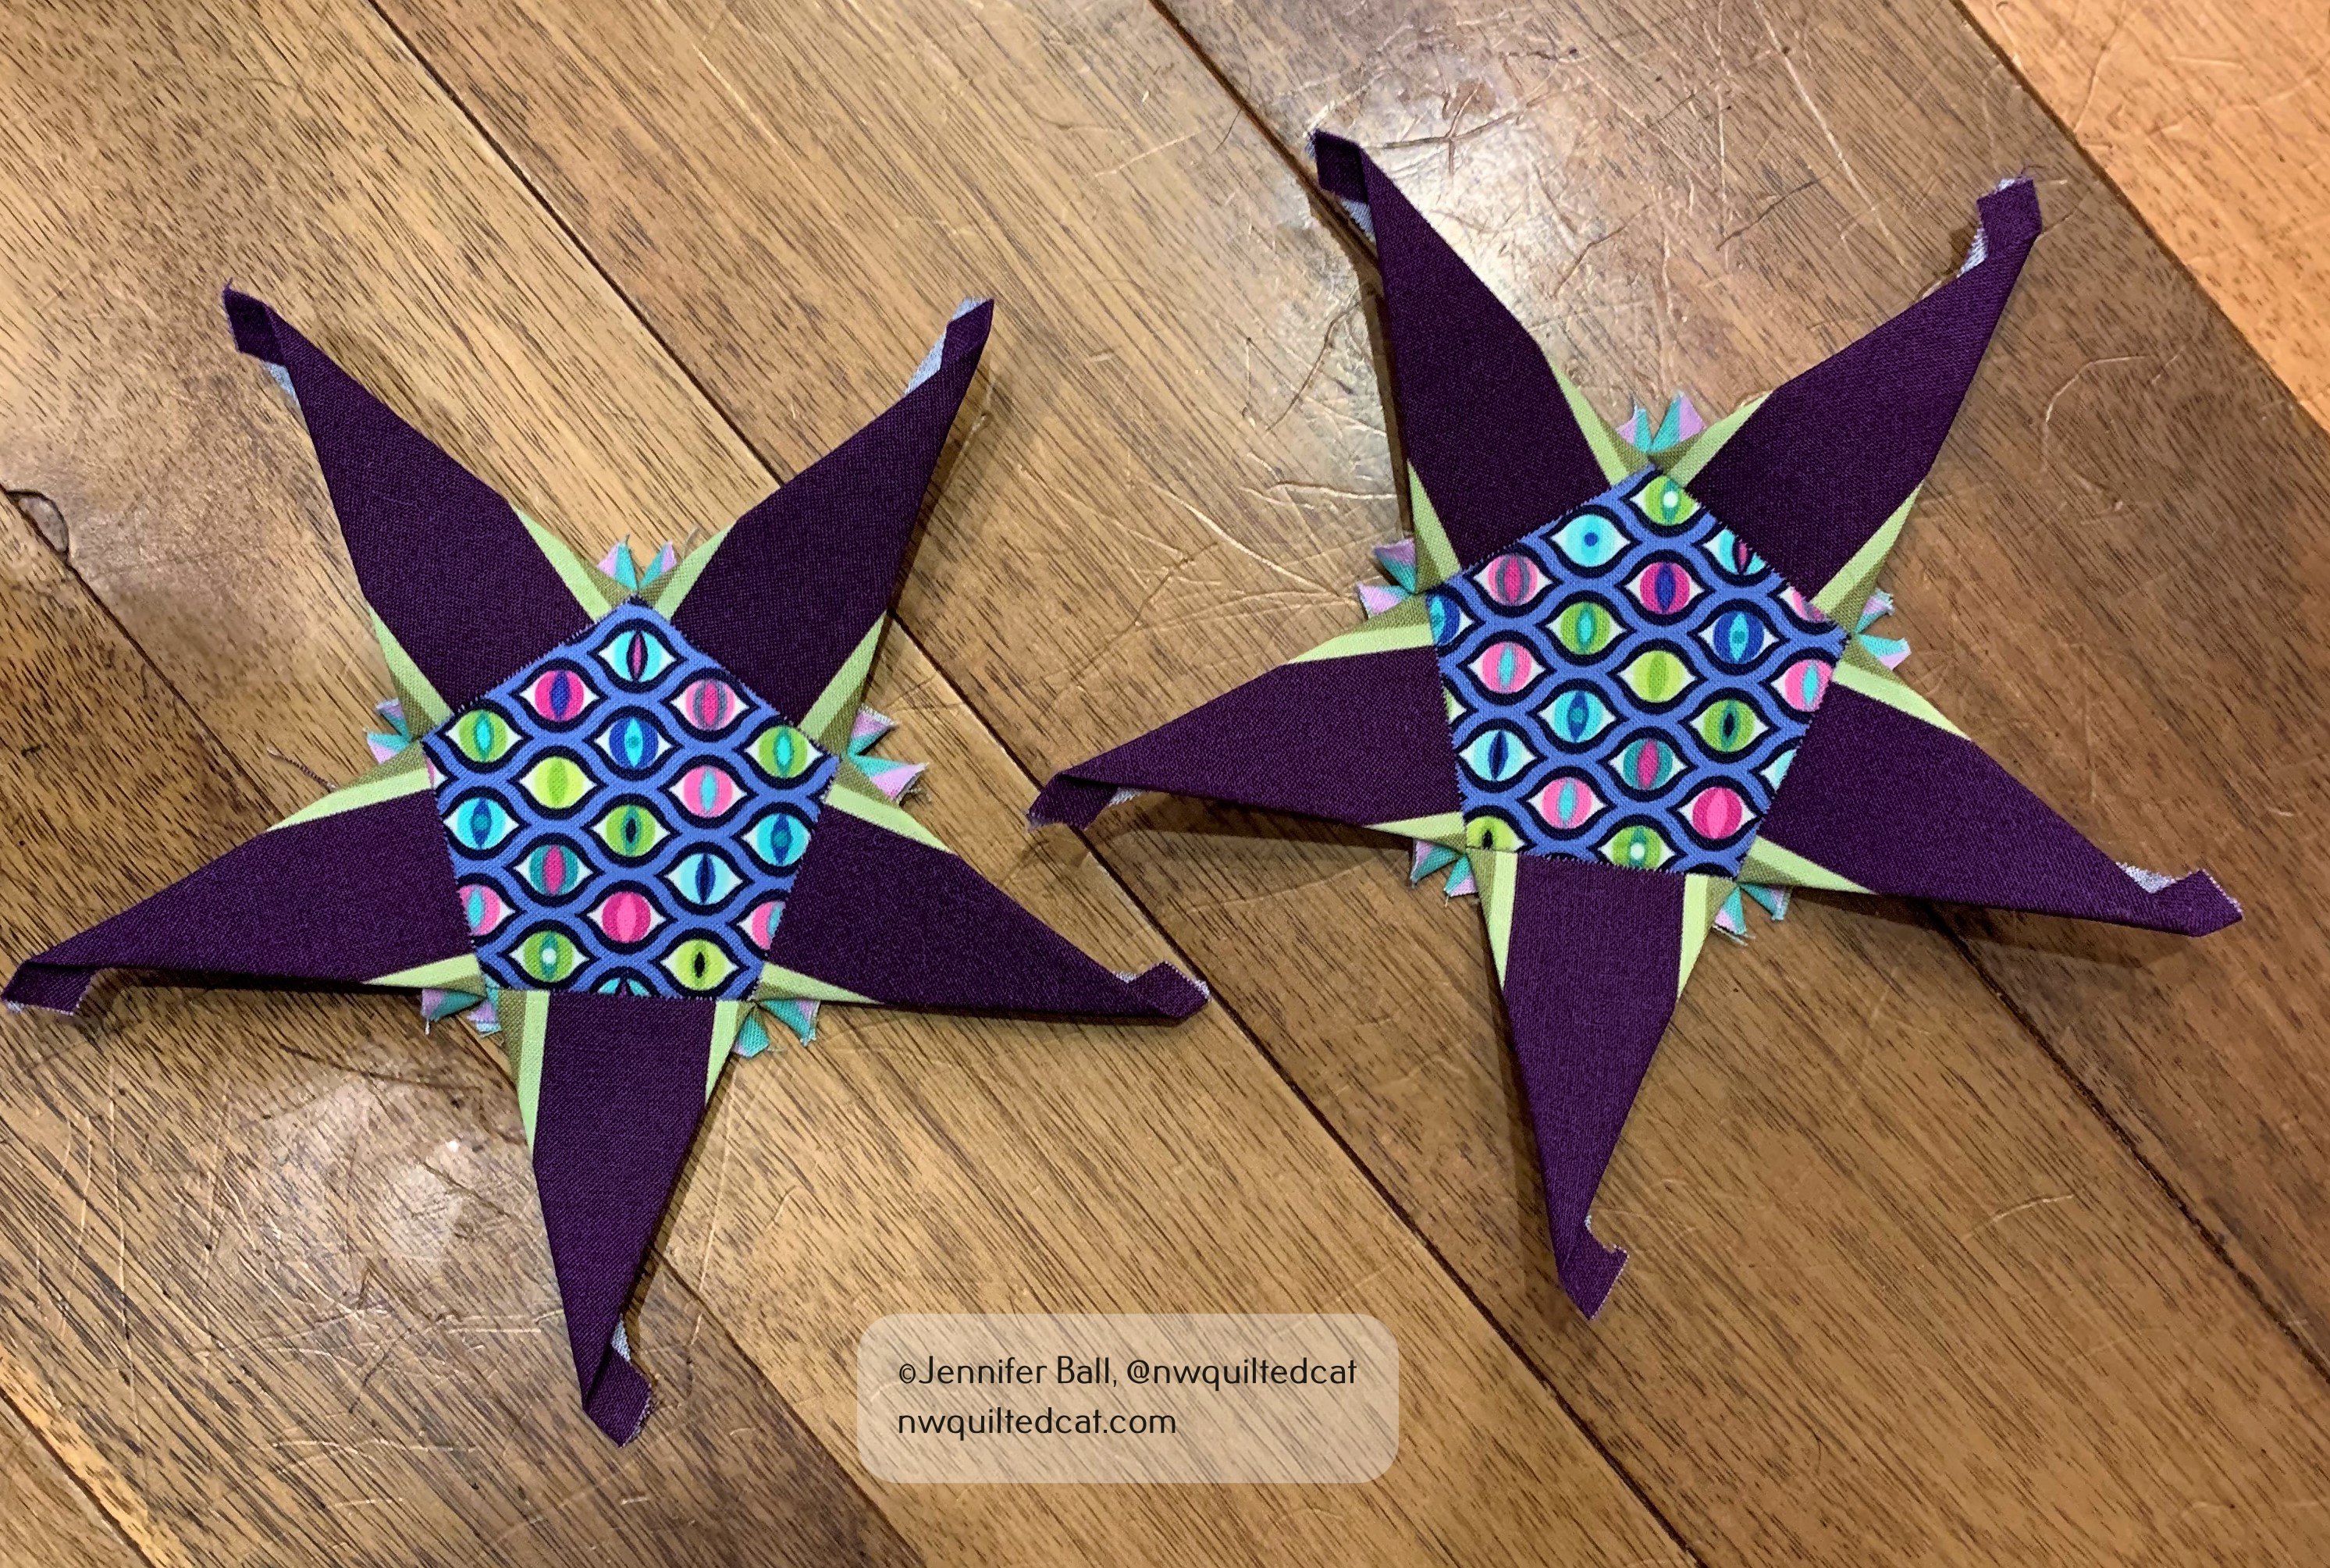
The next round has 10 stars and 20 medium hexagon shapes. I decided on some purple stars to pull out the purple in the center of the quilt.
I fussy cut a striped print from the “Chipper” fabric line so that the dark purple fabric was more or less in the middle of the star points with some green on each side. I had just enough of the cat eyes print from “Tabby Road” to make enough small hexagon centers for the 10 stars needed.
“♪ ♪ ♪ I always feel like someone is watching me . . . ♪ ♪ ♪”
After I finished hand piecing these 10 stars, I placed them next to the my Tula Nova to decide what color I wanted for the medium hexagons in between each star.
Well, my quilt inspector had a strong preference, which I will reveal in a future blog post! He is really loving this cat themed quilt, and loves to help me “arrange” fabrics.
This is a bright and cheerful quilt, and I’m so happy that I started learning how to EPP.
In my post yesterday, I talked about making my first jelly roll rug using the HomeMade fabric line by Tula Pink.
I finished the rug over the weekend, and we had a little bit of sunshine yesterday so I could get some outdoor pictures at lunch.
I absolutely love how this rug turned out! I didn’t experience any waviness or warping that can happen with this rug. I think it may be because my Bernina sits in a cabinet so I have a large, flat surface to support the weight of the rug as I stitch the rope coil rows together. I stitched slowly and carefully, using my widest zigzag stitch with Aurifil 50 weight thread.
I didn’t do any regular pressing, except for pressing each of the beginning tight corners. Those early tight corners were the hardest part for me! I did get a slight bit of puckering, but the pattern did indicate to expect that to happen.
Here’s a look at the finished rug!
My completed Tula Pink jelly roll rug!
Of course, as I was taking this picture, my quilt inspector, Cow, came sauntering out from under a bush where he had been napping. He gave the rug a thorough cat scan!
Cow gives the jelly roll rug a cat scan!
I brought the rug back inside where my best girl, Pepper, sat on it. She is a 65-pound mixed shepherd breed dog for scale.
Pepper likes the rug!
I now have the rug in my quilting room. I need to clean up some of my sewing chaos before taking a picture!
This weekend, I made my first ever Jelly Roll Rug using the pattern by RJ Designs. What is a jelly roll rug? It’s a rug that you make using 2.5-inch strips of fabric and batting. This rug is similar to the braided or crocheted types of rugs that quilters and sewists have made for a long time, but updated to use modern materials.
You might notice that not all fabric manufacturers label their 2.5-inch pre-cut fabric strips as jelly rolls. Moda Fabrics uses the term “jelly rolls,” but other manufacturers might call a similar product design rolls, strip sets, or other names.
If you don’t want to purchase 2.5-inch pre-cut rolls, you can always make your own strip sets from yardage.
The batting strips are similar. You can buy pre-cut 2.5″ batting strips by Bosal called Katahdin On-A-Roll in either 25 yard or 50 yard rolls or you can cut your own from batting leftovers.
I used HomeMade Design Roll for my rug. This is an adorable new line of fabric using bright colors and features items that quilters use every day. I thought it would be the perfect collection to use to make a rug for my quilting room. I had purchased 2 rolls of Katahdin back in 2018, but I was waiting for the just the right fabric collection to come along and Tula really delivered!
This pattern takes a ton of bobbin thread! I pre-wound 5 bobbins, but I needed about 7 total. For me, it took the longest to create the fabric “rope,” which is the 2.5-inch fabric and batting strips folded and stitched together. I’d guess that this step took almost 4 hours.
Here’s a look at my jelly roll rug coil. Doesn’t it look fun?
Jelly roll rug “coil” or “ball”
My Tula Pink themed kitty with the jelly roll rug coil
Once I had my jelly roll rug coil finished, I started sewing it to form the rug on my Bernina. I used my widest zigzag stitch, and started going round-and-round.
Look at my rug growing under my needle!
My jelly roll rug is growing!
It took another 2 hours or so to stitch my rug together. I’m planning on taking some pictures of it today in the afternoon sunshine. Come back tomorrow where I will reveal my completed jelly roll rug!
You can purchase all the supplies to make a rug from your local quilt shop or from the Fat Quarter Shop. I get a small percentage of sales from this link to help me with the costs of this blog.
In 2018, I participated in an Instagram challenge, hosted by Angie, @gnomeangel. For the challenge, we had to post one block per day for 100 days, starting in July, using the blocks from Tula Pink’s City Sampler: 100 Modern Quilt Blocks.
For my project, I used all Tula fabrics plus various solids. I kept up with the challenge and posted all the blocks to Instagram on the assigned days.
Here’s a look at one of my blocks that I made and posted in 2018. This block is on a mini design board.
One of my Tula blocks posted for the 100 days 100 blocks challenge in 2018
Fast forward to this year. In January, the registration opened up for Quilter’s Affair, which is a week of classes leading up to the big Sisters Outdoor Quilt Show in July. I was able to snag a spot in one of Tula’s classes! I decided that I needed to pull out this old project and finish it so that I could take it with me to Sisters. Of course, all this happened before we really knew about COVID-19 and learned about social distancing.
Hopefully, the COVID-19 pandemic will crest before July and social gatherings will once again be able to take place. However, if not, then I hope everyone stays safe and healthy, and we can enjoy the quilt show in 2021.
I pulled out all of my blocks and my book to get started:
Tula’s 100 Modern Quilt Blocks book, filled with my blocks
100 Modern Quilt Blocks book with my blocks, from the side
In the back of the book, there are several finishing layout designs. I decided to make the Trellis layout, which is a throw size using 64 blocks. However, I want to use all 100 of my blocks using this layout for a larger quilt.
I used Kona cotton in White for my block frames and Kona cotton in Lighthouse for the sashing.
I stitched together my first 3 rows in February:
First 3 Rows of my 100 Modern Blocks quilt
I’ve been working on this project little by little over the past 2 months. It helps to have such a bright and colorful quilt project to work on in these uncertain times.
I finished the top 5 rows recently, and my kitty quilt inspector gave it his approval:
First 5 rows of my 100 modern quilt blocks project
I have all 10 rows now completed, but I need to join them together. I will show you the finished quilt flimsy in part 2 soon!
Have you heard about the 2020 Mini Series Sew Along hosted by Alison Glass (#alisonglass) and Giucy Giuce (#giucygiuce) ?
It’s a 10-week sew along with 8 tiny foundation paper-pieced blocks plus a bonus block for those participants who sign up on Alison’s website. The SAL is free; however, you do need to purchase the patterns. You can find the patterns on Alison’s website or from various quilt stores that she mentions
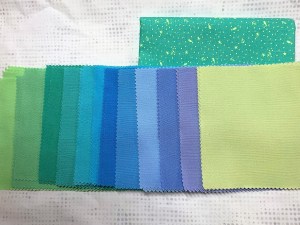
Here are my fabric selections for the SAL:
A Kona charm square pack called Mermaid Shores
A batik fabric for the background that reminds me of pebbles on a beach
A Tula Pink fat quarter from the Zuma line with little stars and seahorses
Fabric Selection for 2020 Mini Series SAL
I’m making the 4-inch blocks rather than the 8-inch blocks due to the length of my charm squares.
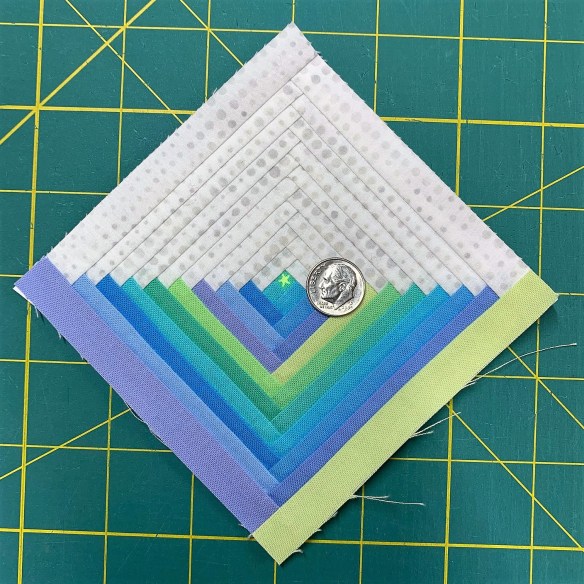
For week one, we are making the classic log cabin block. I’m an experienced foundation paper piecer so I already had an Add-An-Eighth ruler on hand as well as some very fine 80 weight piecing thread. The 80 weight thread is important with smaller blocks because it is less thick than 50 weight thread so your block presses flatter.
I fuzzy cut a little star for the very center of my block from the Zuma fat quarter. You can see it in the picture with the dime for scale.
Here are some pictures of my log cabin block:
Week 1: Log Cabin Block
Week 1: Log Cabin block with dime for scale
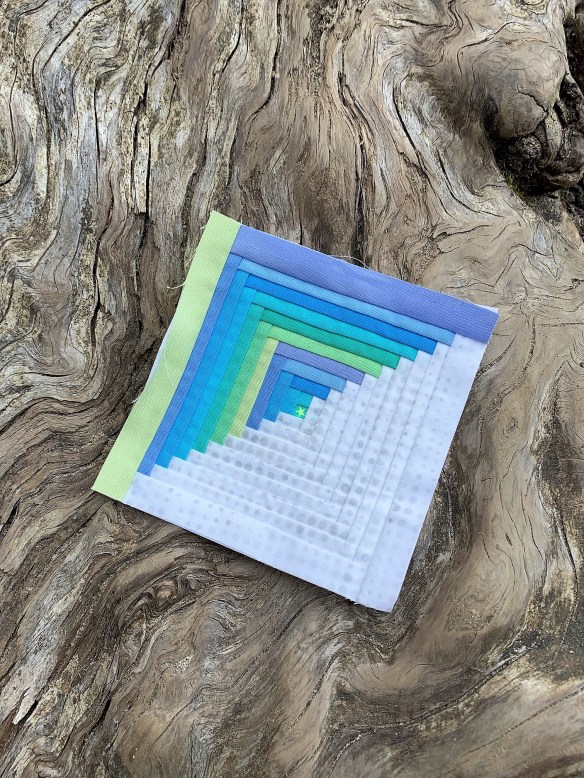
Week 1: Log Cabin Block on Tree
Week 1: Log Cabin block on a stump
I really love these colors together! I’m leaning towards making a small wall-hanging quilt with the blocks from this SAL. I may make a few extra of some of the blocks, but I have’t entirely decided.
Here’s a look at the back of the block. I will keep the paper on for stability until I sew the block to another block or sashing.
Week 1: Log Cabin back of block
Are you participating in the SAL? Leave me a comment below!
I’m so excited to share with you a fun new quarterly swatch service program from a wonderful modern quilt store, The Confident Stitch!
When you sign-up for this program, you can choose to receive from one or more different swatch card options including Quilting Cottons, Garment Fabrics (Warm Tones), and Garment Fabrics (Cool Tones). The links in this post are affiliate links, meaning that I earn a small commission. However, I only endorse quilting products that I use myself and find valuable.
Each swatch card subscription features 8 fabric samples and includes delivery for just $13 plus a special discount code for all of the featured fabrics!
The advantage of having a swatch card for quilters is that you can see and feel the fabrics in person before ordering larger cuts of fabric. When you are matching fabrics for a quilt project, it is so important to be able to see the exact shades and hues in the fabric. I also like to feel the hand of a fabric before purchasing, and each 3-inch by 2-inch swatch is large enough to satisfy our tactile need for fabric petting!
The Spring 2020 swatch cards are shipping now. I really love the bright modern fabrics featured this month for quilters.
Outside of the Swatch Card
The outside portion of the card has a note about Kate McIvor, founder and owner of The Confident Stitch. See the color wall on display with the cute dachshund pillow? I made that pillow as a sample for the shop!
Swatch Service, Quilting Cottons, Outside of Card
Inside of the Swatch Card
You’ll find all the quilty goodness on the inside! Each card comes with a brief description, describing the theme of this quarter’s fabric swatches. For this quarter, the theme is “London in the 1960’s.” Each individual fabric swatch is 3-inches by 2-inches. The fabric designers featured this month include Kaffe Fassett, Tula Pink, Cotton + Steel, Carolyn Friedlander, Ruby Star Society, and Art Gallery Fabrics.
You will also receive a special discount code for all the fabrics listed in the swatch card. This discount is only available to swatch card subscribers!
Swatch Service, Quilting Cottons, Inside of Card
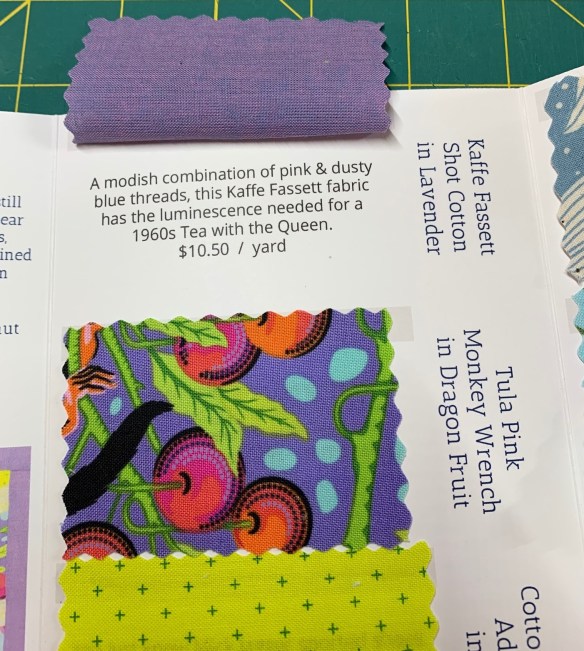
Peek Under Each Fabric
After you have lovingly petted each fabric swatch, lift it up for a description and pricing of each fabric.
Swatch Service, Quilting Cottons, Close-Up
Are you ready to subscribe? Hope on over to The Confident Stitch and sign-up today! Let me know in the comments if you’ve joined! I can’t wait to see the projects that you create using these fabrics.