Remember my post about making fabric baskets? Well, I couldn’t stop with just one, and so I made 4 similar baskets for a group of quilting friends.
I wanted to get a picture of the baskets all together in an outdoor setting. So, my family and I took a weekend drive to a beautiful little lake, with falls colors beginning to emerge.
I placed all 4 baskets into a plastic bag, and I took them with me on the very short hike. It was only 1 mile around the little lake, with a some heavy brush in a few sections.
How cute are these baskets all lined up on a log with the lake in the background?
Fabric baskets on log
We had a great time, having this little lake all to ourselves. It wasn’t chilly, but there was a beautiful cloud hovering over the lake surface and providing a misty backdrop to our time here. The foliage was quite wet, and so our pants became soaked as we walked around the lake, but we didn’t mind at all.
The maples were starting to turn color, with many trees displaying vibrant yellow leaves and a few turning towards orange and red.
Cloud hugging Daly Lake
Wooden bridgeFall foliage
I hope my friends like their fabric baskets! Getting out in nature is one of my favorite things to do, and it really helps me deal with times of stress. I can’t wait to go again!
Recently, I came across a fun sew along on Instagram where the participants were making fabric baskets, also called tubs. I was intrigued by them, by I knew that I didn’t have time to complete one within the sew along timeframe. I purchased the pattern called “Tub Family” from RosieTaylorCrafts on Etsy, and set it aside for a couple of days.
Then, several weekends ago, I had a few hours to try my hand at making one. The pattern comes with 3 sizes of fabric baskets, and I opted to make the largest one. I have some of the beautiful Homemade fabric by Tula Pink, which I think is absolutely perfect to make all sorts of things for my sewing room.
The pattern walks you through the construction steps pretty well, but I have a few pointers if you decide to make one.
Once you have your main basket panel, liner, and foam all ready for quilting, I do recommend using the straight-line quilting as mentioned in the pattern. I tried doing an all over swirly type quilting on my test basket, but I had a much harder time attaching the bottom and getting the basket to sit properly. It’s just kinda floppy!
On my “real” basket, I did straight-line quilting using a beautiful Aurifil bright green thread with a seam guide on my Bernina. In the picture below, you can see my seam guide helped to give me perfect 1-inch quilting lines.
After quilting at 1-inch and .5-inch intervals, I had my finished main panel, ready for my quilt inspector. I used some fun Tula Pink ribbon along either side of the fussy cut sewing machine in the center of the panel. This pattern is so flexible that you could make baskets out of scraps, a single piece of fabric, or several large chunks like I did.
My finished main body panel with quilt inspector
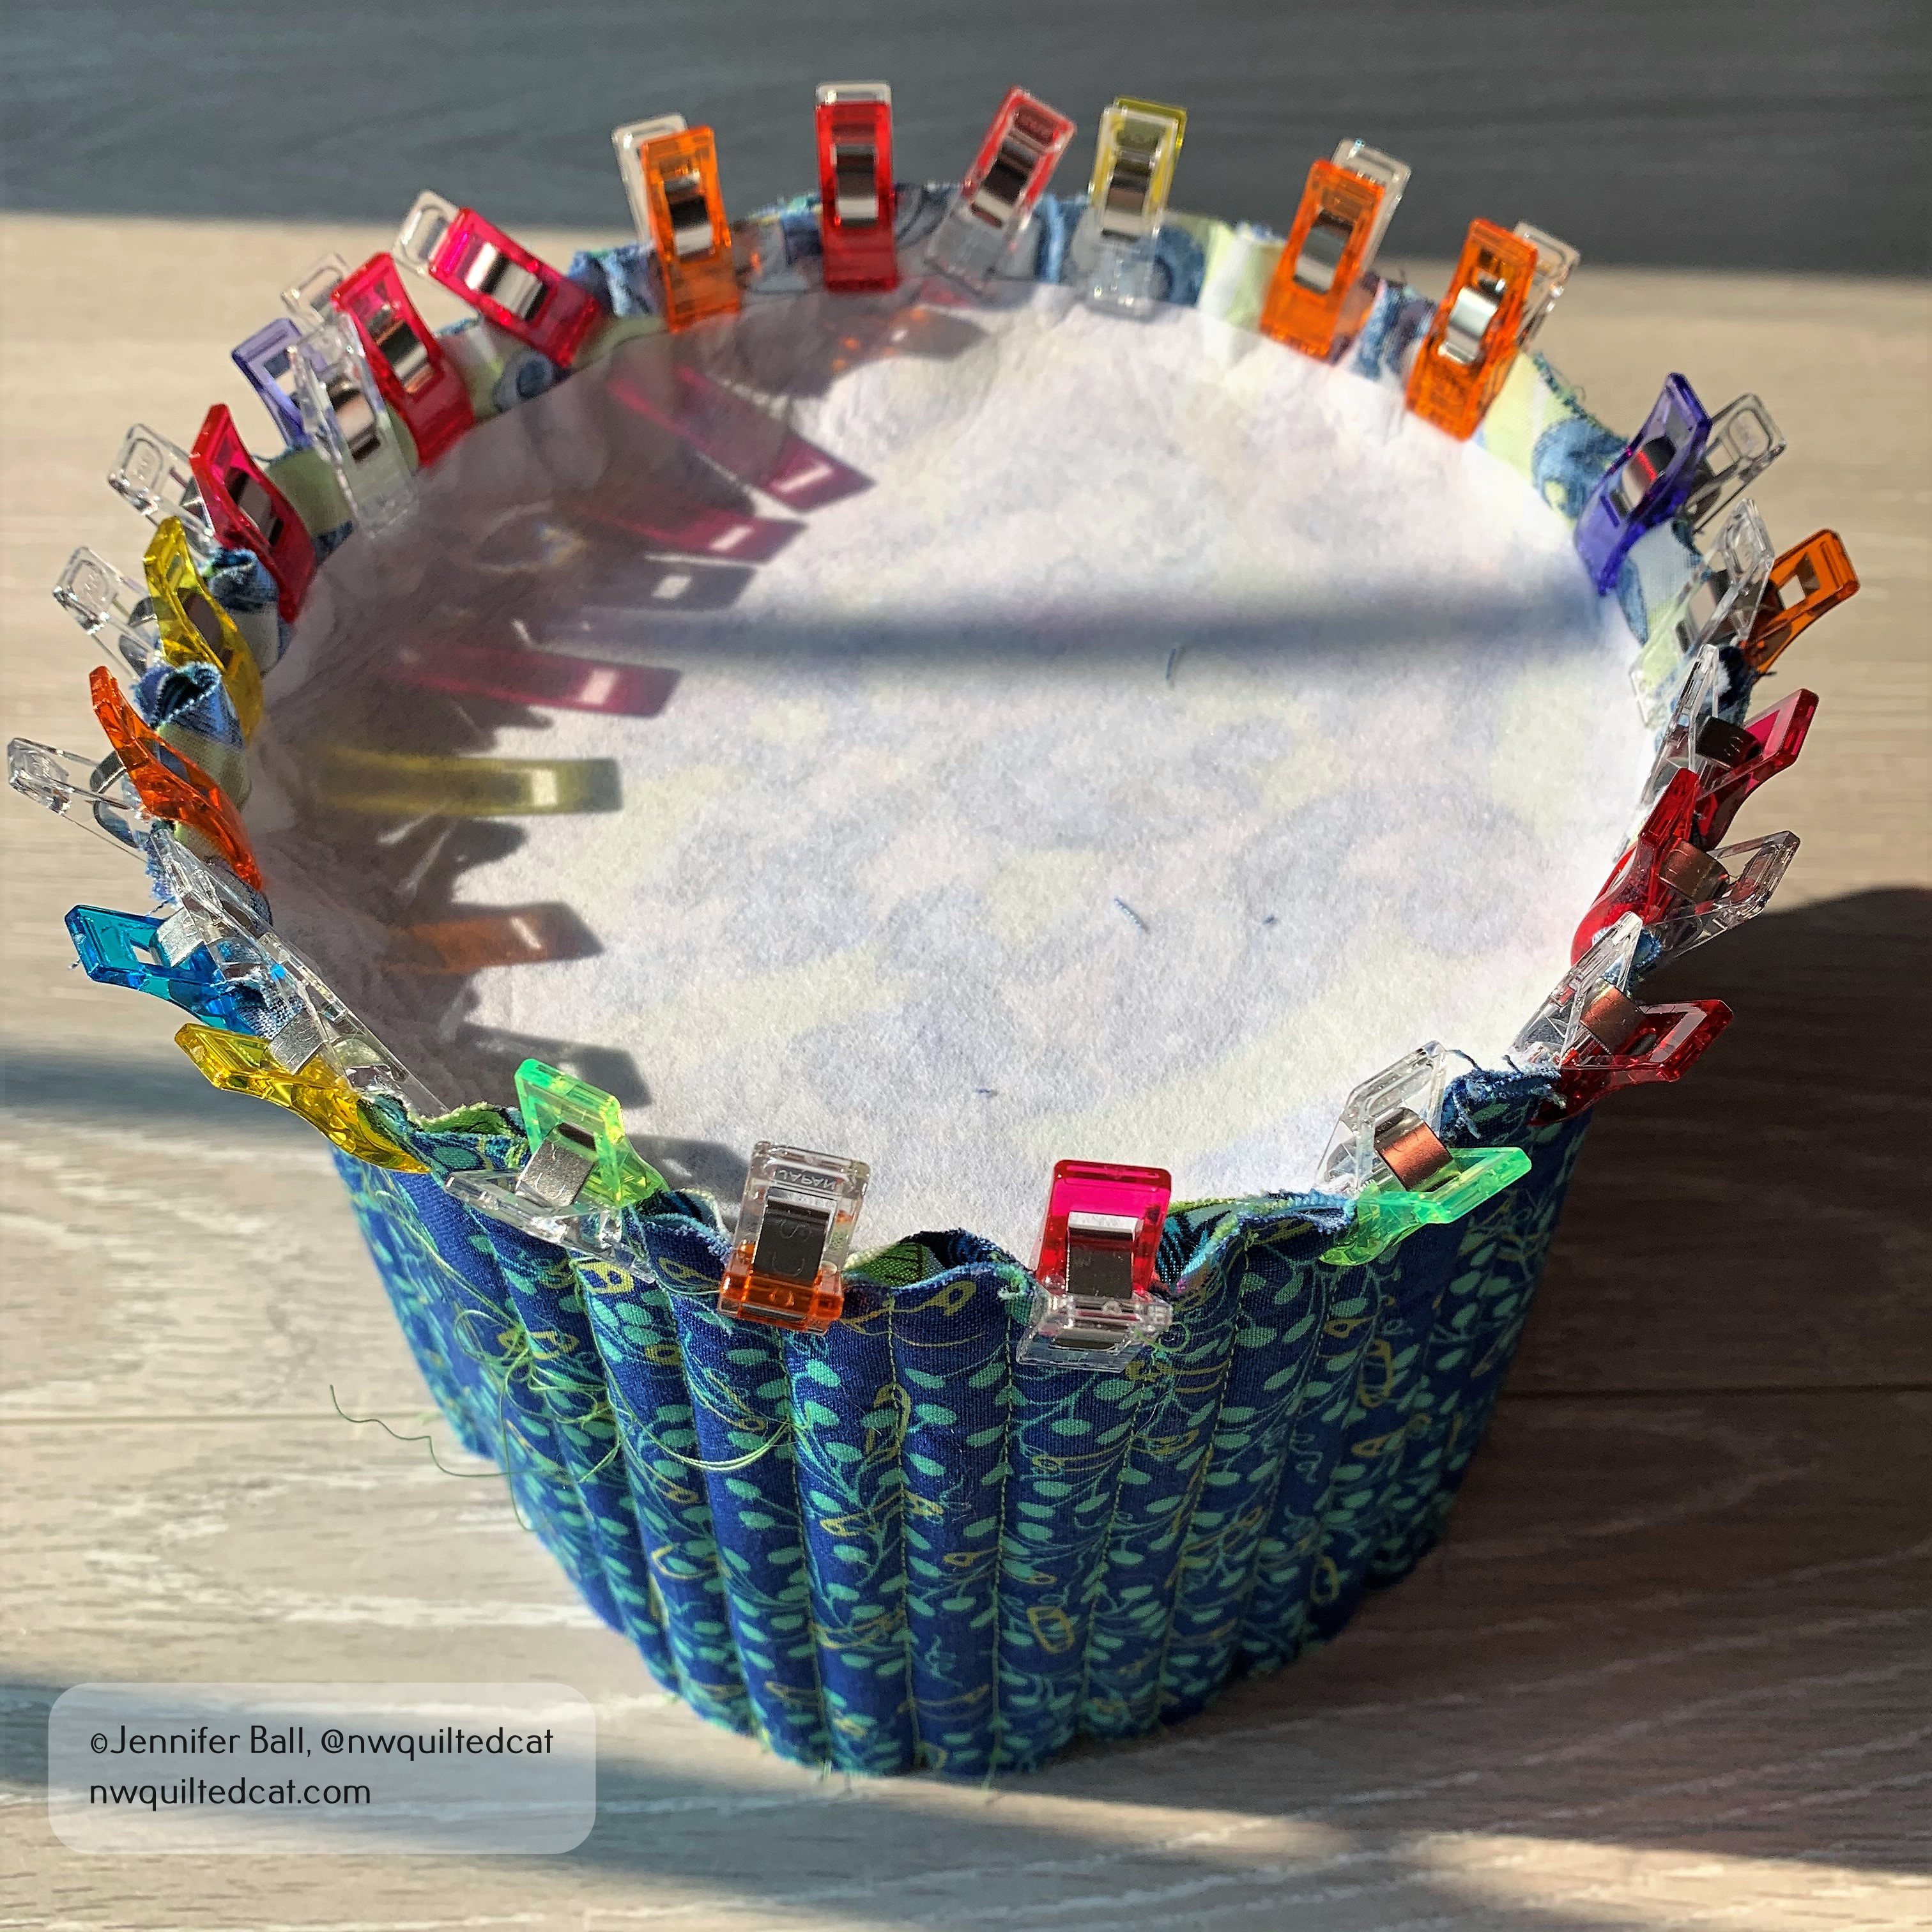
After trimming the main panel to the correct size, I started to attach the base to the body. This step is the hardest part of the whole pattern because the base really needs to be eased in using clips or pins.
I used Clover clips to secure my base rather than pins. No blood! If the base is still too large after easing it, you may need to trim it down slightly.
Using Clover clips to attach the base
The pattern does have you hand stitch the base to the body before using your sewing machine to help with puckers. I highly recommend doing this step. You can remove the clips after hand basting, and then use your machine to slowly and carefully stitch the base to the body.
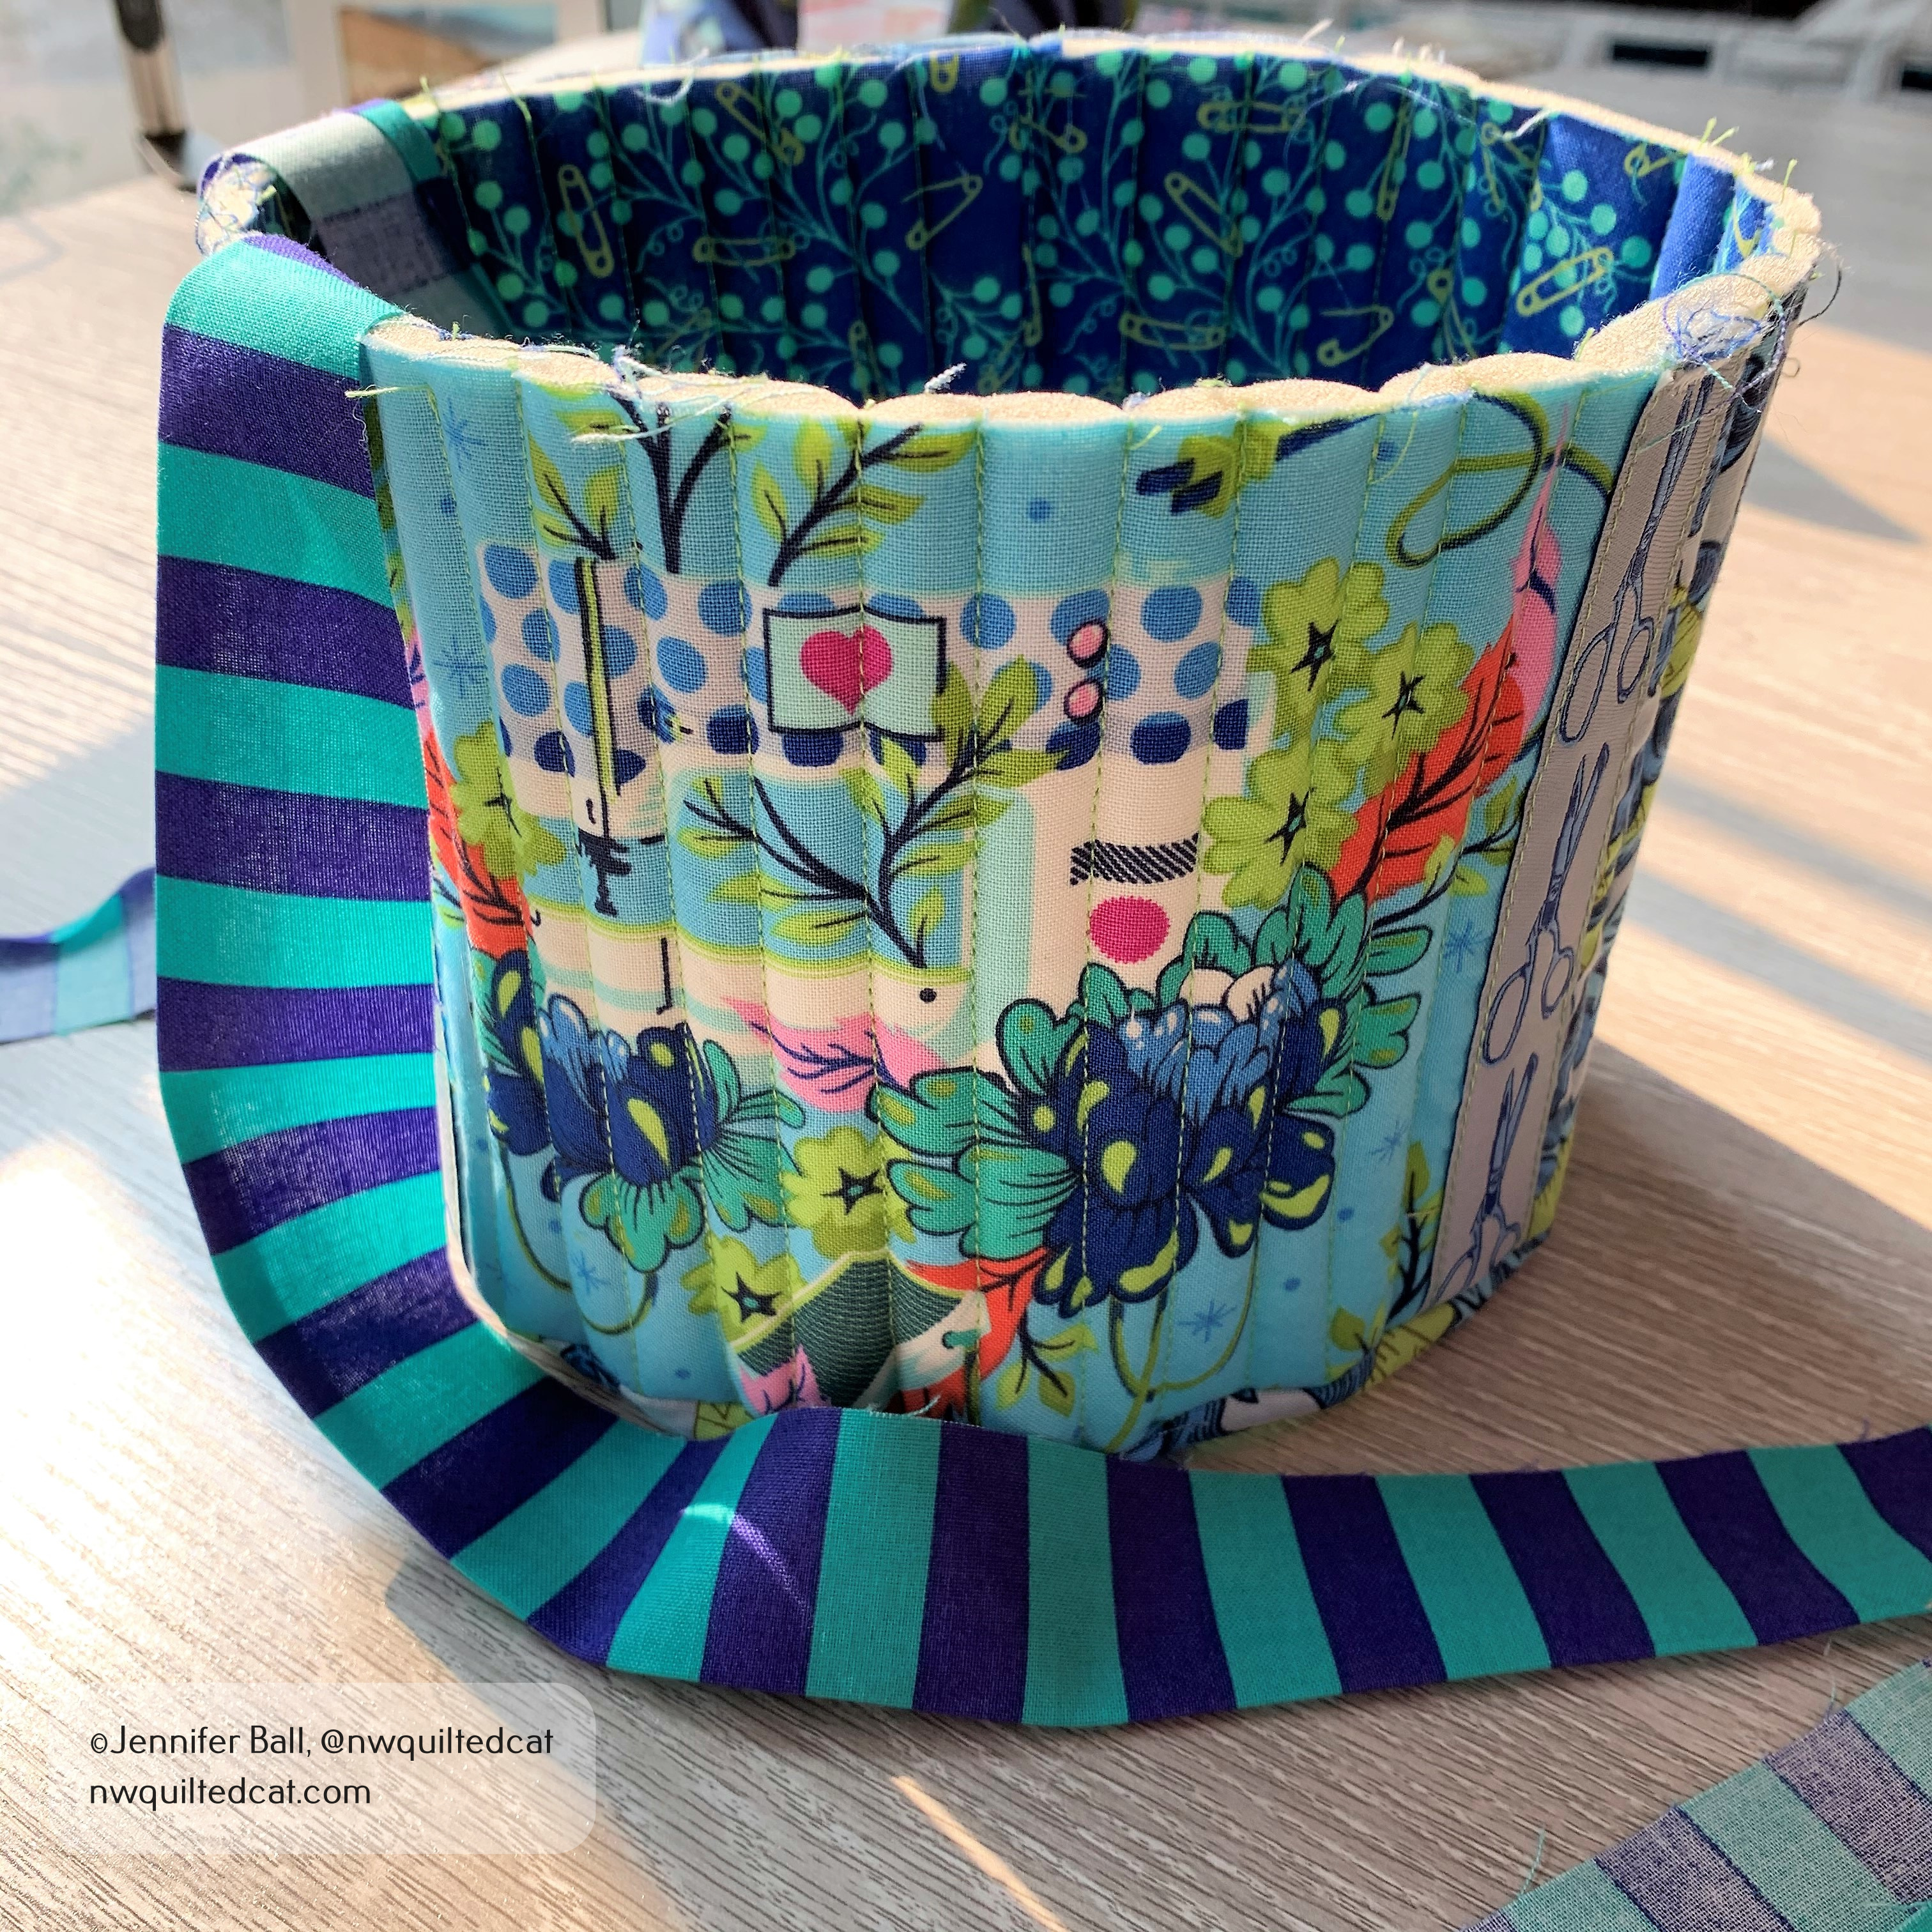
I did my binding a bit different from the pattern by pressing one side in 1/4-inch so that I’d have a nice finished edge to work with when sewing the second long edge to the inside of the basket.
Getting the binding ready
I did completely machine stitch my binding rather than hand sewing the inside, just for lack of time. I used the same color thread as the quilting, and I think it looks fine.
Here’s a look at my completed fabric basket, filled with some EPP supplies:
My finished basket!
These baskets are addictive to make, and I want to try making the medium and small sized ones soon. Maybe Christmas themed ones as well!
There are many examples of completed baskets using the #tubfamily hashtag on Instagram.
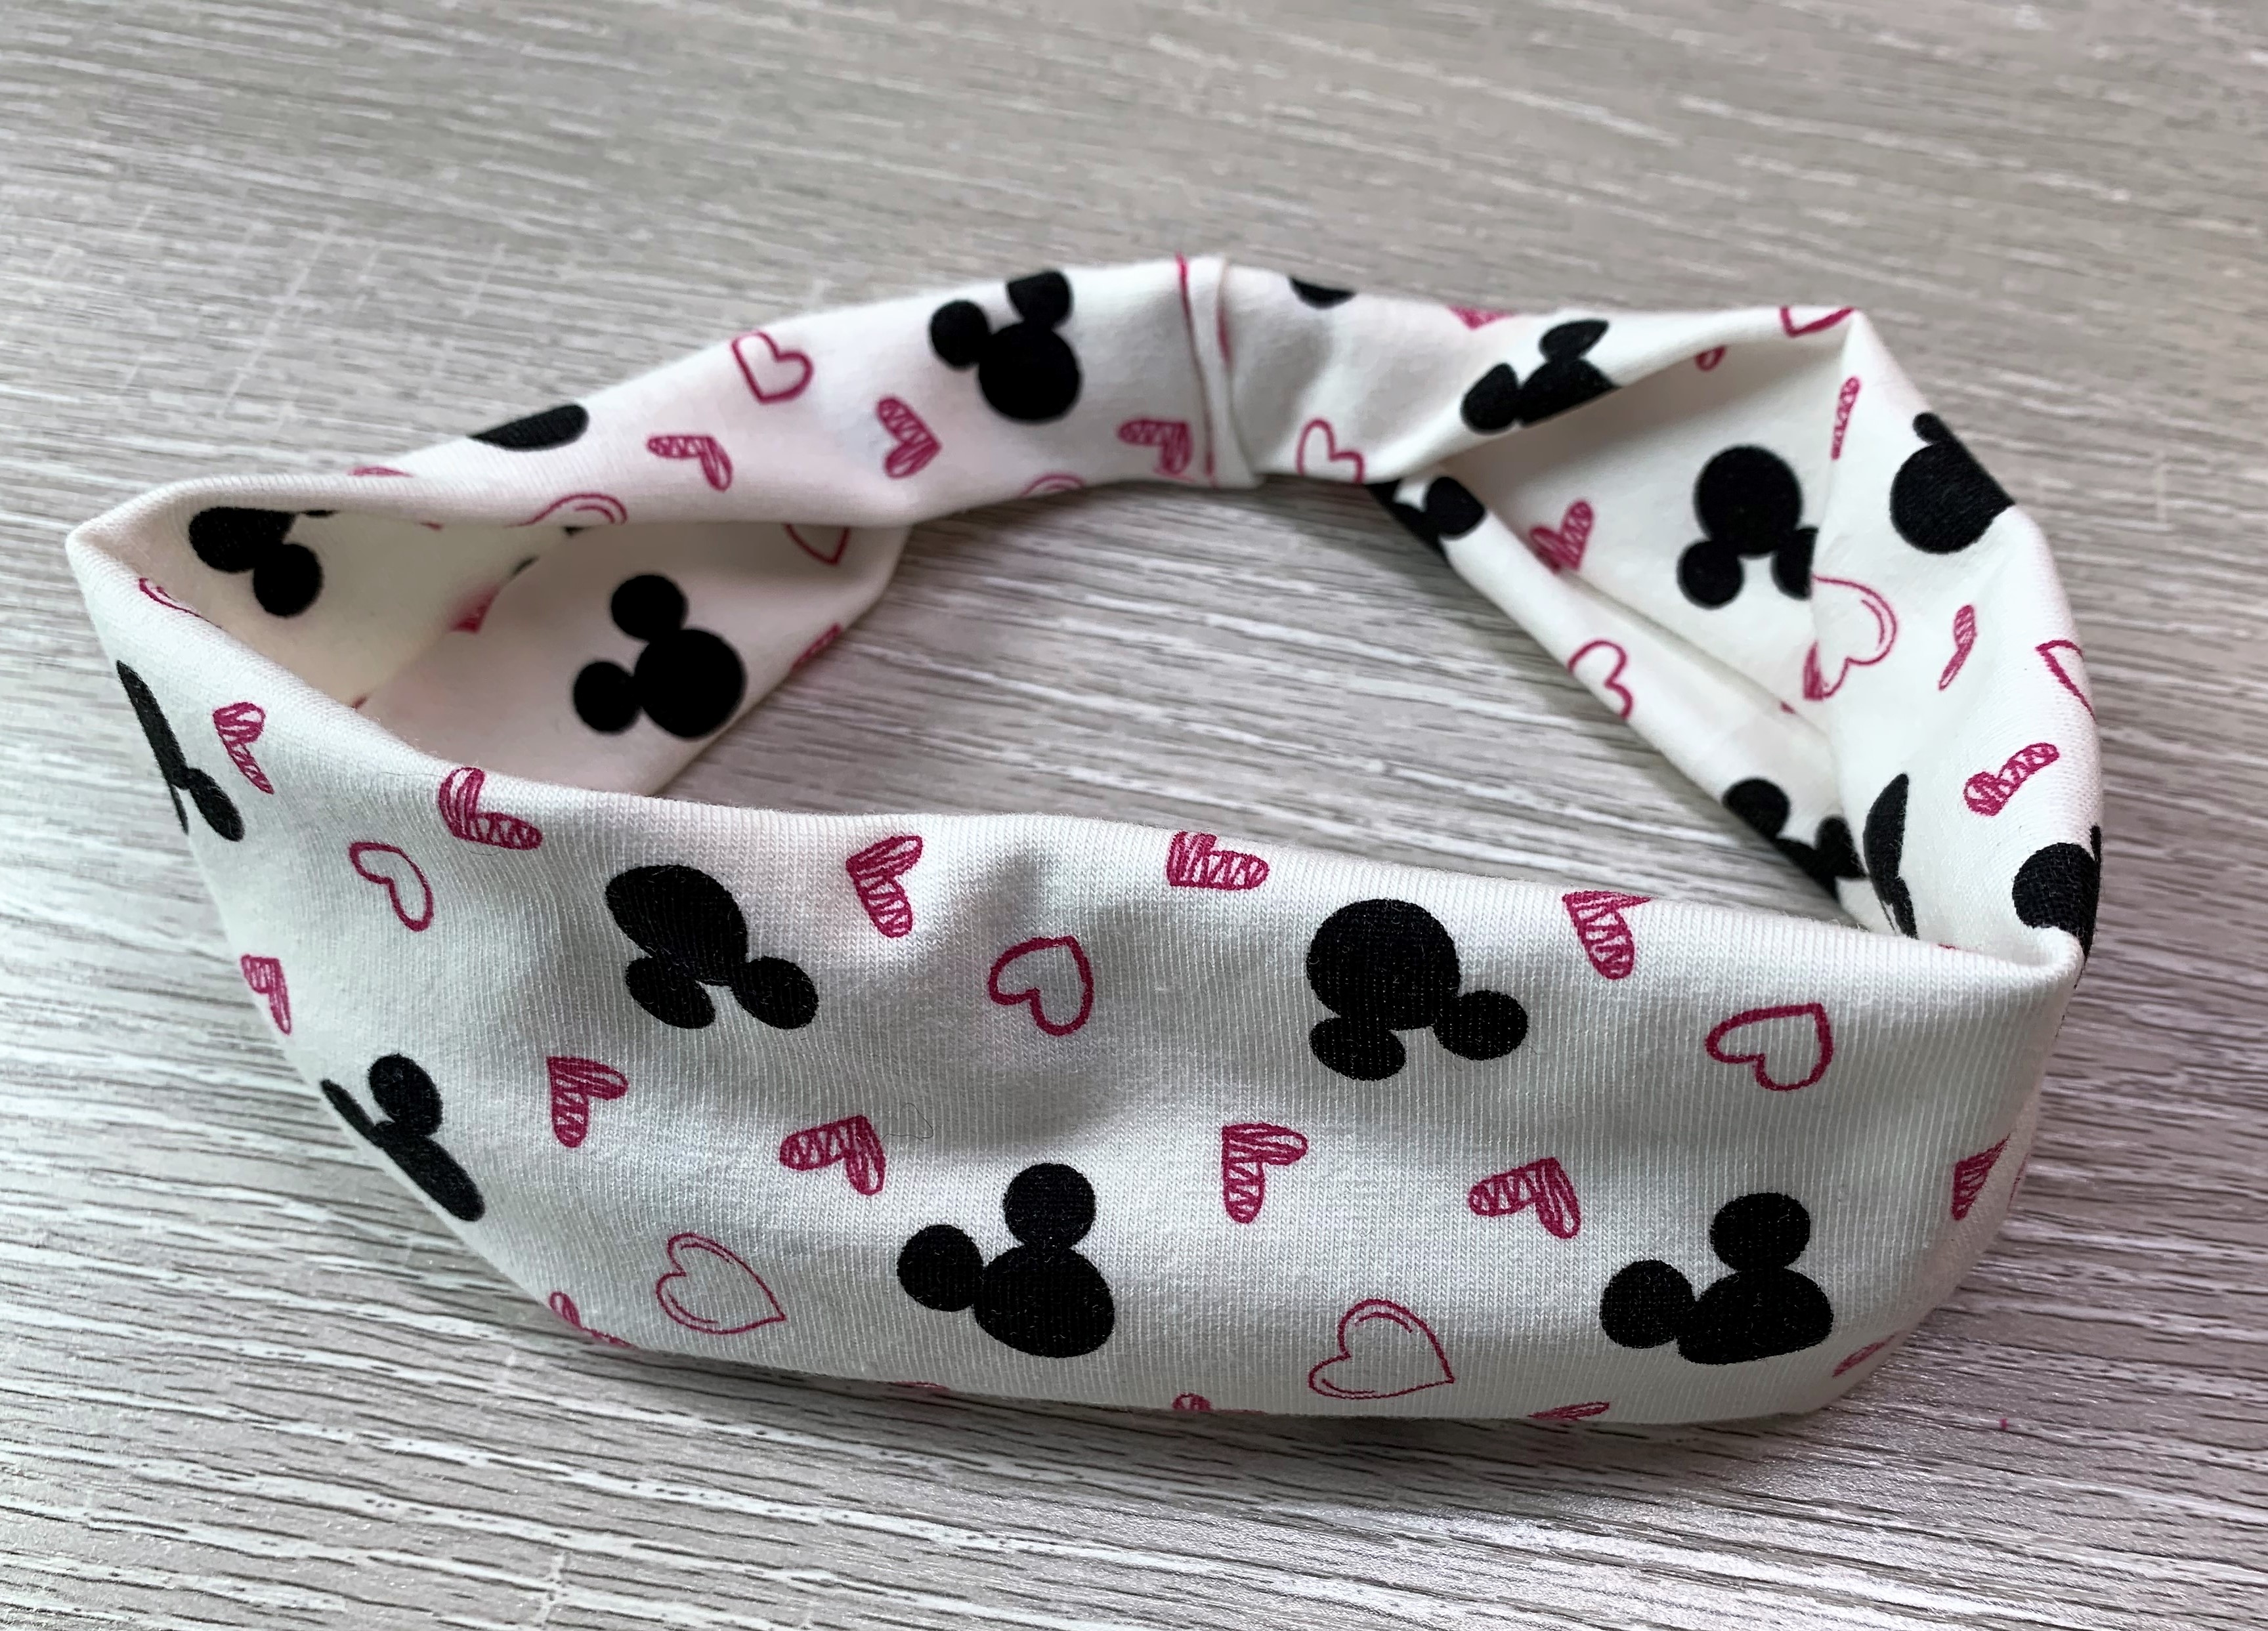
I’ve experienced migraine headaches my entire life. I’ve tried all sorts of remedies, and I do have prescription medicine to help manage the pain.
I’ve told my husband many times that I wished there was some type of headache wrap that I could wear because I tend to use my hands to press against my forehead for some relief. My hands get tired after a few minutes, ugh!
So, why not make something myself? Although this migraine relief headband won’t cure your achy head, it might help relieve the pain.
Supplies
Basic sewing supplies
Knit or other stretchy fabric
A sewing machine needle suitable for sewing on knit fabric
Fabric scissors
Measuring tape
Migraine Relief Headband Tutorial
Use the measuring tape to measure your head, centering the tape in the middle of your forehead.
Subtract 2-inches from the measurement to get your headband length.
Cut a piece of fabric to your headband length by 5-inches wide. For example, my head measured at 20-inches. I use a piece of knit fabric that is 18-inches long by 5-inches wide.
Fold the fabric in half, right sides together, and hold together with clips or pins.
Fold headband in half, right sides together
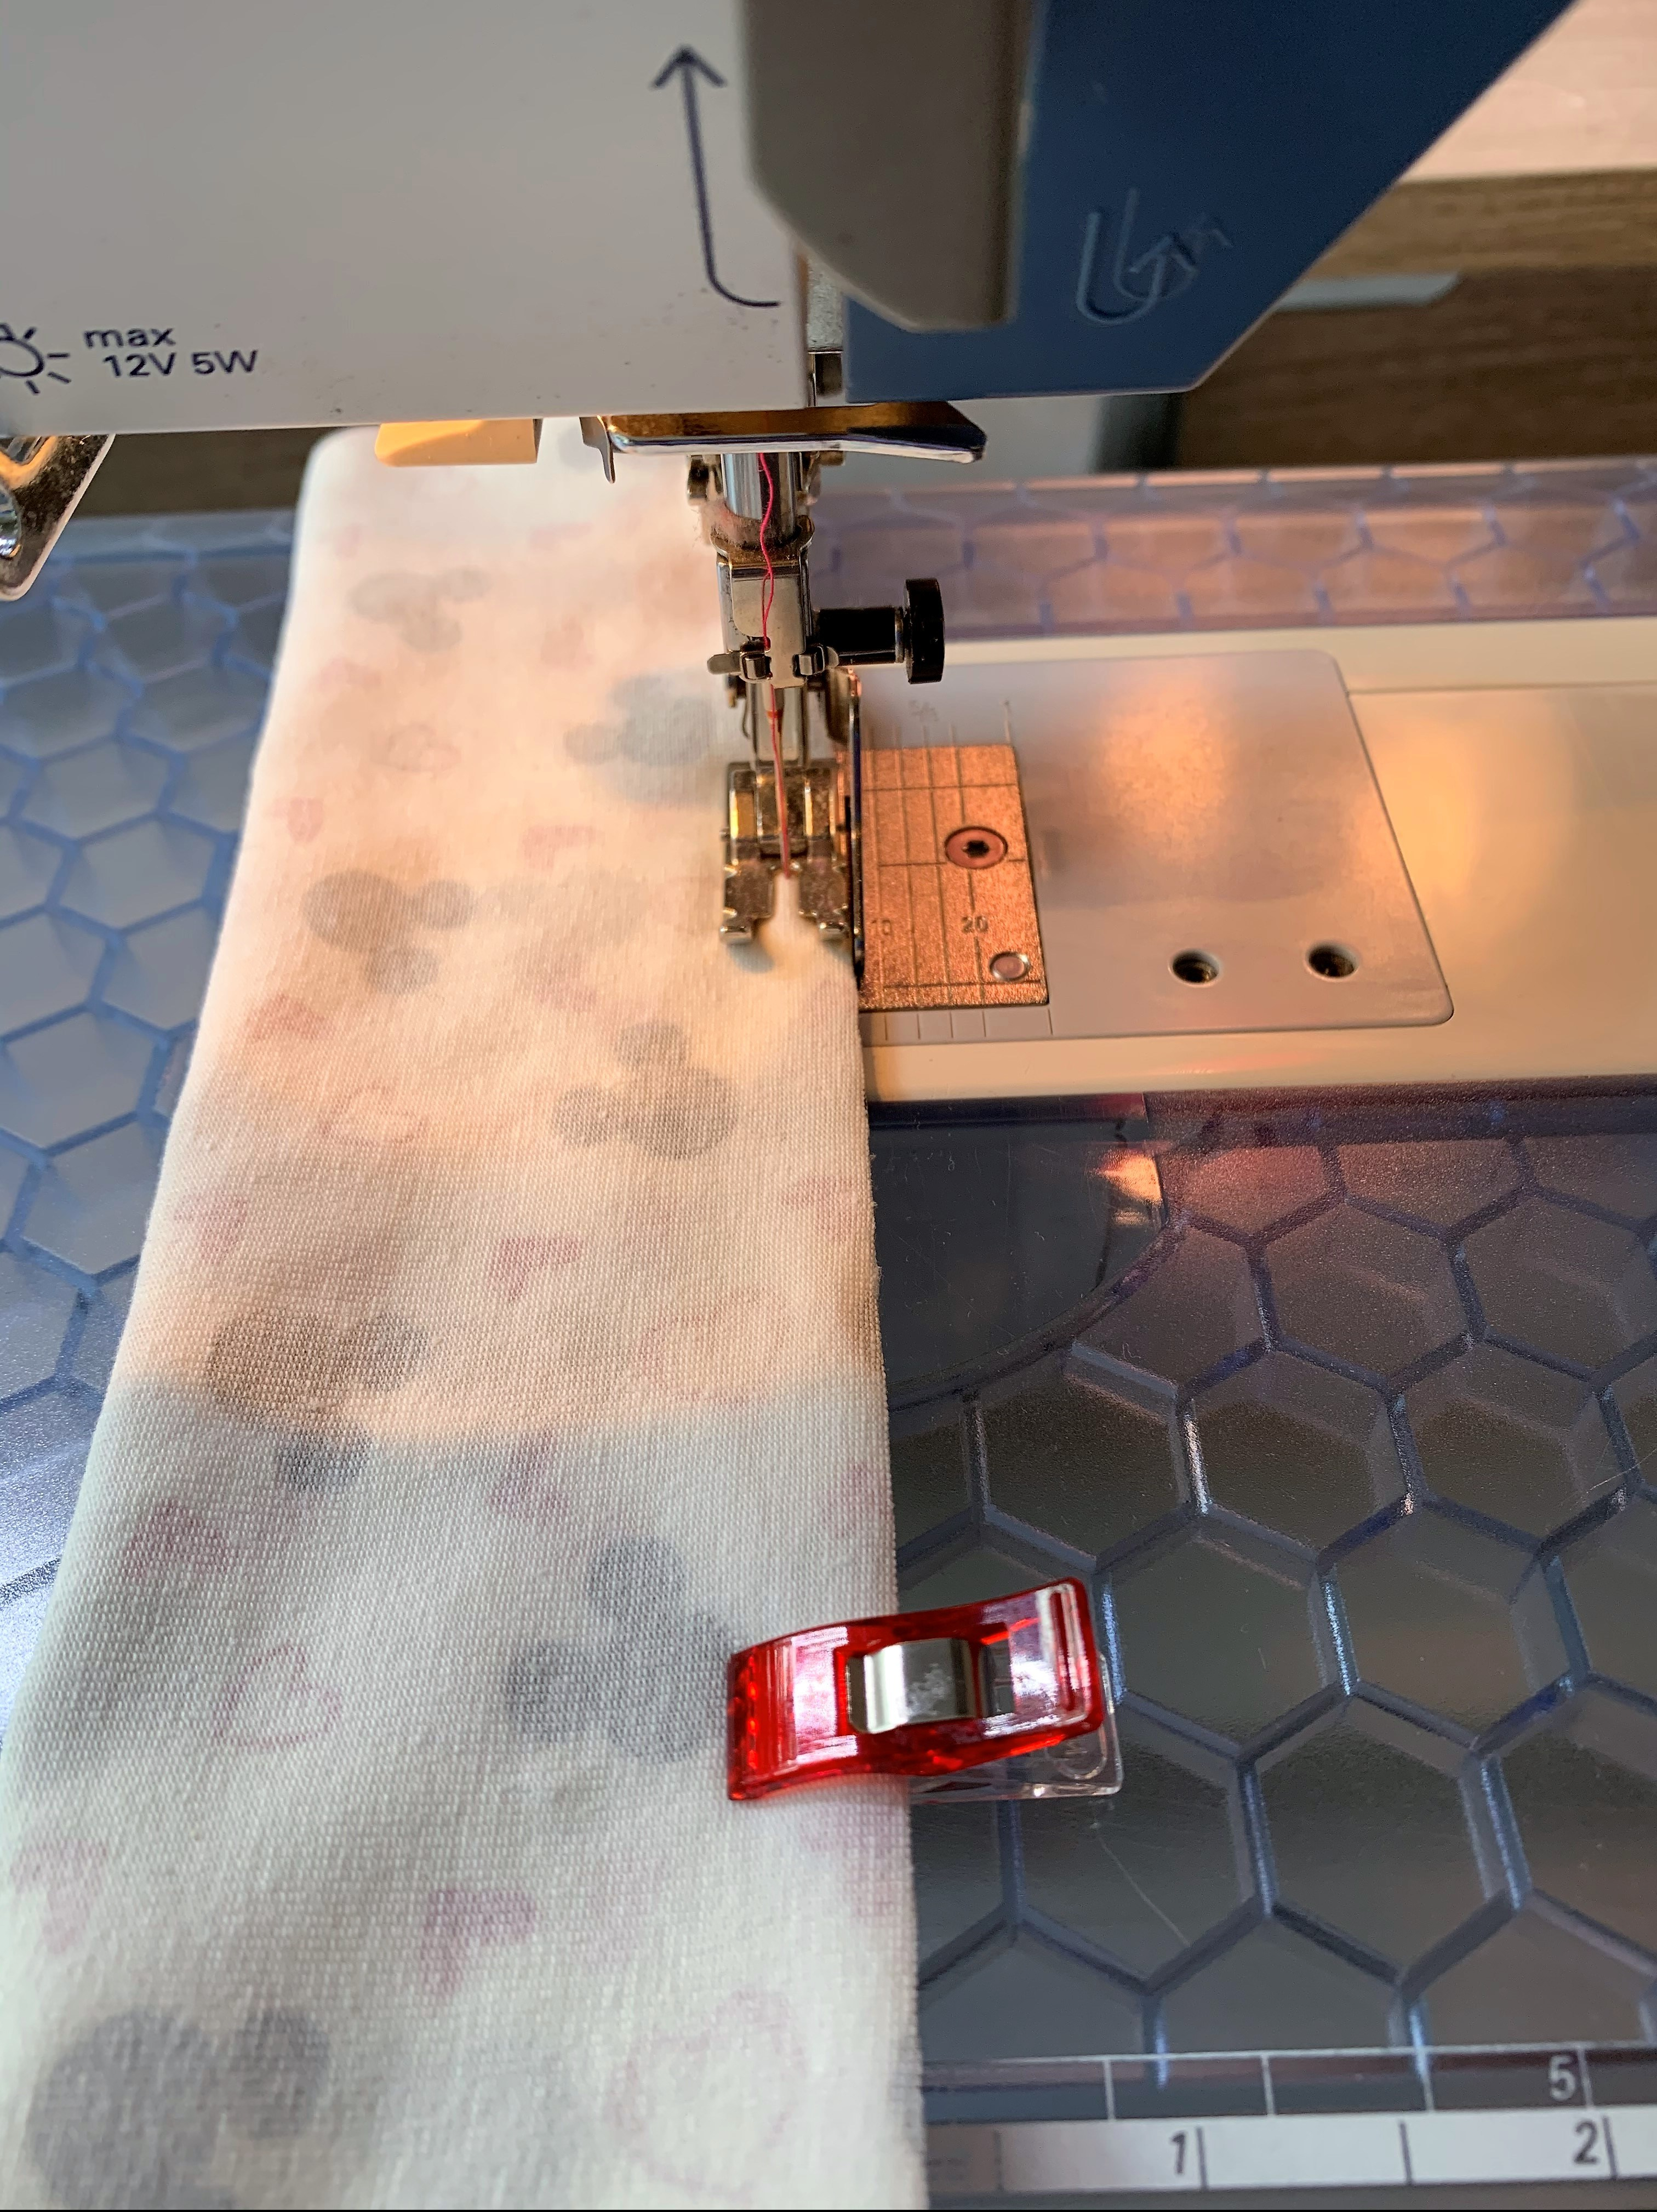
Sew the long edge using a 1/4-inch seam. Be sure to back stitch at both ends. I like to use a stiletto to help feed the fabric through the machine.
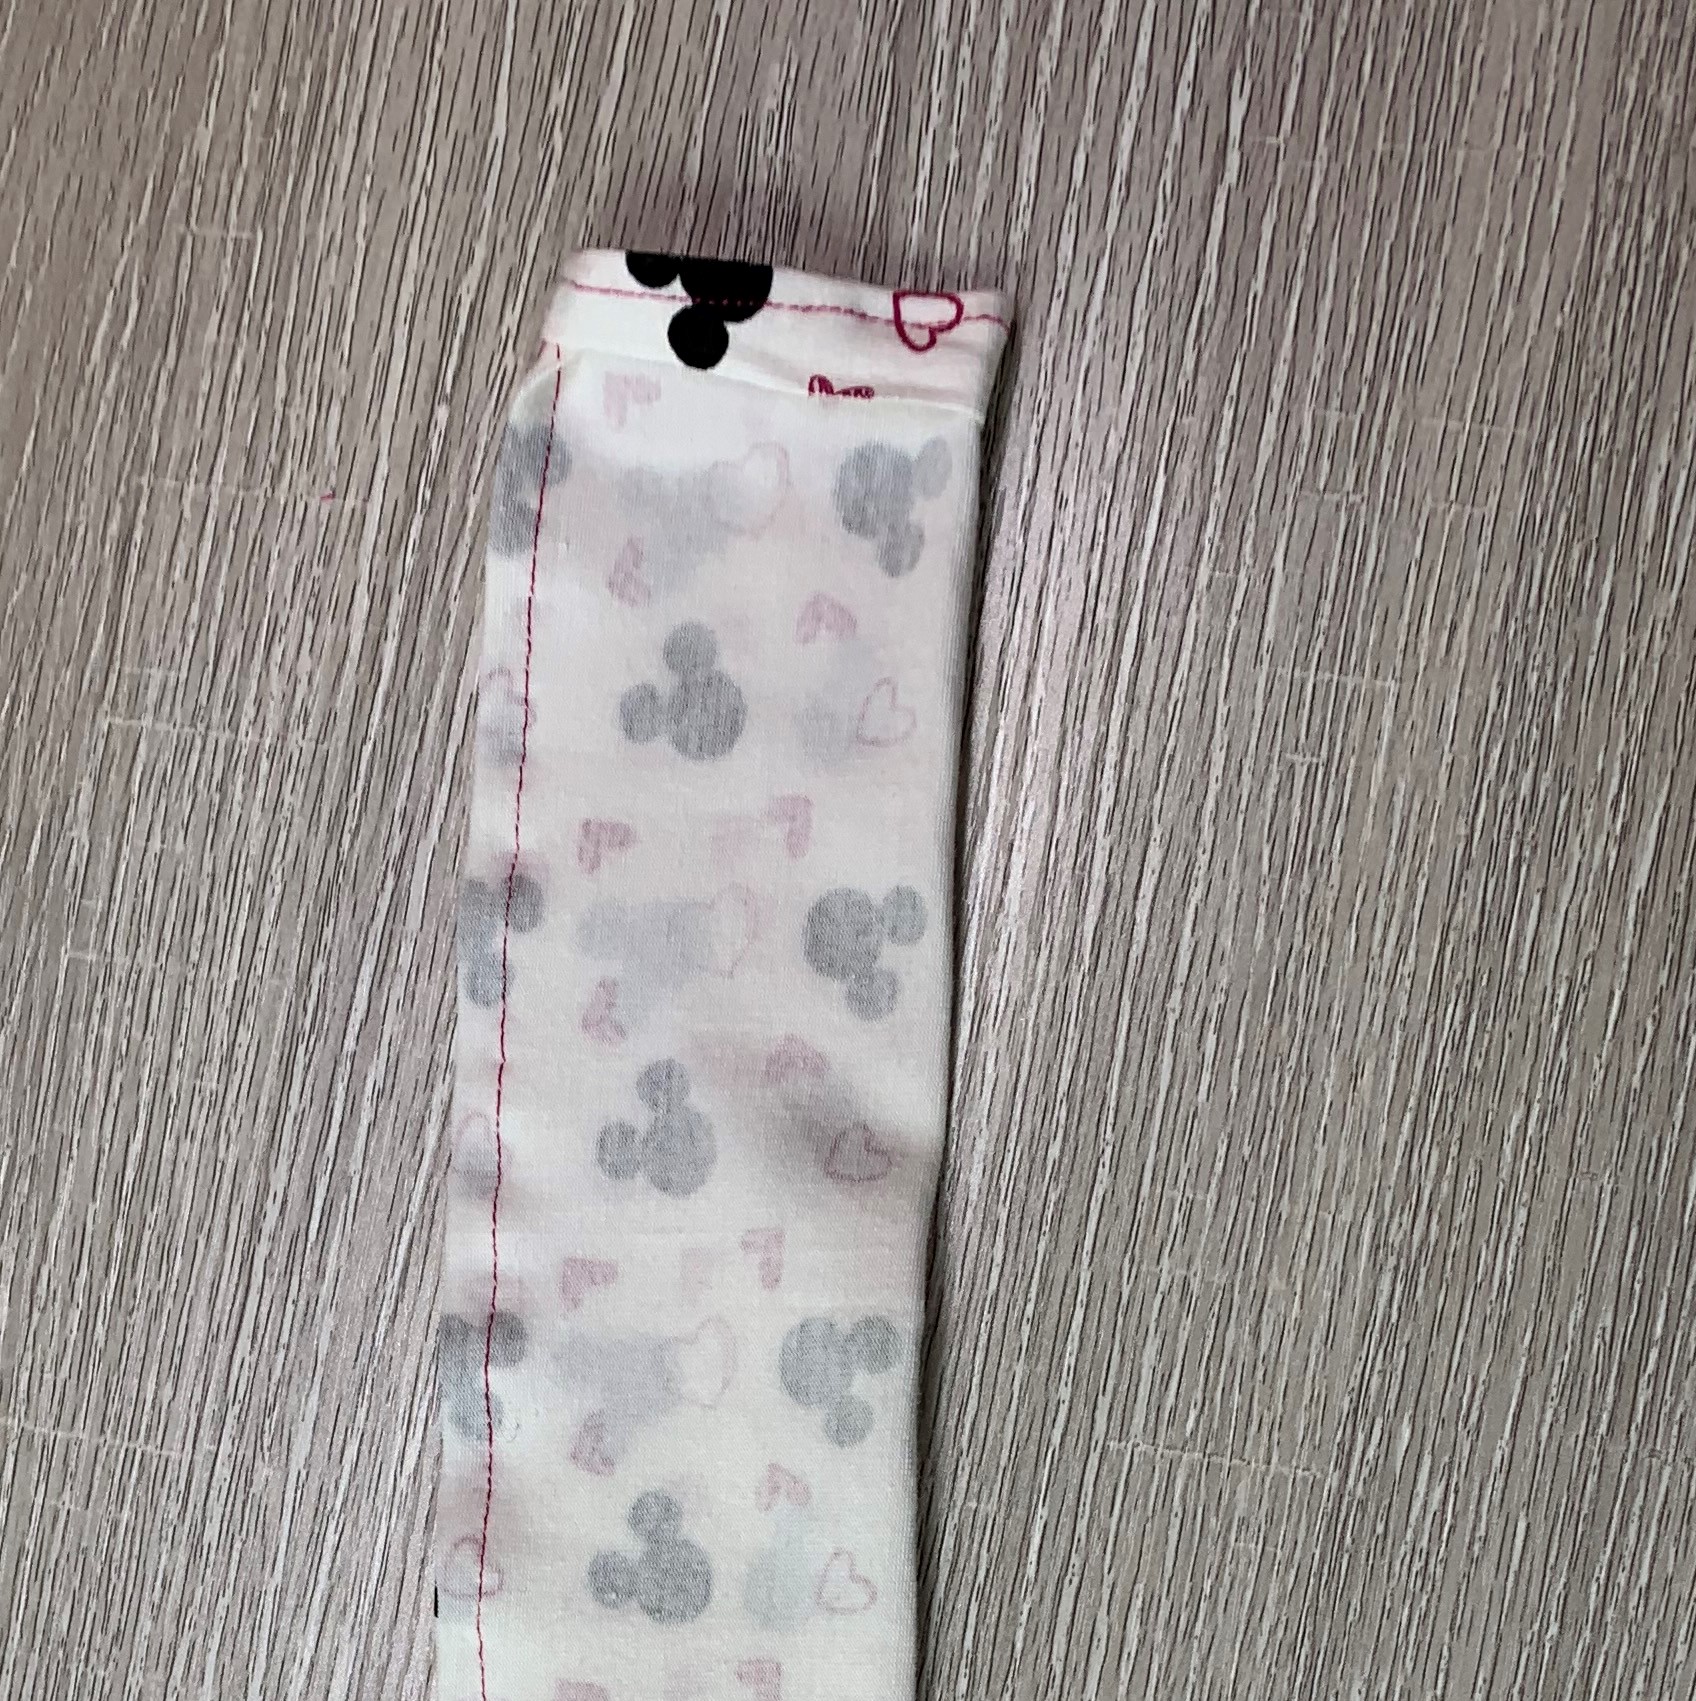
Fold one short edge over, wrong sides together.
Sew the short edge with a 1/4-inch seam. You only need to fold this seam once.
Fold one short side, wrong sides together
Turn the headband inside out. The right side of the fabric should now be on the outside.
Insert the raw short edge into the sewn short edge, about 1/4-inch. Use clips to hold the ends together.
Sew the two short edges together along the earlier stitching line, and remember to back stitch. You can use the headband now or go to the next step.
Tuck in the raw edge
Fold the stitched short seam in half, right sides together.
Stitch using a 1/4-inch seam. I like this final step because it gives the headband a nice finish.
Back of headband, short seam folded in half and sewn
Your headband is now finished and ready to wear! It should fit tightly against your forehead so that the compression offers a little relief.
A Completed Headband!
If you do not have allergies to fragrances, you can add a drop or two of your favorite essential oil to the headband.
I’m making a few of these headbands using different knit prints because they can also be used for exercise or hiking headbands. My bangs continue to grow longer and longer during COVID-19, and I’ve decided to let my hair grow out a bit before visiting my hairdresser. These headbands will come in handy during this awkward hair phase!
Happy sewing and I hope these headbands help with your migraine pain.
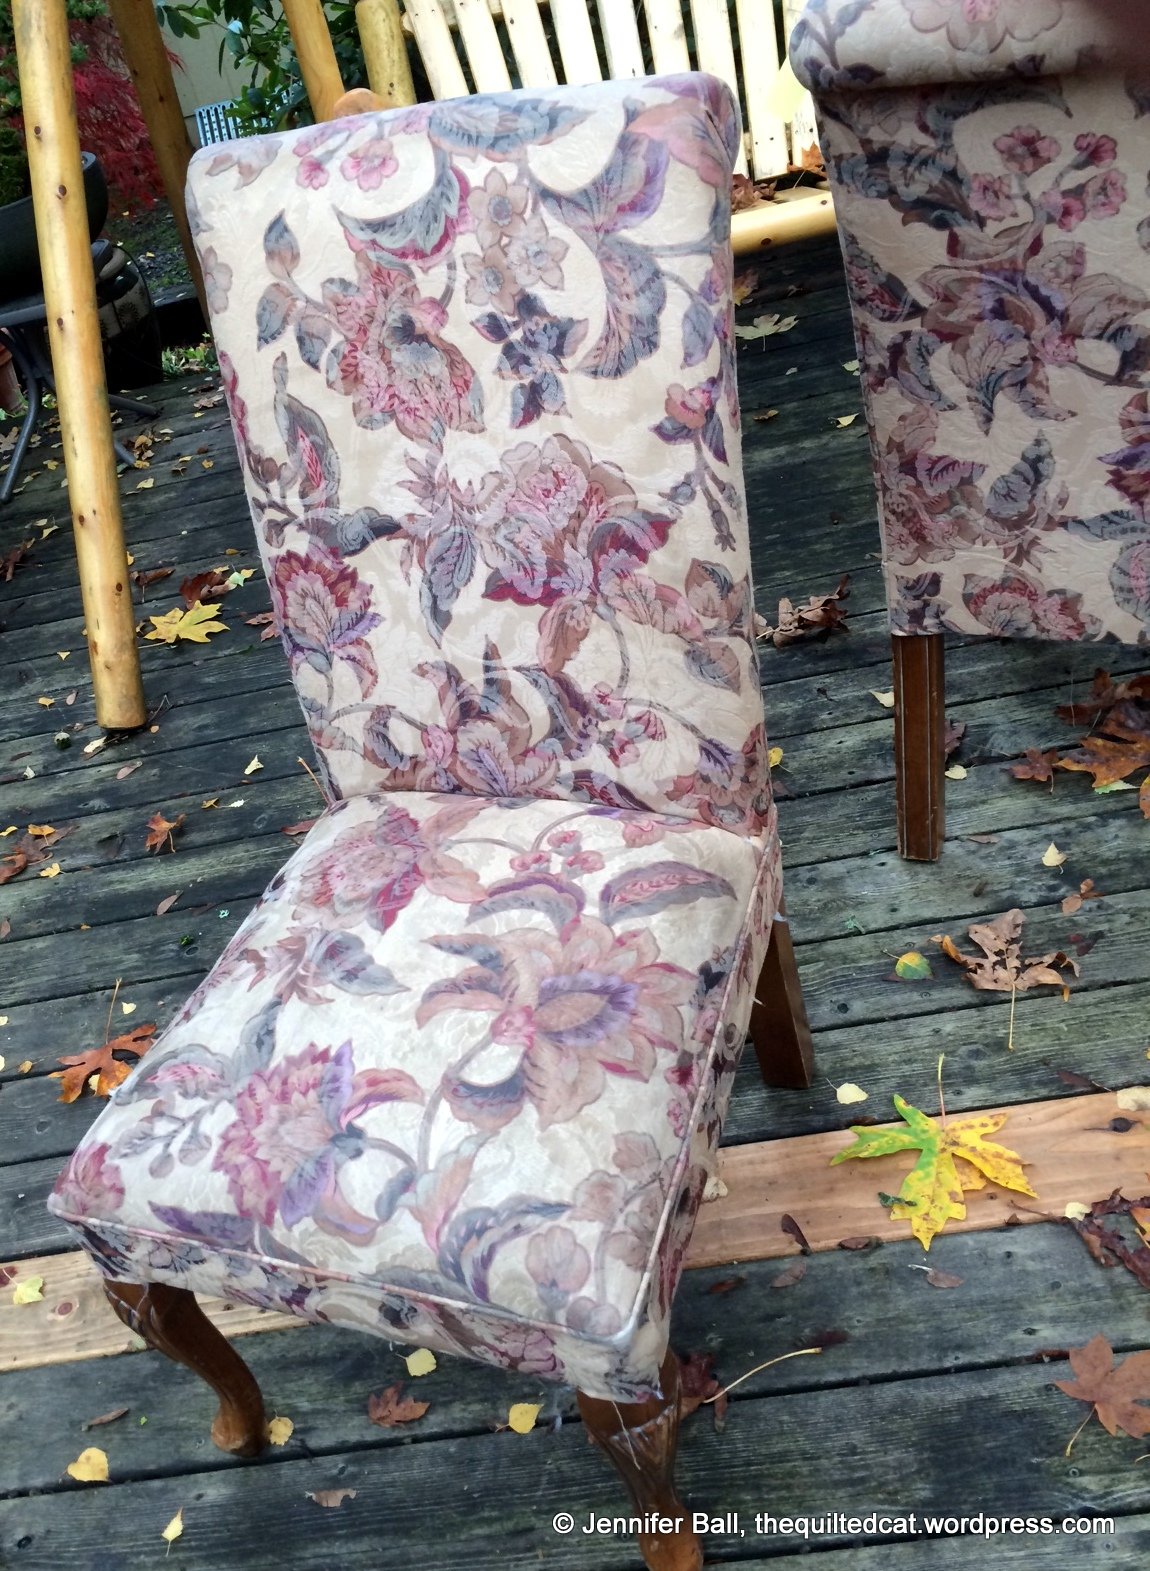
Several months ago, my husband and I purchased two well-worn chairs from a thrift shop. The upholstery was old, tired, and stained and needed to be refreshed. The chair legs also had some condition issues but the overall bones of the chair looked good.
We removed all the old upholstery to use as a pattern and replaced the foam cushions. For the legs, we removed years worth of dirt and stripped off the old stain. This process was pretty time consuming and took about a month, just working on it in our spare time on the weekends.
Thrift Store Chairs (Before)
Close-up of worn and dated upholstery
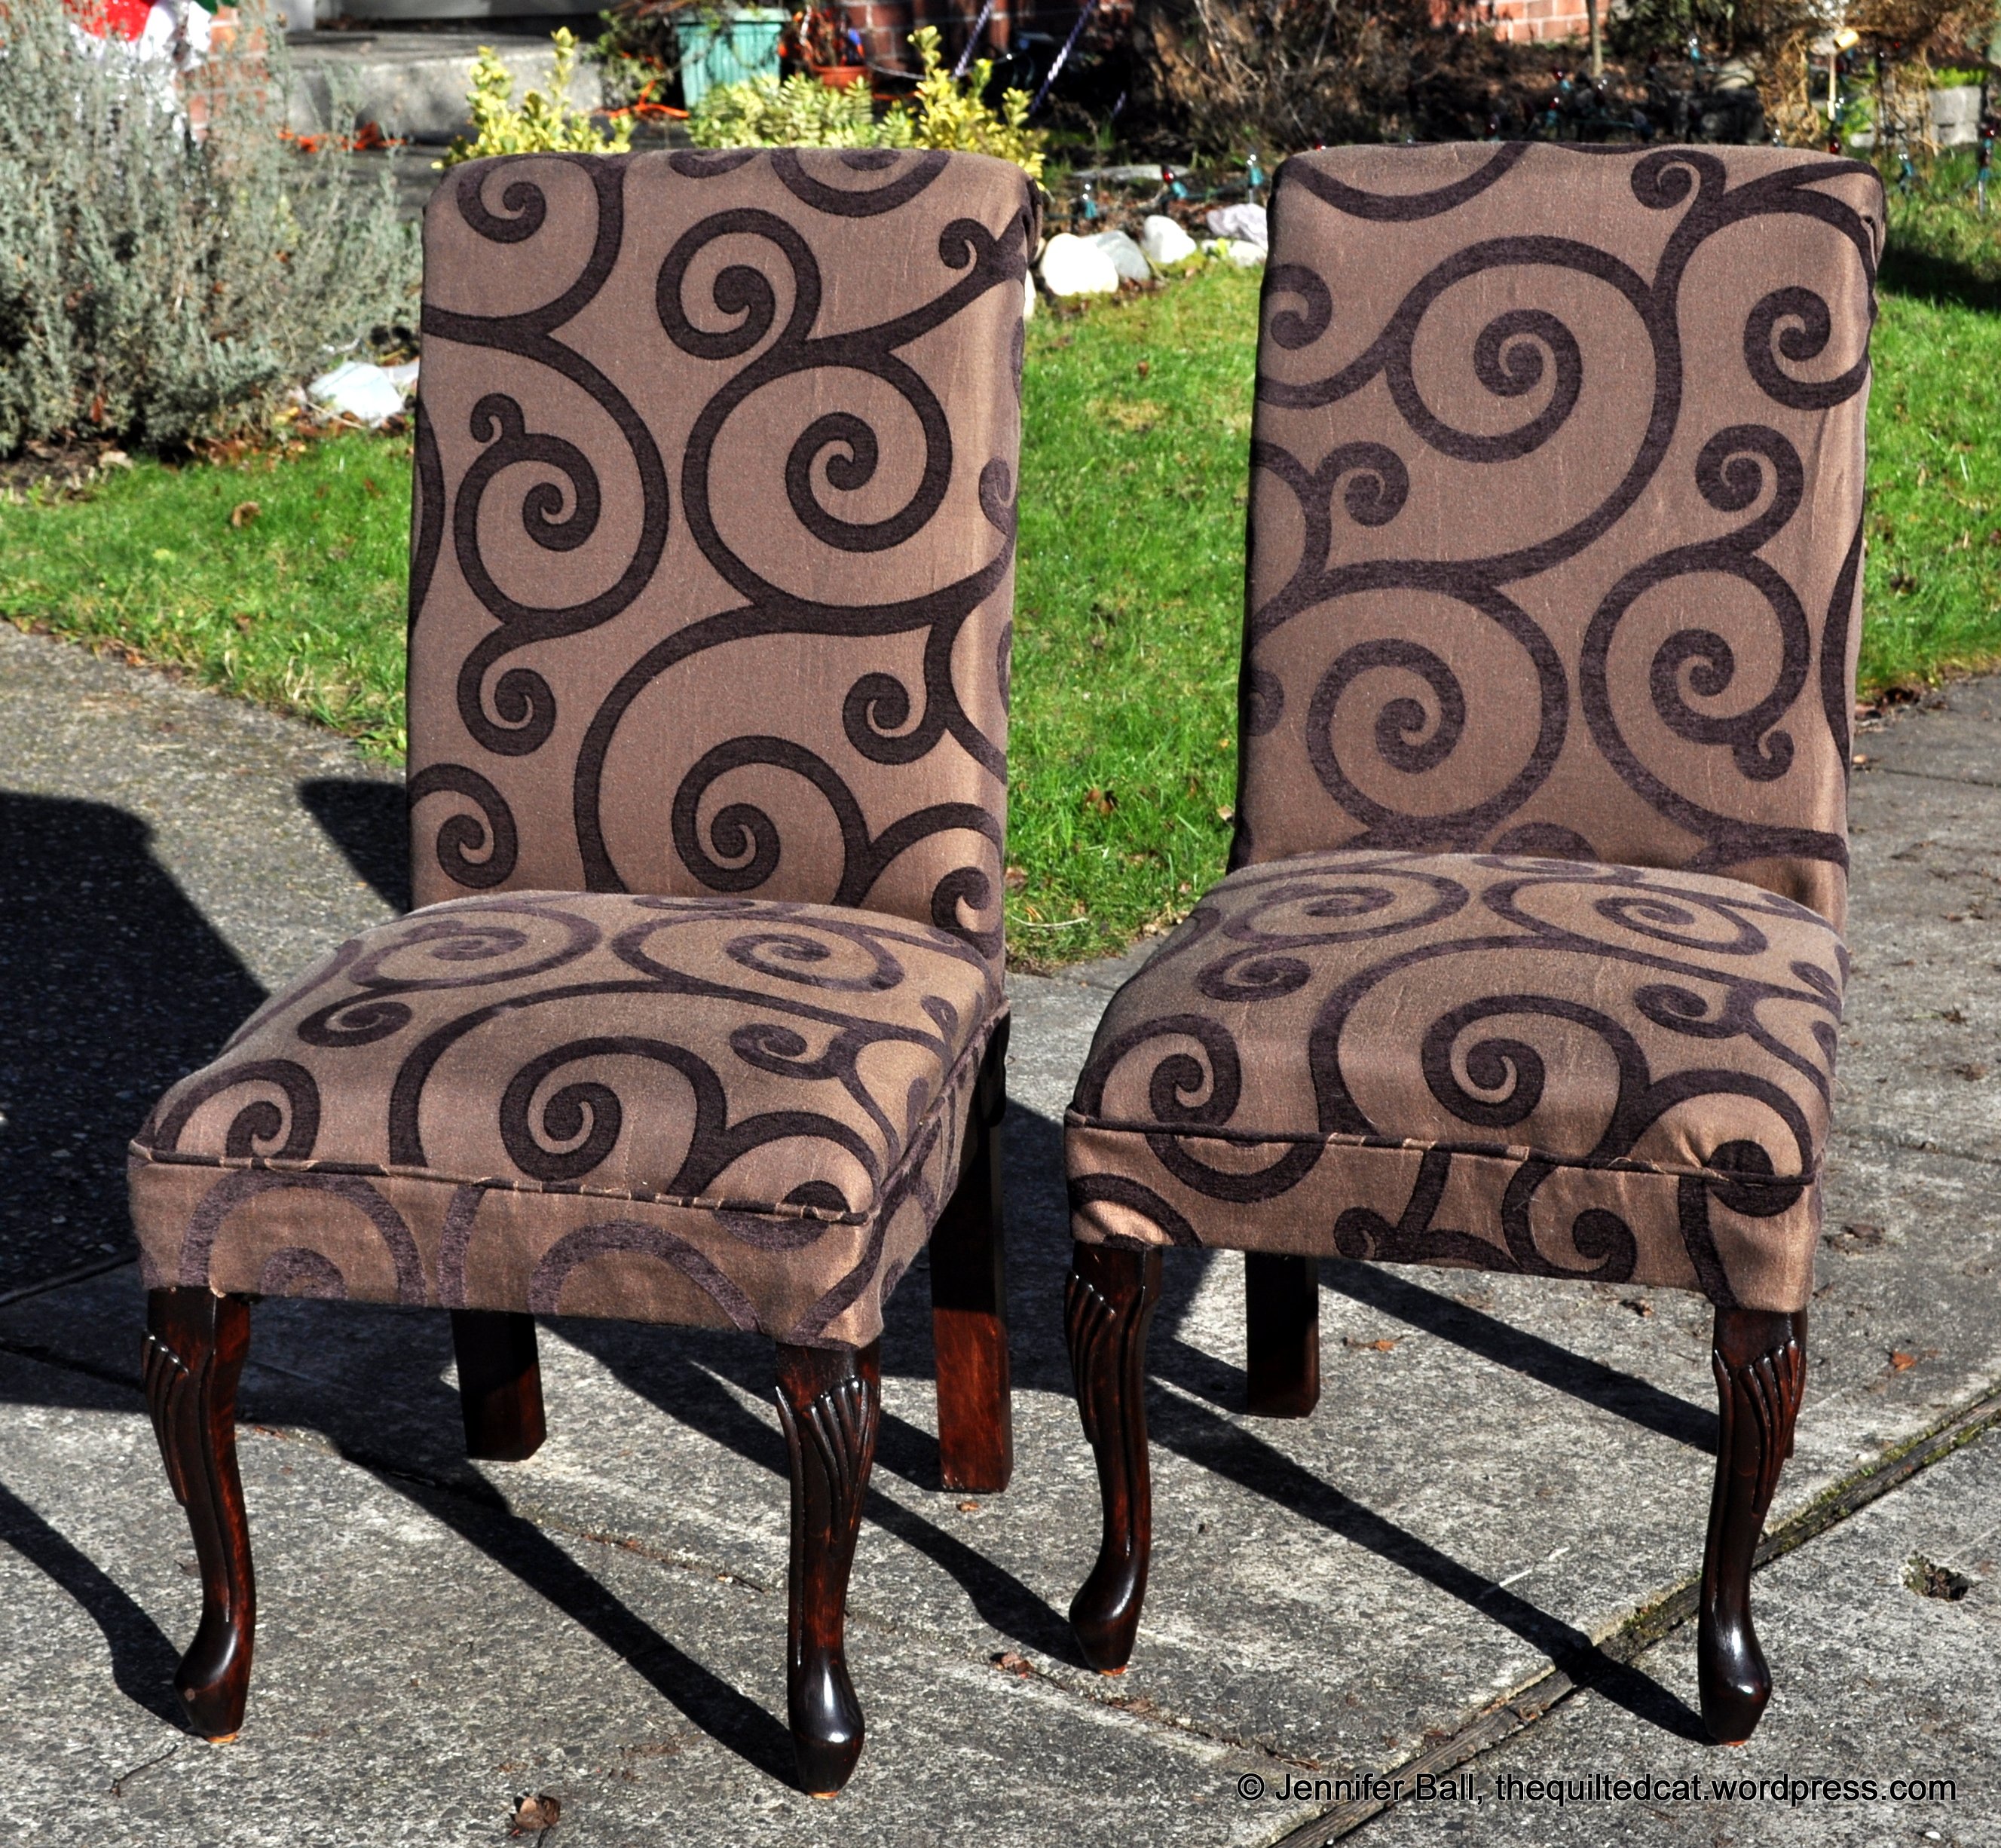
I looked through many, many fabric swatches before we settled on a neutral brown home decor fabric with a darker brown swirling pattern called Rooftop Pecan by Jaclyn Smith. This color and pattern worked well with the colors in our house.
We re-stained the legs a rich mahogany color to match existing wood furniture and to pair with a small little antique bistro table that we purchased several weeks ago.
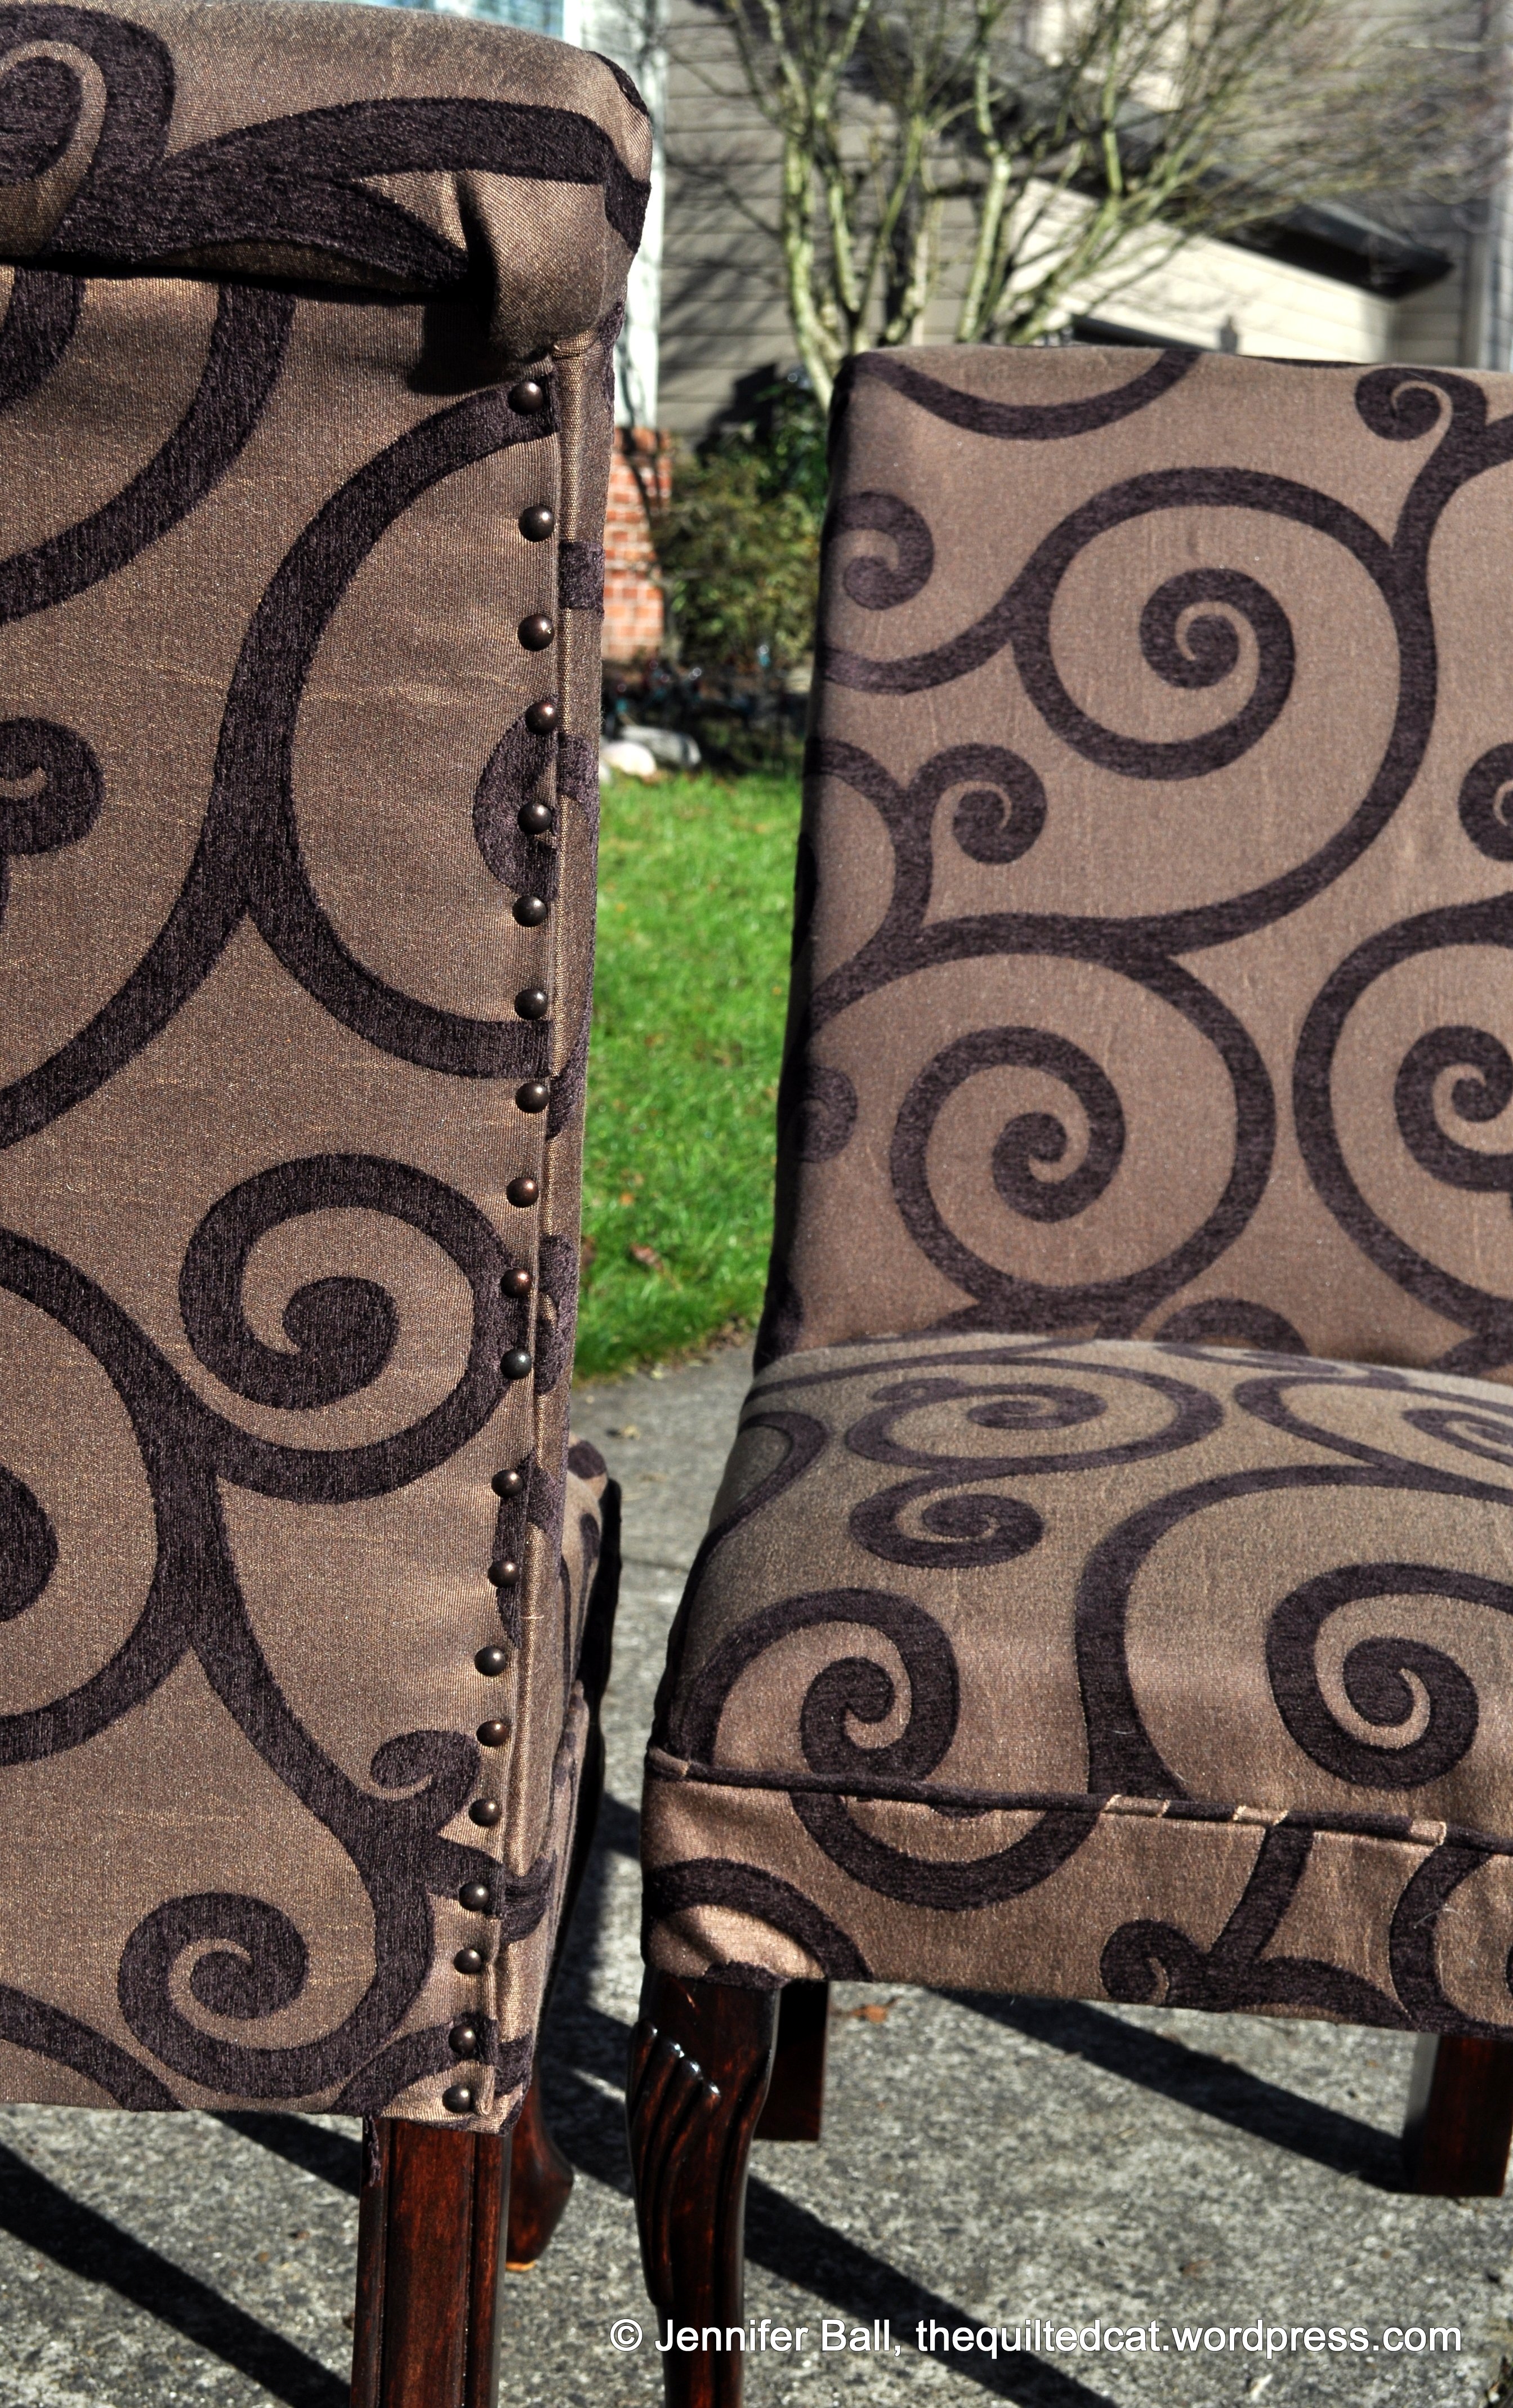
We also added some rubbed bronze upholstery tacks to the backs of the chair for a little extra charm. I really love how they look in person.
Here’s a look at the refreshed chairs (in bright sunshine so the colors are a little different in person):
Re-upholstered chairs, front and back
Re-upholstered Chairs!
Close-Up of Rubbed Bronze Tack Accents
My next step is to make some little lumbar cushions for those of us who are vertically challenged! I always like to be able to touch the floor with my feet. I’m going to use the reverse side of leftover scraps from re-upholstering the chairs.
One more look with the before and after pictures side-by-side:
Chair Transformation
For my next upholstery project, I’m going to redo the sewing chair that I got from my mom. It’s the chair that came with her original New Home sewing machine from the early 1970s, and the fabric is starting to tear in places. I hope to do that project sometime this winter.
I belong to a local quilt guild, and we have our monthly meeting coming up this week. The guild encourages people to create name tags to wear at the meetings since there are quite a few members. I’ve been procrastinating on this task for quite some time!
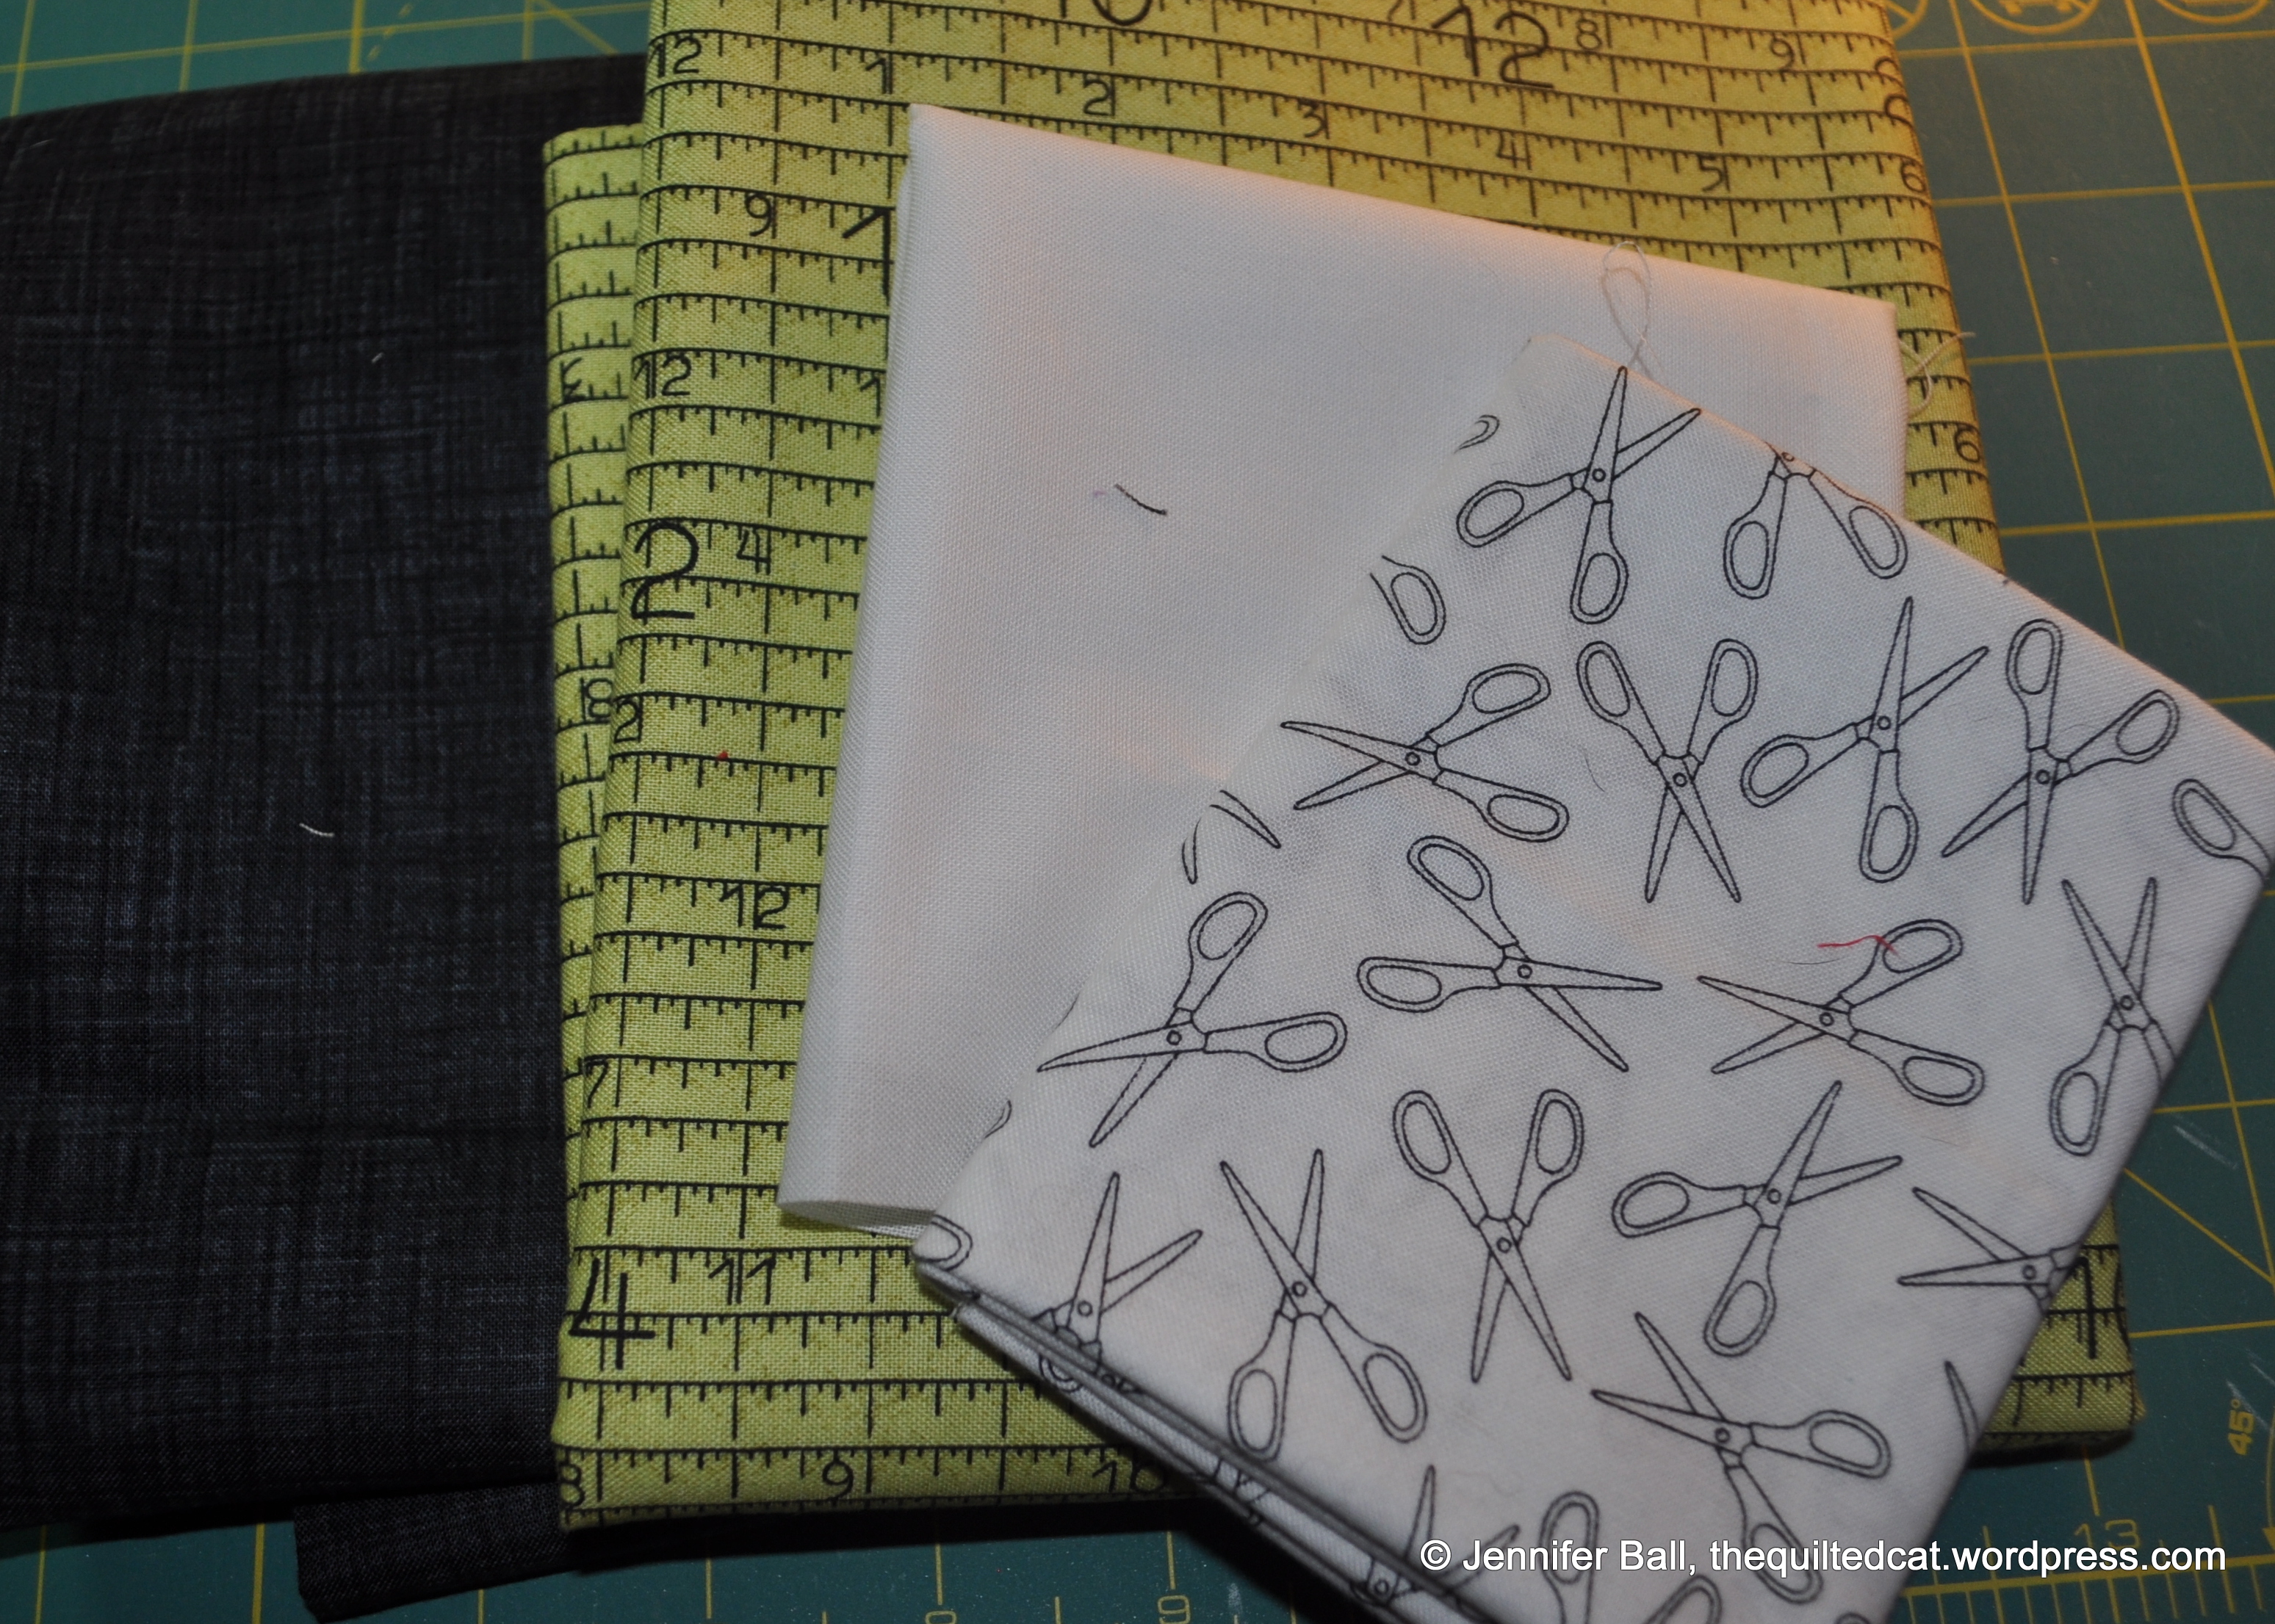
I decided to pull out some fun sewing-themed fabrics to use with my name tag.
Fabrics for Name Tag
These fabrics are:
Black: Color Weave by P&B Textiles
Green: Light Green #23070-H from She Who Sews Handmaids line by Janet Wecker Frisch for Quilting Treasures
Solid White: Kona cotton in white
Scissors Print on White: Pattern #600 by The Henley Studio for Makower Andover (can’t find a link)
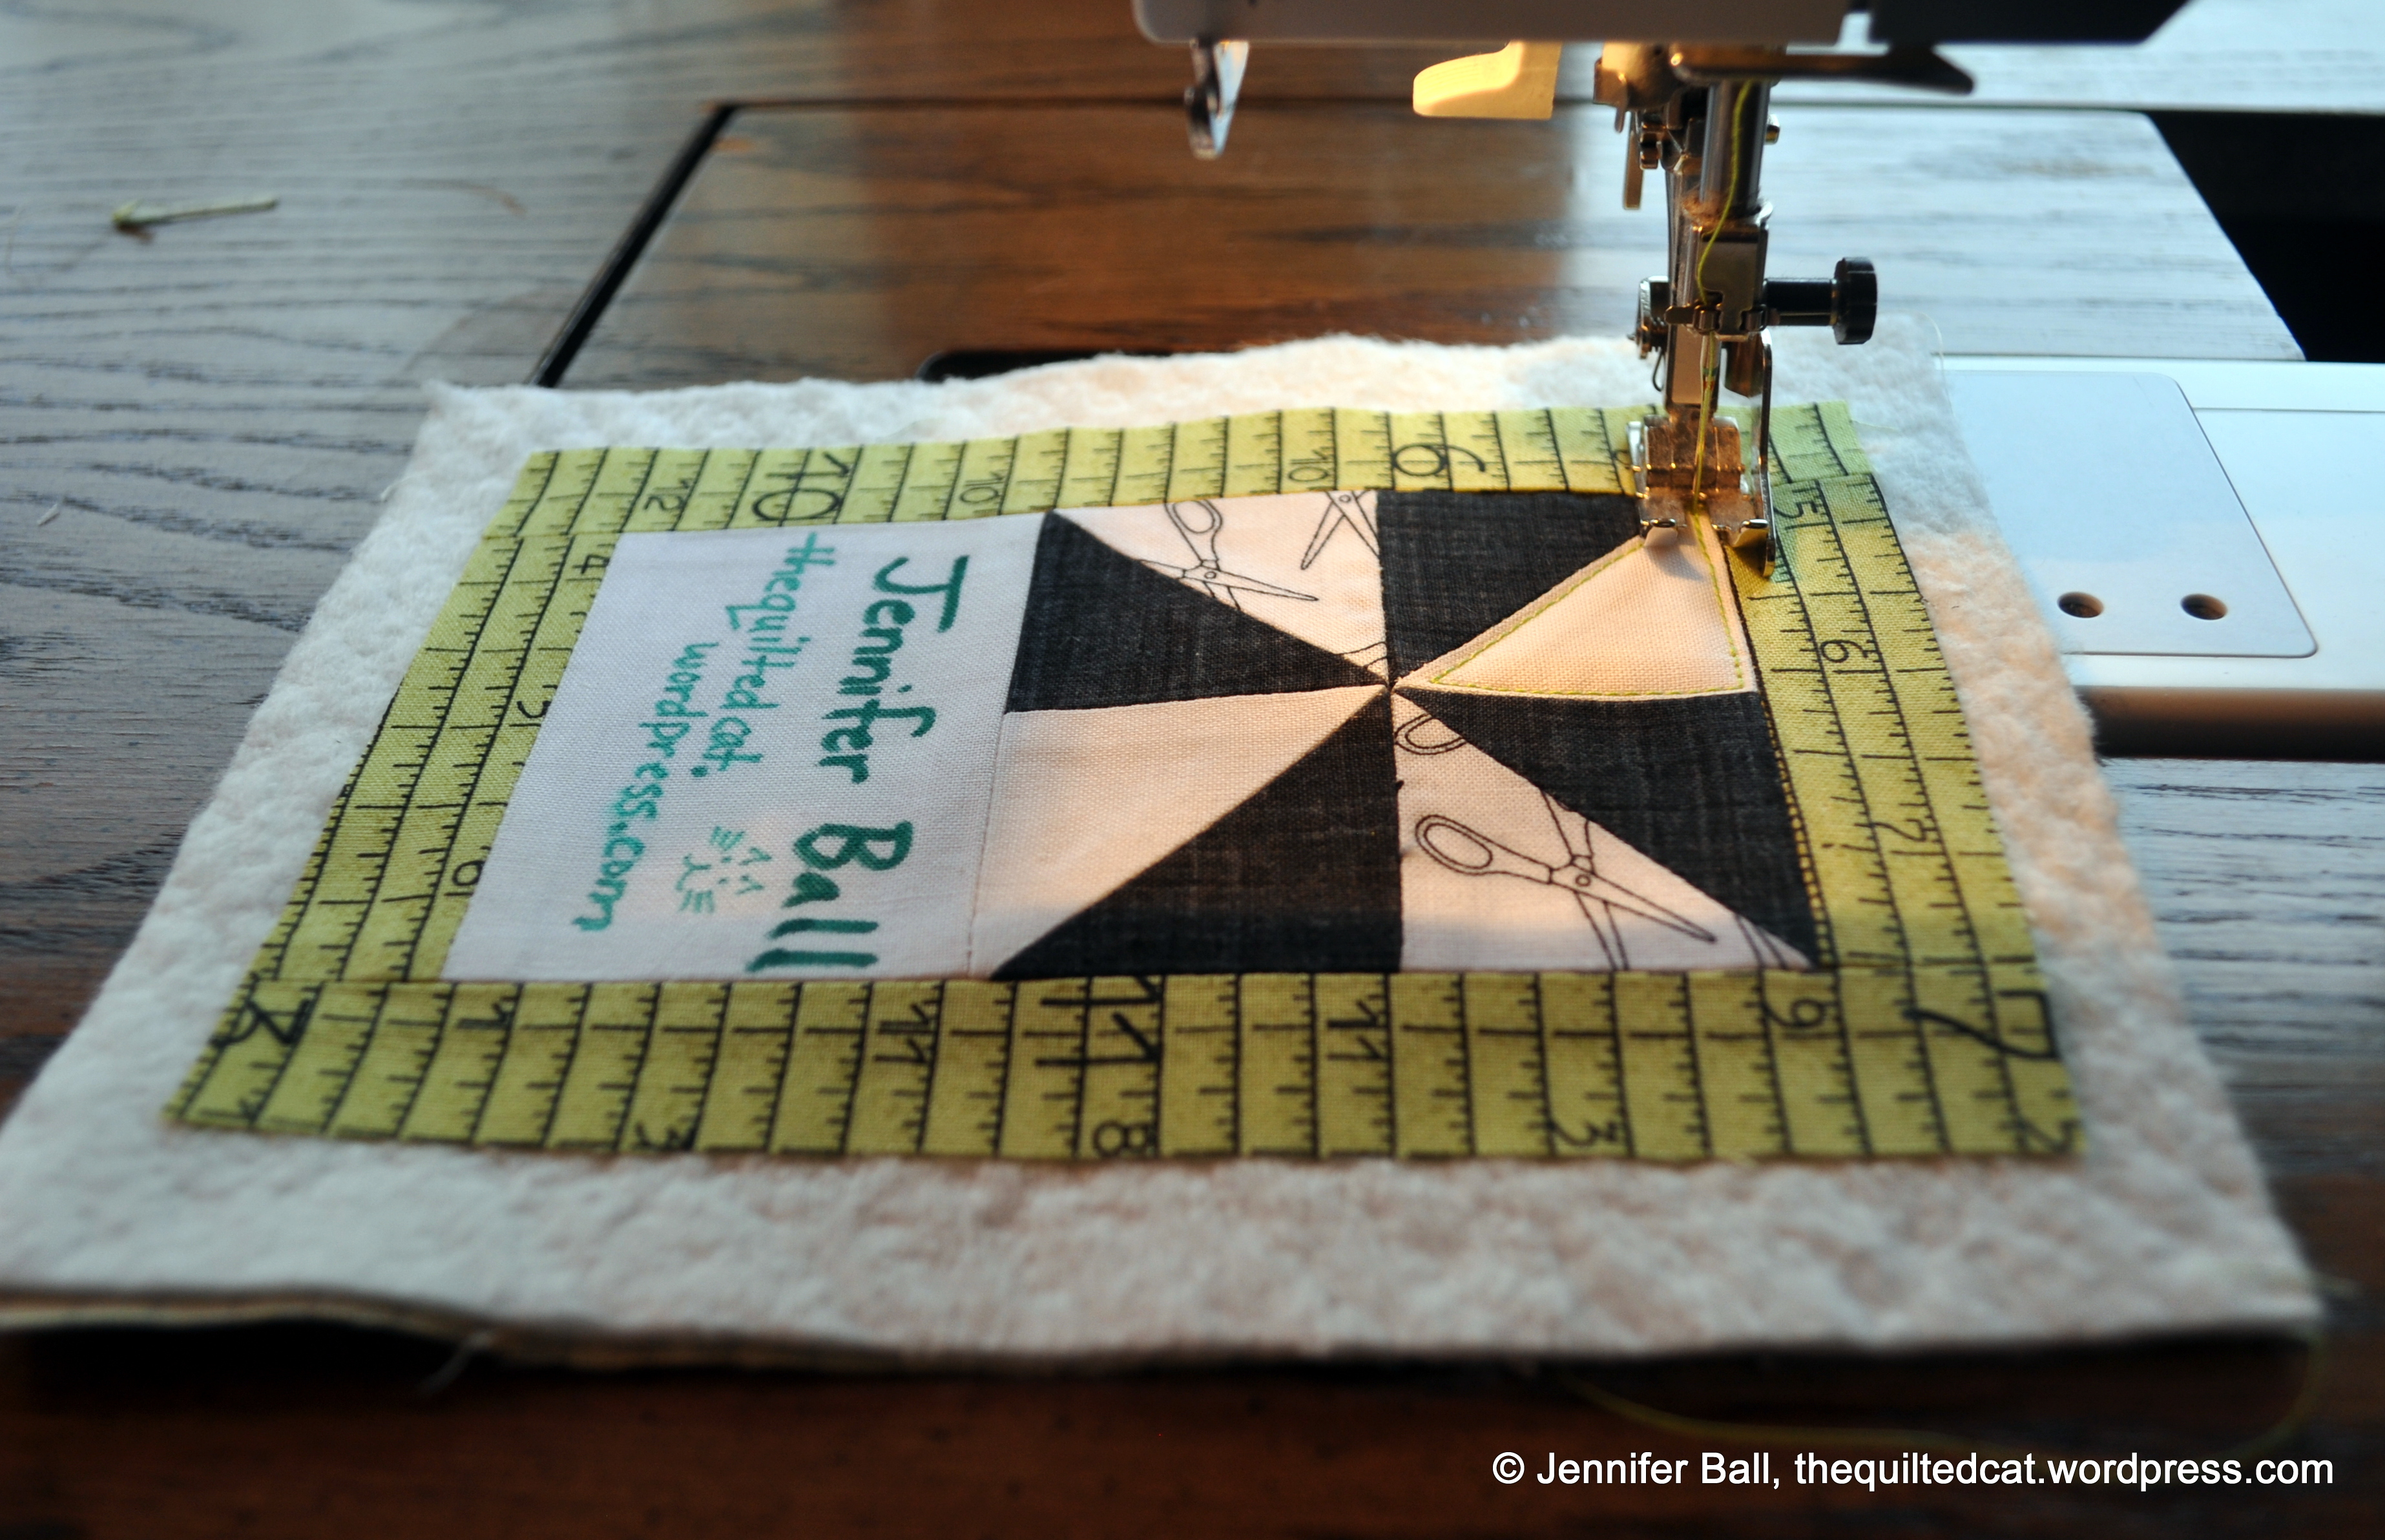
I decided to make a simple pinwheel quilt block with a finished measurement of 3-inches by 3-inches. Next, I added a small white rectangle below the pinwheel so I could write my name. I used the Handmaids green fabric as a border, and then made my miniature quilt sandwich!
Name Tag Quilt Sandwich
Isn’t it cute! For piecing, I used Aurifil #2000. For the quilting, I used an Aurifil Green to echo stitch around each pinwheel shape and around the white rectangle. I used Aurifil black to stitch on the black color weave binding.
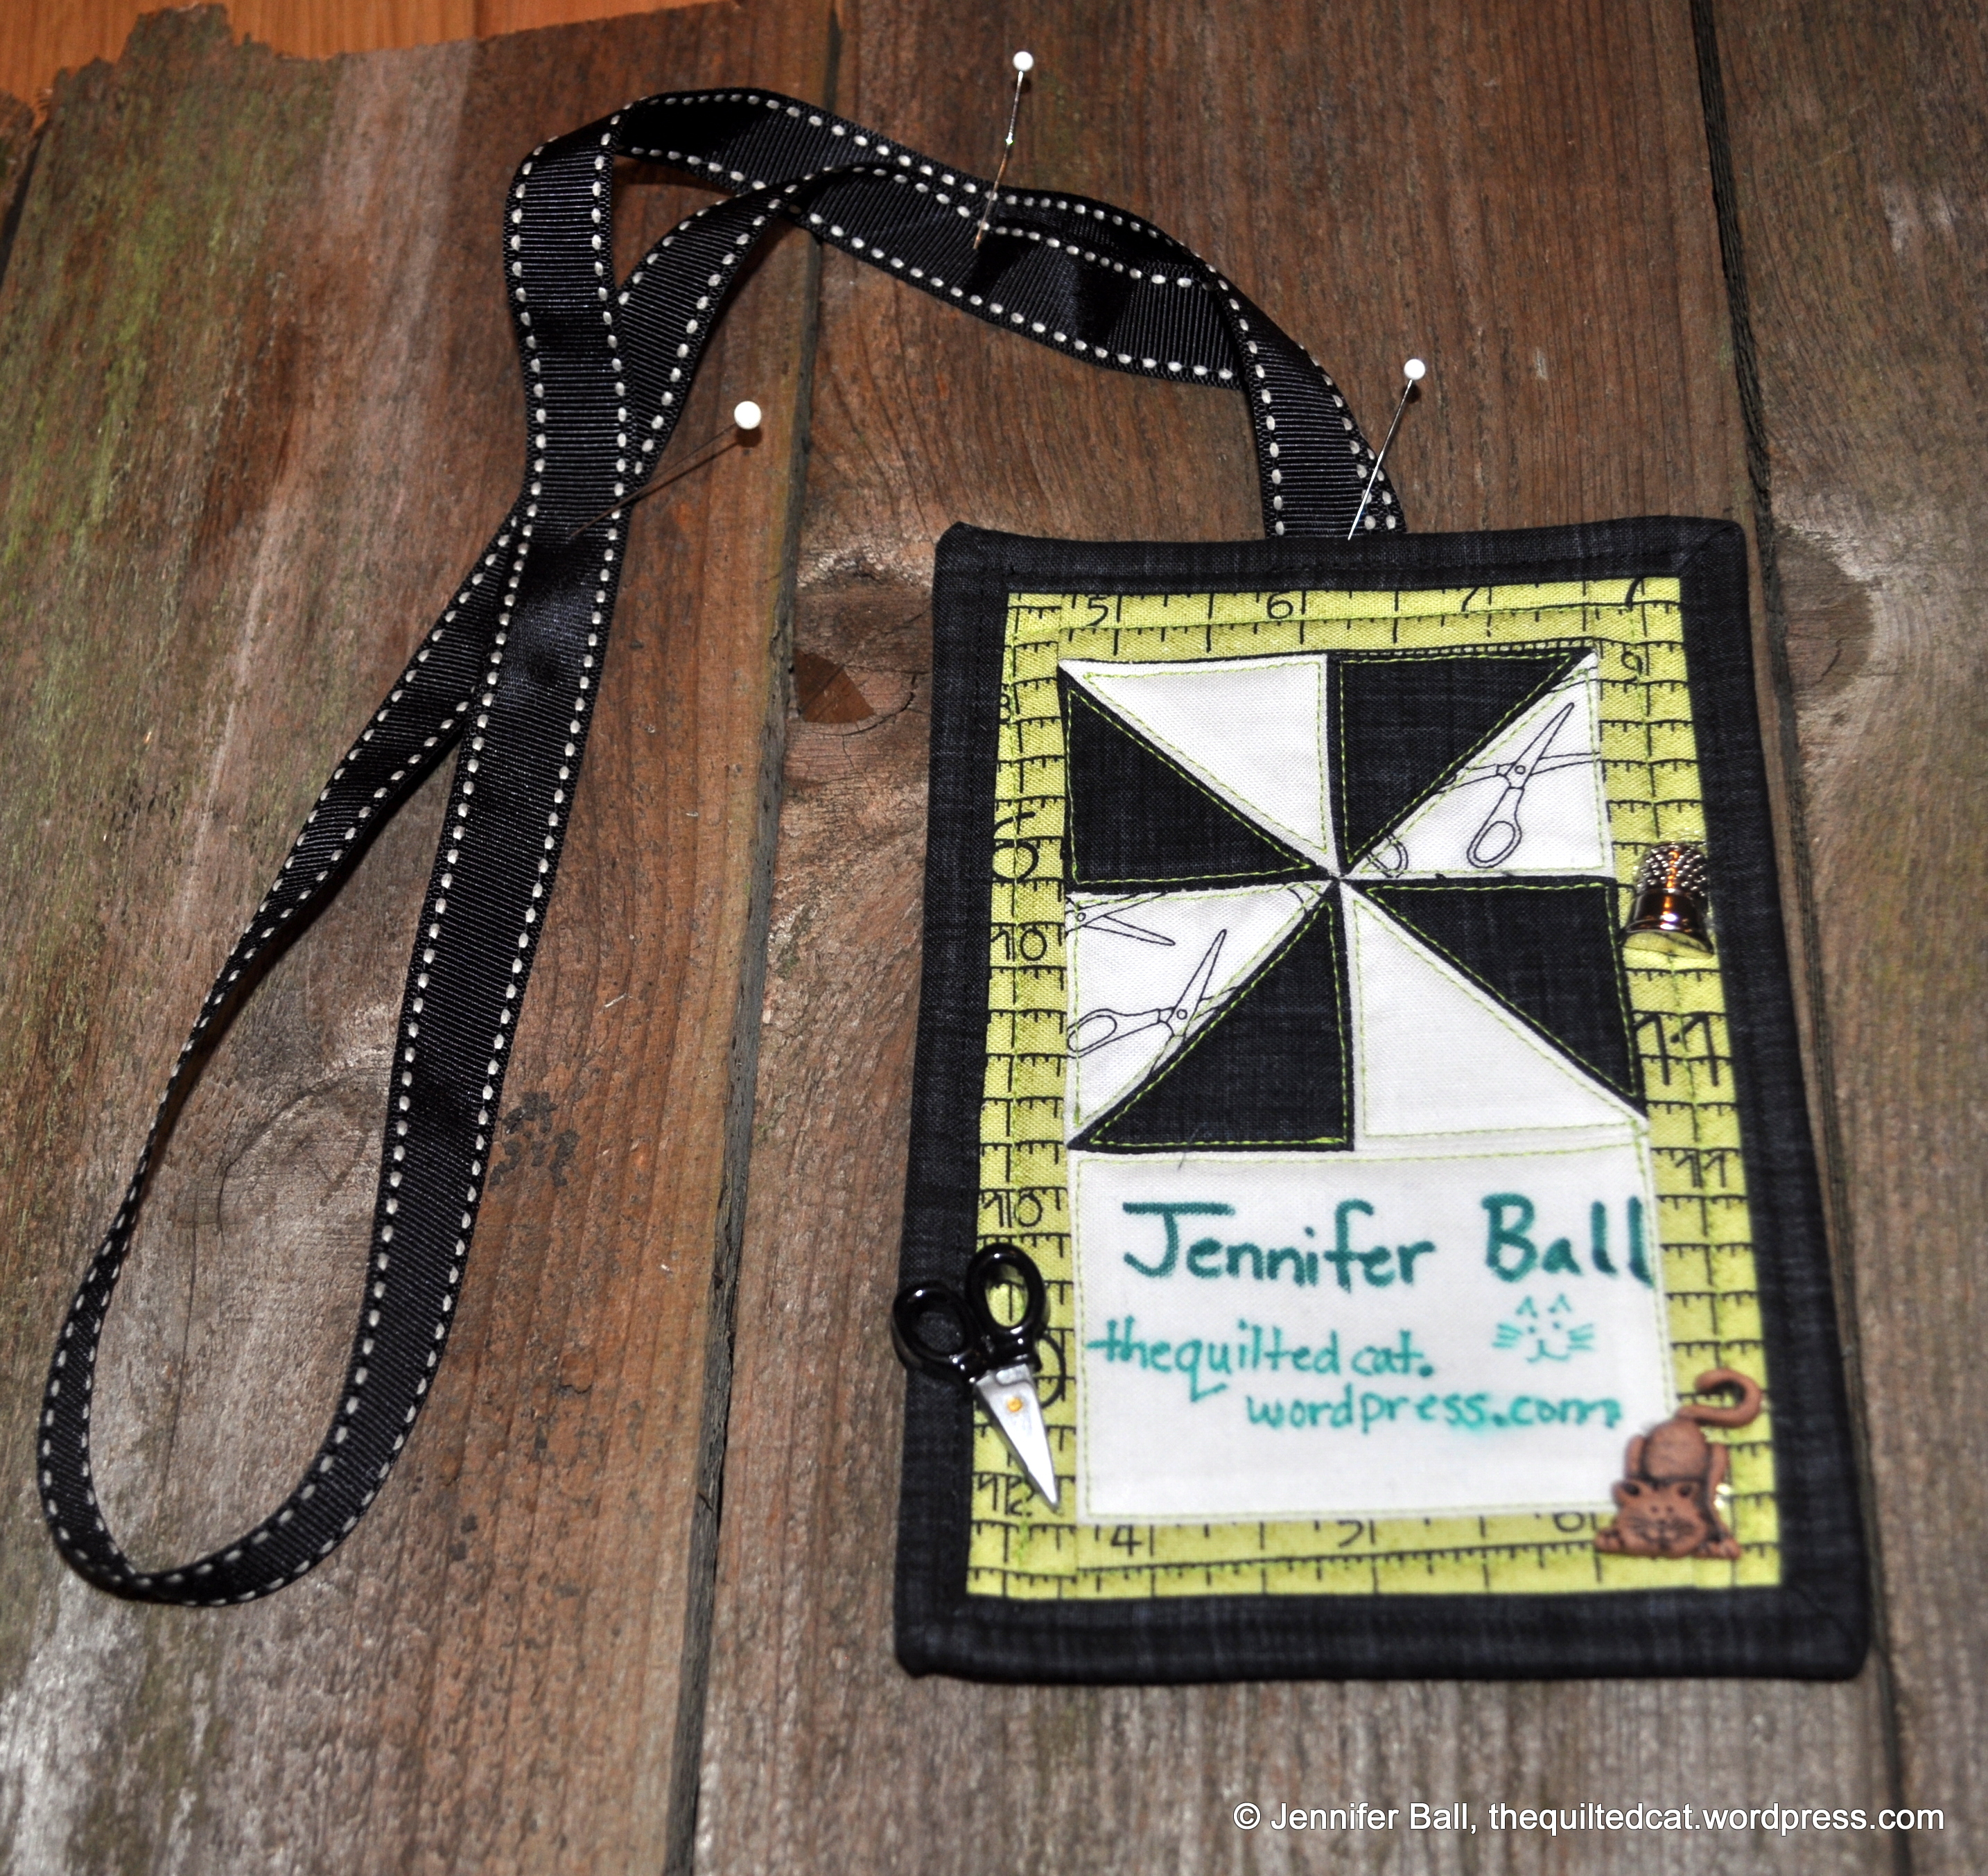
I then cut a piece of black ribbon from my stash and stitched it to the backside of the name tag and turned it into a lanyard. I decided to make a lanyard style to avoid pinning the tag to my clothes and so I could add commemorative buttons from quilting events to the ribbon.
As a final touch, I added 3 decorative buttons: a cat (of course!), a pair of scissors, and a thimble.
Quilted Name Tag Lanyard
I love these quick-and-easy projects!
Do you have a quilted name tag? I’d love to see photos.
In early August, some co-workers and I went to a local glass studio for a team building event. Each attendee got to create their own 6-inch fused glass tile masterpiece!
At first, I wanted to make a quilt pattern, but it quickly became too difficult since I couldn’t cut the glass pieces to exact sizes like I can with fabric pieces. Instead, I decided to create one of my favorite flowers – the sunflower.
I got to pick up my finished piece this week. The finished project is completely smooth with a “sushi” dish like shape (meaning it curves up slightly on all sides). I plan to use it to hold notions in my sewing room.
The first picture shows me holding it up to catch the afternoon light shining through the glass. The second picture shows the dish inside on a kitchen counter. I think it’s really interesting how the yellow and orange “petal” glass pieces seem to change positions, depending on the lighting.
Glass Sunflower Dish Outside
Glass Sunflower Dish on Counter
Here’s a look at the tile before it was fused. The colored glass pieces are positioned on top of a clear glass tile.
Pre-Fused Glass Tile
I think I’ll return to the glass studio in the future. I have some ideas for unique Christmas gifts!
Have you ever made a fused glass or blown glass piece?