Are you looking for a cute and not scary block for Halloween? How about a cute little cat face on a pumpkin? This adorable block will work on trick-or-treat bags, table runners, mini quilts, and larger quilts.
Pattern
For a limited time, this cute cat jack-o-lantern quilt pattern is on sale in a favorite Halloween craft magazine. You can choose to purchase a hard copy that is mailed to you or a PDF download, which you can download to your computer.
Here’s a look at my block:
I loved using a pumpkin-themed fabric for my cat face! Aren’t those little cat-faced pumpkins with fangs just adorable? I want to make several different fabric combinations using different oranges, blacks, and low-volume backgrounds and create a lap quilt.
For my block, I used the following fabrics:
Background fabric: white dotted fabric from “Too Cute to Spook” by Me and My Sisters Designs.
Cat and handle fabric: purple/orange pumpkin fabric from “Bring Your Own Boos” by Cotton + Steel
Pumpkin fabric: orange fabric from “All Hallow’s Eve” by Fig Tree Quilts
This block is a great stash buster, and you can really have great fun with different fabric combinations. I love seeing a cat face block with the whiskers. It adds a nice element of whimsy to the block.
The quilt pattern in the magazine has a great layout with plus-shaped blocks added between rows of cat jack o’ lanterns and makes a finished quilt at 45″ x 48″.
I completed a new quilt called Black Diamonds from the Fat Quarter Shop. This quilt features a new ruler called the half triangle trimmer, which helps you to create perfect 2″ x 4″ half rectangle blocks.
If you purchase the supplies for this quilt using the links in my post, I get a small percentage of the sale to help offset the costs of running this blog. I appreciate any and all purchases via my affiliate links!!
Quilt Kit and Pattern Available Soon!
The Fat Quarter Shop will be announcing this new quilt pattern and quilt kit later in August or early September so watch for an announcement on their social media. The quilt kit will feature a fabric line called “Create” by Alli K Designs.
For my version of the quilt, I used the Too Cute to Spook line by Me and My Sister Designs. I thought this pattern would make a really cute Halloween themed quilt.
Supplies for my Black Diamonds quilt: Too Cute to Spook Fat Eighth bundle, background fabric, pumpkin fabric for center blocks, binding fabric, half rectangle trimmer, and pattern
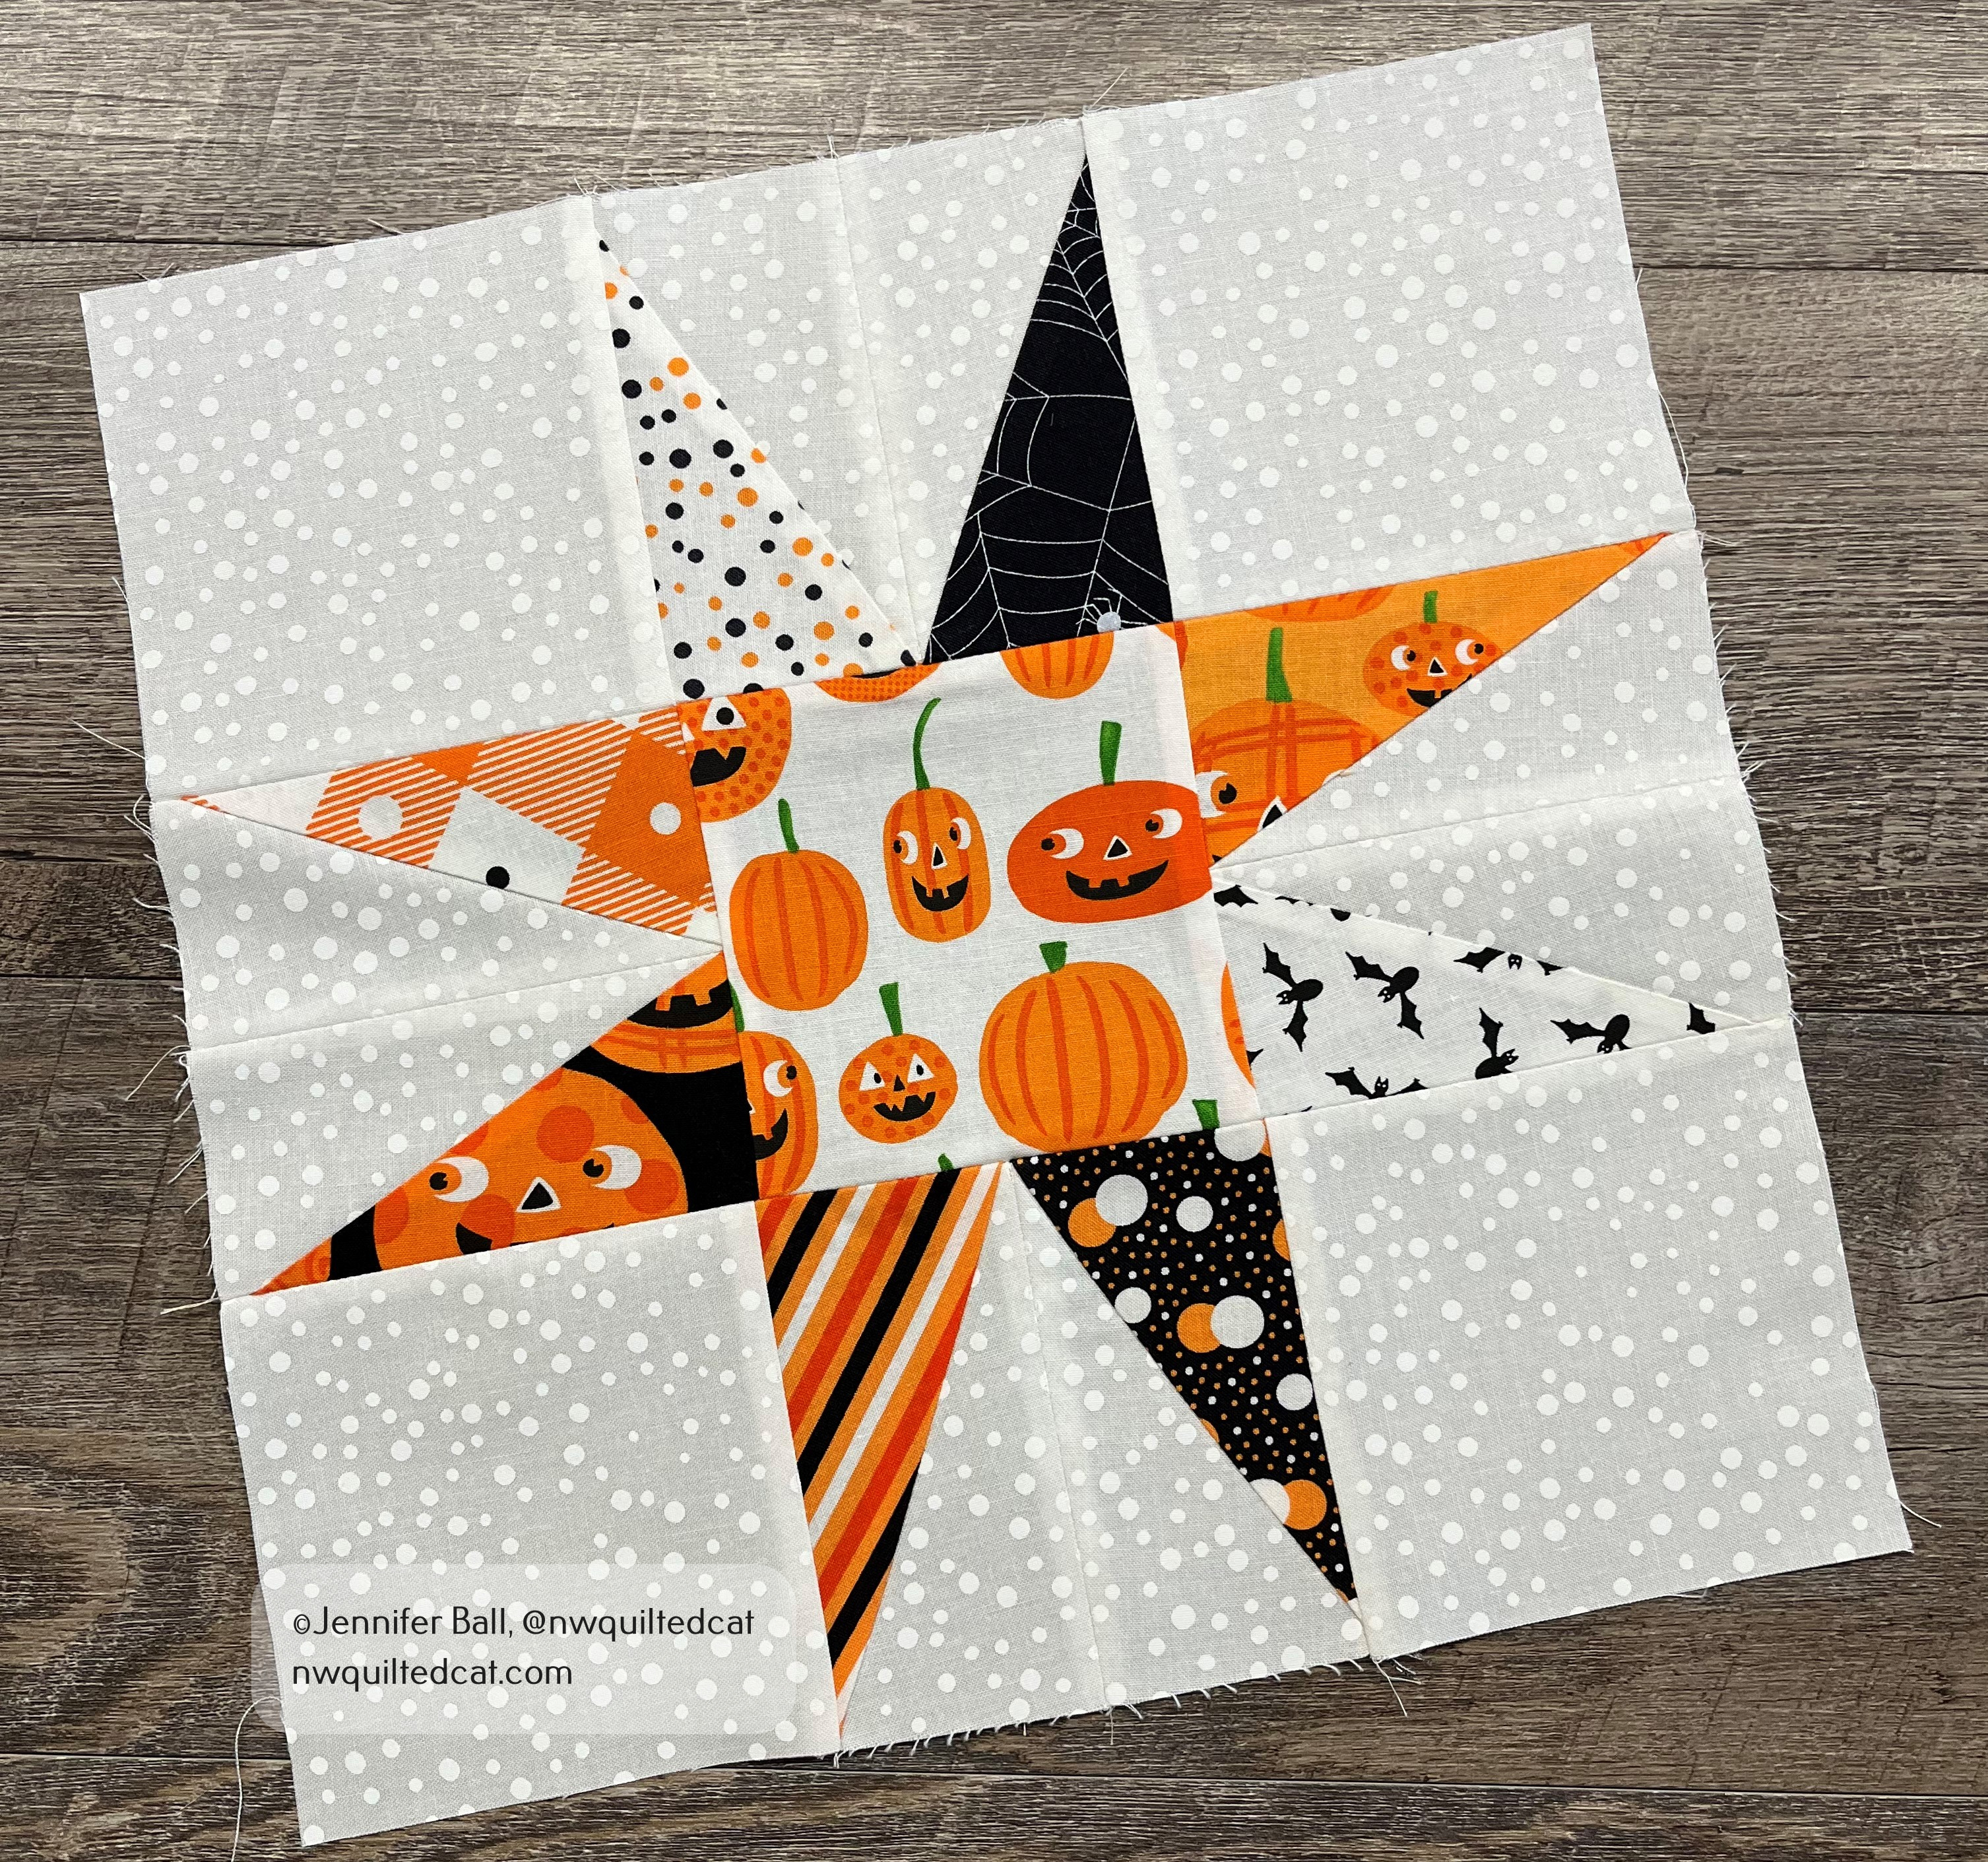
This pattern is really simple to make because it only contains 2 blocks: a star block and a diamond block. Both blocks use the half rectangle trimmer. I decided to make a test block before cutting out all the pieces and chain piecing.
Here’s my test star block:
Black Diamonds quilt: a test star block
Usually, star blocks are made with half square triangles so I really like the look of this elongated star using the half triangle trimmer tool. It’s a really fun shape! I also made a test diamond block, which went together perfectly.
I decided to go for it and cut out all of my fabric pieces according to the directions. For my center squares in my star blocks, I used the same fabric for consistency. If you decide to go this route, then you’ll need a 1/2 yard of fabric. If you go scrappy, then you could use fat eighths or fat quarters.
TIP: A Stripology ruler saves you so much time and effort when cutting out strips of fabric.
I chain-pieced the star block units first and then the diamond block units. In this pattern, pay special attention to directions because you need to make right-side facing units and left-side facing units.
TIP: Use a Sue Daley rotating cutting mat when trimming your half rectangle units. As a bonus, I also use this mat to cut out pieces for English paper piecing.
Here’s a look at all my completed star blocks and diamond blocks:
Completed blocks for the Black Diamonds quilt
Aren’t they cute? When I pieced the units together, I didn’t worry about having 2 of the same fabrics touching each other. There is so much movement in the finished quilt that no one will notice!
After I had completed all these blocks, I laid them out on the floor with the help of my quilt assistant. As a way to check my placement, I usually take a picture with my cell phone. This picture helps to identify any block placement mistakes, and it also helps me to remember what order I need to sew the blocks.
My quilt inspector checks my block placement!
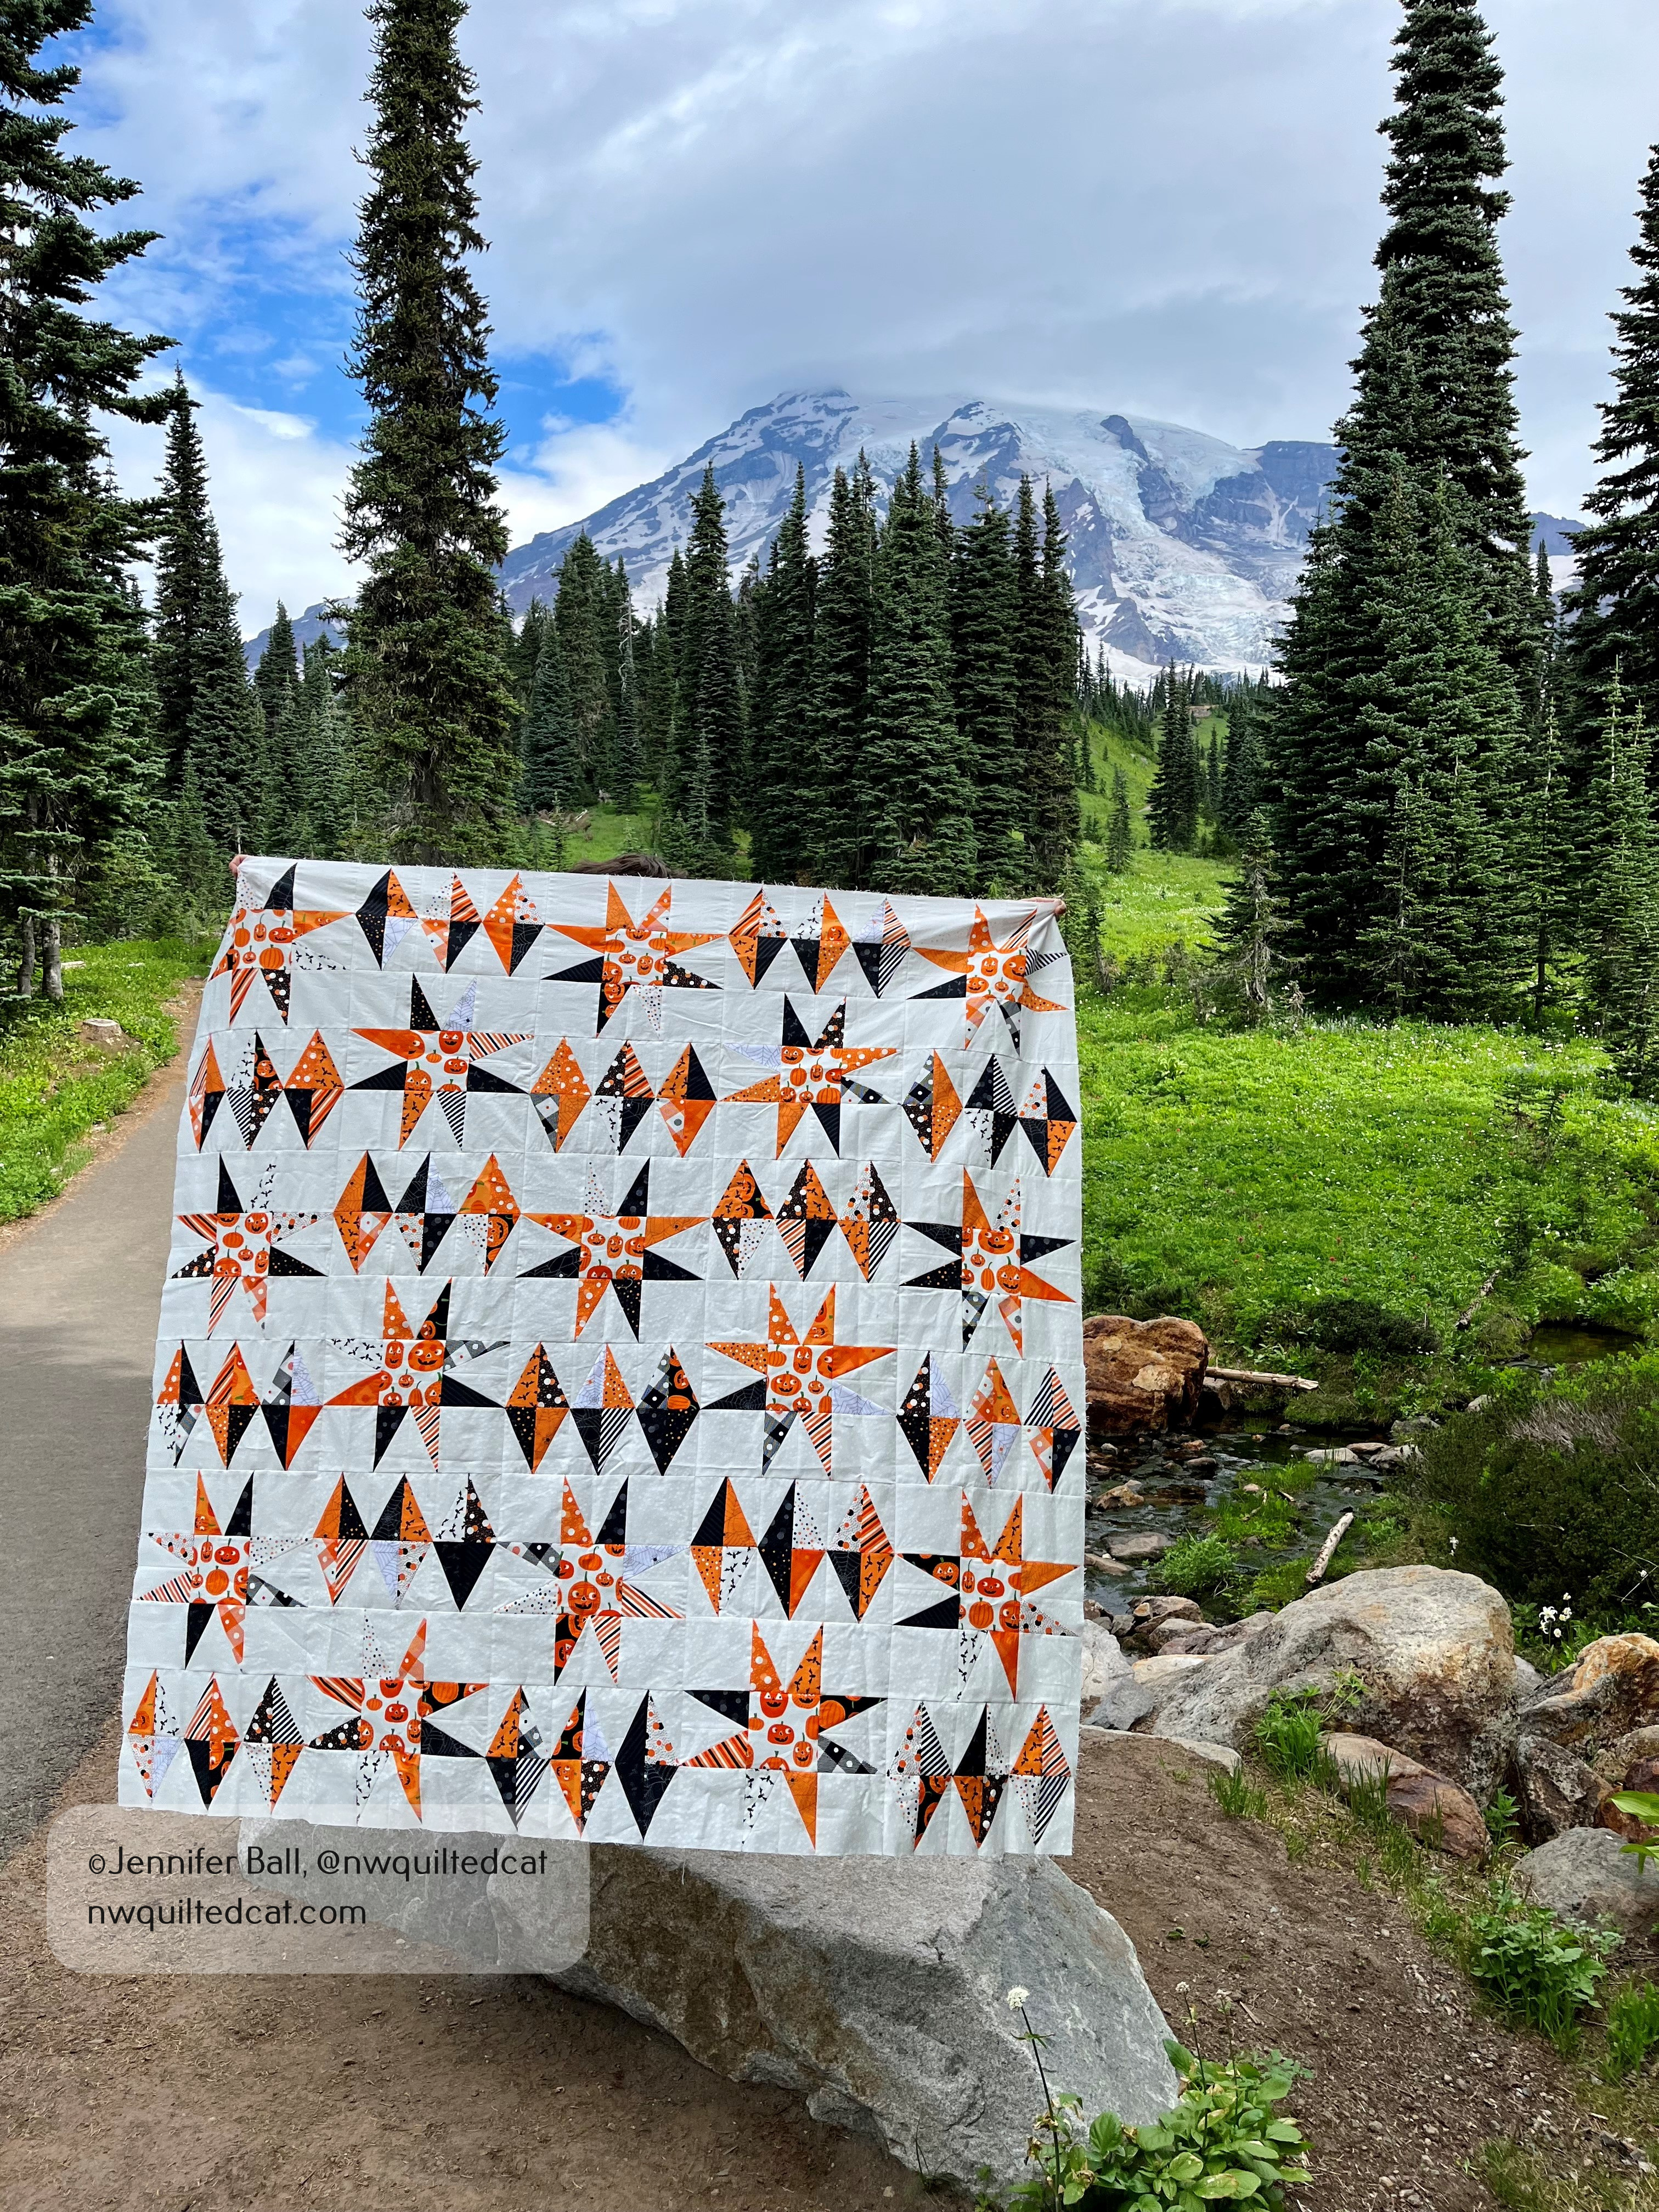
My quilt inspector sometimes likes to rearrange things when I’m not looking! I sewed the rows together and finished the quilt flimsy in time to take on a little mom and son hiking trip. My son was a good sport and held up the quilt top while I took a quick picture.
Black Diamonds quilt flimsy
Once home from our short adventure, I decided to quilt it with an open free-motion stipple pattern using white thread. For the binding, I used a striped fabric from the Too Cute to Spook line, which I think is the perfect finishing touch for this quilt!
Here’s a look at my completed Black Diamonds quilt, Halloween style!!
Completed Black Diamonds quilt
This quilt finishes at 60.5″ x 60.5″ so it’s a perfect lap size. You can easily enlarge it by making more blocks to expand it, and be sure to watch the Fat Quarter Shop for a blog post announcing the pattern and quilt kit plus a look at all the sample quilts. Watch for a live tutorial by the Fat Quarter Shop launching on September 8th.
Have you heard about the Spooky Box from Fat Quarter Shop? Each year, they release a Halloween themed mystery box, filled with quilting goodies including a project with fabric and notions! You can still buy the 2021 box at Fat Quarter Shop with this link.
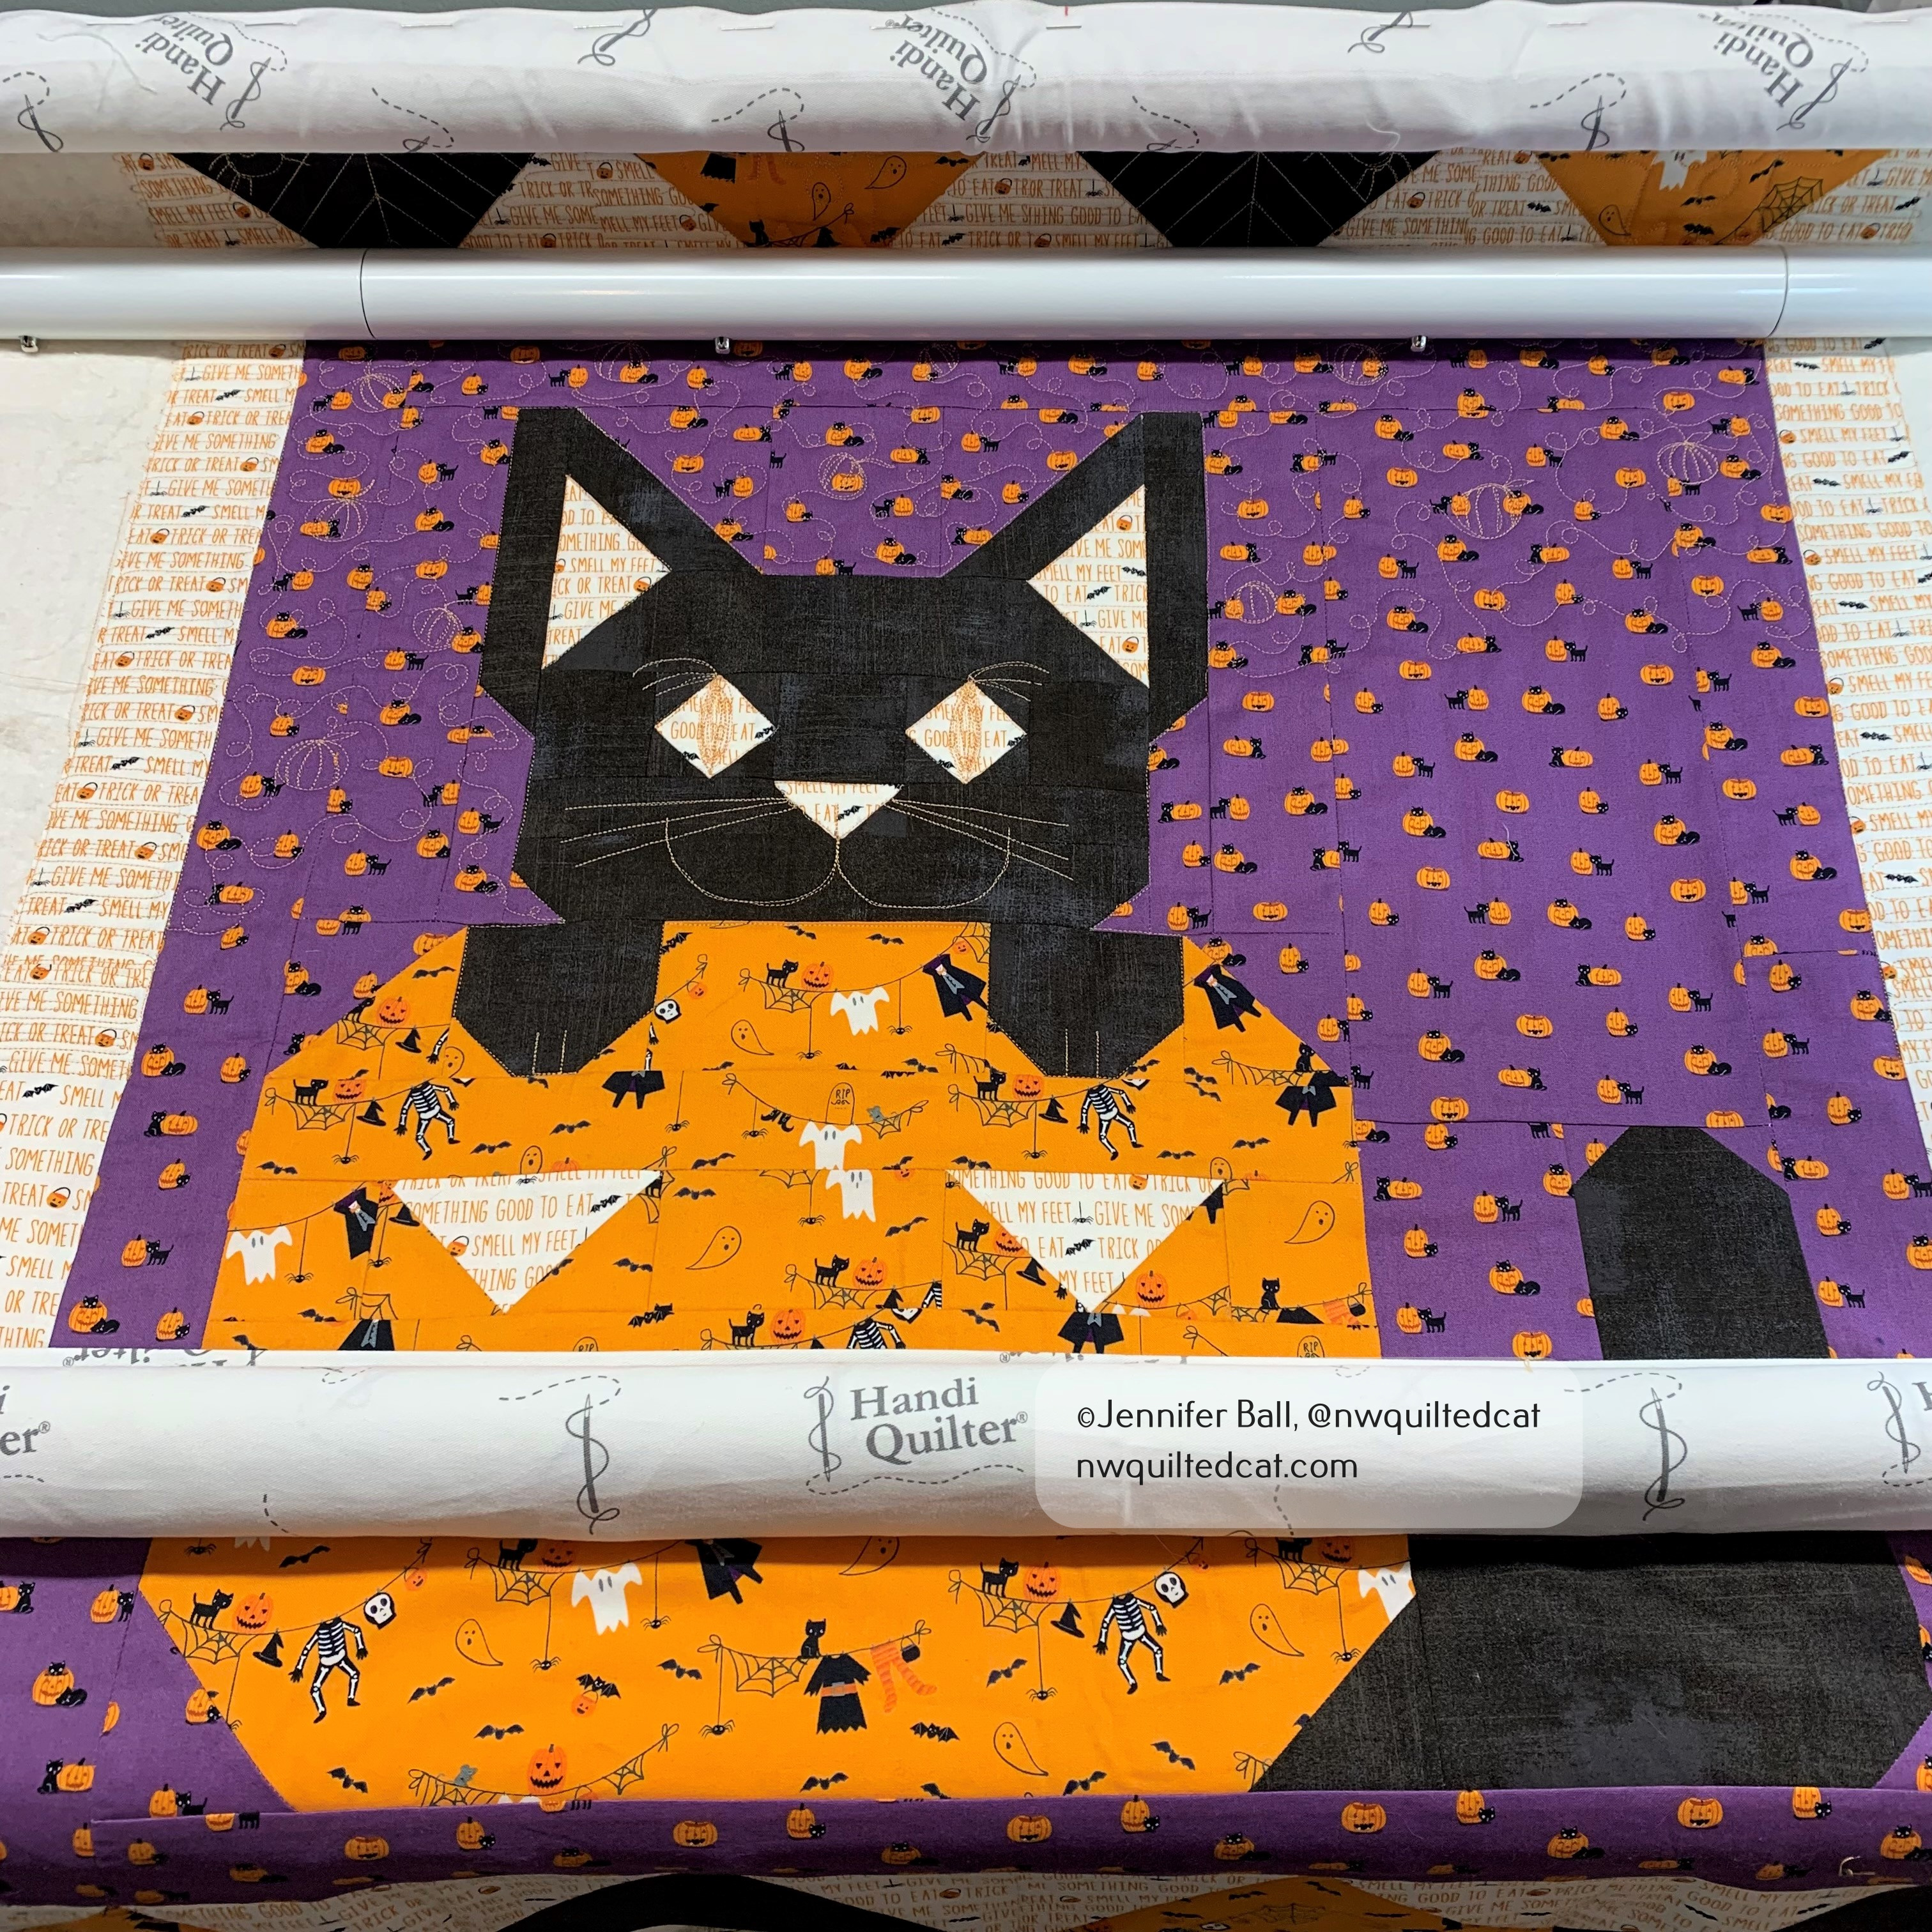
For last year’s 2020 Spooky Box, the quilt project was a fun Cat O’ Lantern mini quilt. I pieced this quilt last October, but then set it aside in my to-quilt pile. I was inspired to pull it out and quilt it recently as I was decorating my yard for Halloween.
I made a few modifications from the original pattern. I swapped the black and purple fabrics so that I could have black cat popping up from behind the pumpkin. I also changed the shape of the cat’s eyes and nose from squares into diamonds and a triangle. I knew that I’d quilt in more face details such as whiskers and the famous cat grin.
I did all free-motion and hand guided ruler work using Glide thread in Apricot Blush for most of the quilt and Glide thread in Black on the cat.
Here’s a look at a little spider that I added to each of the black triangles at the top and bottom portions of the quilt:
A little quilted spider
In the orange triangles, I quilted little ghost shapes. I did some basic fills in the background portion, and a swirly pumpkin fill in the purple behind the cat.
For the cat face, I added some eyebrows, whiskers, pupils, and grin. I later enhanced the pupils with an outline of black thread.
I gave the cat a little dimension by quilting some swirls on the forehead, checks, paws, and tail. For the pumpkin, I kept it simple with straight-line quilting to keep the emphasis on the sweet cat!
We went to pick pumpkins last weekend, and my son held the quilt up while I snapped a quick picture in between other pumpkin hunters. I love a striped binding so I used this black/gray/white striped fabric in my stash that I think really frames this little Cat O’ Lantern quilt perfectly.
Happy Halloween from the cat at the pumpkin patch!
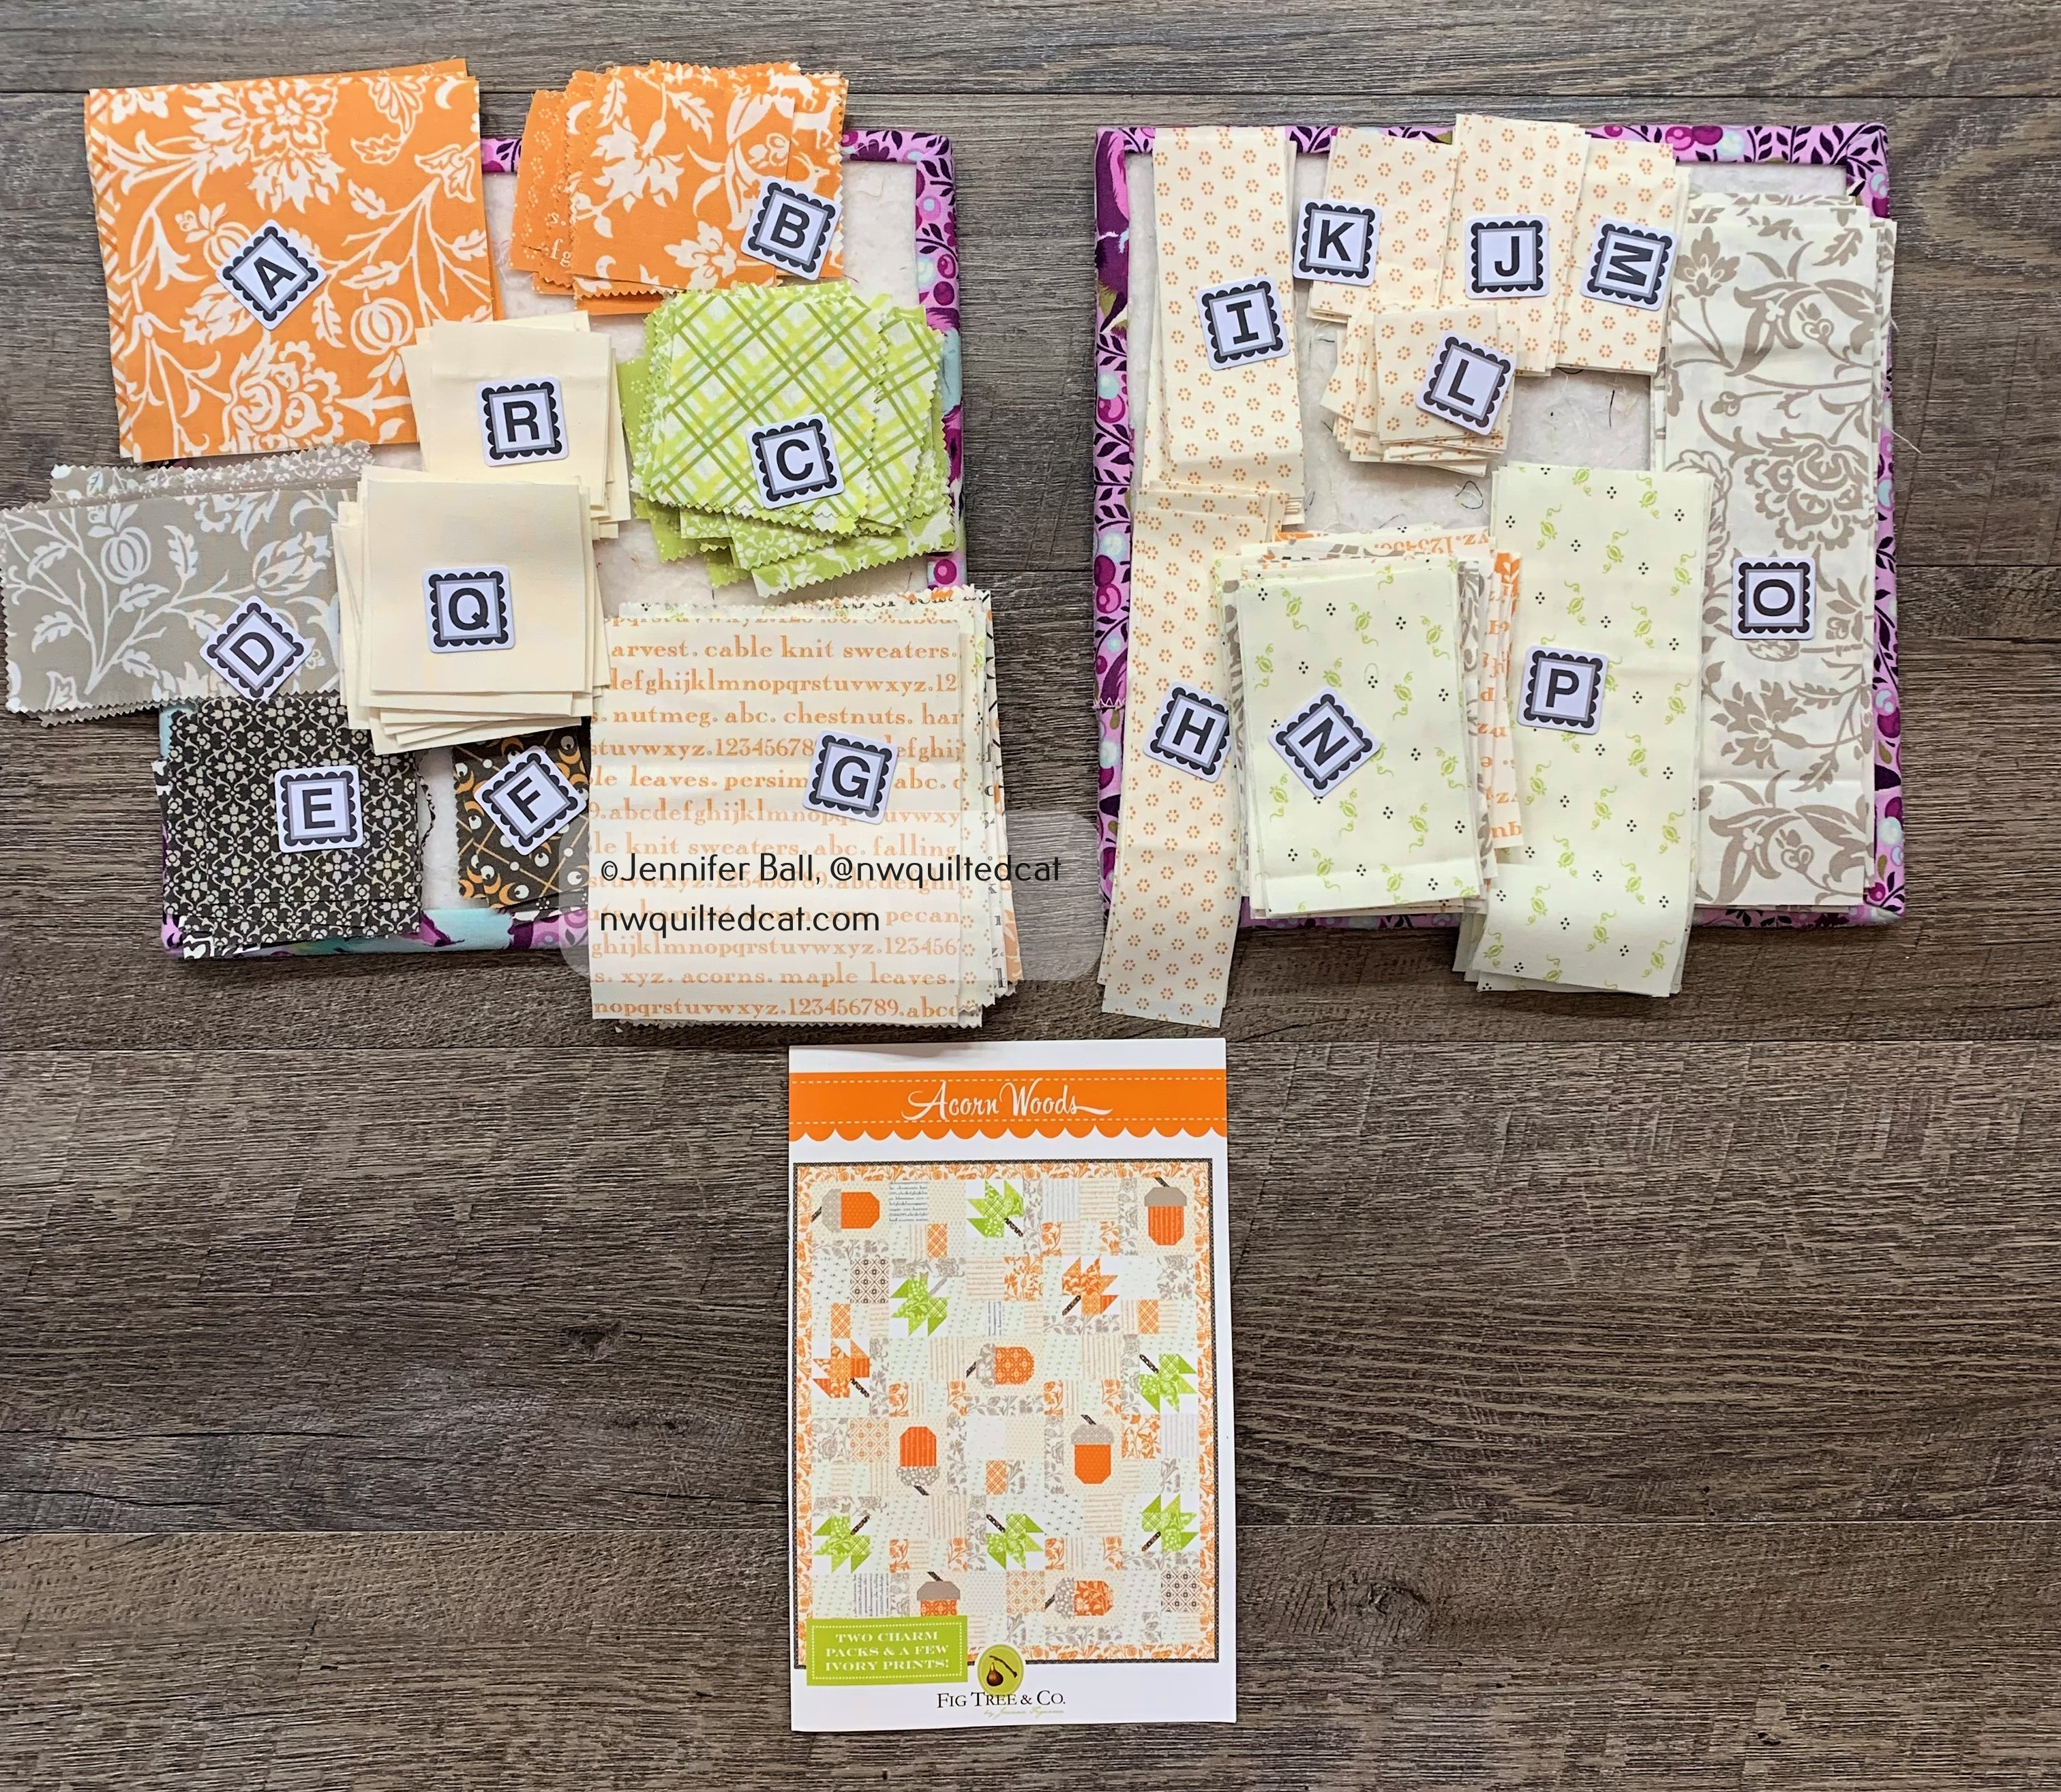
This past weekend, I did some traditional piecing and started work on a nut themed throw quilt for fall. What nut, you might ask? The acorn! I’m using the Acorn Woods pattern by Fig Tree Quilts, which you can get on sale at the Fat Quarter Shop this month.
I’m also using the Pumpkin & Blossoms fabric line by Fig Tree with beautiful pumpkin oranges, grays, greens, and creams. It is such a warm and cozy fabric line for the fall season so you can use it for months. I like that this fabric line isn’t Halloween-y but you could use it for Halloween-themed quilts.
I cut all my pieces and labeled them with Alphabitties so that I could just sit-and-sew all the blocks assembly-line style. The Alphabitties keep everything tidy and organized, and I don’t mix up some of the smaller sub-cut pieces when I’m at my machine.
Here’s a look at the acorn blocks. Aren’t they fun?
Acorn blocks
To add a little more fall theming, this quilt contains some leaves to sprinkle in amongst the acorn blocks. The bright green leaves add some color interest to the layout.
Leaf blocks
In addition to the leaf and acorn blocks, there are some low-volume setting blocks. The blocks come together pretty quickly, and I was able to sew them together over the weekend and on one evening after work.
Here’s a look at the quilt top outside in my backyard this afternoon:
Acorn Woods quilt top (not yet quilted)
I thought that I might have a cat come over and inspect the quilt, but they were too busy dozing in the sunshine.
This quilt top is really pretty, and I can’t wait to quilt it! I want to finish it soon so that I can take advantage of the fall sunshine and get some pictures of it on a lovely hike with beautiful leaves.
I had a wonderful time teaching my Stellar Twist block in an introduction to foundation paper piecing class at Hollyhill Quilt Shoppe.
If you want to purchase the pattern, you can find it here on Craftsy starting today. I’d love to see what you make with it! I’ve made a mini quilt plus a Halloween themed table runner and a holiday themed table runner.
Stellar Twist Mini Quilt
This pattern is very versatile and comes together pretty quickly. I don’t show you how to do foundation paper piecing in the pattern so if you need to learn how, ask your local quilt shop for a class!
I’ve designed a foundation paper pieced pattern (FPP) called Stellar Twist! This pattern is perfect for beginners who want to learn the basics of FPP techniques. I’m so excited to announce that I’ll be teaching this pattern at a local quilt store, Hollyhill Quilt Shoppe on Saturday, July 29th.
In addition, Hollyhill is having a Grand Opening Celebration at their new location in Wilsonville on Saturday, July 15th. I’ll be attending the celebration, so come out and say hello and register for the class!
Currently, the pattern is only available if you attend the class. At a later date, I’ll likely have the pattern for purchase on Craftsy.
Here is a look at the mini quilt version using the Sunday Supper fabric collection by Sweetwater.
Stellar Twist Mini Quilt
I used my HQSixteen to do some heavy custom quilting on this mini using white Aurifil thread in 50 weight.
Stellar Twist Custom Quilting
Stellar Twist Mini, photo by Hollyhill Quilt Shoppe
The Stellar Twist pattern is very versatile! Add more blocks to create a crib quilt or bed quilt or stitch blocks together vertically to make a table runner. For the class, I’m also making a Halloween table runner sampler and a holiday table runner sampler.
Here’s a look at a Halloween table runner using Moda Grunge fabric. This one will be quilted soon!
Stellar Twist Halloween Table Runner
Next, I will sew the holiday table runner version in time for the meet-n-greet at the Grand Opening Celebration!
My little guy is getting excited for trick-or-treating tonight, and I’m excited to get some more sewing time in this weekend. We carved some jack-o-lanterns last night:
Jack-o-Lanterns!
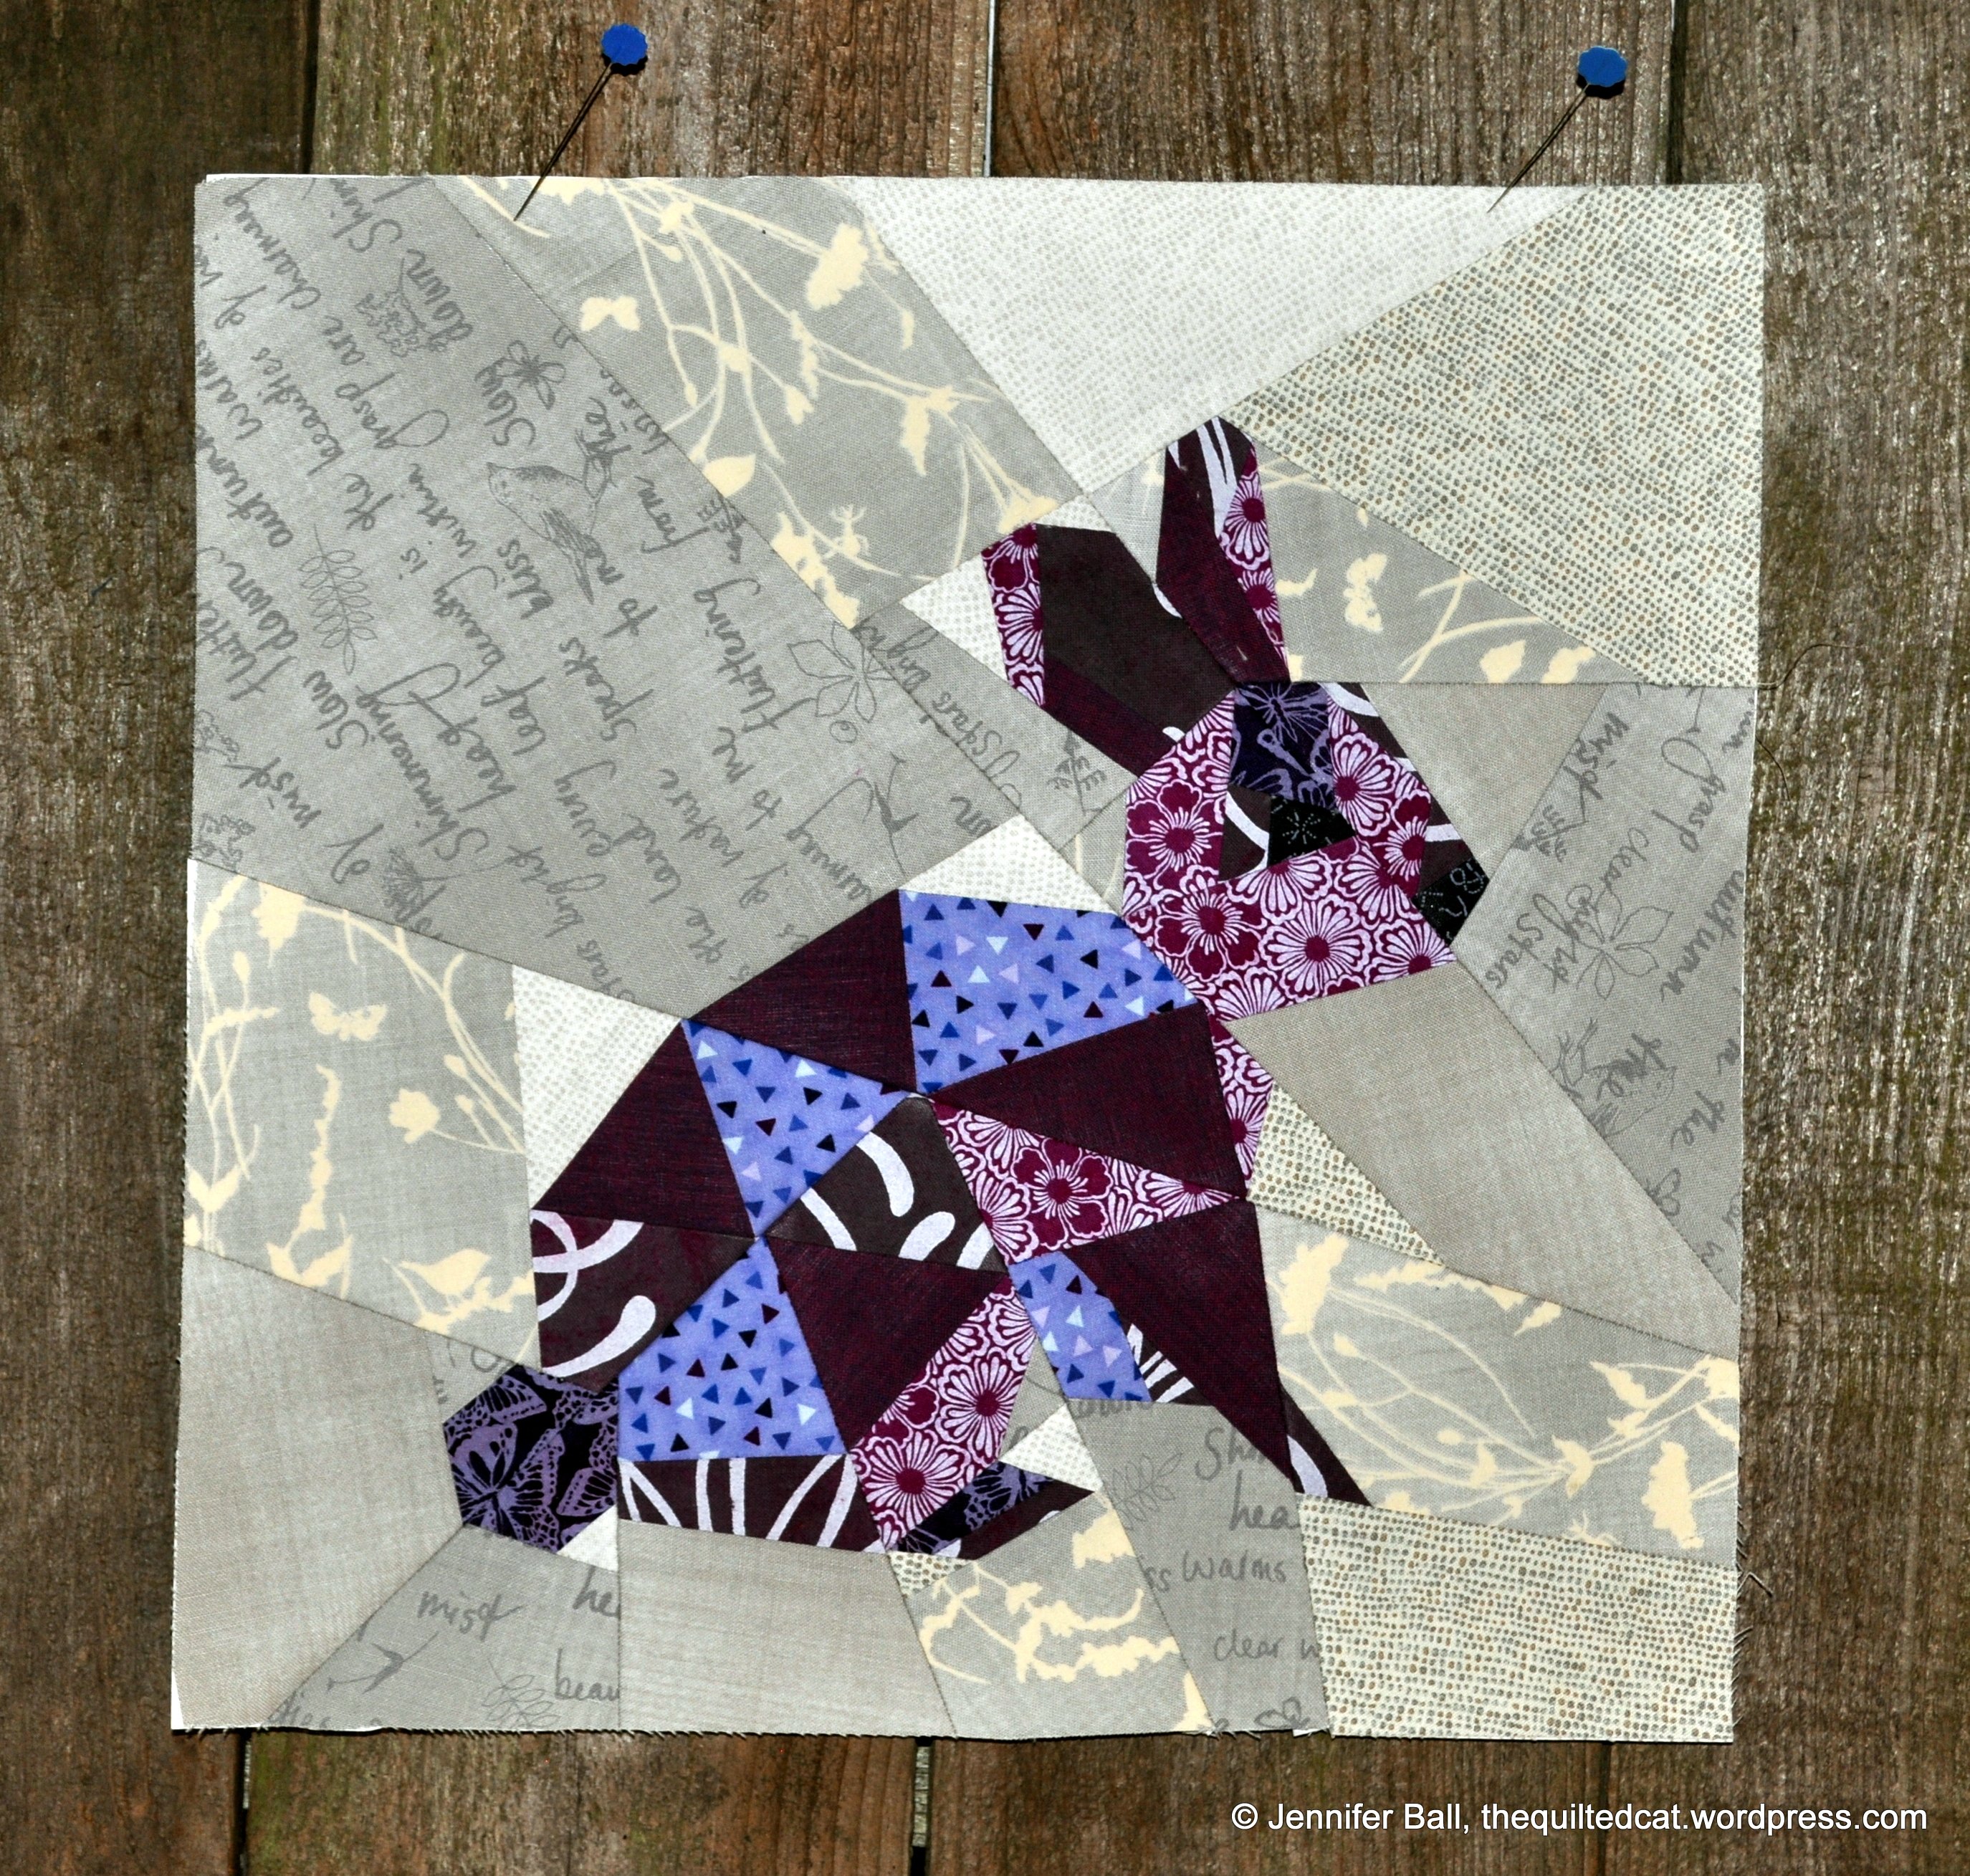
Recently, I had the great pleasure of meeting Violet Craft in person at an open house at a local quilt shop called the Pine Needle. I’ve been eyeing her paper pieced Forest Abstractions pattern for a while so I went ahead and purchased it. I love paper piecing, but haven’t done much of it during the past year. I’m going slow and easy, working in the blocks in between other quilt projects.
I decided to use a variety of low-volume prints for the backgrounds instead of using solids. I picked up a fat quarter stack of lovely fabric from a quilt shop in Spokane called Charming Lulu when I met my sister there for a little shop hop several weekends ago. They carry a wonderful selection of modern fabrics, and I hope to visit next time I’m in Spokane.
I haven’t found a website for Charming Lulu, but they are on Facebook.
Field Guide Fat Quarter Stack
Charming Lulu Quilt Store
For the bunny, I chose some wonderful purple and magenta fabrics that I picked up at a quilt show last year. I’m pretty sure that I’ll use different colors for each critter in the quilt, but we’ll see.
Forest Abstractions Pattern and Fabrics
Here’s a look at my completed bunny block:
Forest Abstractions Bunny
I hope to make another block from this pattern soon.
If you participated in the Black Cat Crossing blog hop, I offered a giveaway on my post here. I used a random number generator and the lucky winner is . . . .
Carole, I will be emailing you today to make the arrangements.
Thanks to everyone who participated in the blog hop. I do hope that you enjoyed all the wonderful Halloween creations.
Stay tuned because I’m participating in Quiltmaker’s 100 Blocks Blog Tour in November. I have a block published in the next issue, and I can’t wait to show it to you!
Greeeeeetings, my dears! Today is my day to share with you the creations that I stitched up in my cauldron for the Black Cat Crossing blog hop. Many thanks go to Madame Samm of Sew We Quilt for encouraging people of all skill levels to brew up something to share with us. I also want to thank our fabulous cheerleader, Wendy of Why Knot Kwilt, for organizing this blog hop!
I picked up some of the Black Cat Crossing fabric by Maywood Studios at a local quilt shop that recently opened in town. I love supporting my local shops!
For my first project, I decided to do a wool felt project with just an accent of cotton fabric. One can never have too many pin cushions, right? Sew off I went to stitch up a little witch hat to keep me company in my sewing room. The hat band uses a strip of fabric from Black Cat Crossing. I used black Aurifil thread for the piecing and midnight glitter hologram thread by Superior to add some sparkle to the brim. The finished pin cushion is about 4.5 inches tall.
My stitching assistants ensured the quality of this little pin cushion:
Tiger likes the witch hat
Cow is planning his revenge
Now that I had a pin cushion ready to go, I stoked up my cauldron and set to brewing up a special creation using only Black Cat Crossing fabric!
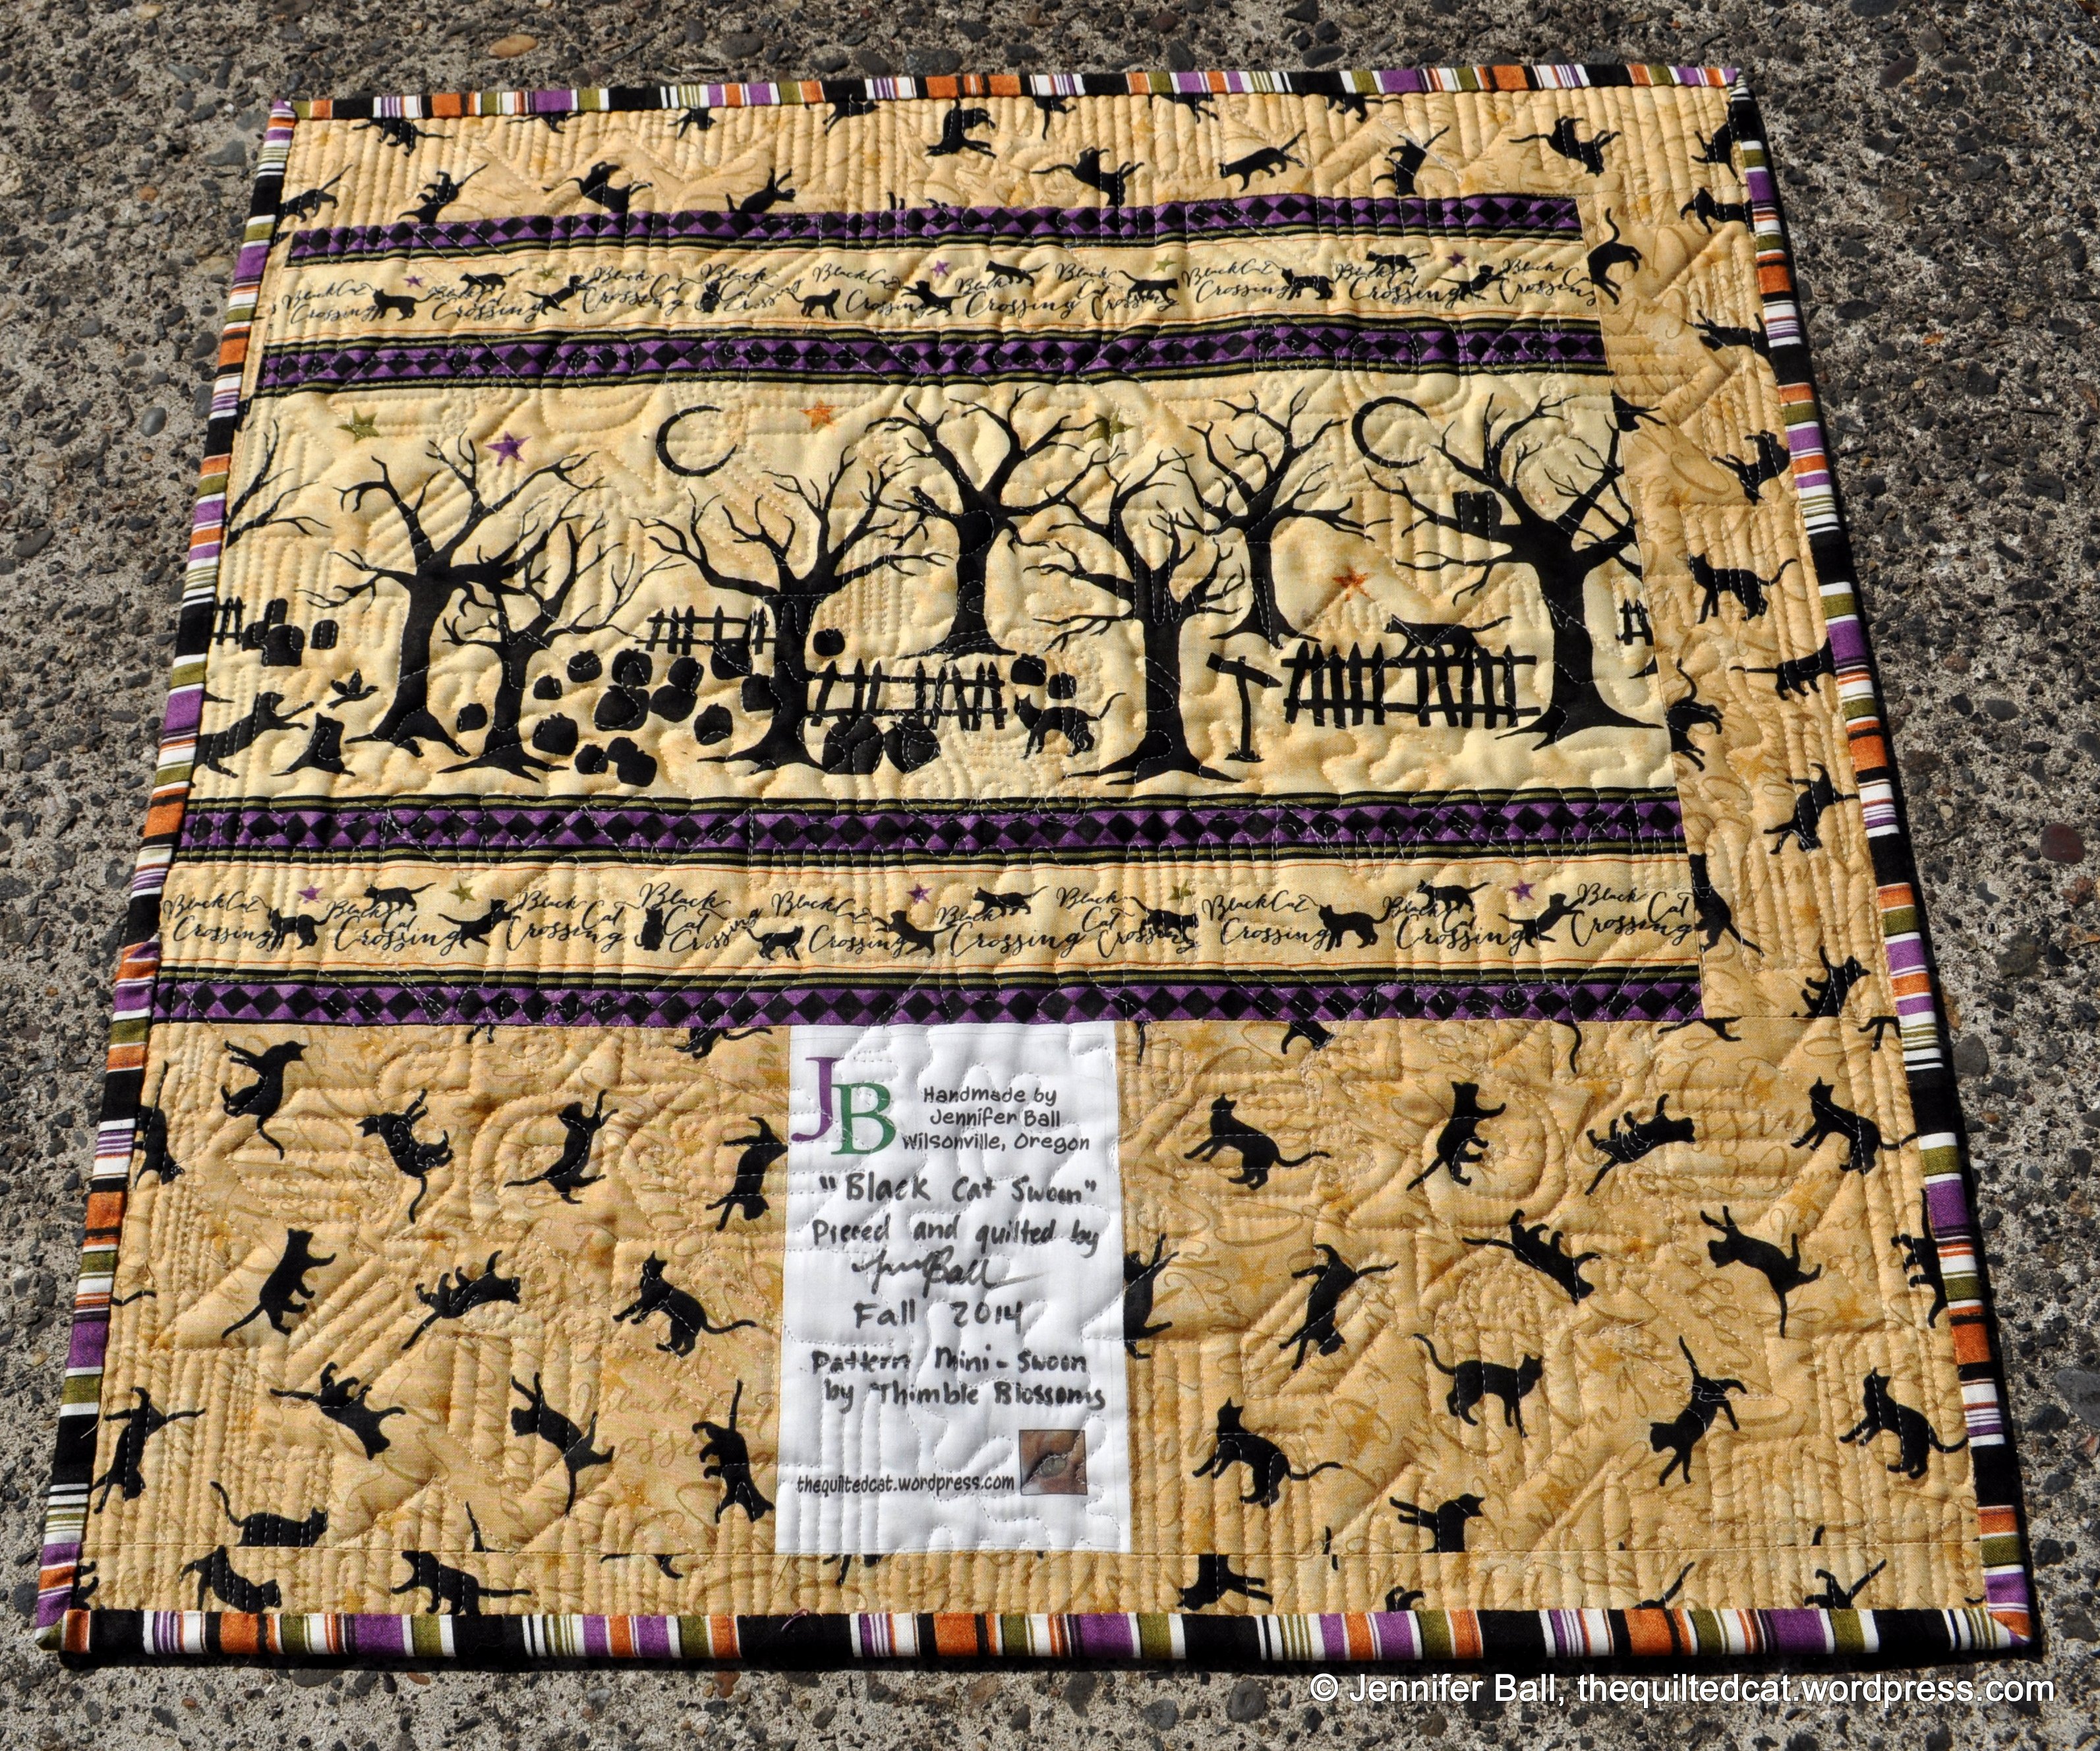
For this project, I stretched my skill levels by creating a mini quilt and by practicing some heavy free motion quilting. I used an Aurifil cream thread for all the piecing and quilting. The pattern is Mini Swoon by Thimble Blossoms.
I modified the pattern slightly so that I could add the Black Cat Crossing border fabric in between the swoon blocks. I’m calling my finished mini quilt, “Black Cat Swoon!”
For the backing, I used left over pieces plus my label:
I just love how this mini quilt looks, and I can easily display it in various locations around the house during the fall season.
For my giveaway, I’m offering up 2 fat quarters from Black Cat Crossing. Just leave me a comment on this post for an entry. You get a bonus entry if you tell me how you follow my blog, and I’ll draw a random winner from all comments on Halloween, October 31st. I’m willing to ship internationally. Sometimes WordPress and Blogger do not communicate well together so make sure that I have a way to contact you!
Black Cat Crossing Giveaway
I hope you enjoyed my Black Cat Crossing projects, and that they inspire you to make something beautiful!
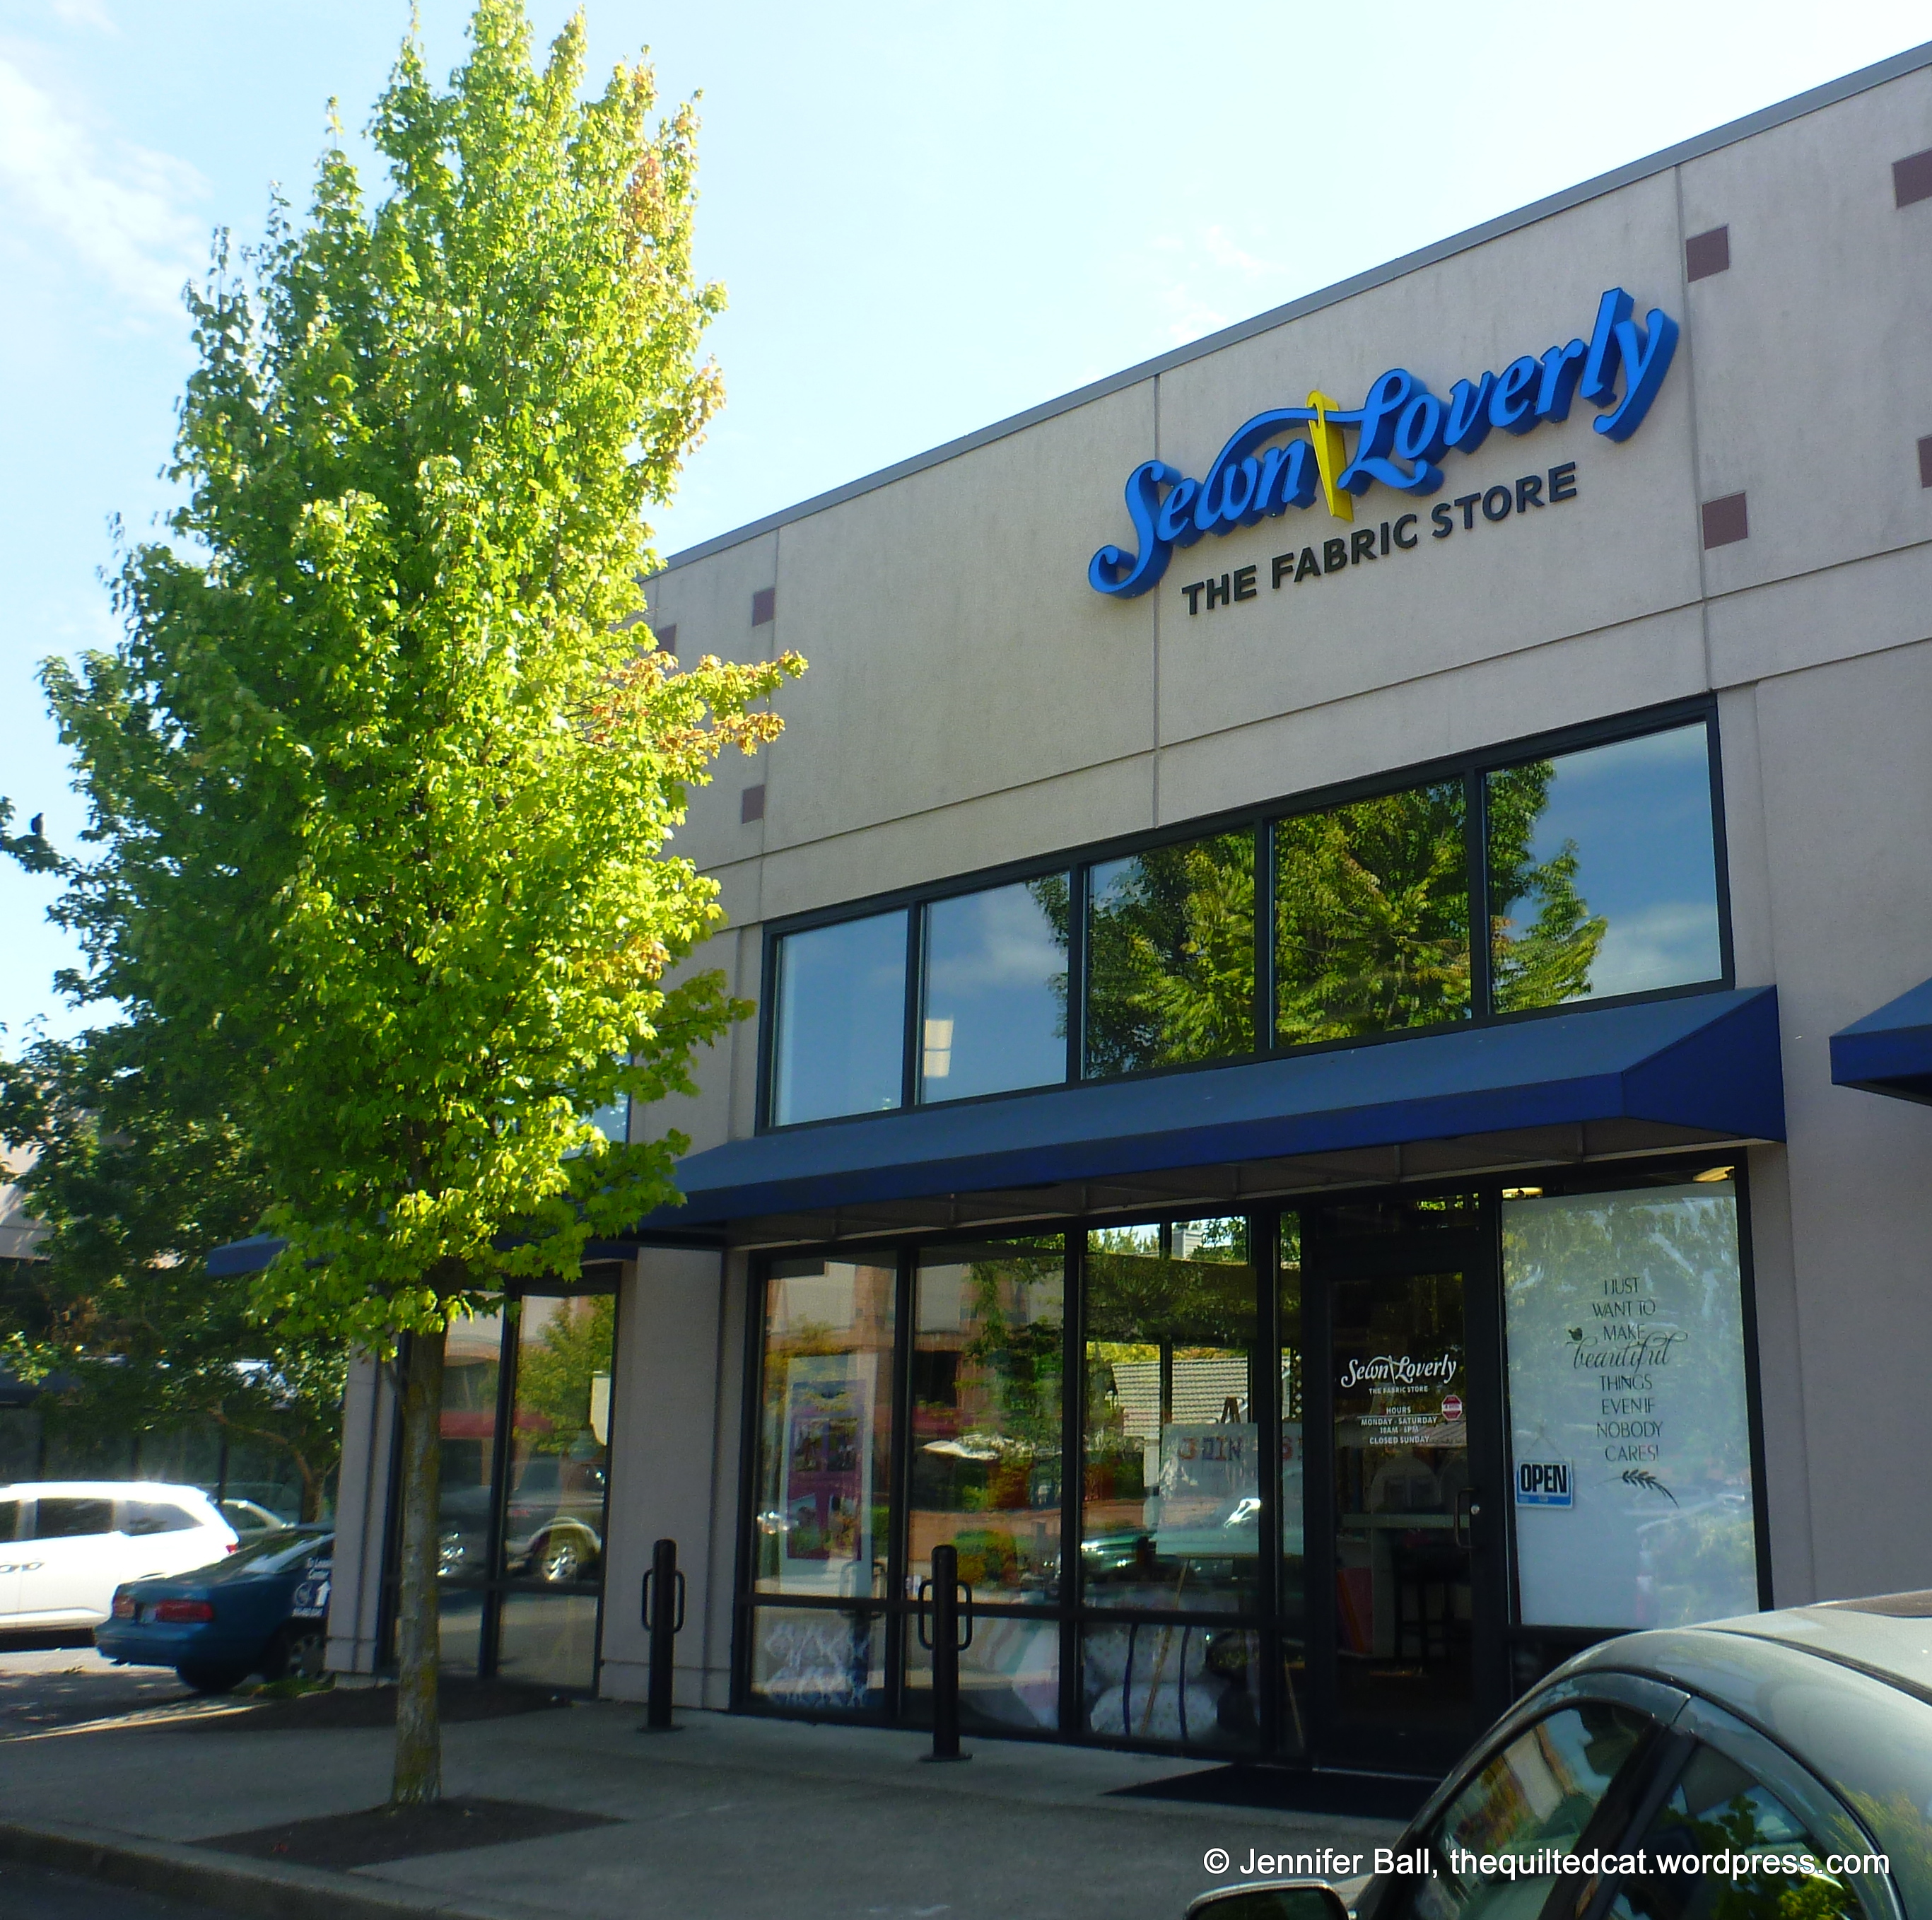
Recently, my son and I visited a local pet store to pick up some supplies. While parking the car, I saw the word “sew” out of the corner of my eye! Wait, what?
With 9-year-old in tow, I walked down the sidewalk and found that a new quilt shop has opened in Oregon, specifically in Wilsonville. The store is called Sewn Loverly and has its grand opening this Saturday, September 6th starting at 10:00 a.m. This store is owned and operated by a mother/daughter duo, and I’ve already stopped in 3 or 4 times. They know me now, ha, ha!
Here’s the store front:
Sewn Loverly
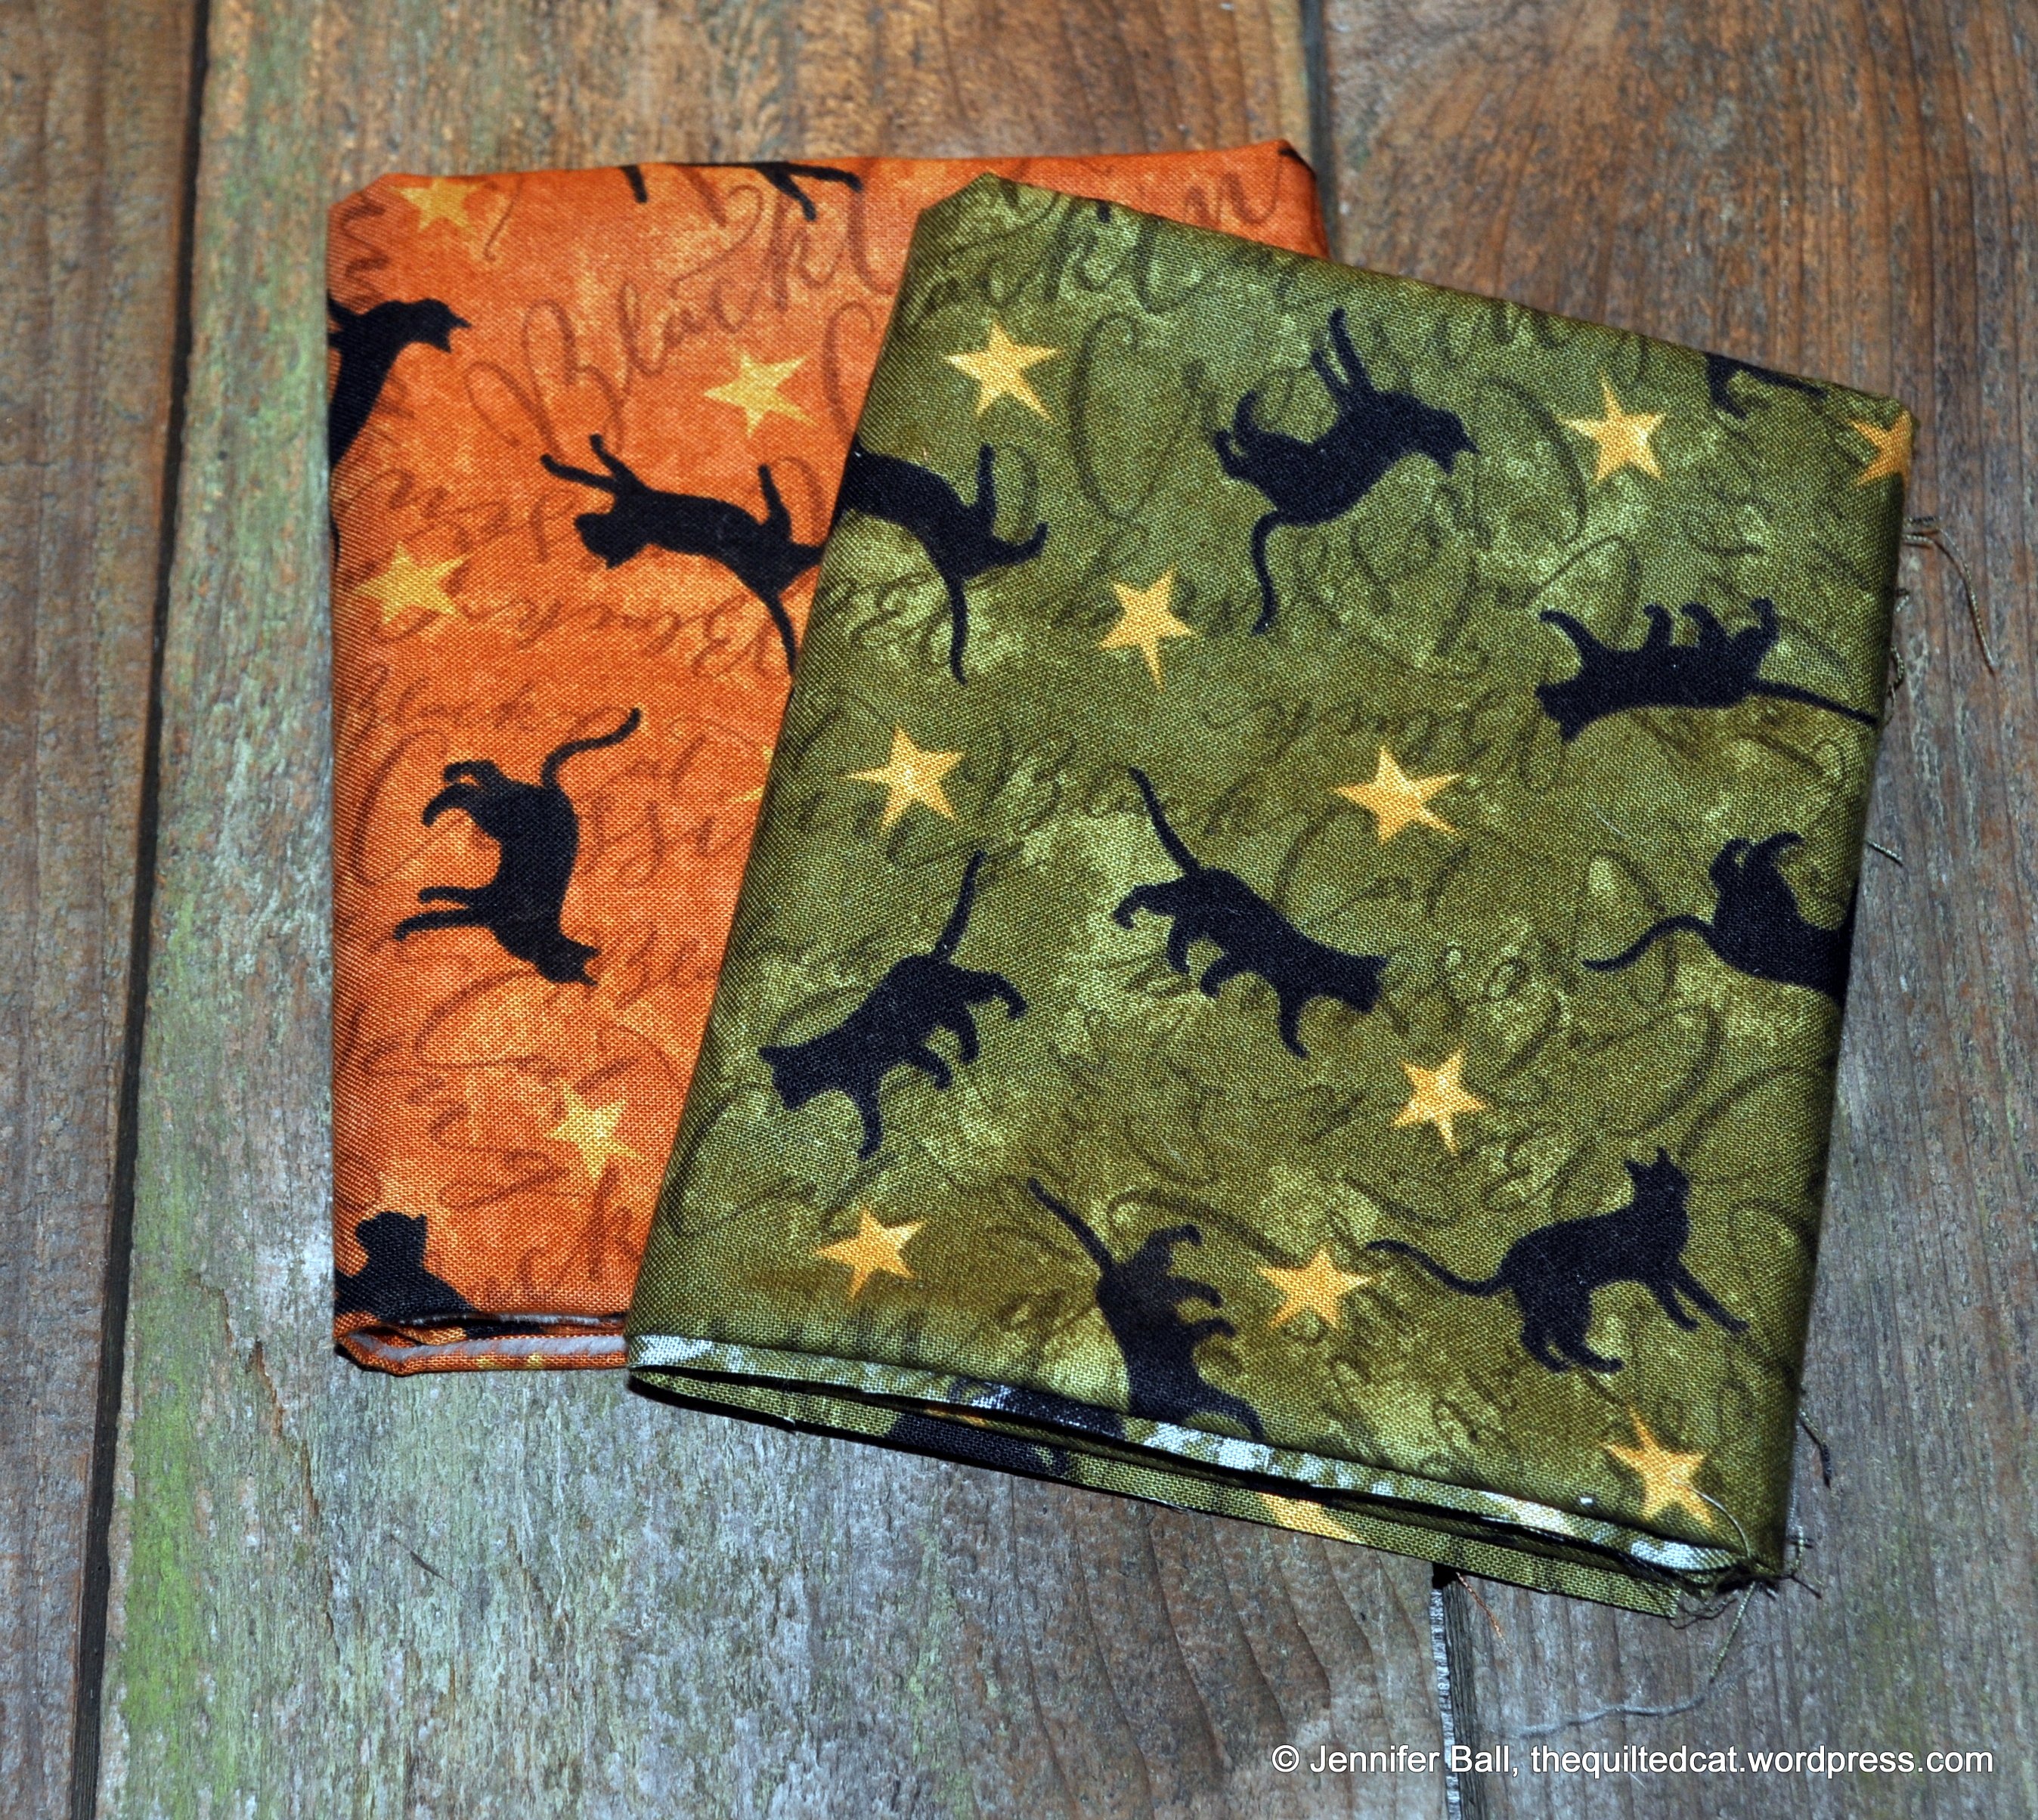
I picked up some fun Halloween fabrics to use in a blog hop that I’m participating in this October. I’ve got a cute project in mind, but can’t reveal it quite yet. I posted this photo earlier to Instagram:
New Halloween Fabrics
If you’re in the area, be sure to stop by and say hello to the wonderful gals at Sewn Loverly!
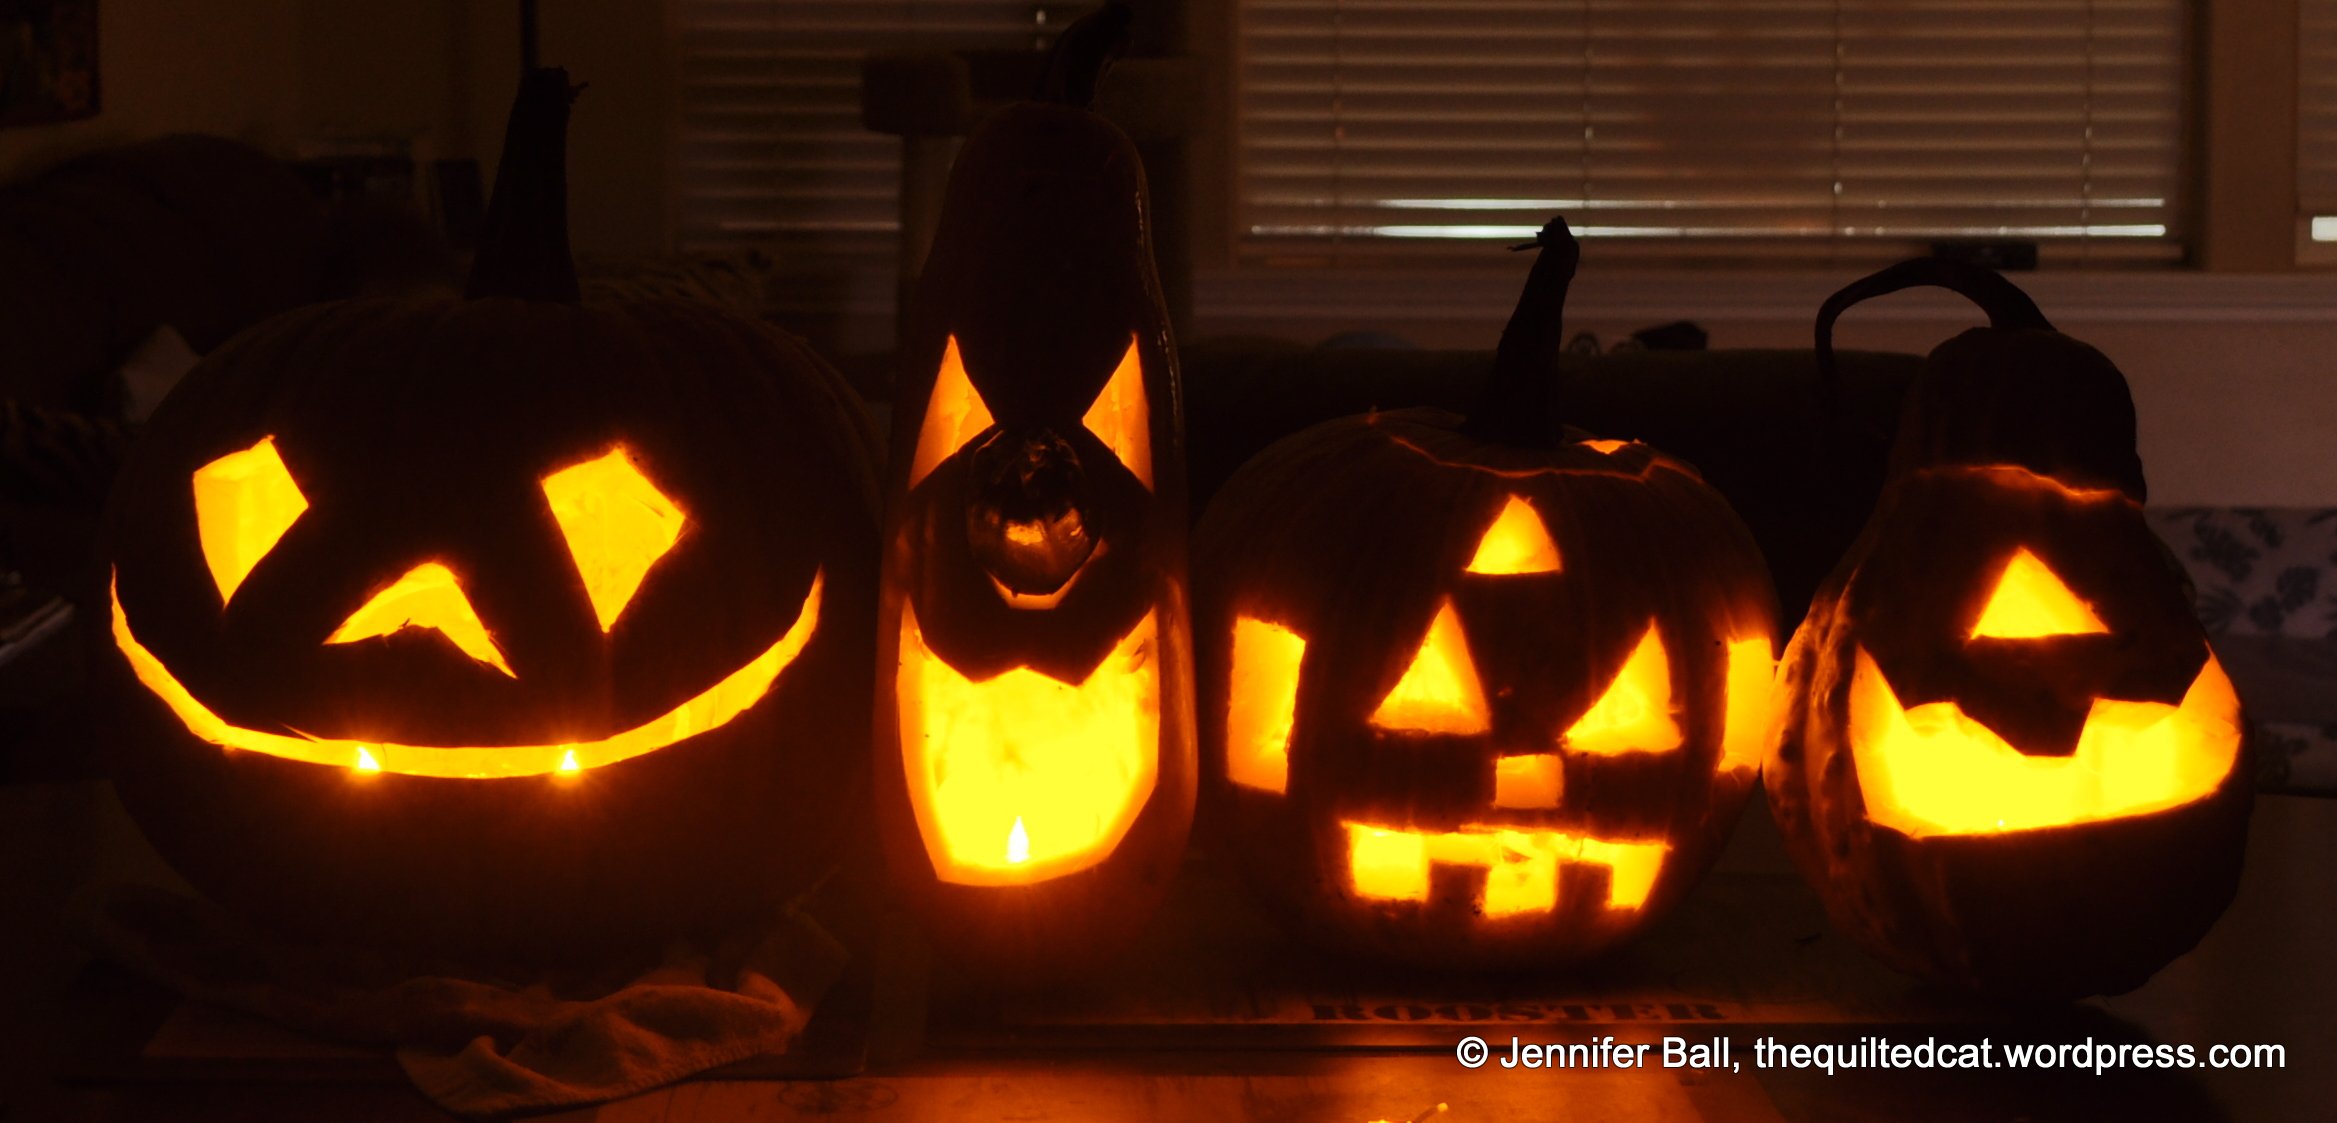
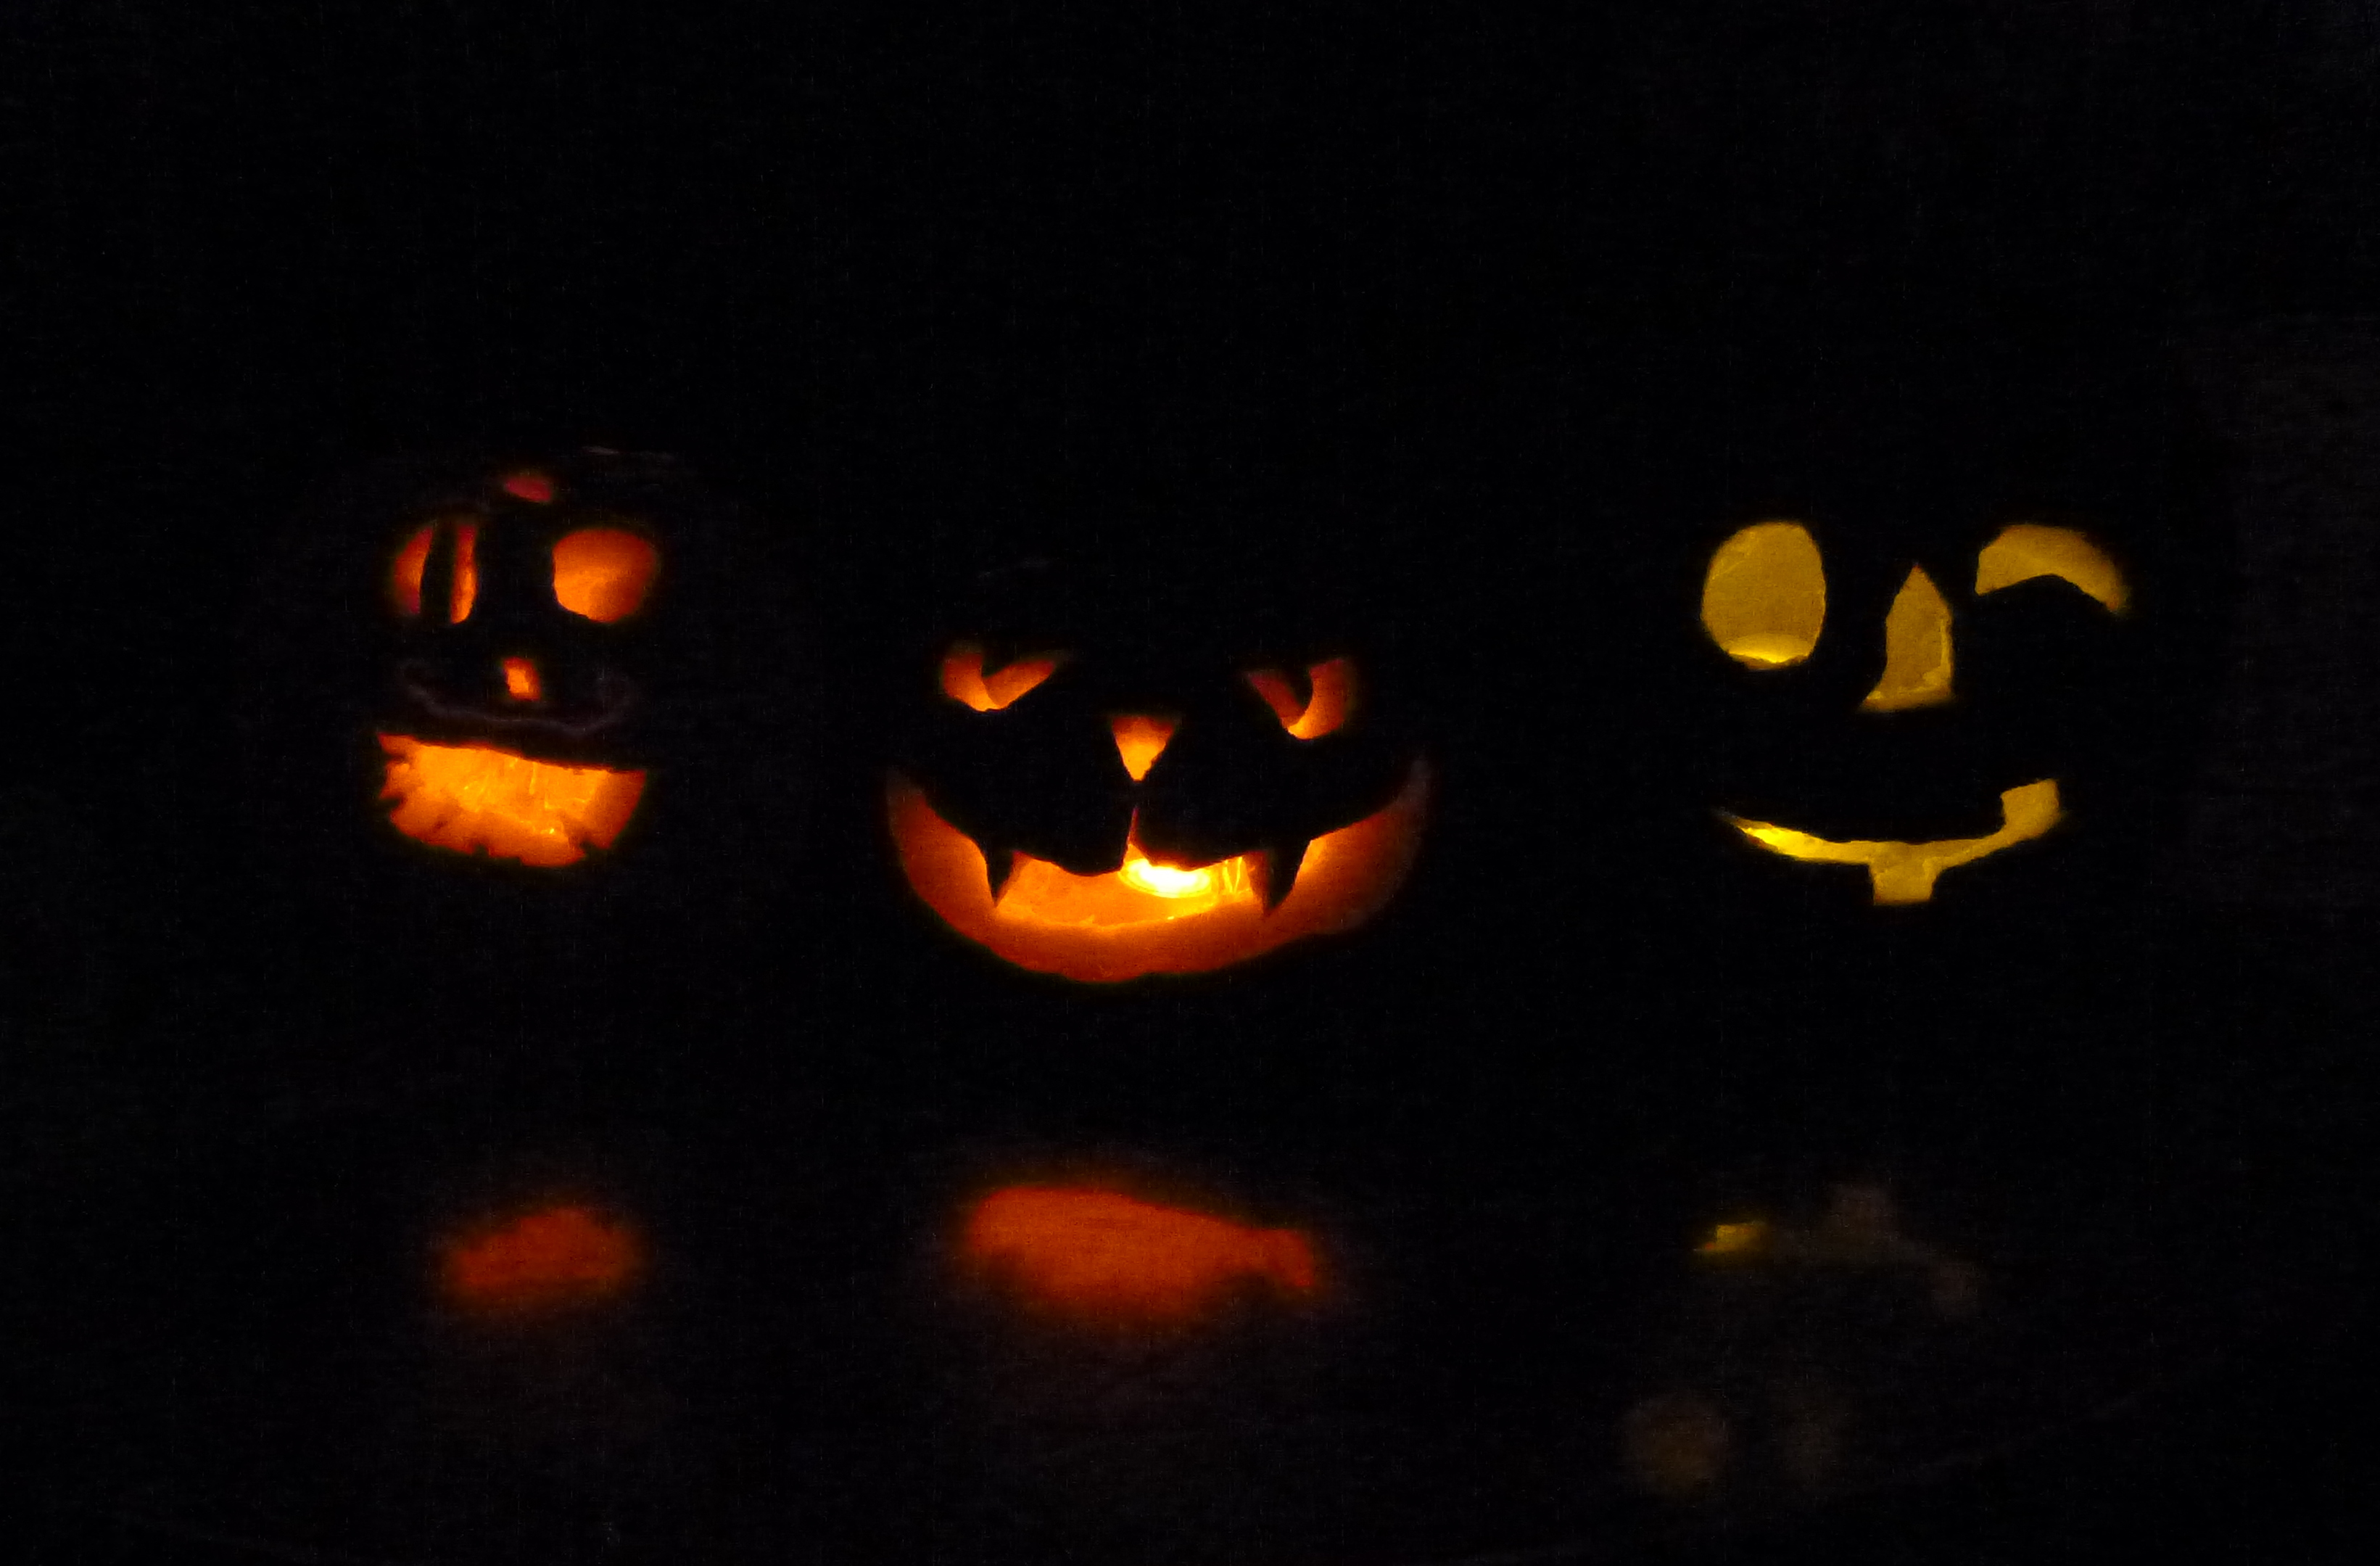
We are still busy handing out candy to the little ghouls and goblins here on the west coast. Here are the pumpkins that we carved last night:
Jack-o-Lanterns
I hope everyone had a safe and fun night of trick-or-treating!
And now for the Wicked Blog Hop Giveaway Winner . . . . . . .
.
.
.
.
.
using a random number generator is . . . .
.
.
.
.
Lisa of In the Boon Docks! Lisa, I will be emailing you a copy of my Pumpkin Cat Patch pattern! I really hope you enjoy the pattern, and I’d love to see a picture of your finished quilt!