Blogger’s Quilt Festival 2014, Art Quilt Entry

Happy Friday!

Many talented quilters are linking up some fabulous quilt projects this week over at Amy’s Blogger’s Quilt Festival for 2014.

At first, I was uncertain whether to add a project that I worked on this past year that has special meaning for me. I did blog about this art quilt earlier so long-time readers may recognize it. The art quilt is a fabric portrait of my very special cat and quilt inspector, Tiger. This is my first time entering the Blogger’s Quilt Festival, and I’m loving all the entries!

This quilt is my own design based on a photograph that I took of Tiger. I used different orange fabrics to imitate the orange stripes in his fur. I also accented the piece with free-motion quilting on my domestic machine. This quilting really accents his fur, the clouds in the sky, and the illusion of grass in the lower background.

I did some paper-piecing on the corner border blocks to draw the eye into the center of the quilt and to accent the colors in the cat’s fur.

I really love how this project turned out, and I now use a cropped image of the cat face as an avatar for various social media sites.

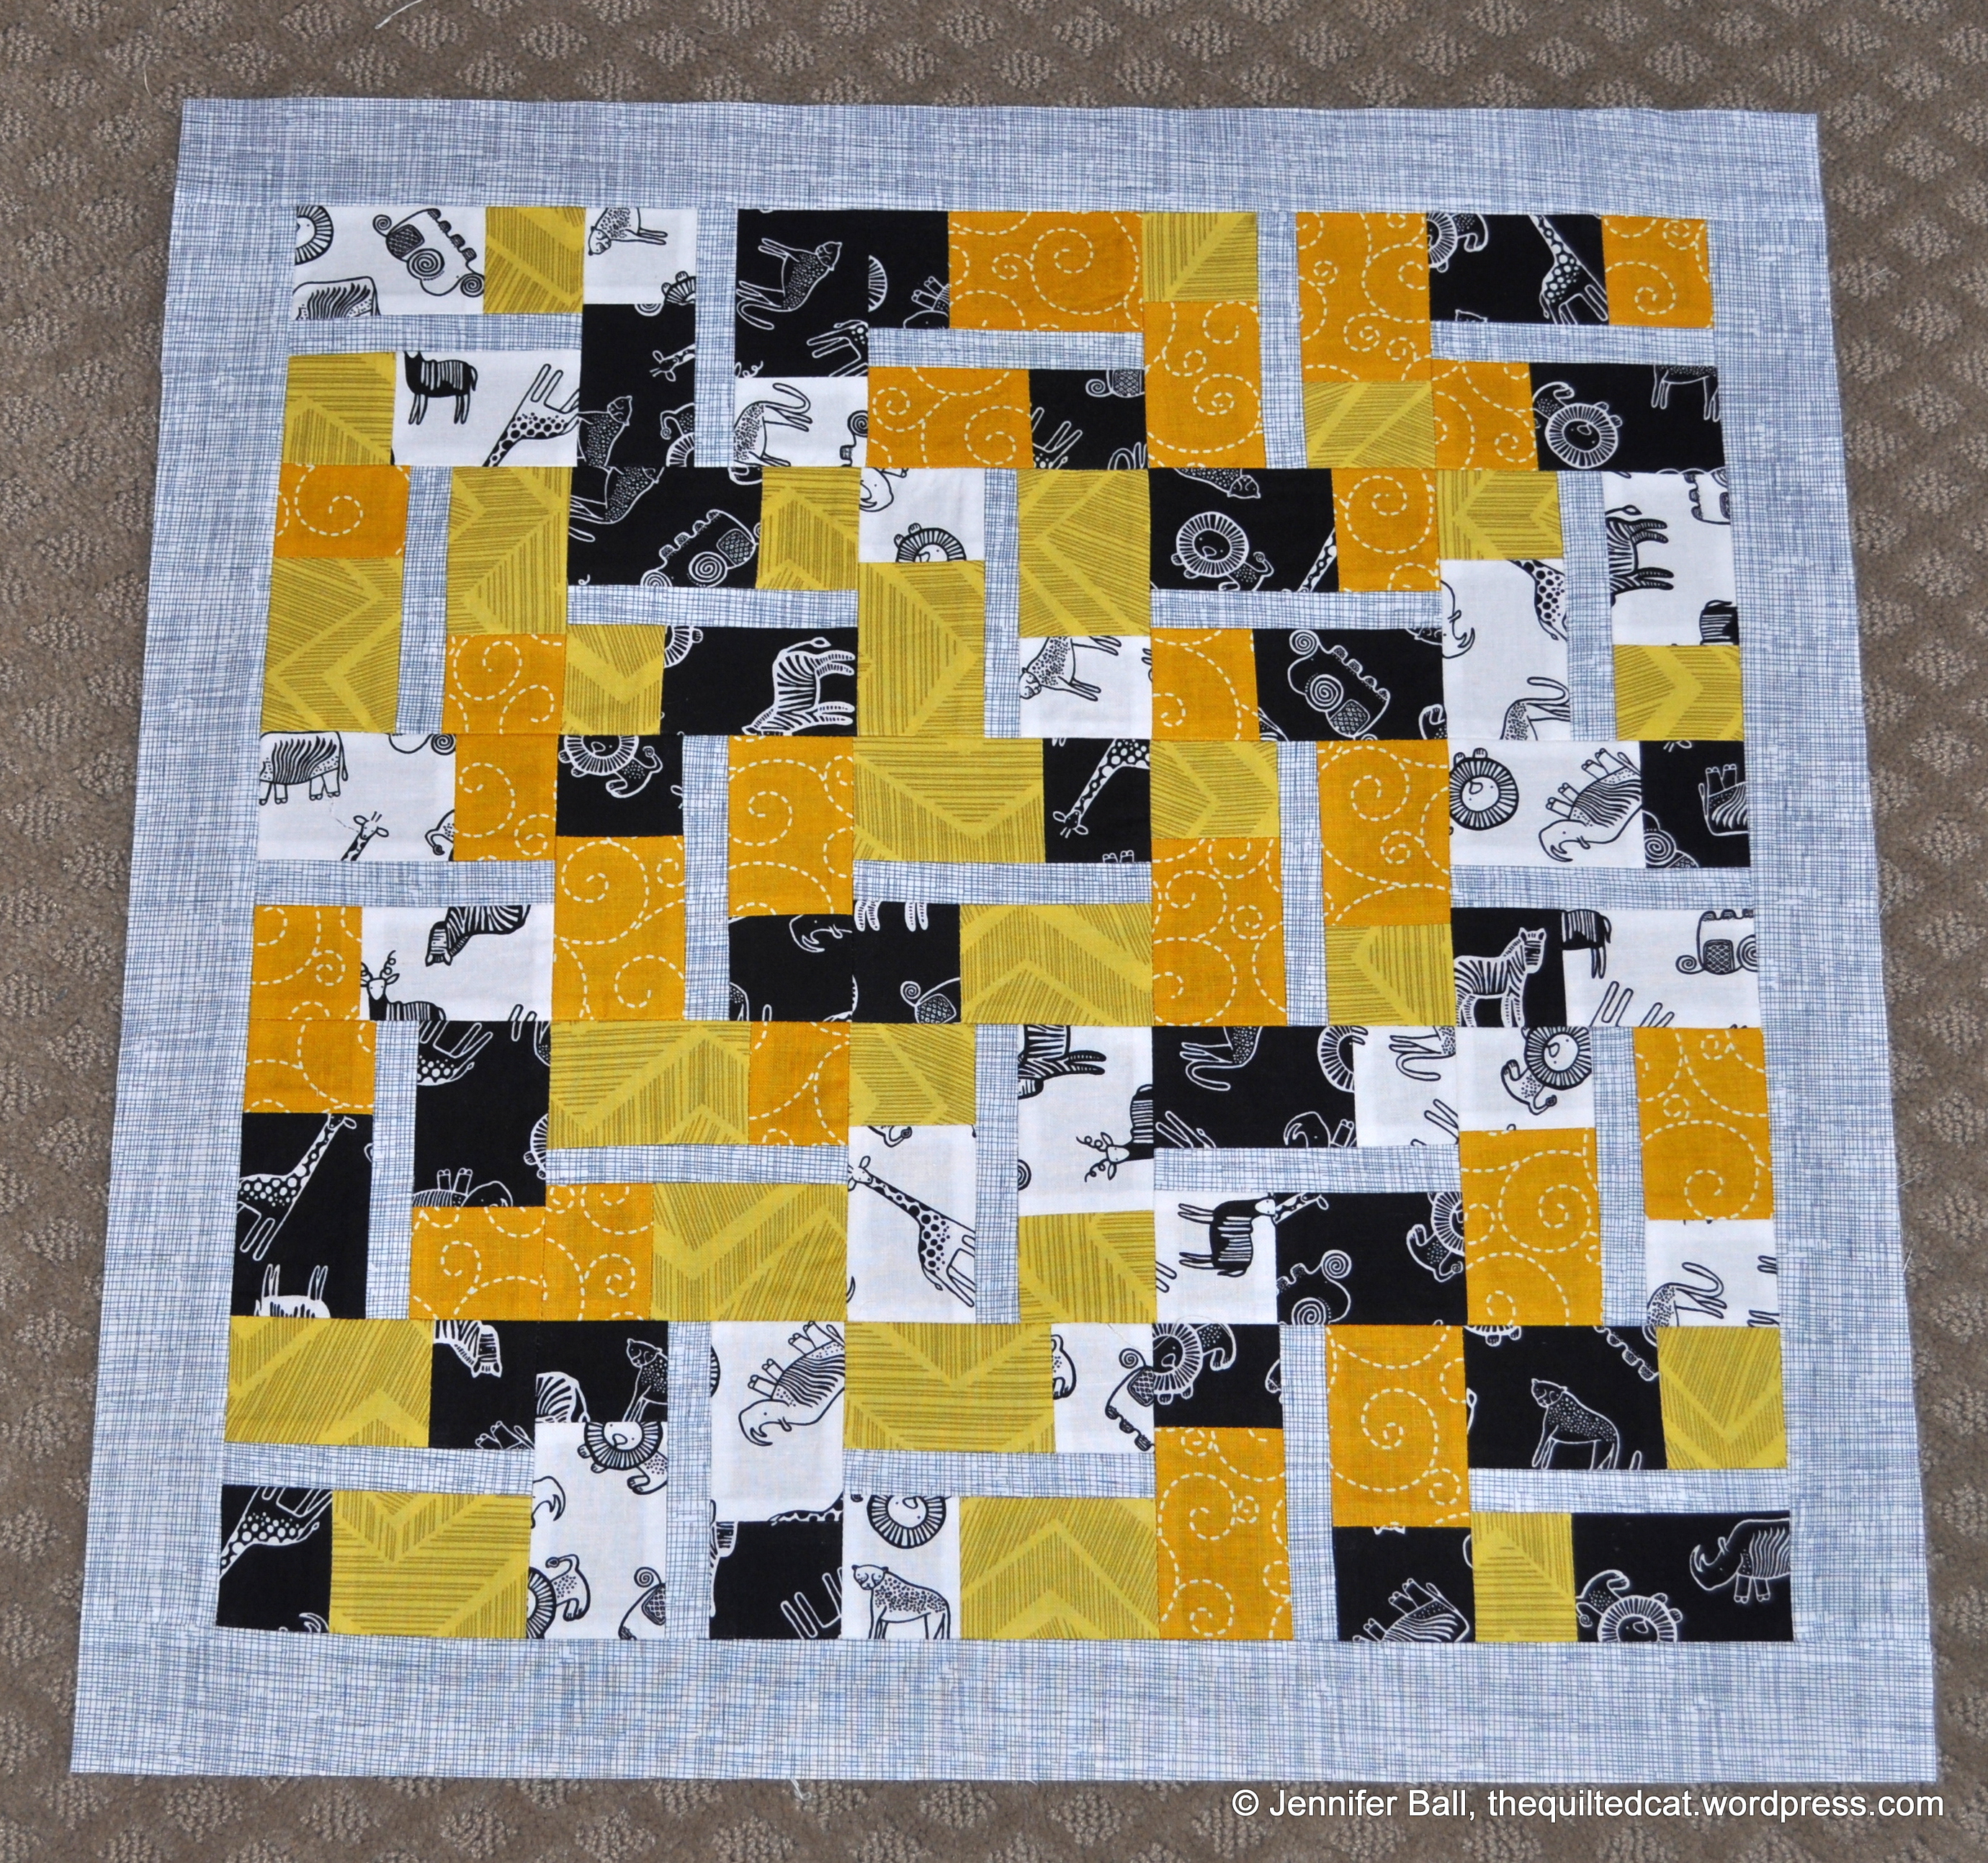
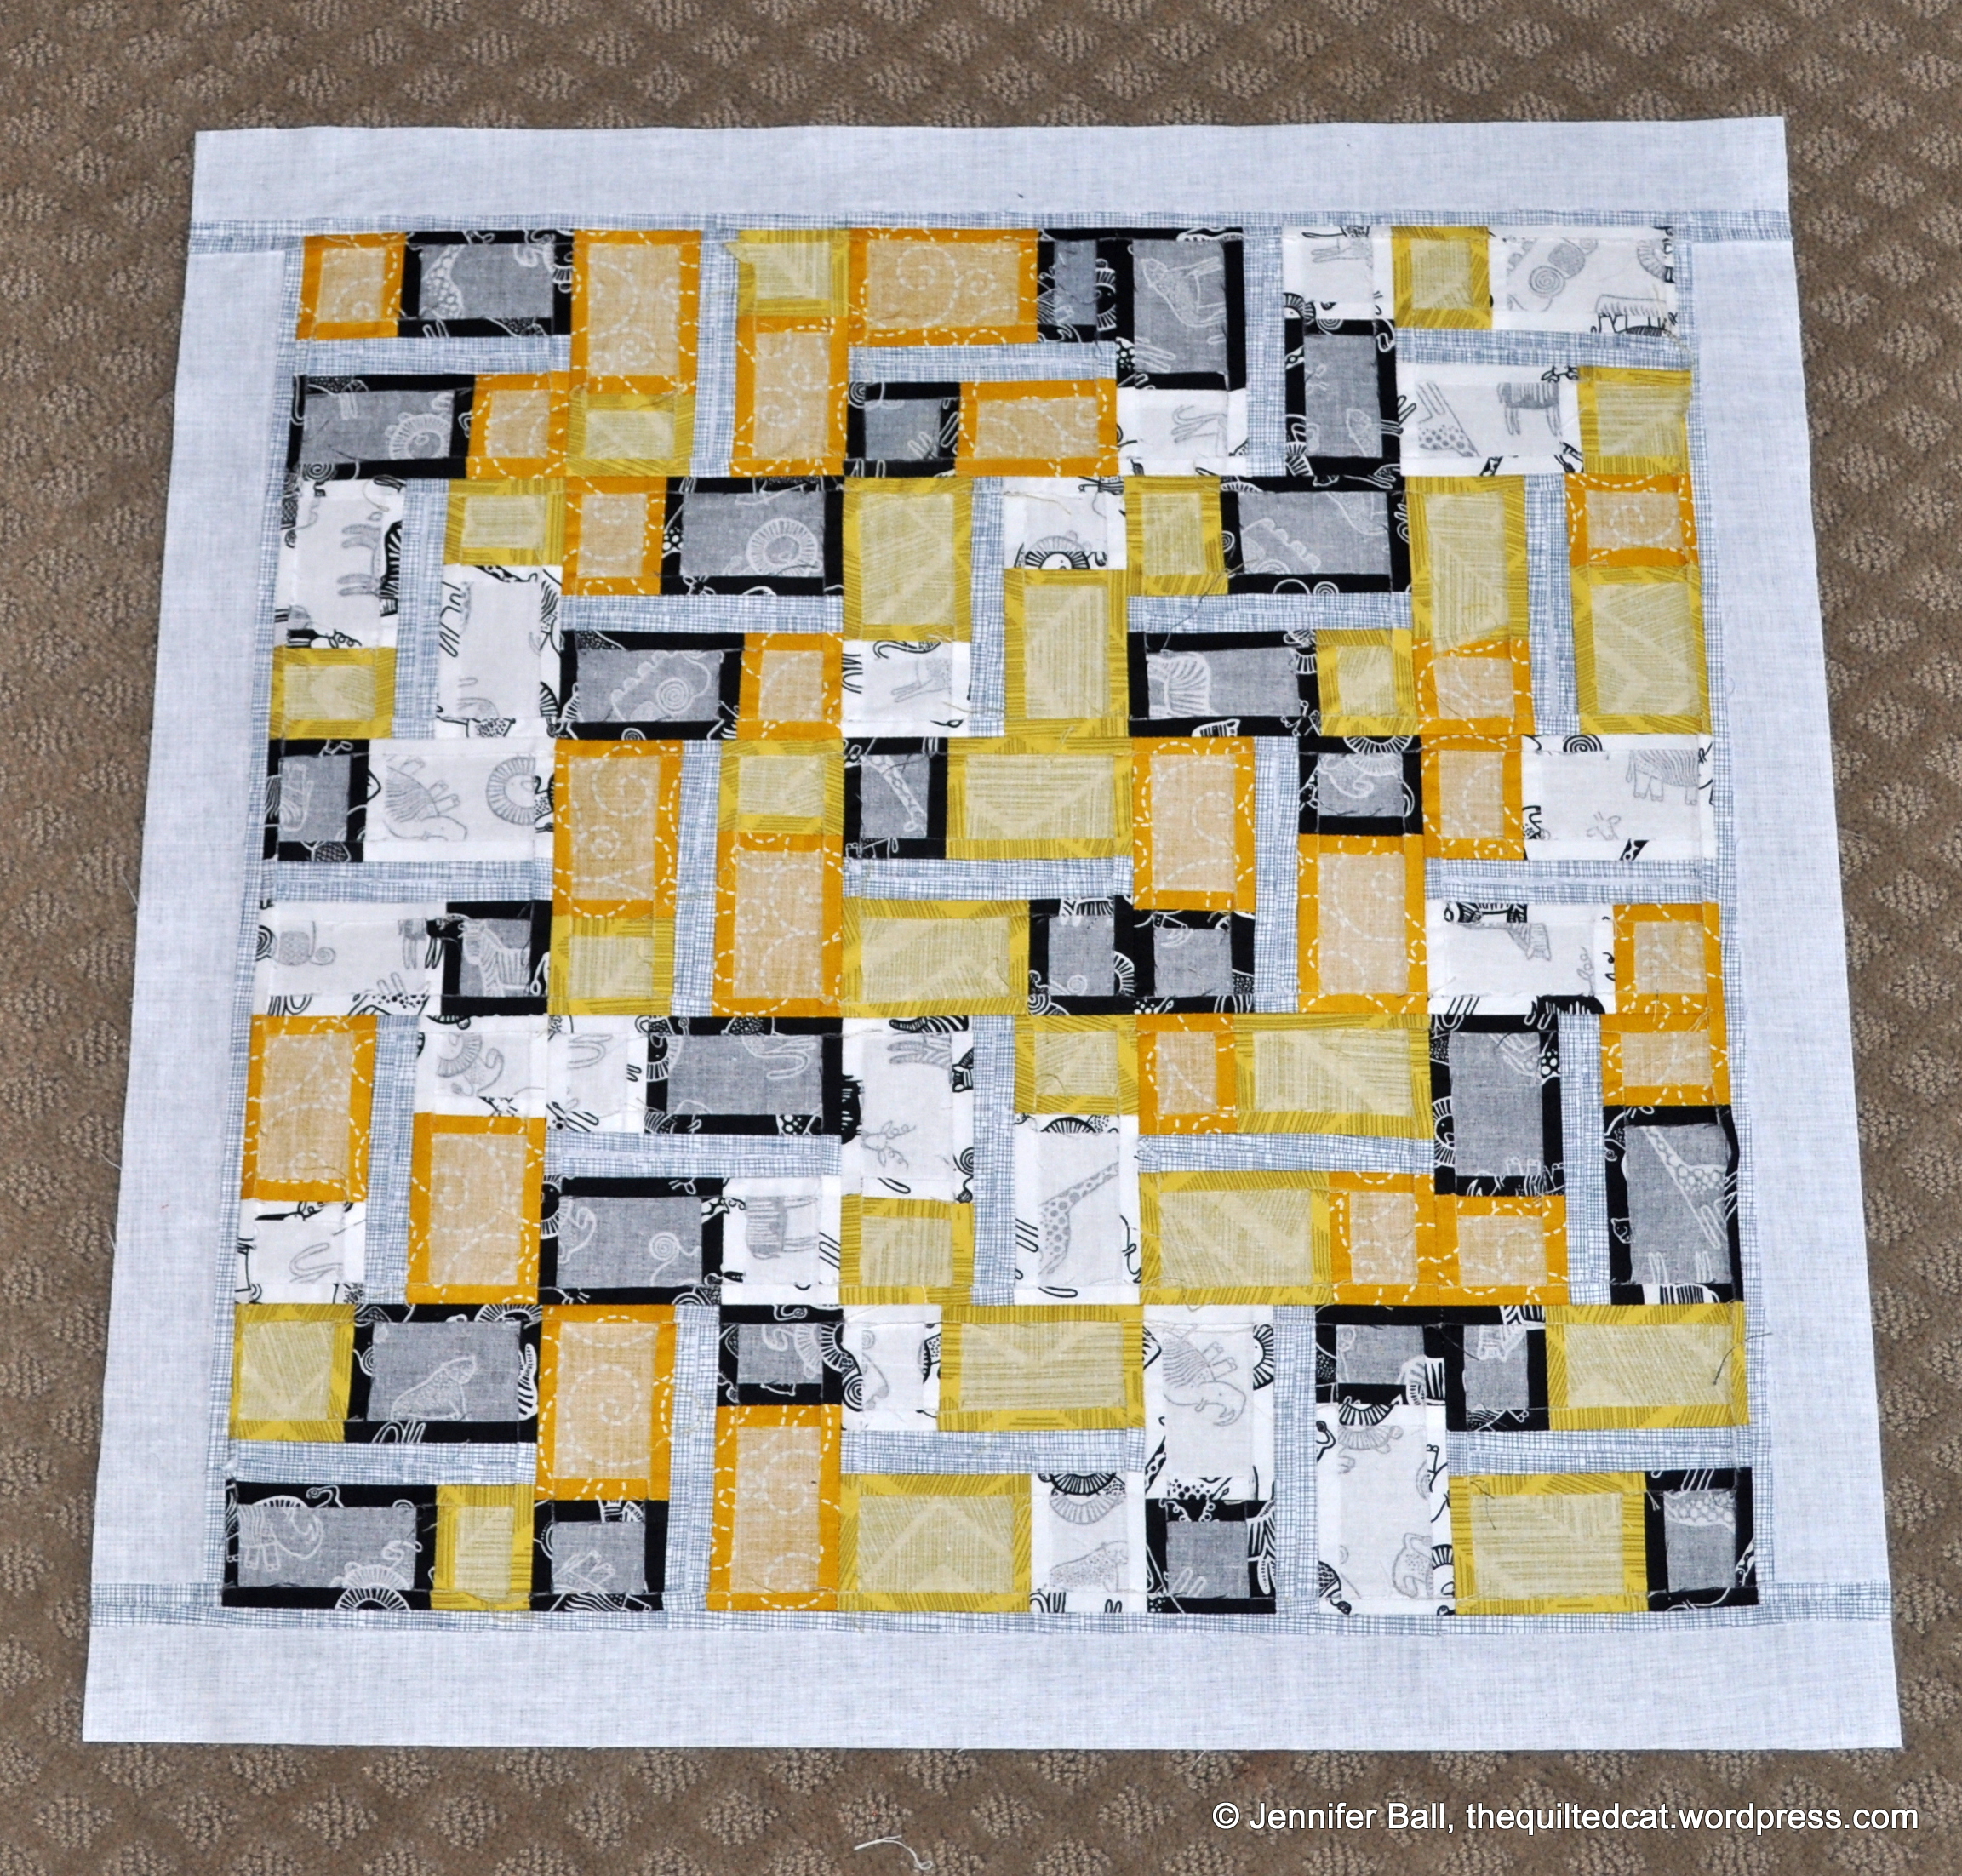
Here’s a view of the whole quilt:

Tiger, A Quilted Portrait

Tiger, A Quilted Portrait

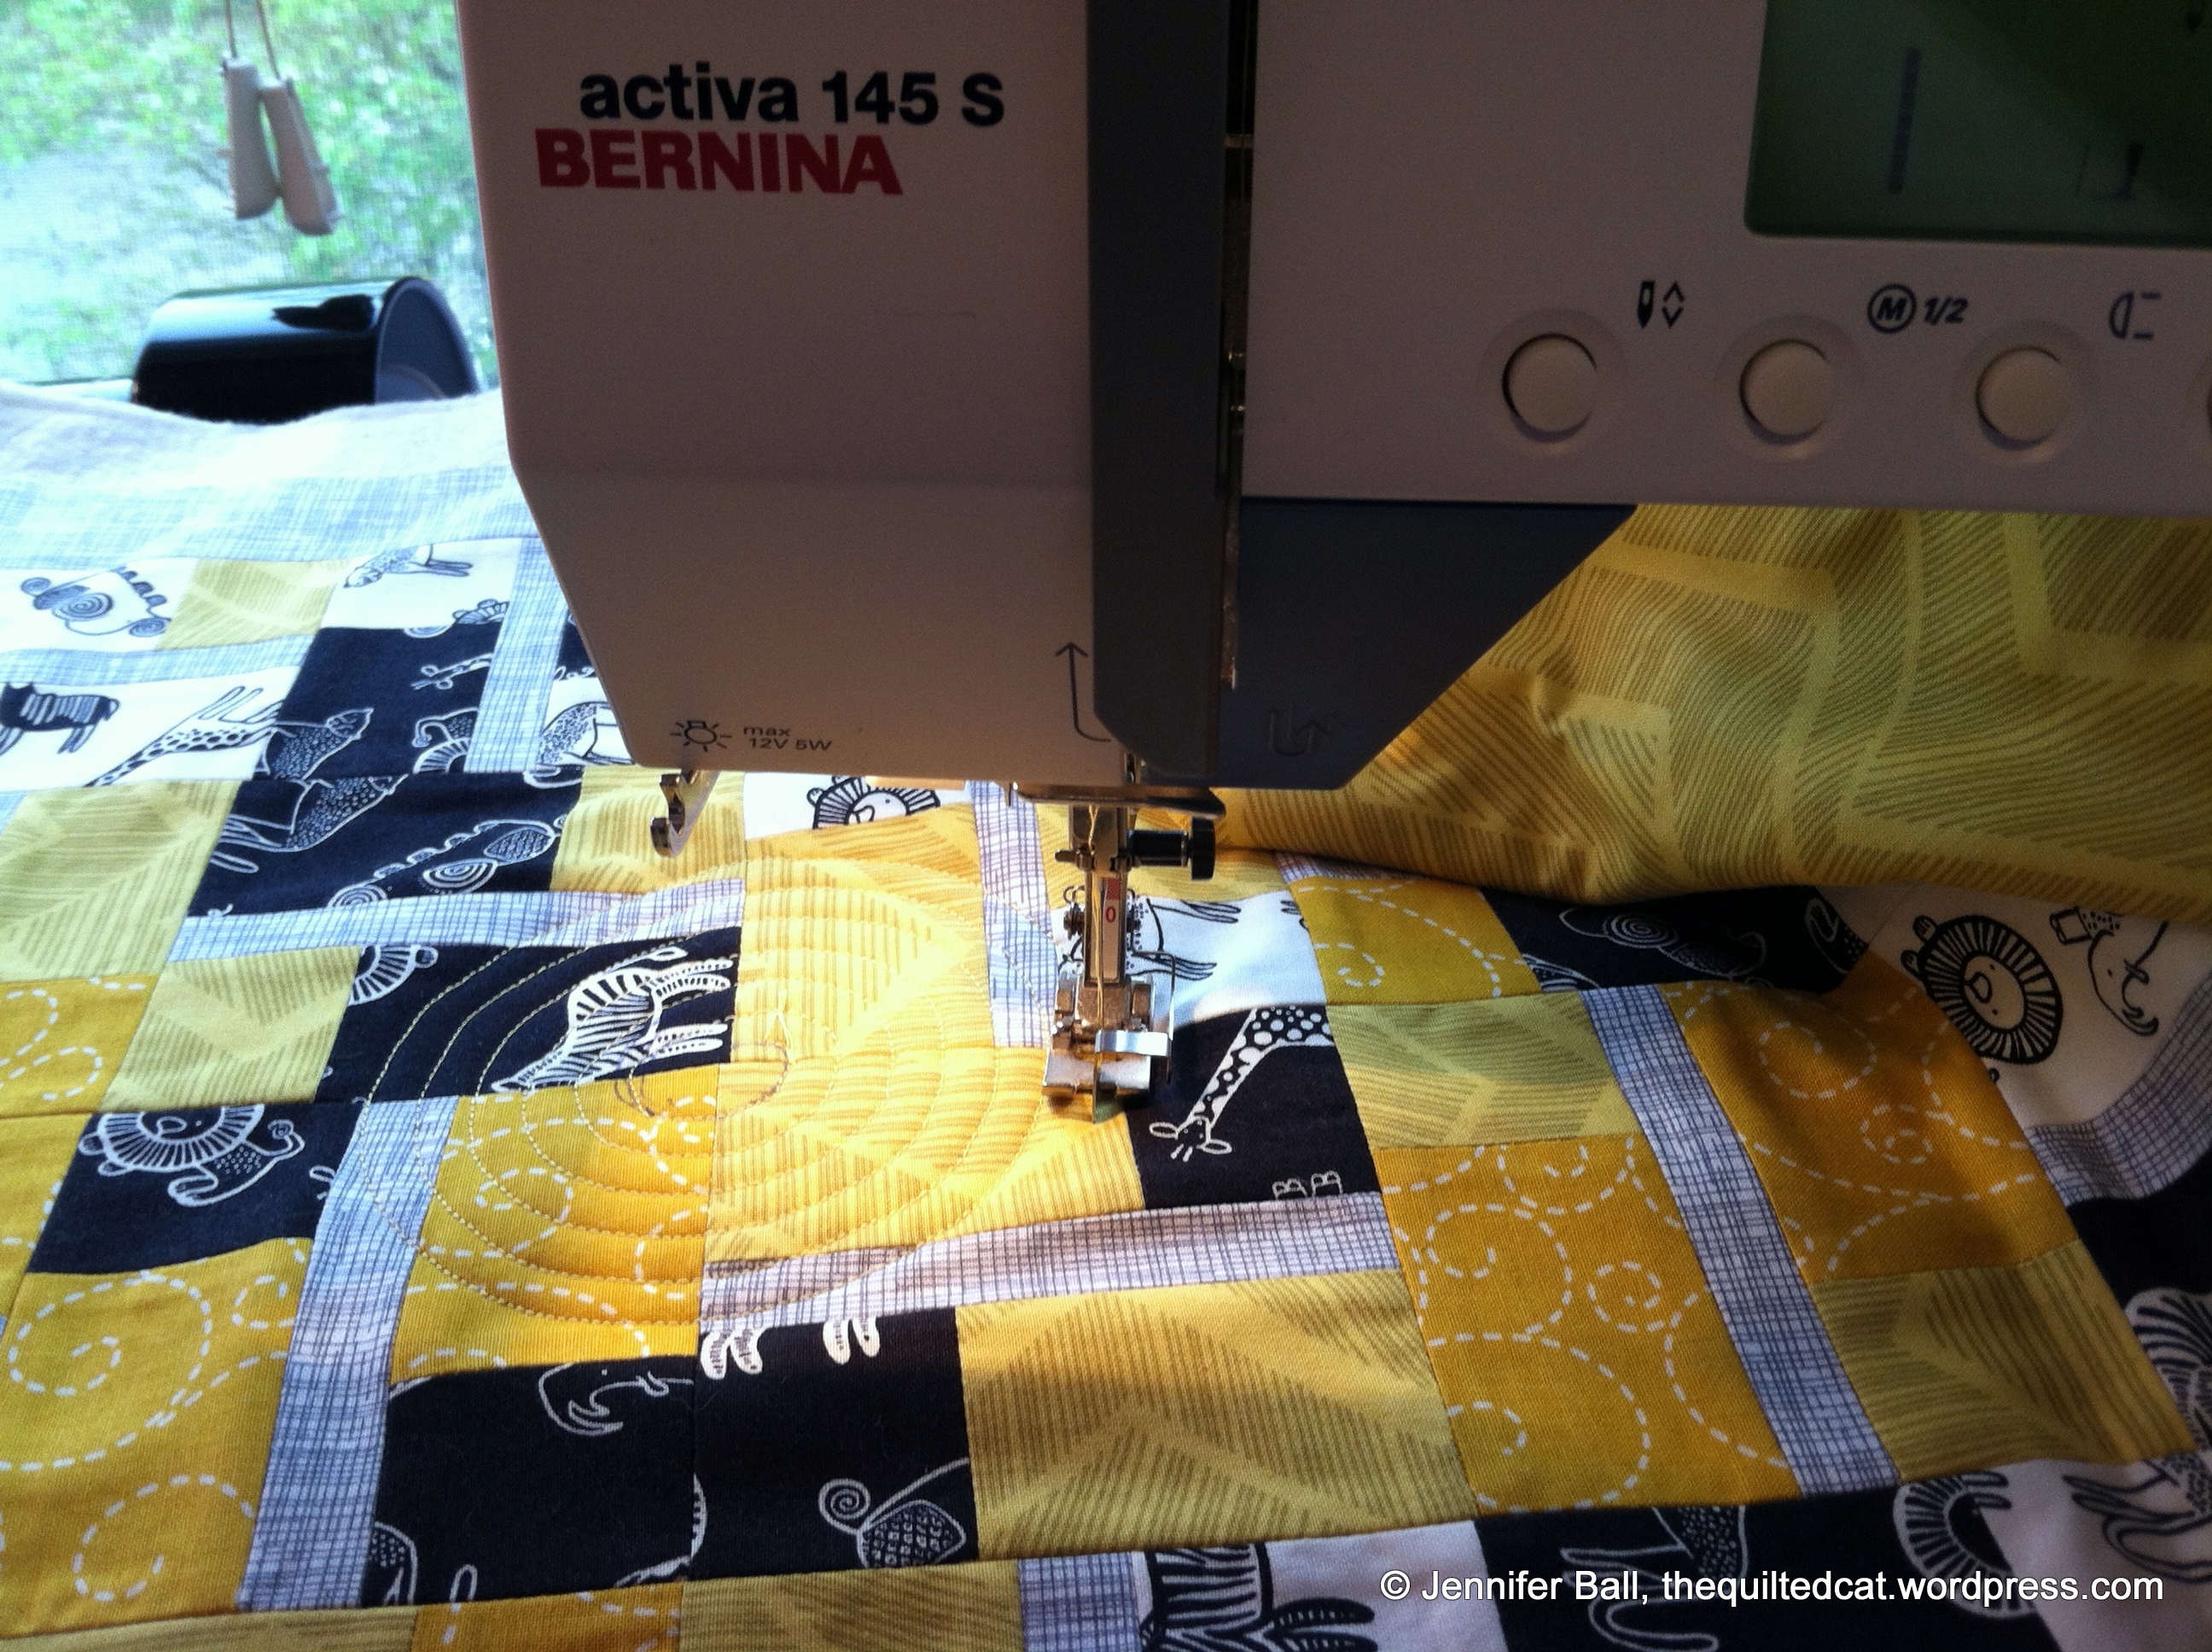
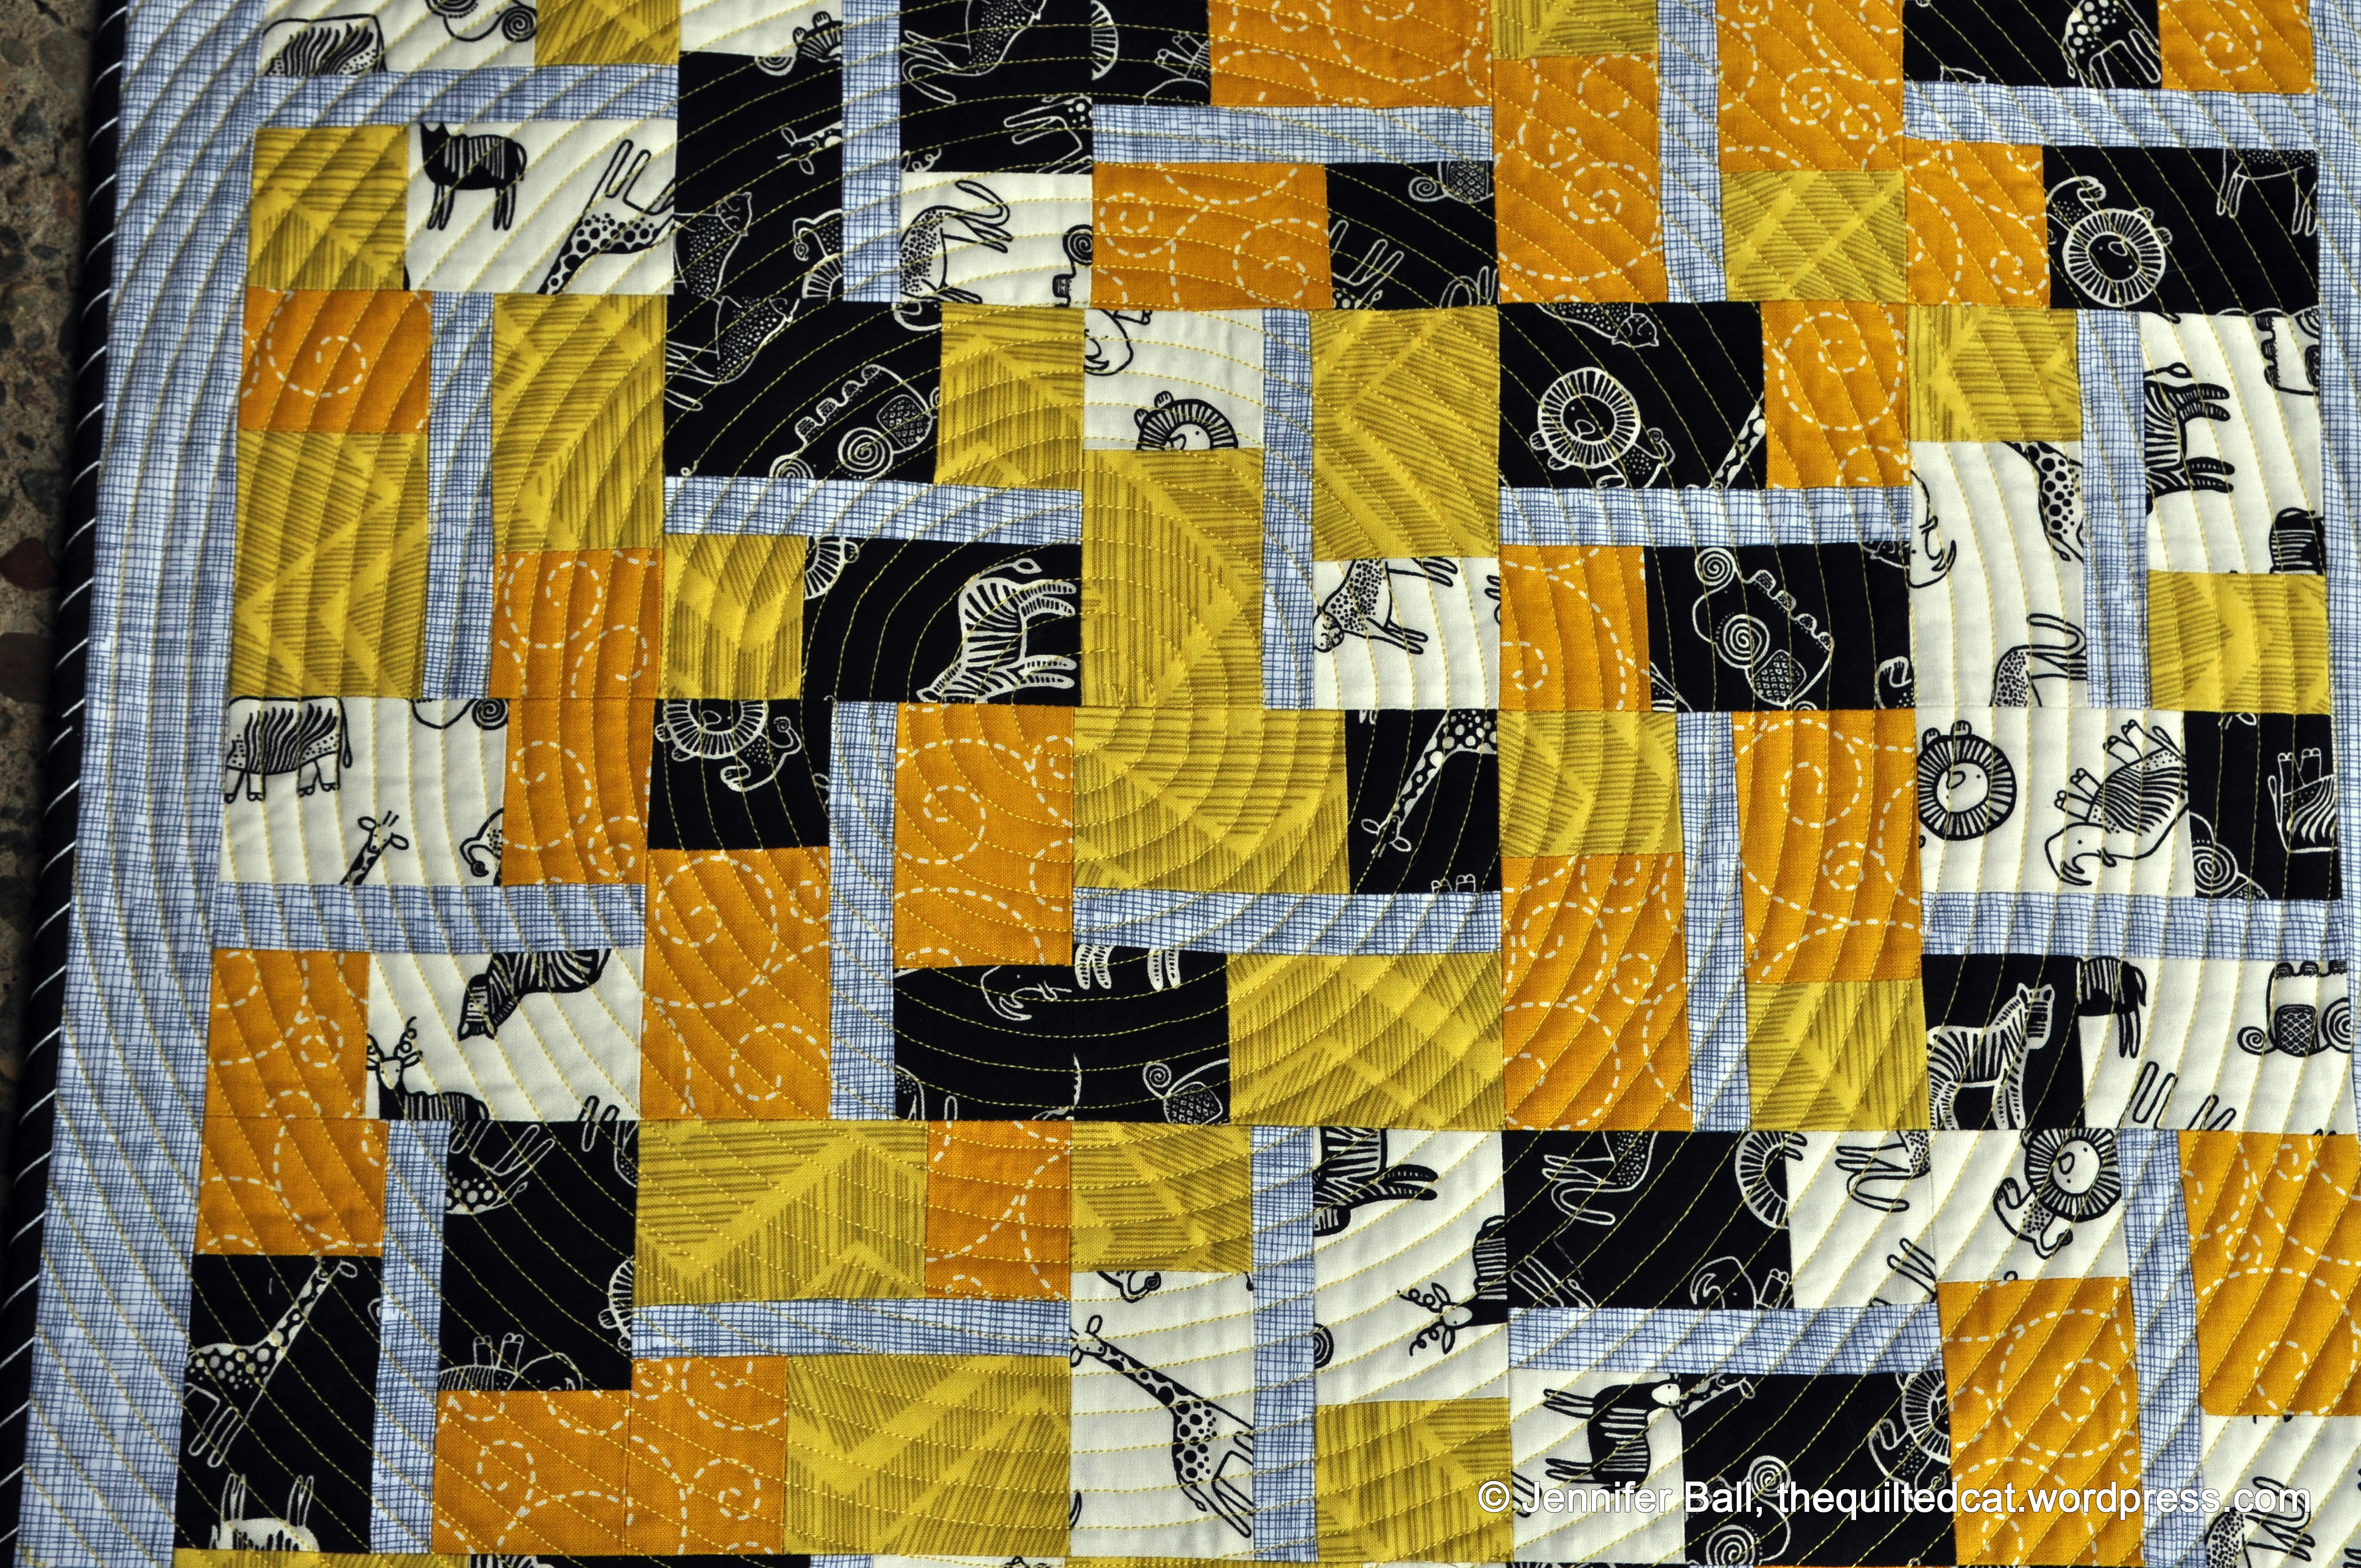
Here’s a closer look at the free-motion quilting:

Tiger, quilting close-up

Tiger, quilting close-up

And a look with Tiger himself!

Tiger inspects his quilt

Tiger inspects his quilt

Close-up view of a paper pieced corner:

Fan block

Fan block

I hope you enjoyed my entry into the art quilt category. I really loved making this unique quilted portrait of my cat buddy!

You can pop on over to the festival here and look at all the wonderful entries in many categories in the festival and vote starting May 24th.

Enjoy!
~Jennifer

Sunny Savannah Mini Quilt

Happy Wednesday everyone!

Dear Stella and Timeless Treasures are hosting a mini quilt challenge called Modern Traditional. The entry quilts must be 20-inches by 20-inches and have to include at least 2 prints from each company and no solids allowed! Entries are due today, April 30th and will be judged by two guest judges, Julie Herman and Katy Jones.

I decided to jump into this challenge with my entry called Sunny Savannah!

The fabrics that I used are:
Wee Gallery, Wild, Safari Animals in White (Dear Stella)
Wee Gallery, Wild, Safari Animals in Black (Dear Stella)
Zig Zag in Black for the binding only (Dear Stella)
Alice Kennedy, Matilda, Chevron in Citron (Timeless Treasures)
Woodstock, Stitched Swirl in Gold (Timeless Treasures)
Crosshatch Sketch in Grey (Timeless Treasures)

Since all the pieces in the quilt are very angular, I wanted the quilting to pop out a bit but still enhance the overall design. I decided to do an off-center swirl pattern in 1/4-inch increments on the entire quilt. I used a yellow Aurifil 40 wt thread for the quilting and Aurifil 50 wt Light Sand for the piecing. The swirl pattern reminds me of the sun shining down on the safari animals and so I decided to call this little quilt, Sunny Savannah. I really love the overall effect!

Here are some photos of the completed mini quilt:

Sunny Savannah, Completed Quilt

Sunny Savannah, Completed Quilt

The back of the quilt is the Chevron in Citron fabric from Dear Stella with a label. I love the spiral quilting!

Sunny Savannah, Quilt Back

Sunny Savannah, Quilt Back

Just for fun, I took some pictures of the quilt flimsy. I thought it might be interesting to show you the backside of the quilt top because of all the neatly pressed rectangle shapes!

Sunny Savannah Quilt Flimsy

Sunny Savannah Quilt Flimsy

Quilt Top Backside

Quilt Top Backside

Some close-ups of the spiral quilting! I spray basted and then went slow and careful on my Bernina.

Spiral quilting in process

Spiral quilting in process

Spiral quilting close-up

Spiral quilting close-up

I want to give a shout out to Charlie and Lindsay at Hawthorne Threads. Since I wasn’t able to pick up the fabrics from my LQS, I ordered my fabrics from Hawthorne Threads on a Tuesday evening after work and had them in my mailbox on that Friday! Thank you so much for the quick shipping!

I hope you enjoyed looking at my mini quilt for the challenge. If you’re on Instagram, search for #DSTTchallenge to view other entries.

Enjoy!
~Jennifer

Test Block Maker for Quiltmaker’s 100 Blocks, Vol 9

Hi everyone,

For the past 6 months or so, I’ve been a test block maker for Quiltmaker’s 100 Blocks magazine, volume 9. This issue will be available at retailers soon and contains some really fun blocks!

I can now show you the blocks that I tested and hope they inspire you to try something new! I had fun making these blocks while improving my piecing skills at the same time.

In total, I made 12 test blocks using traditional piecing, paper piecing, and applique (depending on the block). The blocks are all 12.5 x 12.5 inches unfinished.

Block #807, Spring Tulips by Nancy Mahoney

Spring Tulips designed by Nancy Mahoney

Spring Tulips designed by Nancy Mahoney

Block #808, Greetings Earthling by Sue Marsh

Greetings Earthling designed by Sue Marsh

Greetings Earthling designed by Sue Marsh

Block #810, Felicity by Ellen Murphy

Felicity designed by Ellen Murphy

Felicity designed by Ellen Murphy

Block #827, Flying Dutchman by Doris Rice

Flying Dutchman designed by Doris Rice

Flying Dutchman designed by Doris Rice

Block #844, Plant Perfect by Amanda Murphy

Plant Perfect designed by Amanda Murphy

Plant Perfect designed by Amanda Murphy

Block #845, Tweet-ness by Heidi Pridemore

Tweet-ness designed by Heidi Pridemore

Tweet-ness designed by Heidi Pridemore

Block #849, Tribal Crossing by Anita Grossman Solomon

Tribal Crossing designed by Anita Grossman Solomon

Tribal Crossing designed by Anita Grossman Solomon

Block #865, Spin Cycle by Gudrun Erla

Spin Cycle by Gudrun Erla

Spin Cycle by Gudrun Erla

Block #873, Hovering Stars by Bonnie Hunter

Hovering Stars designed by Bonnie Hunter

Hovering Stars designed by Bonnie Hunter

Block #875, Robo-Bop by Kimberly Jolly

Robo-Bop designed by Kimberly Jolly

Robo-Bop designed by Kimberly Jolly

Block #892, Love Letters by Amy Rullkoetter

Love Letters designed by Amy Rullkoetter

Love Letters designed by Amy Rullkoetter

Block #898, Two Tulips by Margie Ullery

Two Tulips designed by Margie Ullery

Two Tulips designed by Margie Ullery

I’m continuing to be a test block maker for volume 10, which will be published later this year.

Quiltmaker is sponsoring a blog hop to celebrate the publication of volume 9 so check it out!

Enjoy!
~Jennifer

Pin Cushion Exchange

Hi everyone,

I had a terrific time this past week at the April monthly meeting for the Portland Modern Quilt Guild. I met new people and saw some wonderful quilts as well as a preview from Violet Craft’s new fabric line called Brambleberry Ridge.

This month, members were invited to make a pin cushion and bring it in a brown paper bag. At break time, we got to exchange pin cushions by choosing a brown paper bag and finding our surprise inside!

I made a cute little bird pin cushion using red and aqua fabrics. The pattern is by Joel Dewberry. You can find the pattern for free here.

After I finished the bird, I took a wooden spool and wrapped it in red ribbon. I then attached the wooden spool to the bird to give it a cute little base.

Here’s a look at the pin cushion I made:

Bird Pin Cushion

Bird Pin Cushion

Bottom of Wooden Spool on Bird Pin Cushion

Bottom of Wooden Spool on Bird Pin Cushion

I received this great pin cushion in exchange with colors that I really like. My thanks to Ellen Colburn for making this beautiful pin cushion!

Colorful Pin Cushion

Colorful Pin Cushion

Today, I worked on quilting my Triangle QAL. I hope to get the binding stitched on later tonight and will take photos of the finished quilt this week.

Enjoy!
~Jennifer

Wedding Quilt Triangles

Triangles seem are pretty popular among quilters lately so when Julie of Jaybird Quilts posted about creating triangle blocks to send to her for a wedding quilt, I decided to hop aboard!

Having just finished my Triangle QAL flimsy, I kept my triangle theme going and ordered the Kona cotton color bundle from Pink Chalk Fabrics. These are colors that Julie has specifically chosen to keep a uniform look to the wedding quilt.

I started off by piecing together some rows of colors in graduated sizes so I could cut out 1 6.5-inch, 60 degree triangle.

Wedding Triangle with Graduated Color Bands

Wedding Triangle with Graduated Color Bands

I still had a portion of the pieced row left, so I decided to make a second triangle by adding a solid color to one side of the block and flipping the orientation of the banded rows.

Wedding Triangle with Solid on 1 side

Wedding Triangle with Solid on 1 side

Now I had some really strange-shaped pieces of that pieced row left. Hmm, what to do? I decided to sew them together in a rough square shape. Then, I took the triangle ruler and cut out a third triangle block. This is my crazy triangle!

Crazy Triangle!

Crazy Triangle!

Here are all 3 triangles together:

3 Triangles for the Wedding Quilt

3 Triangles for the Wedding Quilt

I have packaged up these colorful little triangles and sent them to Julie. She is still taking blocks until April 30th, if you want to send some. Check out her blog post to view the list of Kona solids.

This is such a fun idea, and I can’t wait to see the finished quilt!

Enjoy!
~Jennifer

Scott Lake Quilted Postcard, Sisters Outdoor Quilt Show

Each year, the Sisters Outdoor Quilt Show has a special fundraiser called Wish Upon a Card. Participants make fabric postcards to be auctioned during the quilt show week.

This year, I decided to make a fabric postcard featuring Scott Lake with the Three Sisters in the background. For inspiration, I used a photograph that I took at Scott Lake last fall during a camping trip.

Here’s my original picture:

Scott Lake at Sunset

Scott Lake at Sunset

It’s such a beautiful place and worth the short drive from Sisters if you are visiting the area.

I printed out my photo and then started to look in my scrap bin for fabrics to use. I’m entering the Michael Miller fabric challenge with this postcard so I needed to incorporate a piece of the Beadwork fabric into my design.

I decided to use the Beadwork fabric to represent the green meadow on the far side of the lake.

I built my postcard by layering the sky and water to form a solid foundation piece. Next, I carefully cut out and appliqued the mountain, lake, and tree shapes to this foundation using various colors of Aurifil thread. I added rocks to the water, a cloud to the sky, and a stick along the grass in the foreground.

Once all the shapes were appliqued, I used embroidery floss to add extra details such as the hint of tree trunks and late summer snow on the mountains. Finally, I layered the completed fabric postcard top with interfacing and cardstock and bound the edges using a black color weave fabric by P&B Textiles.

Here’s a look at the finished fabric postcard side-by-side with my printed photo:

Scott Lake Fabric Postcard and Picture

Scott Lake Fabric Postcard and Picture

Here’s a close-up look of the fabric postcard:

Scott Lake Fabric Postcard for the Sisters Outdoor Quilt Show

Scott Lake Fabric Postcard for the Sisters Outdoor Quilt Show

I really love how this fabric postcard turned out, and I’d be so thrilled to be one of the finalists!

I plan to attend the Sisters Outdoor Quilt Show this year, and I always stop by the wonderful postcard exhibit and auction.

Happy quilting!
~Jennifer

Happy Worldwide Quilting Day!

Did you know that today, March 15th, is Worldwide Quilting Day? Yippee – a special day devoted to our love of all things quilty.

I celebrated the event by purchasing some gorgeous fabric from a local quilt shop having a 20% off sale this week. I was drooling over the new Sunnyside line by Kate Spain for Moda. You can purchase this fabric online from Fat Quarter Shop if your local shop does not have it.

I didn’t have a specific project in mind until I saw the Reach for the Stars quilt on Dawn’s blog, First Light Designs. This quilt pattern features a medallion in the quilt center, something that I haven’t yet tried in a quilt. The design is by Terry Krysan and can be found in the Quilter’s Newsletter magazine as a 7-part series. Look for the October/November 2013 issue for the fabric requirements and the medallion instructions.

For my quilt, I’m using the Sunnyside line plus 2 Bella Solids (Night Sky and Porcelain) and 1 color weave in turquoise. I’m using Aurifil in Light Sand (#2000) for all the piecing. I really need to get an Aurifil thread color chart so I can pick out the best thread color for the quilting.

Here’s a quick iPhone picture of my medallion before I had it sewn together.

Tiger on Medallion

Tiger on Medallion

I finished sewing the borders onto the medallion this evening and tried to catch the last of the light. These pictures are a little grainy due to the low-light conditions, but I hope you see the beautiful Sunnyside fabrics!

Reach for the Stars Medallion

Reach for the Stars Medallion

Some of my points do not quite match up, but I can see definite improvement in my piecing skills over the last year.

Of course, one of my cat inspectors could not resist sitting on the medallion during my photo session. I could hardly keep him off the fabric so I guess he approves!

Cow the Cat on the medallion

Cow the Cat on the medallion

Once I finish piecing the top for my Star Light Star Bright QAL project, then I hope to be able to work on the next blocks on this Reach for the Stars quilt.

I hope you had a little time to do some sewing today!

Enjoy,
~Jennifer

Andover Fabrics Downton Abbey Tea Party + Giveaway!

Good morning, everyone!

I had a little panic moment when my pictures from this event would not download from my camera card to my computer! Fortunately, I found a workaround and I was able to retrieve the pictures – yea!

Last weekend, I was so excited to be able to attend a Downton Abbey themed tea and trunk show by Andover Fabrics and hosted by Fabric Depot. This was a ticketed event that had been scheduled for the weekend before but got postponed due to a snow and ice storm in Portland.

Each place setting was beautifully decorated and we could choose between a Creme de la Earl Grey tea or a Forest Park tea. I went with the Earl Grey and it was delicious! We also enjoyed delicate little bite-sized treats to go with our tea!

During the tea, attendees were invited to show a panel of judges any sewn creations that they had made using the Downton Abbey fabric line by Andover. I saw many beautiful and elegant dresses, hats, and bags that definitely fit the period of the show. Since I don’t really sew garments, I decided to create a little table topper using the Rock Candy pattern by Jaybird Quilts. You can read about it in my earlier post here. I believe that I had the only quilty type project to show the judges.

Towards the end of the tea, the prizes were announced and I won second place (most creative) for my little table topper! The prize was a $50 gift certificate to Fabric Depot that I, of course, spent when the tea concluded.

Here’s a picture of my prize and my entry:

I had so much fun at this event and found myself purchasing more Downton Abbey fabric! I want to make a bag and possibly a small quilt wall-hanging.

The trunk show included some completed quilts and bags using the fabric line. I took a few pictures so you could enjoy all of the wonderful creations.

This slideshow requires JavaScript.

Fabric Depot has posted a summary of this event with more photos on their blog here. There is a picture of my hands and the judges’ hands holding my little table topper about half-way through the blog post.

And now for the giveaway! To enter the giveaway, just leave a comment on this post. Be sure that I can contact you if you win! The giveaway will be open until Monday, February 24th at 8:00 a.m., Pacific Time. I’ll use a random number generator to choose a winner. If you are a follower, you can earn an extra entry by letting me know how you follow my blog. I will mail internationally so everyone can enter.

The prize is a pack of Gutermann thread designed to go with the Dowager Countess fabrics from the Downton Abbey collection. This set includes a plum thread (#942), a light grey thread (#100), and a dark grey thread (#112).

Dowager Countess Thread Pack Giveaway

Dowager Countess Thread Pack Giveaway

Good luck!
-Jennifer

Star Light Star Bright QAL, Half Square Triangles

Happy Monday!

This weekend, I found time to work on my project for the Star Light Star Bright QAL hosted and designed by Melissa. There is still time to join the fun so pop on over to her blog to check out all the details!

Our assignment this week was to create our half square triangles. I’m making the 9-block baby size quilt so I had quite a few HST’s to sew and trim!

The sewing part went pretty fast as I chain-stitched each grouping. The important part of this step was to keep our groupings separate so we don’t confuse the half square triangles between groups. I labeled each group with a sticky note and only sewed one group at a time.

Next, we trimmed our little HST’s! This part makes me happy to sew all those perfectly square little blocks, but I definitely get a sore left forearm. I cut with my right hand, but seem to hold onto my squaring ruler pretty tightly with my left hand so that the fabric doesn’t wiggle. This seems to lead to soreness the next day when I do lots of trimming.

Here’s a look at my little mountain of trimmed edges:

HST Trimmings

HST Trimmings

I’ll use these trimmings to make more cat nip presents for my quilt inspectors.

Here’s a look at all my half square triangles, neatly trimmed. I have group 1 spread out on my cutting table next to groups 2 through 9.

Half Square Triangles for Star Light Star Bright QAL

Half Square Triangles for Star Light Star Bright QAL

And here’s a look at all my HST’s and flying geese bundled up together in a little tray:

Organizing Tray for Star Light Star Bright QAL

Organizing Tray for Star Light Star Bright QAL

Stay tuned for next week’s post where I will show you my block centers for this QAL.

I also had the opportunity to attend a Downton Abbey tea party hosted by Andover Fabrics on Saturday. I even won a prize – eek! I’ll upload my photos from this wonderful event to an upcoming post so stay tuned!

Enjoy!
~Jennifer

Homespun & Holly Holiday Workshop!

This weekend, I was delighted to attend the 5th annual “Homespun & Holly” holiday workshop at one of my all-time favorite quilt shops, Hollyhill Quilt Shoppe!

The event features 4 different holiday themed projects by some very talented designers! The projects are not revealed until the event. Participants rotate between the 4 designers so each attendee gets to make each project.

My first project station was with Karla Eisenbach of Sweetwater. She had such a fun little tree ornament project called “Embellished Trees.” She provided enough materials for each person to make 5 of these little trees, and I was able to complete 2 during class.

Karla also designed one of my favorite fabric lines called “Mama Said Sew.” I brought my completed project from the Star Surround QAL and asked her to sign the label. Here’s a picture of me and Karla with my quilt featuring her fabric line (I’m the one in the solid black shirt):

Jennifer and Karla with quilt featuring Mama Said Sew fabric

Jennifer and Karla with quilt featuring Mama Said Sew fabric

For my second project, I rotated to Debbie Busby of Wooden Spool Designs. Her project was a cute little holiday felt wreath called “Crazy Hex Ornament.” I finished about half of this project in class and finished the rest at home. Debbie had this great little tool called the “Clover Chaco Liner Chalk Wheel” that we used to draw around our hex template onto the black felt. I must get one!!

I arrived at Anne Sutton of Bunny Hill Designs’ station for my third project. I was so excited to meet Anne because I had just finished sewing on the outer border of her Merry Merry Snowman quilt just the night before. I asked her to sign my quilt label. Her project was my favorite because it featured an adorable little snowman popping out of a mitten called “Cozy Christmas!”

For my last station, I went to visit the cheerful sister duo, Barb & Mary of Me & My Sister Designs! They had the cutest little scissor and bead project for us that only took a short time to assemble. As a bonus, they had a short game for everyone at the table and the top 6 finishers won a free pattern! They also took everyone on a “field trip” to Hollyhill’s companion store across the street featuring Christmas fabrics, quilt kits, and decorations. This store is called Boughs of Holly and is a wonderful place to visit!

Lastly, Brian and Jan, the owners of Hollyhill and organizers of this wonderful event, gave each attendee a special gift. Inside the package, I found yummy chocolates, a snowman ornament, a pattern, thread, and 2 Aspen Frost mini charm packs to make the pattern.

Homespun & Holly Gift Bag

Homespun & Holly Gift Bag

I had such a great time and really hope that “Homespun & Holly” will return in the future. I’d like to thank Brian and Jan as well as the wonderful staff of Hollyhill Quilt Shoppe for making this year’s event such a treat! I’d also like to thank all the talented designers who came to visit and share their special projects with everyone!

I’m so inspired to finish up my holiday sewing and crafting projects!

Enjoy!
~Jennifer