A Cute Cat Jack O’ Lantern Block for Halloween

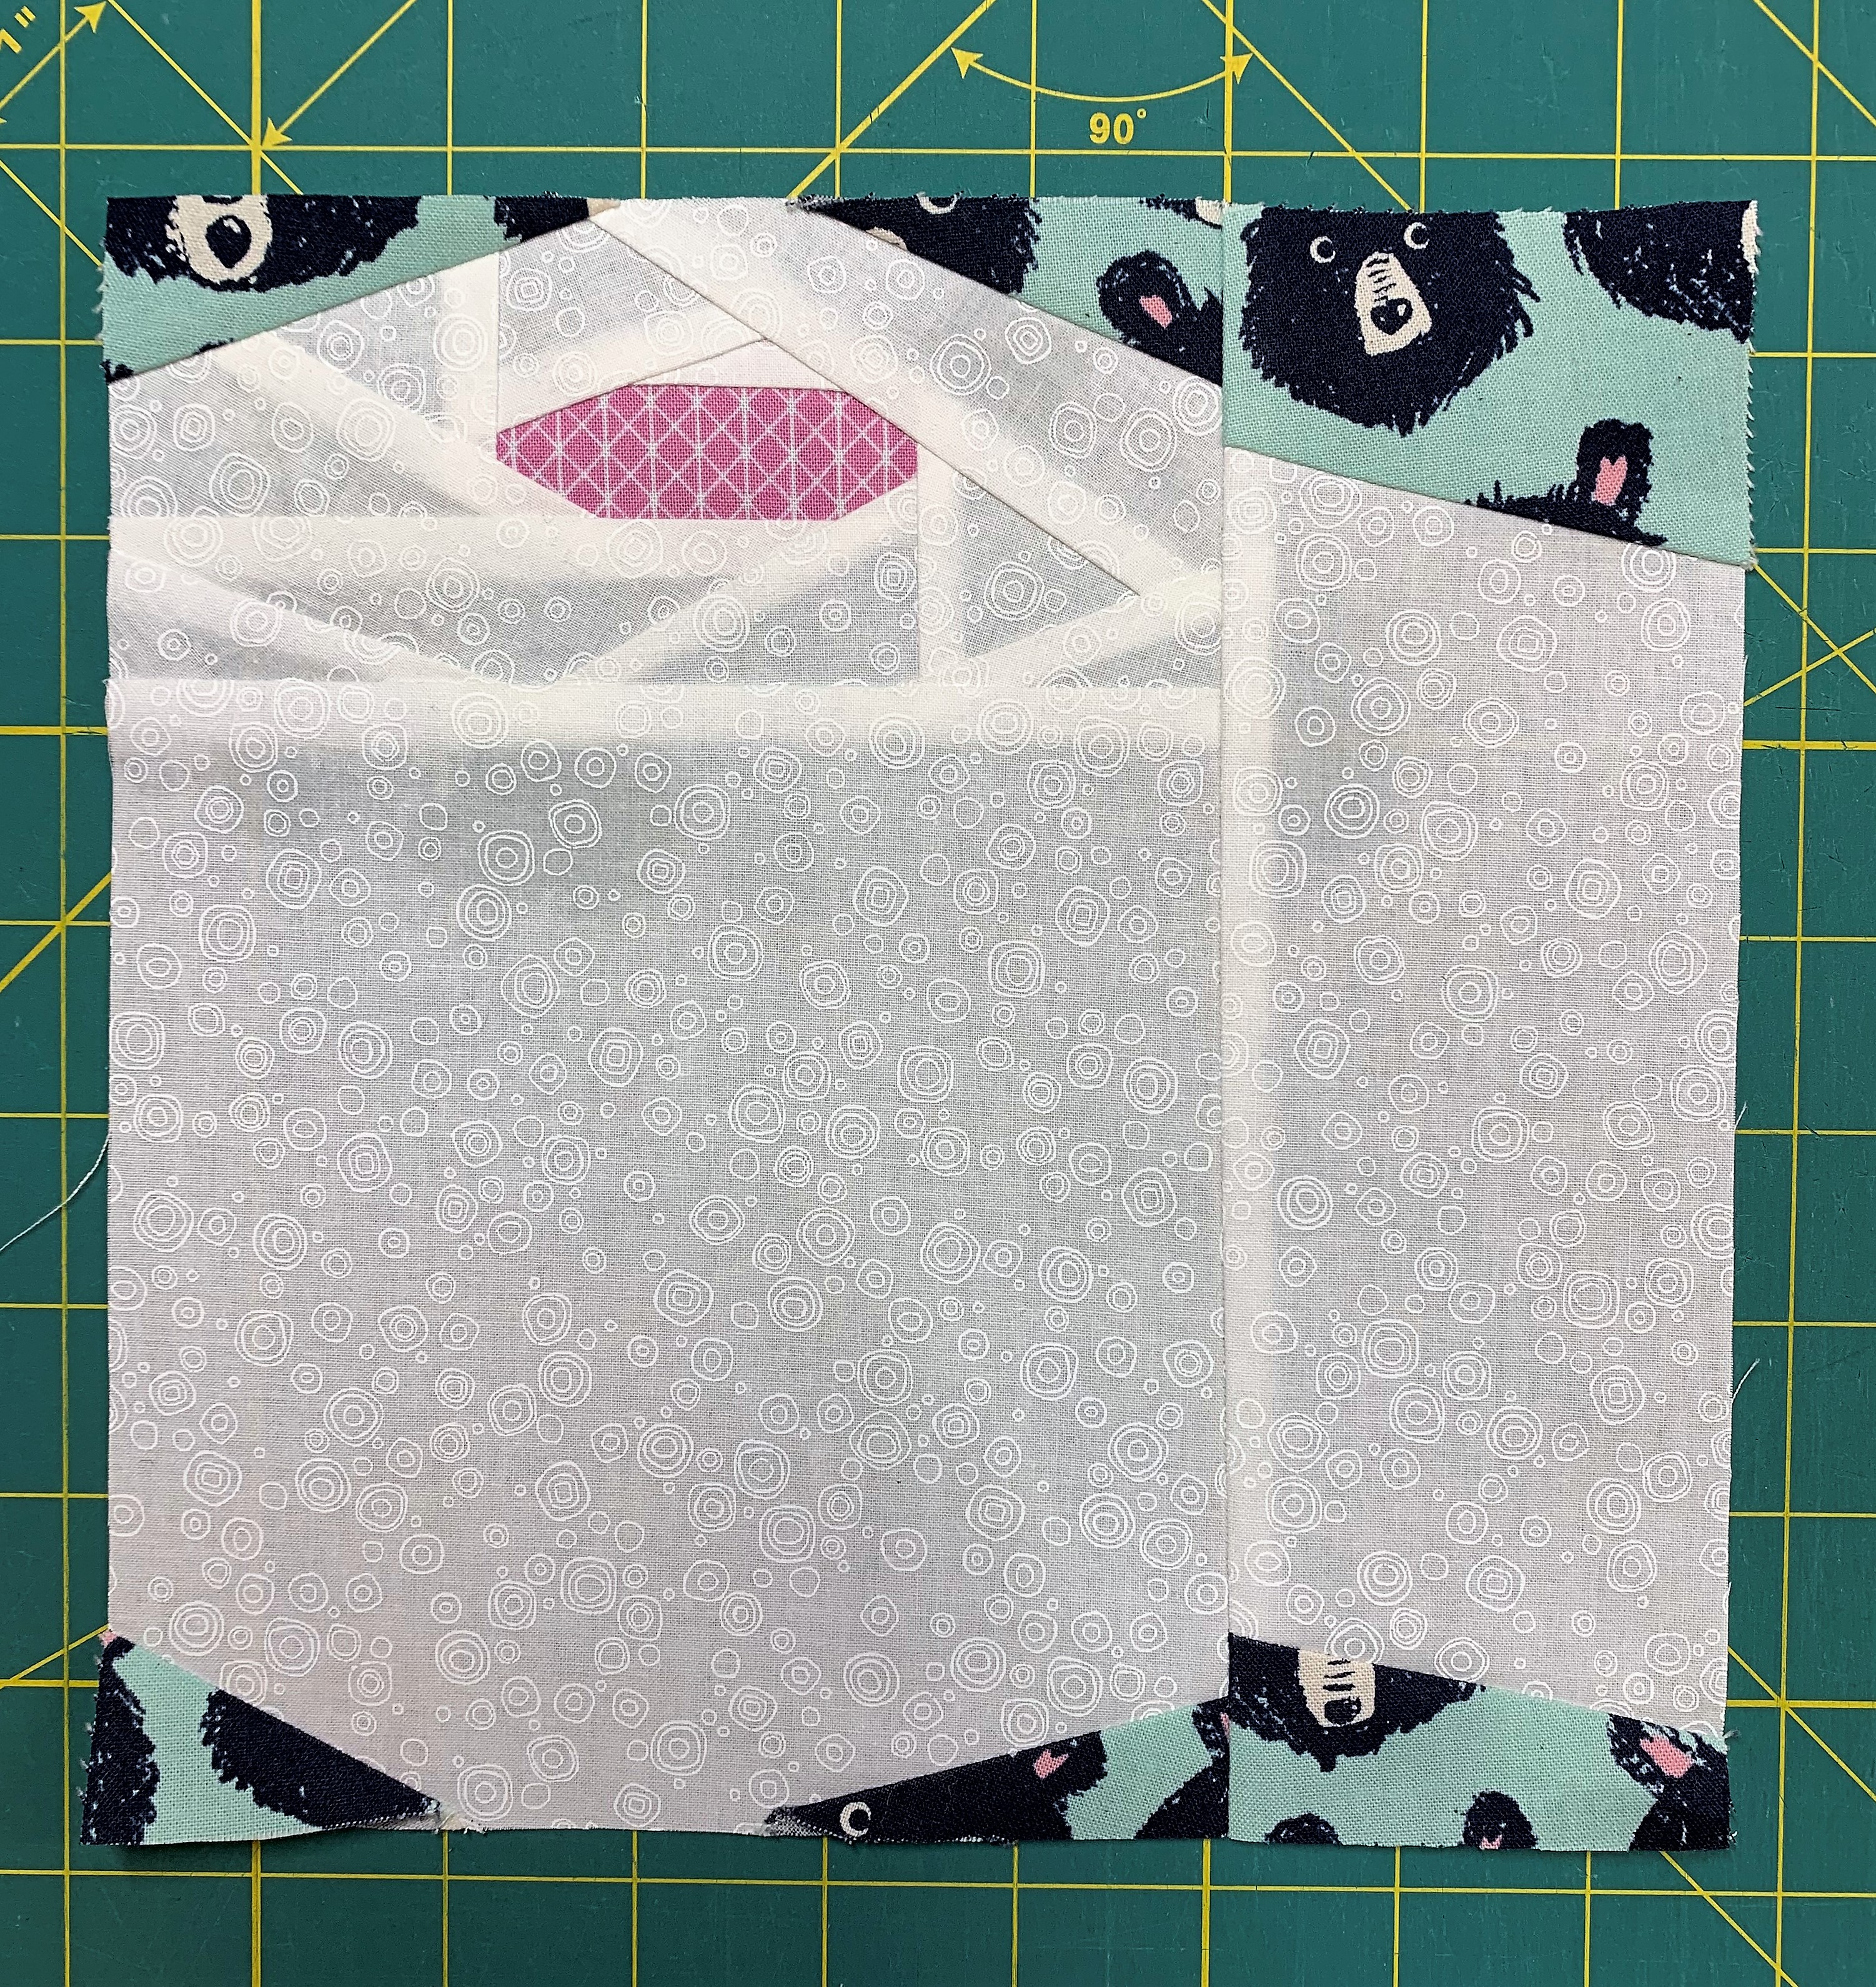
Are you looking for a cute and not scary block for Halloween? How about a cute little cat face on a pumpkin? This adorable block will work on trick-or-treat bags, table runners, mini quilts, and larger quilts.

Pattern

For a limited time, this cute cat jack-o-lantern quilt pattern is on sale in a favorite Halloween craft magazine. You can choose to purchase a hard copy that is mailed to you or a PDF download, which you can download to your computer.

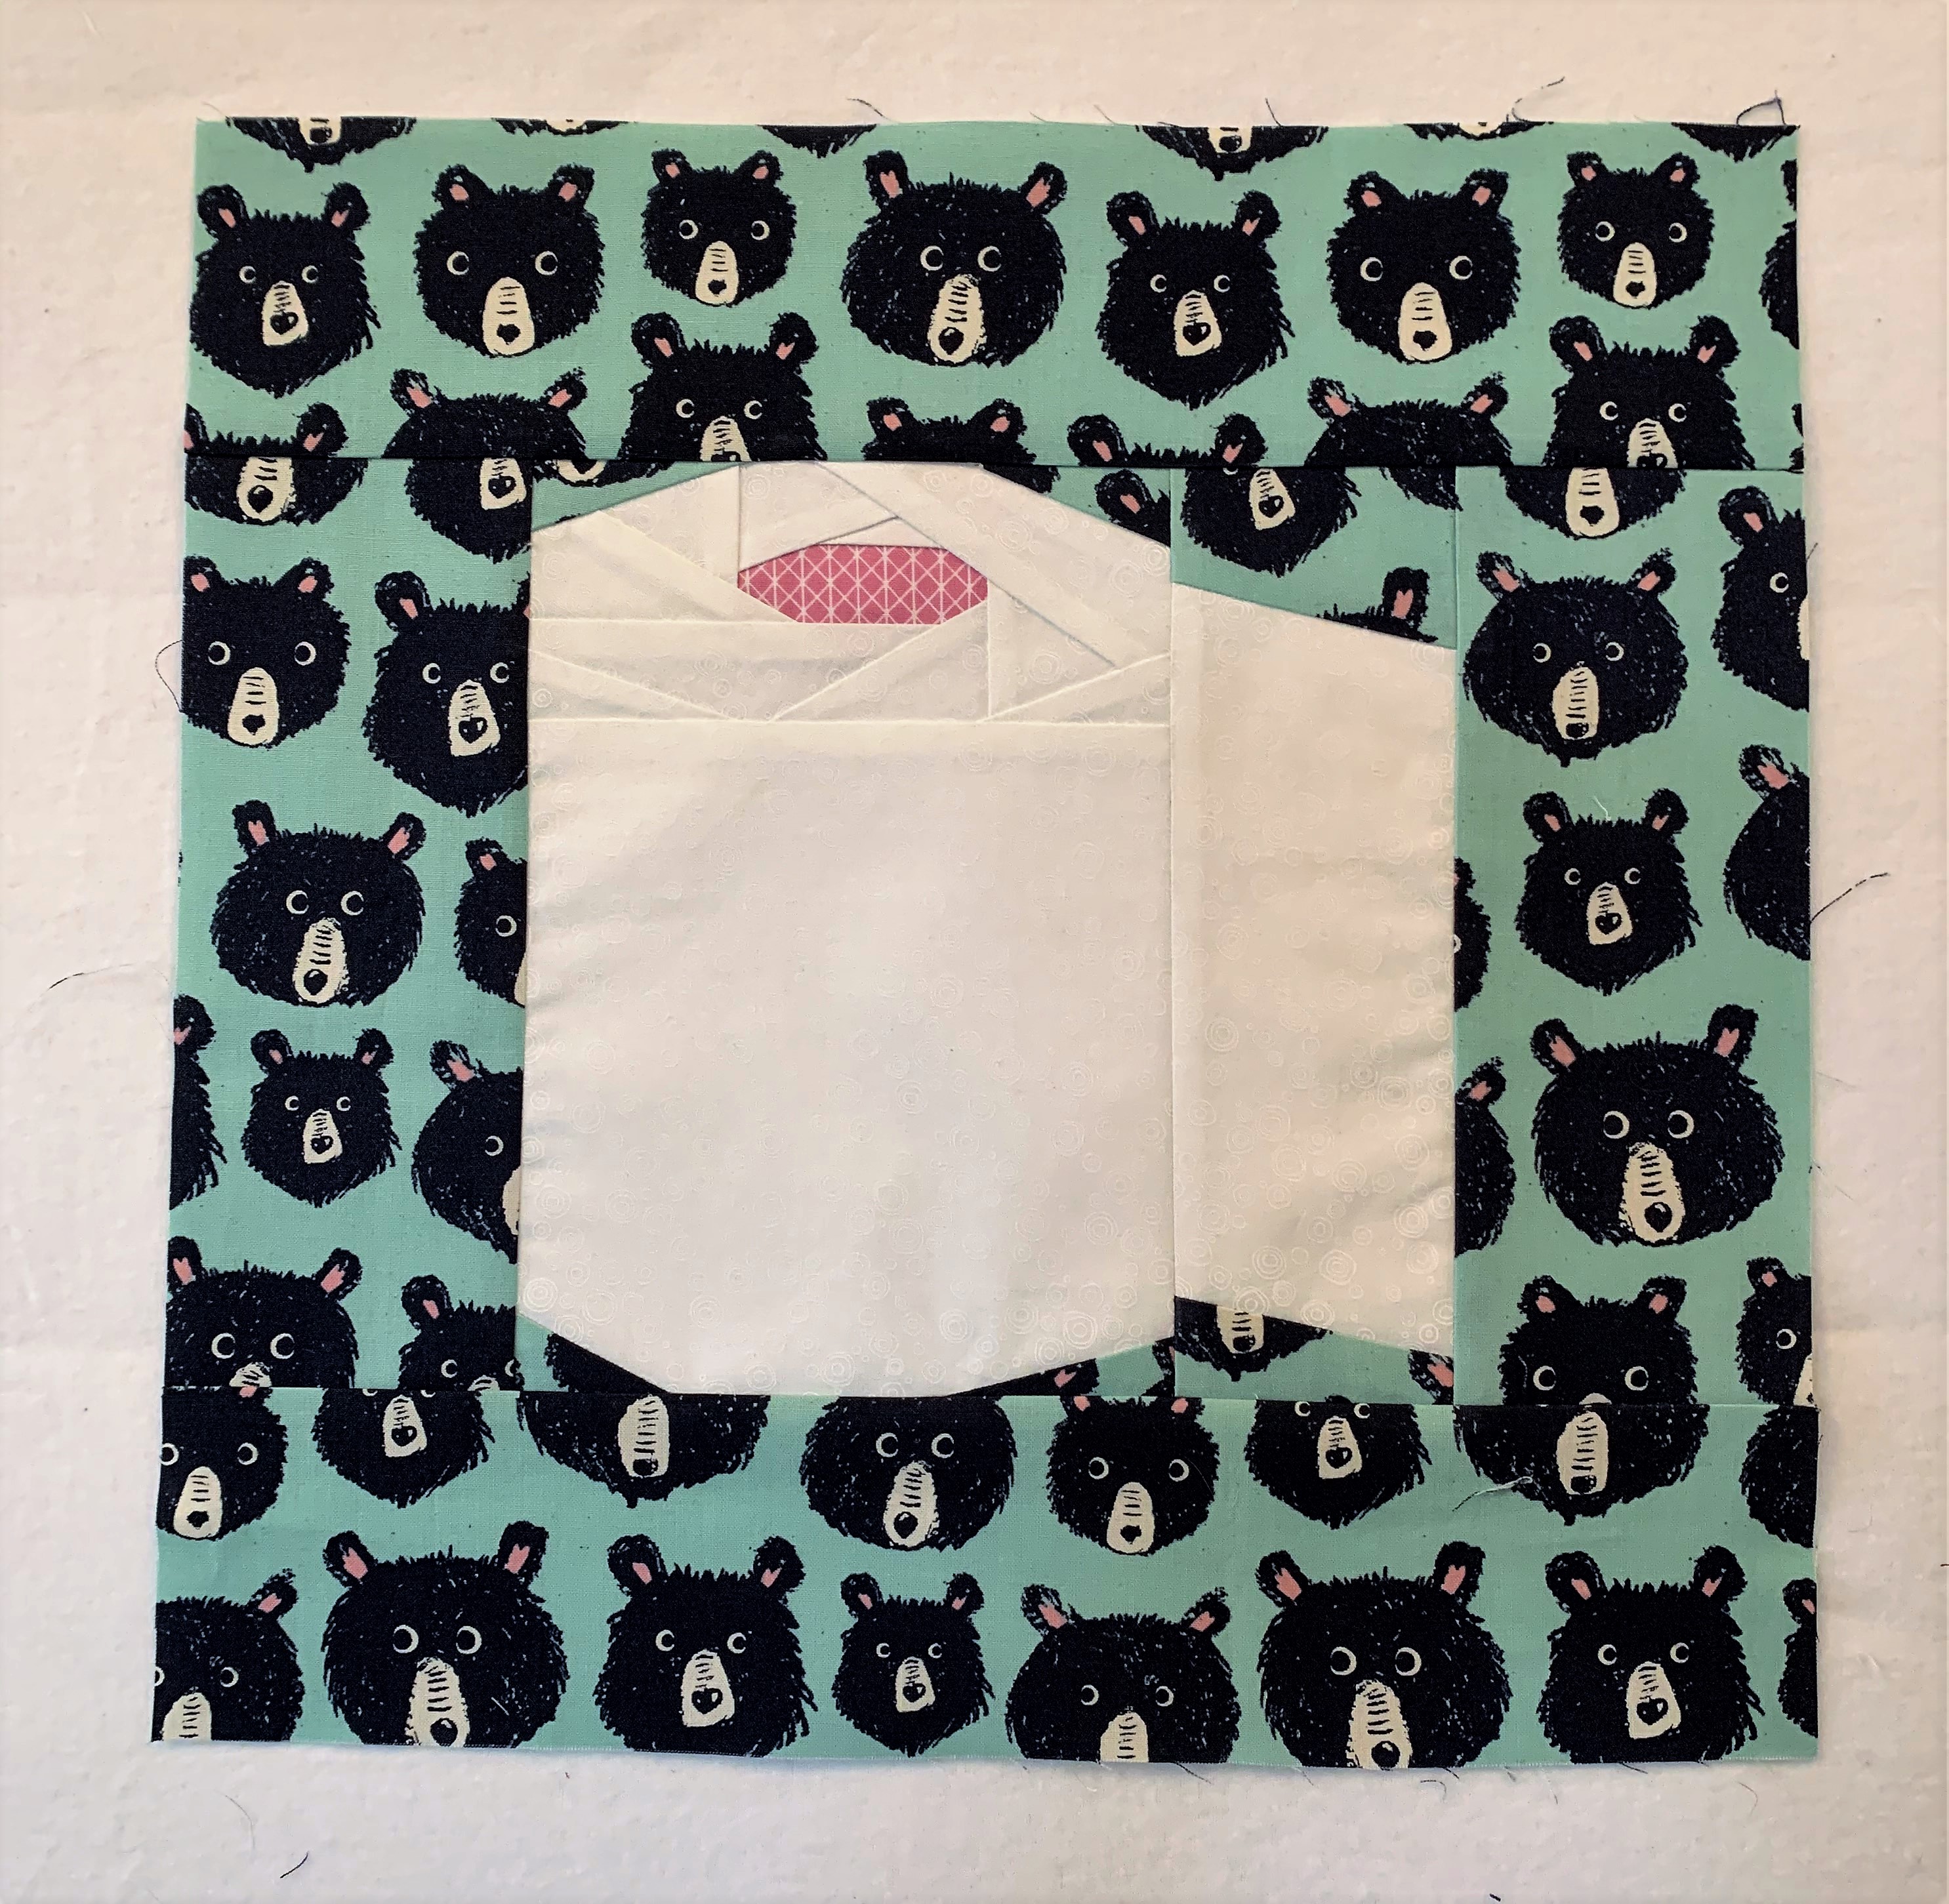
Here’s a look at my block:

I loved using a pumpkin-themed fabric for my cat face! Aren’t those little cat-faced pumpkins with fangs just adorable? I want to make several different fabric combinations using different oranges, blacks, and low-volume backgrounds and create a lap quilt.

For my block, I used the following fabrics:

  • Background fabric: white dotted fabric from “Too Cute to Spook” by Me and My Sisters Designs.
  • Cat and handle fabric: purple/orange pumpkin fabric from “Bring Your Own Boos” by Cotton + Steel
  • Pumpkin fabric: orange fabric from “All Hallow’s Eve” by Fig Tree Quilts

This block is a great stash buster, and you can really have great fun with different fabric combinations. I love seeing a cat face block with the whiskers. It adds a nice element of whimsy to the block.

The quilt pattern in the magazine has a great layout with plus-shaped blocks added between rows of cat jack o’ lanterns and makes a finished quilt at 45″ x 48″.

Time to get started on those Halloween projects!

~Jen

Antique Table Topper or Giant Mug Rug?

My husband and I found a little table a few years ago while antiquing that we use to have our breakfast. The table faces a sliding glass door, looking out on our background. It’s relaxing to watch the birds flitting about while sipping coffee before starting work for the day.

However, we don’t want to scuff up the table’s surface more than it already is so we’ve been using various items like kitchen towels and coffee coasters as protection. Last weekend, I decided to make a table topper for this little table, but it also reminds me of a giant mug rug! When it gets dirty, we can just toss it in the wash.

Here’s what the table looks like without any topper:

Little antique table

I had some fun fabric in my stash with an outdoors theme that I thought would work well. The colors match the kitchen, and we love to be out hiking! I measured the diameter of the table, which is 25 inches. I selected 5 fabric prints, and cut out 5.5 inch squares that finish at 5 inches each. I placed them in a 5×5 grid, stitched them together, and then quilted this base shape.

Starting quilt shape for table topper

The fabrics that I used are:

  • 5130-15 (dark mountain print) from Smoke & Rust by Lella Boutique
  • 5130-14 (gray mountain print) from Smoke & Rust
  • 5135-13 (plus sign print) from Smoke & Rust
  • 5131-16 (orange text print) from Smoke & Rust
  • 55551-21 Timber Campsite Cream from Timber by Sweetwater

I quilted the project using meandering free-motion with Glide thread in Apricot Blush.

Once I had my square-shaped base, I took placed the table upside down on the back of the quilt and traced the circle. I drew a cutting line in about 3/4″ from the original tracing line so that my quilt would not extend to the edges of the table. I wanted a little peek-a-boo border of the table.

Table topper, trimmed to fit

I choose the orange text print for my binding. I needed to use bias binding to get a stretchy binding that I can easily sew to curves. It worked out so nicely!

Circular table topper, bound

Now for the reveal! Did my quick table topper project work? Does the coffee taste better while using it?? Yes, it does, because I don’t have to worry about leaving water marks anymore.

Completed table topper
Completed table topper with chairs that need to be reupholstered

We also have these 2 antique chairs to go along with the little coffee table. However, they are in sore need of reupholstering. I hope to tackle that project this year, and choose a new fabric that will go with the table topper fabrics.

Happy quilting!

~Jen

Painted Quilt Blocks

I usually talk about sewing quilt blocks on my blog, but I recently did a project where I painted quilt blocks. Painted? Yes! Much like painted barn blocks are used to embellish buildings, you can embellish furniture with painted blocks.

In August, I got my son a different computer desk and so his old desk needed a new purpose. It is about 10 years old and was banged up quite a bit from years of kid, and then teenage, use. I cleaned up the desk, tightened up the screws, and repainted it glossy white. Pepper kindly guarded my work area from squirrel invaders!

Desk freshly painted white while Pepper watches in the background

I decided to paint 2 classic quilt block shapes on the left-hand side of the desk top: the churn dash block and the 9-patch block.

I used FrogTape to mask off the far left side of the table and the initial parts of the churn dash blocks. I used regular craft acrylic paints. Here’s what the first part of the churn dash blocks looked like after they were dried and I removed the tape:

The beginning of painted churn dash blocks with Gracie helpfully supervising

For each section of the painted quilt blocks, I carefully used the tape to mask off sections where I didn’t want the back. I completed the churn dash blocks first before working on the 9-patch block. I applied 2-3 coats of each color so this process took about a week with drying time.

FrogTape works really well to keep the painted edges sharp

Once I finished painting my blocks, I let the paint dry overnight. I used a glossy crystal clear spray paint to finish the project and to protect the painted blocks.

Here’s a look at the freshly painted desk:

My newly painted quick blocks with dry September grass, lol

With some help from my teen, we transported this newly painted table into my sewing room. I thought my little Singer Featherweight would look cute on it!

My newly painted quick block desk with a Singer Featherweight

I now have a fun table with brightly painted quilt blocks that I can use for years to come!

Happy quilting!

-Jen

Fall 2021 Swatch Service from the Confident Stitch

Are you ready for fall? After a long, hot summer here in the Pacific Northwest, we are expecting our first soaking rain tomorrow. The leaves are beginning to turn brilliant colors, and the evenings are cooler and comfortable.

I’m starting to sew more now that summer is winding down, and I’m thinking about fall and winter projects. This quarter’s quilting cotton swatch fabrics and patterns from the Confident Stitch are absolutely perfect for the season, featuring the gorgeous fall colors.

In this quarter’s package, you’ll receive the following items:

  • (14) individual 5.5″ swatches of quilting cotton fabrics
  • (1) 5.5″ x 22″ strip of bronze solid fabric
  • (1) 5.5″ x 44″ strip of dragon fruit solid fabric
Fall 2021 Quilting Cotton Swatch Service Bundle

What is the best part? You can use the fabric in this swatch set to make the included pattern, Turkey Time Table Topper, which is perfect for your fall table settings. The table topper finishes at 17.5″ x 25.25″, and the Confident Stitch has an accompanying video for you to watch on how to make this project.

You also get an Information Card listing all the fabrics and prices in this quarter’s swatch service. The large project featured is the Faster Fourteen Quilt by Hunter’s Design Studio, and the Confident Stitch has a kit available to order or you can choose your own individual fabrics.

Fall 2021 Quilting Cotton Swatch Service Contents

I’ve used patterns from Hunter’s Design Studio, and they are great patterns that can you complete pretty quickly. Most recently, I’ve made these quilts to give as charity quilts to organizations such as Project Linus. They also make great baby quilts!

If you want to subscribe to quarterly swatch service, also known as Kate’s Swatch Experience, the cost is $15 every 3 months. The Confident Stitch offers 3 options: quilting cottons, garment fabrics in warm tones, and garment fabrics in cool tones. You can sign up for 1, 2 or all 3 swatch services. As a quilter, I highly recommend the quilting cotton service to get a nice variety of swatches plus a fun project as happy mail every quarter!

Let me know in the comments if you’ve joined! I plan on making a project with my swatches soon, and I’ll blog about it in an upcoming post.

Happy quilting,

Jen

Making a Tula Pink Themed Clock for My Sewing Room

Hi everyone,

Have you seen the HomeMade line of fabric by Tula Pink? I really love it, especially because my main piecing machine is a Bernina. I’m making all kinds of projects for my sewing room from this line of fabric.

I decided to make a clock using the Petal to the Metal print, which features a sewing machine and has 3 different colorways (a purple, a blue, and a mint green). I measured one repeat of the sewing machine print so I could pick out the right size for my clock base at my local craft store.

From the craft store, I purchased a round wooden clock base, clock face numbers, a clock mechanism with hands, and some paint.

On the clock mechanism, be sure to purchase one with a long enough shaft to fit your clock base. I initially purchased a mechanism that had a 3/8″ shaft, but I really needed a 3/4″ shaft to fit my base.

I spray painted my wooden base with 2 coats of a pretty teal paint, waiting for each coat to dry. I made a circular template from cardboard, and then used it to cut out my fabric. I adhered the fabric to the clock base using Mod Podge. Once it was completely dried, I used a clear coat spray to seal it.

Once the wooden base dried, I drilled a hole for the mechanism shaft and applied the clock numbers. The numbers have an adhesive back so you just press them onto the clock. I eyeballed the approximate location of each number.

Next, I inserted the clock shaft through the base and attached the hands. The clock mechanism runs on AA batteries, which you insert into the back of the mechanism. There is also a little hanger on the back of the mechanism so you can easily hang it on a wall.

I made 2 of these clocks so that I could give one to my sister. The top clock, in the picture below, is completely finished, and the bottom clock needs the numbers and mechanism.

Tula Pink themed clocks – one finished and one in progress

I really love how cute these little sewing machine clocks are when finished. They are a fun addition to add to any room, particularly your own sewing room!

Finished Tula Pink HomeMade “Sewing Machine” Clock

Enjoy!

~Jen

Making a Ski Patrol Themed Pillow, Part 2, the Reveal!

Hi everyone,

In my last post, I talked about making a pillow front as part of a special graduation gift for my nephew. Although we are not able to travel to his modified graduation ceremony, I still wanted to make him a gift that he could take with him to college in the fall.

For the pillow back, I designed a foundation paper pieced block based on the logo of the ski resort where he worked as a ski patrol member. I thought it would a fun personal touch!

I used solid Kona cottons in red, blue, and white for the ski resort logo. The background is the same ski lift print from Dear Stella that I used on the pillow front.

For quilting, I used the channel locks on my HQ Avante for hand-guided straight lines. I wanted to keep the quilting very simple. I used Glide thread in white. I did quilt all three of the pillow panels at the same time using solid pieces of backing and batting.

Quilting the ski patrol pillow panels

Once I finished quilting the panels, I cut each panel down to the appropriate size, using the dimensions in the free “Simple Quilted Pillows” pattern by Elizabeth Hartman.

Ski patrol pillow panels after quilting and trimming

I did bind the two back panel pieces using the same red Kona cotton for a nice pop of color on the pillow back. I pre-washed all the fabrics, and washed the red Kona two times with color catchers. I wanted to be sure that my nephew could remove the pillow cover and wash it without worrying about the red fabric bleeding into the other fabrics.

Ski Patrol pillow front, close-up

I really love how this pillow turned out, and I hope that my nephew enjoys it as he starts his college life!

Happy quilting,

~Jen

Homemade Flower Boxes for Mother’s Day

Hi everyone,

If you celebrate Mother’s Day, I hope you had a good one over the weekend! We enjoyed the day at home with very warm temperatures, near 90 degrees.

My husband helped our 14-year-old design and build some little flower boxes that I could hang along the fence for my mother’s day gift. They created a plan to use some old fencing material that we had leftover after replacing our fence several summers ago.

Flower box plan

Next up, learning safety! Our son is getting some learning opportunities at home due to COVID-19 closing down the schools. He learned how to use the saw and some basic construction techniques.

Learning how to use the saw safely

He worked hard on this project all afternoon. Once he had cut all of the flower box shapes, he assembled the flower boxes with glues and nails. We let the wood glue dry, and then he treated the boxes with a sealant.

In total, he made me 4 little flower boxes! I planted different colored petunias in each one, and I know that they will bloom all summer, providing beautiful cascading color spots along my fence.

I’m so happy and fortunate that my two guys worked on this project for me. I will treasure these little flower boxes for years to come!

Enjoy!

~Jennifer

A Finished Tula Pink Jelly Roll Rug!

Hi everyone,

In my post yesterday, I talked about making my first jelly roll rug using the HomeMade fabric line by Tula Pink.

I finished the rug over the weekend, and we had a little bit of sunshine yesterday so I could get some outdoor pictures at lunch.

I absolutely love how this rug turned out! I didn’t experience any waviness or warping that can happen with this rug. I think it may be because my Bernina sits in a cabinet so I have a large, flat surface to support the weight of the rug as I stitch the rope coil rows together. I stitched slowly and carefully, using my widest zigzag stitch with Aurifil 50 weight thread.

I didn’t do any regular pressing, except for pressing each of the beginning tight corners. Those early tight corners were the hardest part for me! I did get a slight bit of puckering, but the pattern did indicate to expect that to happen.

Here’s a look at the finished rug!


My completed Tula Pink jelly roll rug!

Of course, as I was taking this picture, my quilt inspector, Cow, came sauntering out from under a bush where he had been napping. He gave the rug a thorough cat scan!

Cow gives the jelly roll rug a cat scan!

I brought the rug back inside where my best girl, Pepper, sat on it. She is a 65-pound mixed shepherd breed dog for scale.

Pepper likes the rug!

I now have the rug in my quilting room. I need to clean up some of my sewing chaos before taking a picture!

I hope that you all have a great day!

Happy quilting,

Jen

Making a Jelly Roll Rug for my Quilt Room

Hi everyone,

This weekend, I made my first ever Jelly Roll Rug using the pattern by RJ Designs. What is a jelly roll rug? It’s a rug that you make using 2.5-inch strips of fabric and batting. This rug is similar to the braided or crocheted types of rugs that quilters and sewists have made for a long time, but updated to use modern materials.

You might notice that not all fabric manufacturers label their 2.5-inch pre-cut fabric strips as jelly rolls. Moda Fabrics uses the term “jelly rolls,” but other manufacturers might call a similar product design rolls, strip sets, or other names.

If you don’t want to purchase 2.5-inch pre-cut rolls, you can always make your own strip sets from yardage.

The batting strips are similar. You can buy pre-cut 2.5″ batting strips by Bosal called Katahdin On-A-Roll in either 25 yard or 50 yard rolls or you can cut your own from batting leftovers.

I used HomeMade Design Roll for my rug. This is an adorable new line of fabric using bright colors and features items that quilters use every day. I thought it would be the perfect collection to use to make a rug for my quilting room. I had purchased 2 rolls of Katahdin back in 2018, but I was waiting for the just the right fabric collection to come along and Tula really delivered!

This pattern takes a ton of bobbin thread! I pre-wound 5 bobbins, but I needed about 7 total. For me, it took the longest to create the fabric “rope,” which is the 2.5-inch fabric and batting strips folded and stitched together. I’d guess that this step took almost 4 hours.

Here’s a look at my jelly roll rug coil. Doesn’t it look fun?

Once I had my jelly roll rug coil finished, I started sewing it to form the rug on my Bernina. I used my widest zigzag stitch, and started going round-and-round.

Look at my rug growing under my needle!

My jelly roll rug is growing!

It took another 2 hours or so to stitch my rug together. I’m planning on taking some pictures of it today in the afternoon sunshine. Come back tomorrow where I will reveal my completed jelly roll rug!

You can purchase all the supplies to make a rug from your local quilt shop or from the Fat Quarter Shop. I get a small percentage of sales from this link to help me with the costs of this blog.

Happy sewing!

~Jen

Using the Oliso Mini Project Iron with Foundation Paper Piecing Projects

Hi everyone,

I started a new mini quilt project yesterday to acknowledge the current pandemic situation. I wanted to make something small and quick, but something a little cheeky to hang in my guest bathroom. Can you guess what it is? Keep reading!

This little mini quilt uses foundation paper piecing, but it is a good pattern for beginners because there are no tiny pieces and only two sections to join together. You can use regular copy paper to print your foundations if you don’t have any “fancy” foundation paper.

I also want to recommend using the new Olison mini project iron for your foundation paper piecing projects. It is small, lightweight, and works great for small projects. I keep my mini project iron next to the left of my sewing machine on a small ironing table. I can flip, press, and trim my foundations without needing to move over to my big ironing station.

These mini irons come in pink or yellow, and Oliso is currently having a sale on them so they are a great deal! You also get a silicone solemate so that you can leave your iron on in the down position. I do get a small percentage of the sale if you purchase through my link, which helps fund the costs of this blog.

Here’s a look at my pink mini iron in action. I do like to use a small wool pressing mat under my irons for crisper seams. Remember, do not use steam when foundation paper piecing because it will shrink your paper!

Oliso mini project iron in pink

This mini quilt is a free pattern available from Mitchie at Miso Quilty called “Keep Calm and Roll On.” She has the block available in 3 sizes, but I selected to make the smallest size at 8-inches by 8-inches before adding borders.

I used fabrics from my stash, digging deep to find just the right background print for maximum cuteness!

  • Ramblings from P&B Textiles for the toilet paper
  • Netorious in Pink from Cotton + Steel for the toilet paper roll hole on the top
  • The Warm Fuzzies by Sarah Watts for Cotton + Steel (2017) for the background/borders
  • Aurifil silver white #2309 for all the piecing

Keep Calm and Roll On block at 8×8 inch size

I cut my bear borders slightly larger at 3-1/4″ so that I could see more of the bears.

Keep Calm and Roll On, toilet paper roll block with borders

Don’t you just love those bear faces? To me, they are saying, “hey, humans, what’s going on with your toilet paper shortage?”

In my next post, I’ll show you how I quilted this fun little mini quilt.

Until then, I hope you have enough toilet paper rolls! 🙂

Happy quilting,

Jen