Sew Mama Sew Giveaway Week!

Hi everyone!

It’s that fabulous time of year again – Giveaway Week at Sew Mama Sew.

For the giveaway, I’m offering 2 Moda mini charm packs of “Holiday In the Pines” plus a spool of 50 weight Essential cotton thread by Connecting Threads in Caramel.

Sew Mama Sew Giveaway

Sew Mama Sew Giveaway

I will ship internationally!

You can enter twice by:
1. Leave a comment on this post telling me how you would use the mini charm packs. I love hearing about your projects!

2. Follow me either here on my blog or on Instagram (nwquiltedcat) and then leave a second comment on this blog post letting me know that you follow me.

The contest ends this Friday, December 12th at midnight Pacific Standard Time. I’ll draw a name over the weekend and contact the winner and post here on my blog.

That’s it! Hop on over to Sew Mama Sew to view all the other fabulous entries!

Good luck!

~Jennifer

Broken Dishes for the Grand Illusion Mystery Quilt!

Greeting quilty friends!

For those of you who follow Bonnie Hunter, you may know that she released the first clue in her latest mystery quilt, Grand Illusion. These clues will only be available for a short while, and Bonnie will retire them from her blog next spring for inclusion in a future book.

This quilt is named for the Grand Hotel on Mackinac Island in Michigan and draws its color inspiration from the hotel’s interior and grounds. I hope to visit it one day!

In October, Bonnie posted color recommendations in the form of paint chips. Although you can choose your own color scheme, I decided to stick with Bonnie’s choices as she has fabulous color sense, and I really wanted to see how these rich hues will play together in the quilt.

Here are my paint chips and fabric pulls. I’m using mostly Moda Grunge fabrics for the neutrals, black, turquoise, and pink. The yellow is Moda Marble Dot. I couldn’t find one grassy green that I really liked in a single fabric so I pulled a few fat quarter pieces into my pile.

Grand Illusion Mystery fabrics

Grand Illusion Mystery fabrics

We sewed broken dishes for part 1 this week. I’m making one-half of the normal amount of blocks so I can make a smaller sized quilt. I did buy enough fabric to make the full quantity of blocks so if I later decide to expand the quilt once the mystery is revealed, I can do so.

Here are my broken dishes units:

Grand Illusion Mystery, part 1

Grand Illusion Mystery, part 1

The colors really do pop, although my camera faded the intensity of the fabrics, particularly the turquoise. I really like how the turquoise Grunge fabric has yellow accents in it to play well with the Marble Dots.

The next clue will be released this Friday, December 5th on Bonnie’s blog so go check it out!

Happy stitching!
~Jennifer

Toes in the Sand Completed + Giveaway Winners

Happy Monday, quilting friends!

I’m so happy that it is a short work week due to the Thanksgiving holiday! I hope to get some extra sewing time in over the long holiday weekend.

Recently, I finished a long BOM project called Toes in the Sand by Jaybird Quilts. I started this project back in April 2013! I’ve had the individual blocks assembled for a while, but finally finished the top and quilting recently.

My hubby and I decided to celebrate our 14th anniversary by going to the Oregon coast for a weekend. We stayed in Seaside and really lucked out with the weather. It was clear, sunny, and not too breezy with a high of about 48 degrees. I knew that my Toes in the Sand quilt had to come along for some beach photography!

Here’s a look at the finished project, front and back sides:

Toes in the Sand - Found some more triangle shapes in the swing set

Toes in the Sand – Found some more triangle shapes in the swing set

Toes in the Sand Completed Quilt, Seaside, Oregon

Toes in the Sand Completed Quilt, Seaside, Oregon

Backing with My "sidekick" Brutus

Backing with My “sidekick” Brutus

I free-motion quilted Toes in the Sand using an Aurifil cream thread in 50 wt and an all-over “wonky triangles” pattern that I made up as I went along. I think it accents the blocks perfectly without overwhelming them. My backing is made from a few left-over scraps of PB&J fabric by Moda along with larger pieces of Kona cotton in Aqua.

After the photo shoot, my “sidekick” Brutus showed his love of the beach!

Brutus at Seaside, Oregon

Brutus at Seaside, Oregon

What could be more fun than seeing a picture of a happy dog? Winning an issue of Quiltmaker’s 100 blocks magazine, volume 10!

In this post, I announced a giveaway for 2 copies of the magazine. I randomly selected winners and have emailed them.

Congratulations to the winners:
dezertsuz and Cathy Melancon

Happy quilting!
~Jennifer

Forest Abstractions Bunny + Giveaway Winner

Happy Halloween, everyone!

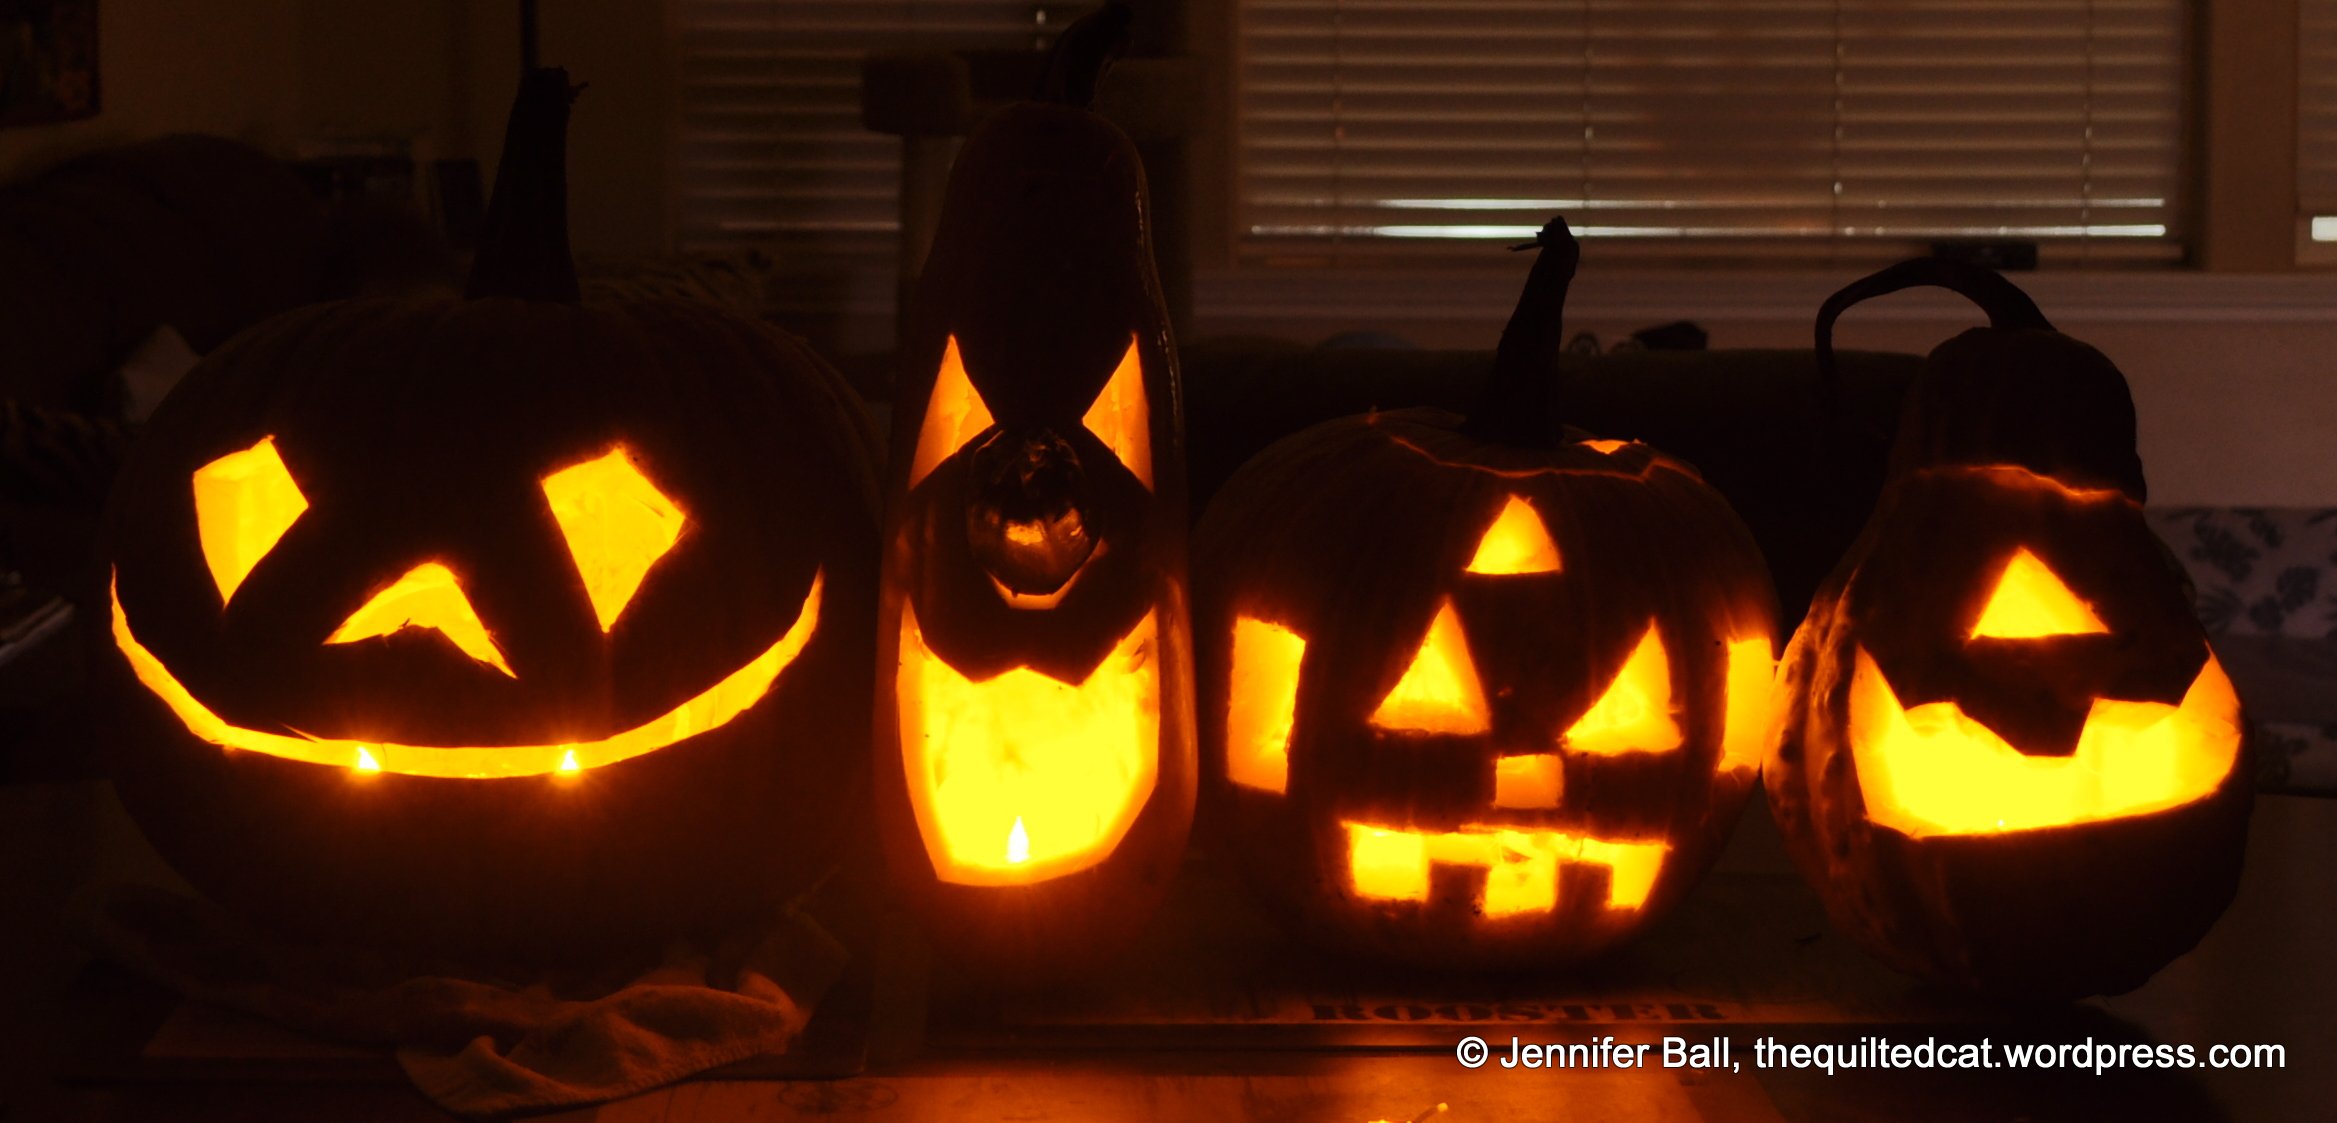
My little guy is getting excited for trick-or-treating tonight, and I’m excited to get some more sewing time in this weekend. We carved some jack-o-lanterns last night:

Jack-o-Lanterns!

Jack-o-Lanterns!

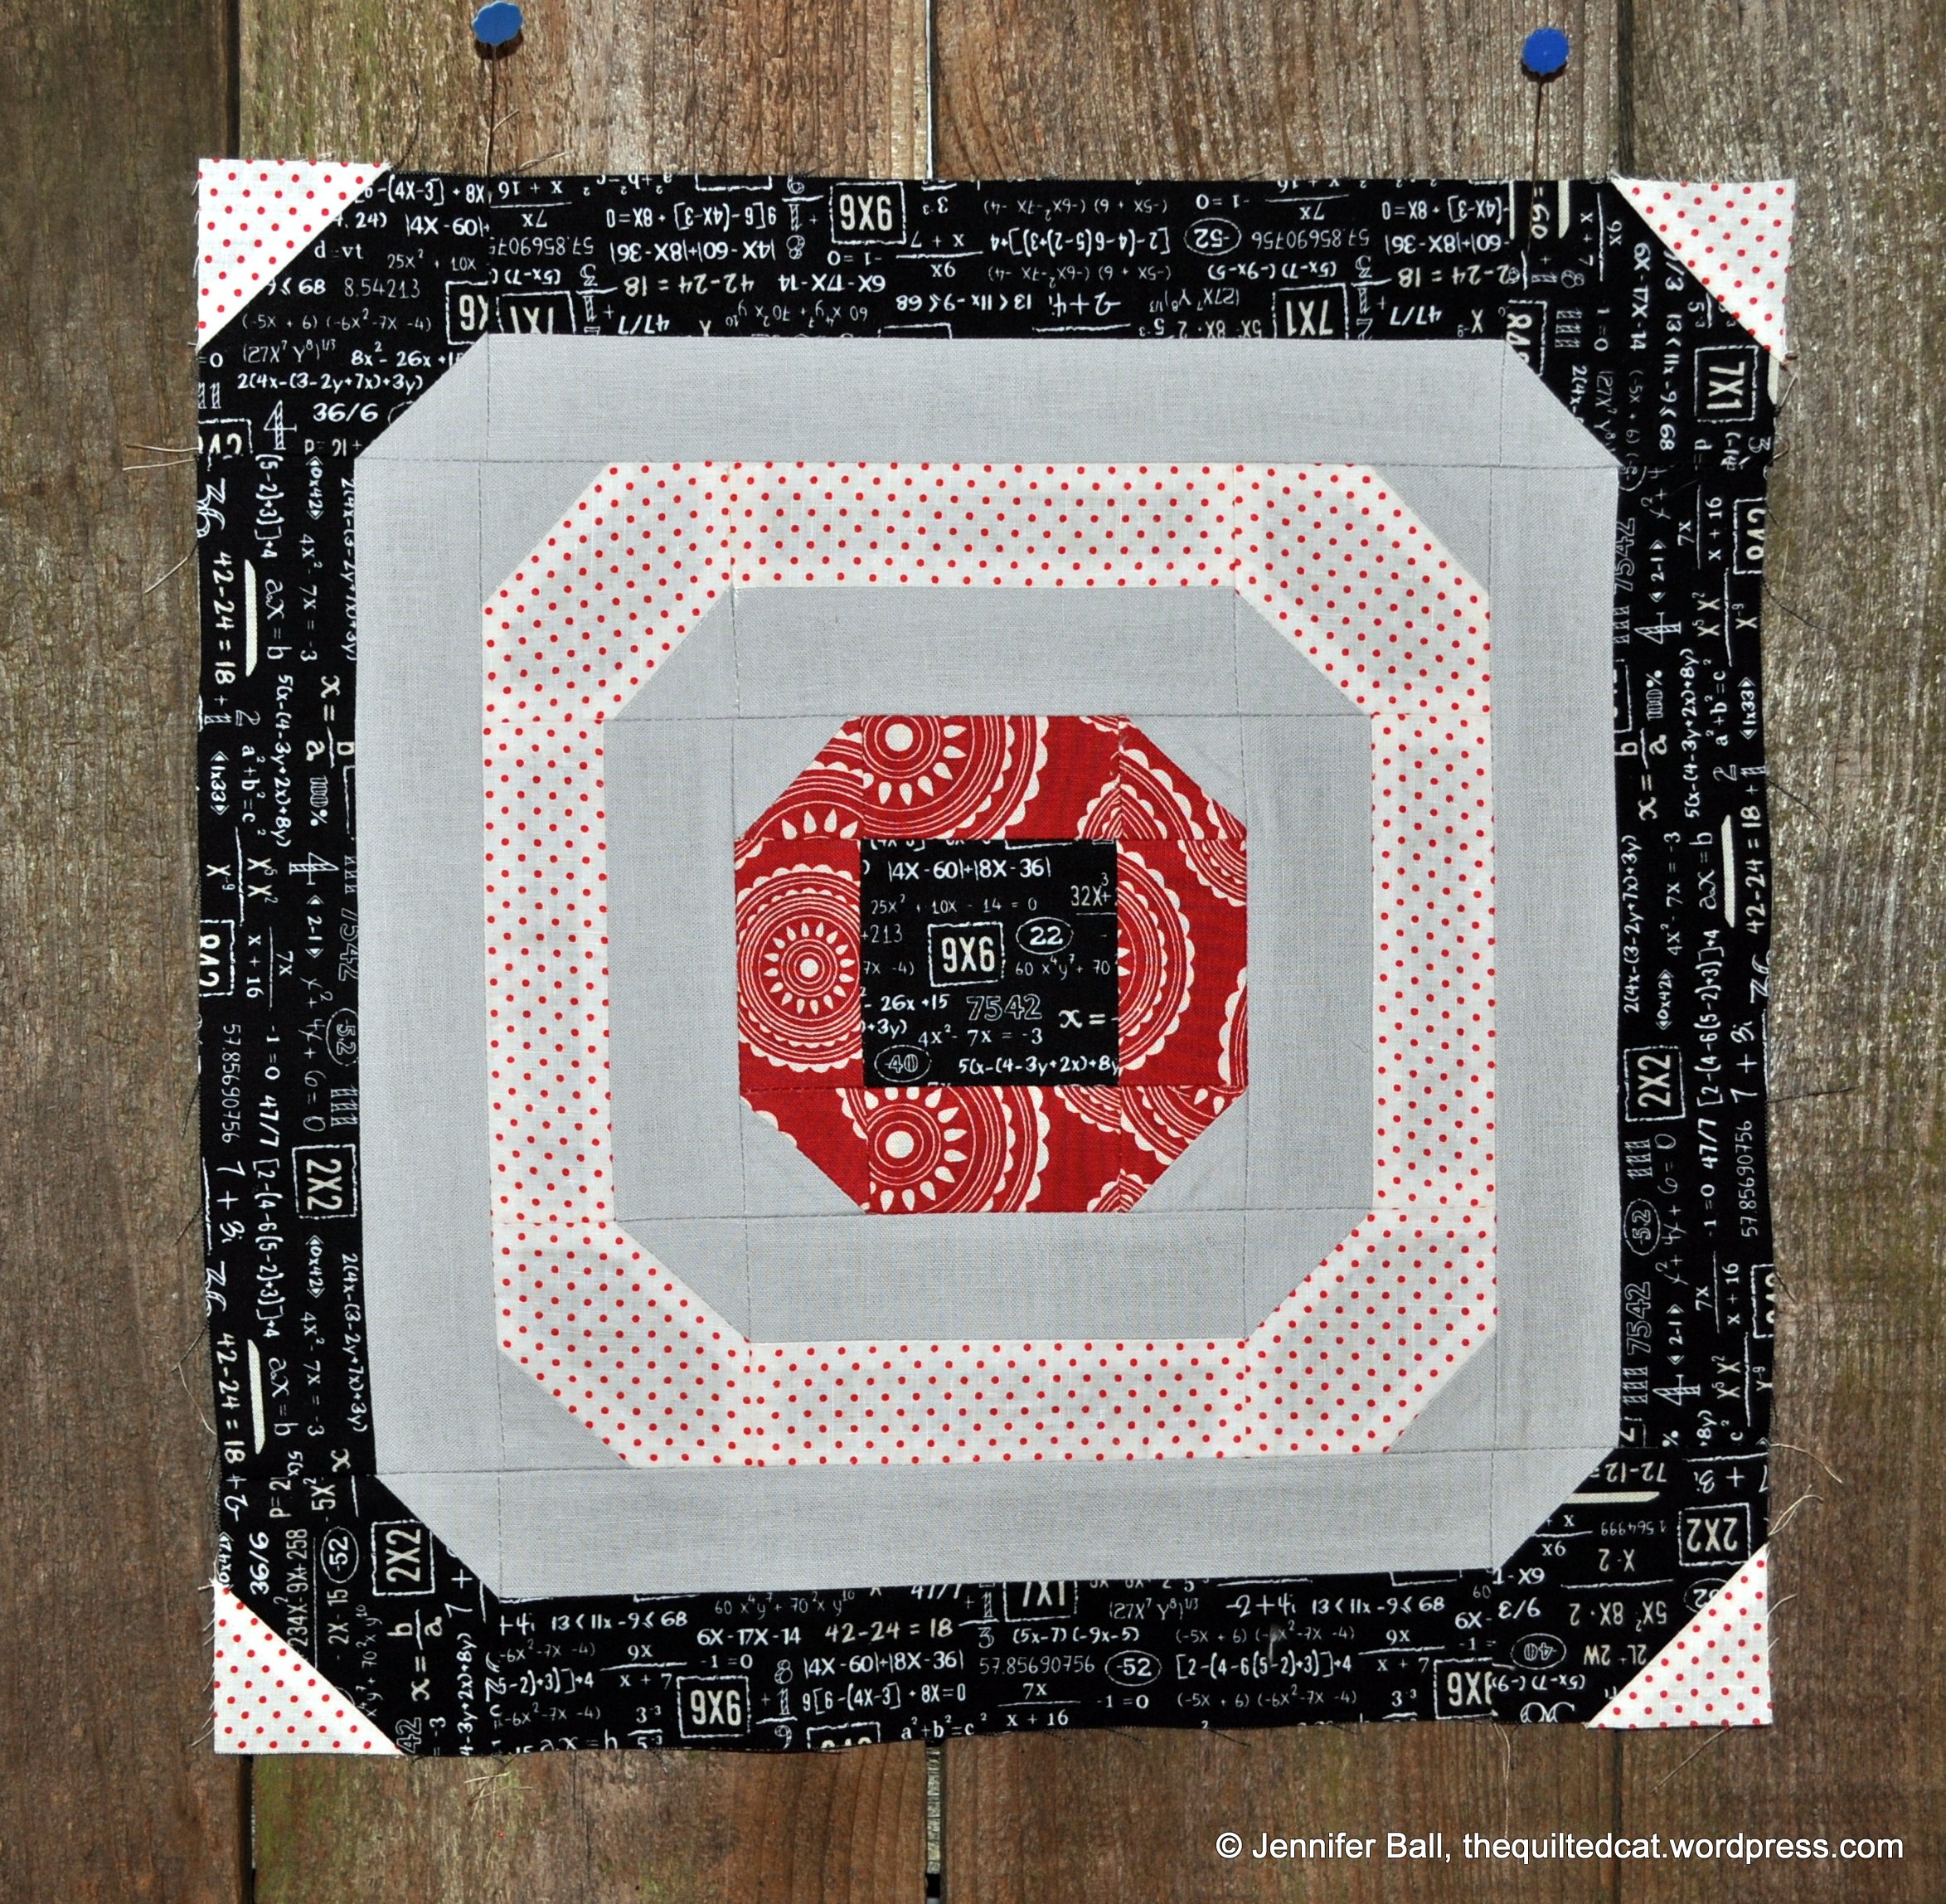
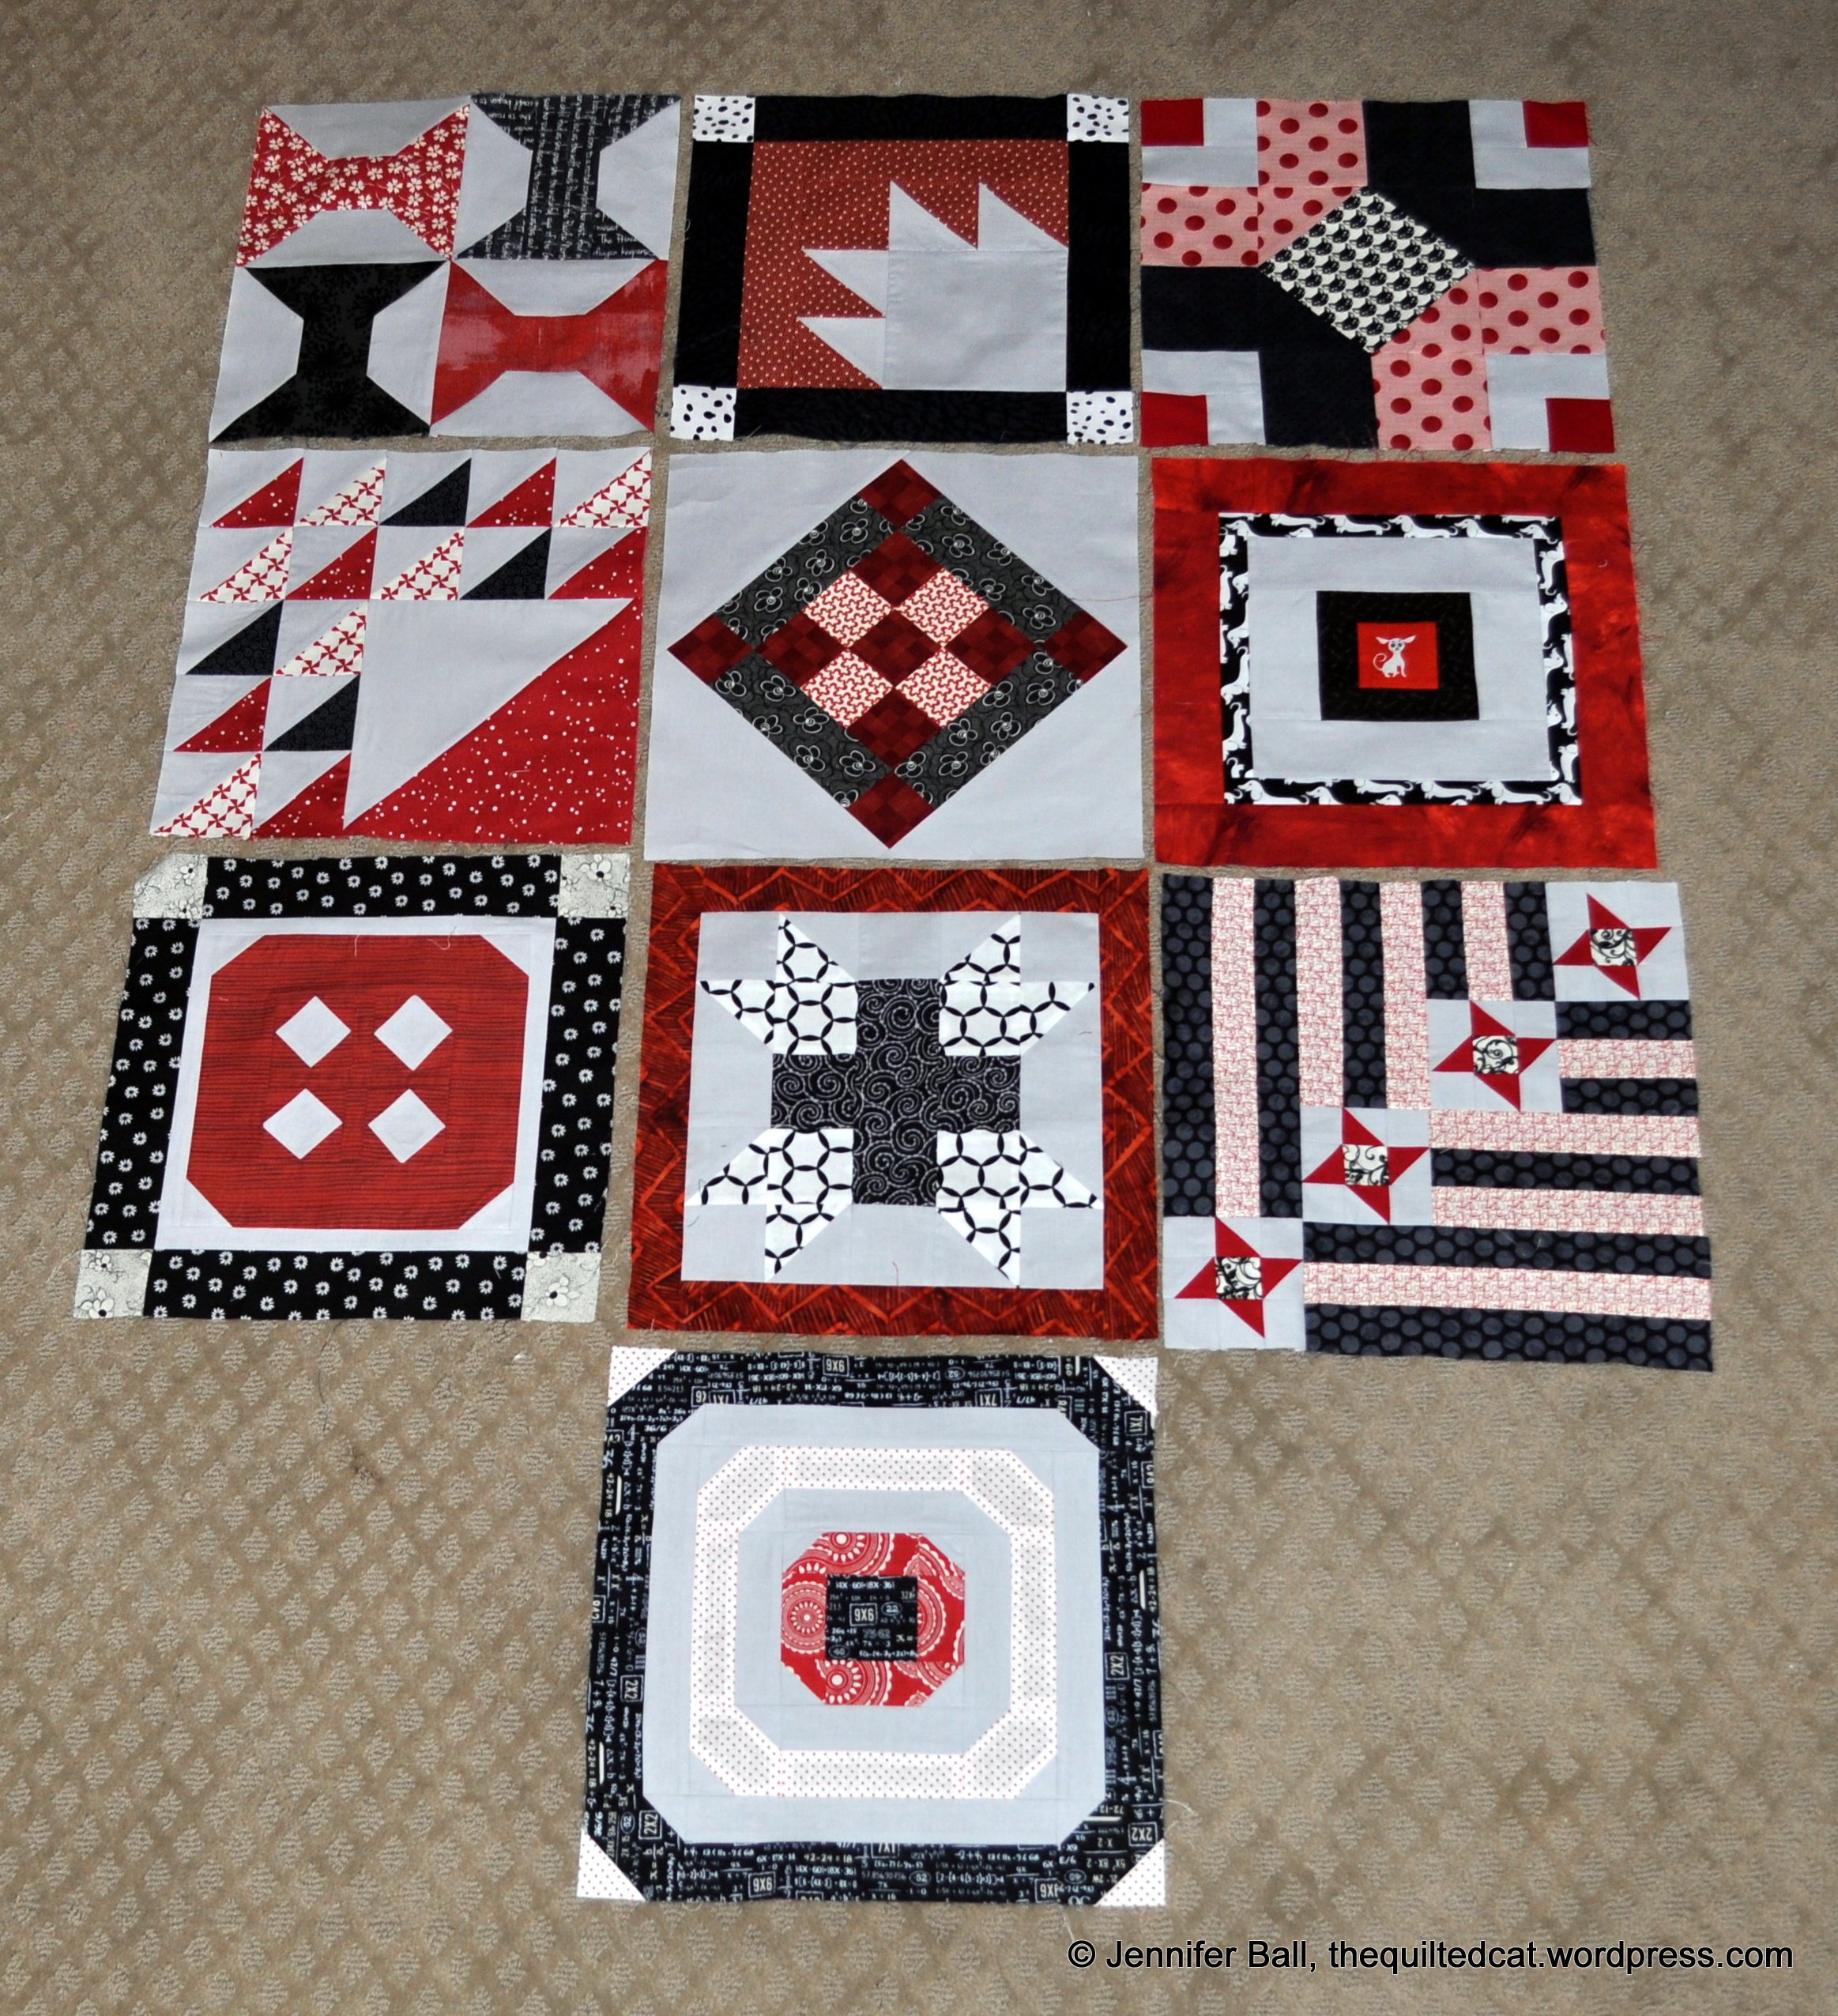
Recently, I had the great pleasure of meeting Violet Craft in person at an open house at a local quilt shop called the Pine Needle. I’ve been eyeing her paper pieced Forest Abstractions pattern for a while so I went ahead and purchased it. I love paper piecing, but haven’t done much of it during the past year. I’m going slow and easy, working in the blocks in between other quilt projects.

I decided to use a variety of low-volume prints for the backgrounds instead of using solids. I picked up a fat quarter stack of lovely fabric from a quilt shop in Spokane called Charming Lulu when I met my sister there for a little shop hop several weekends ago. They carry a wonderful selection of modern fabrics, and I hope to visit next time I’m in Spokane.

I haven’t found a website for Charming Lulu, but they are on Facebook.

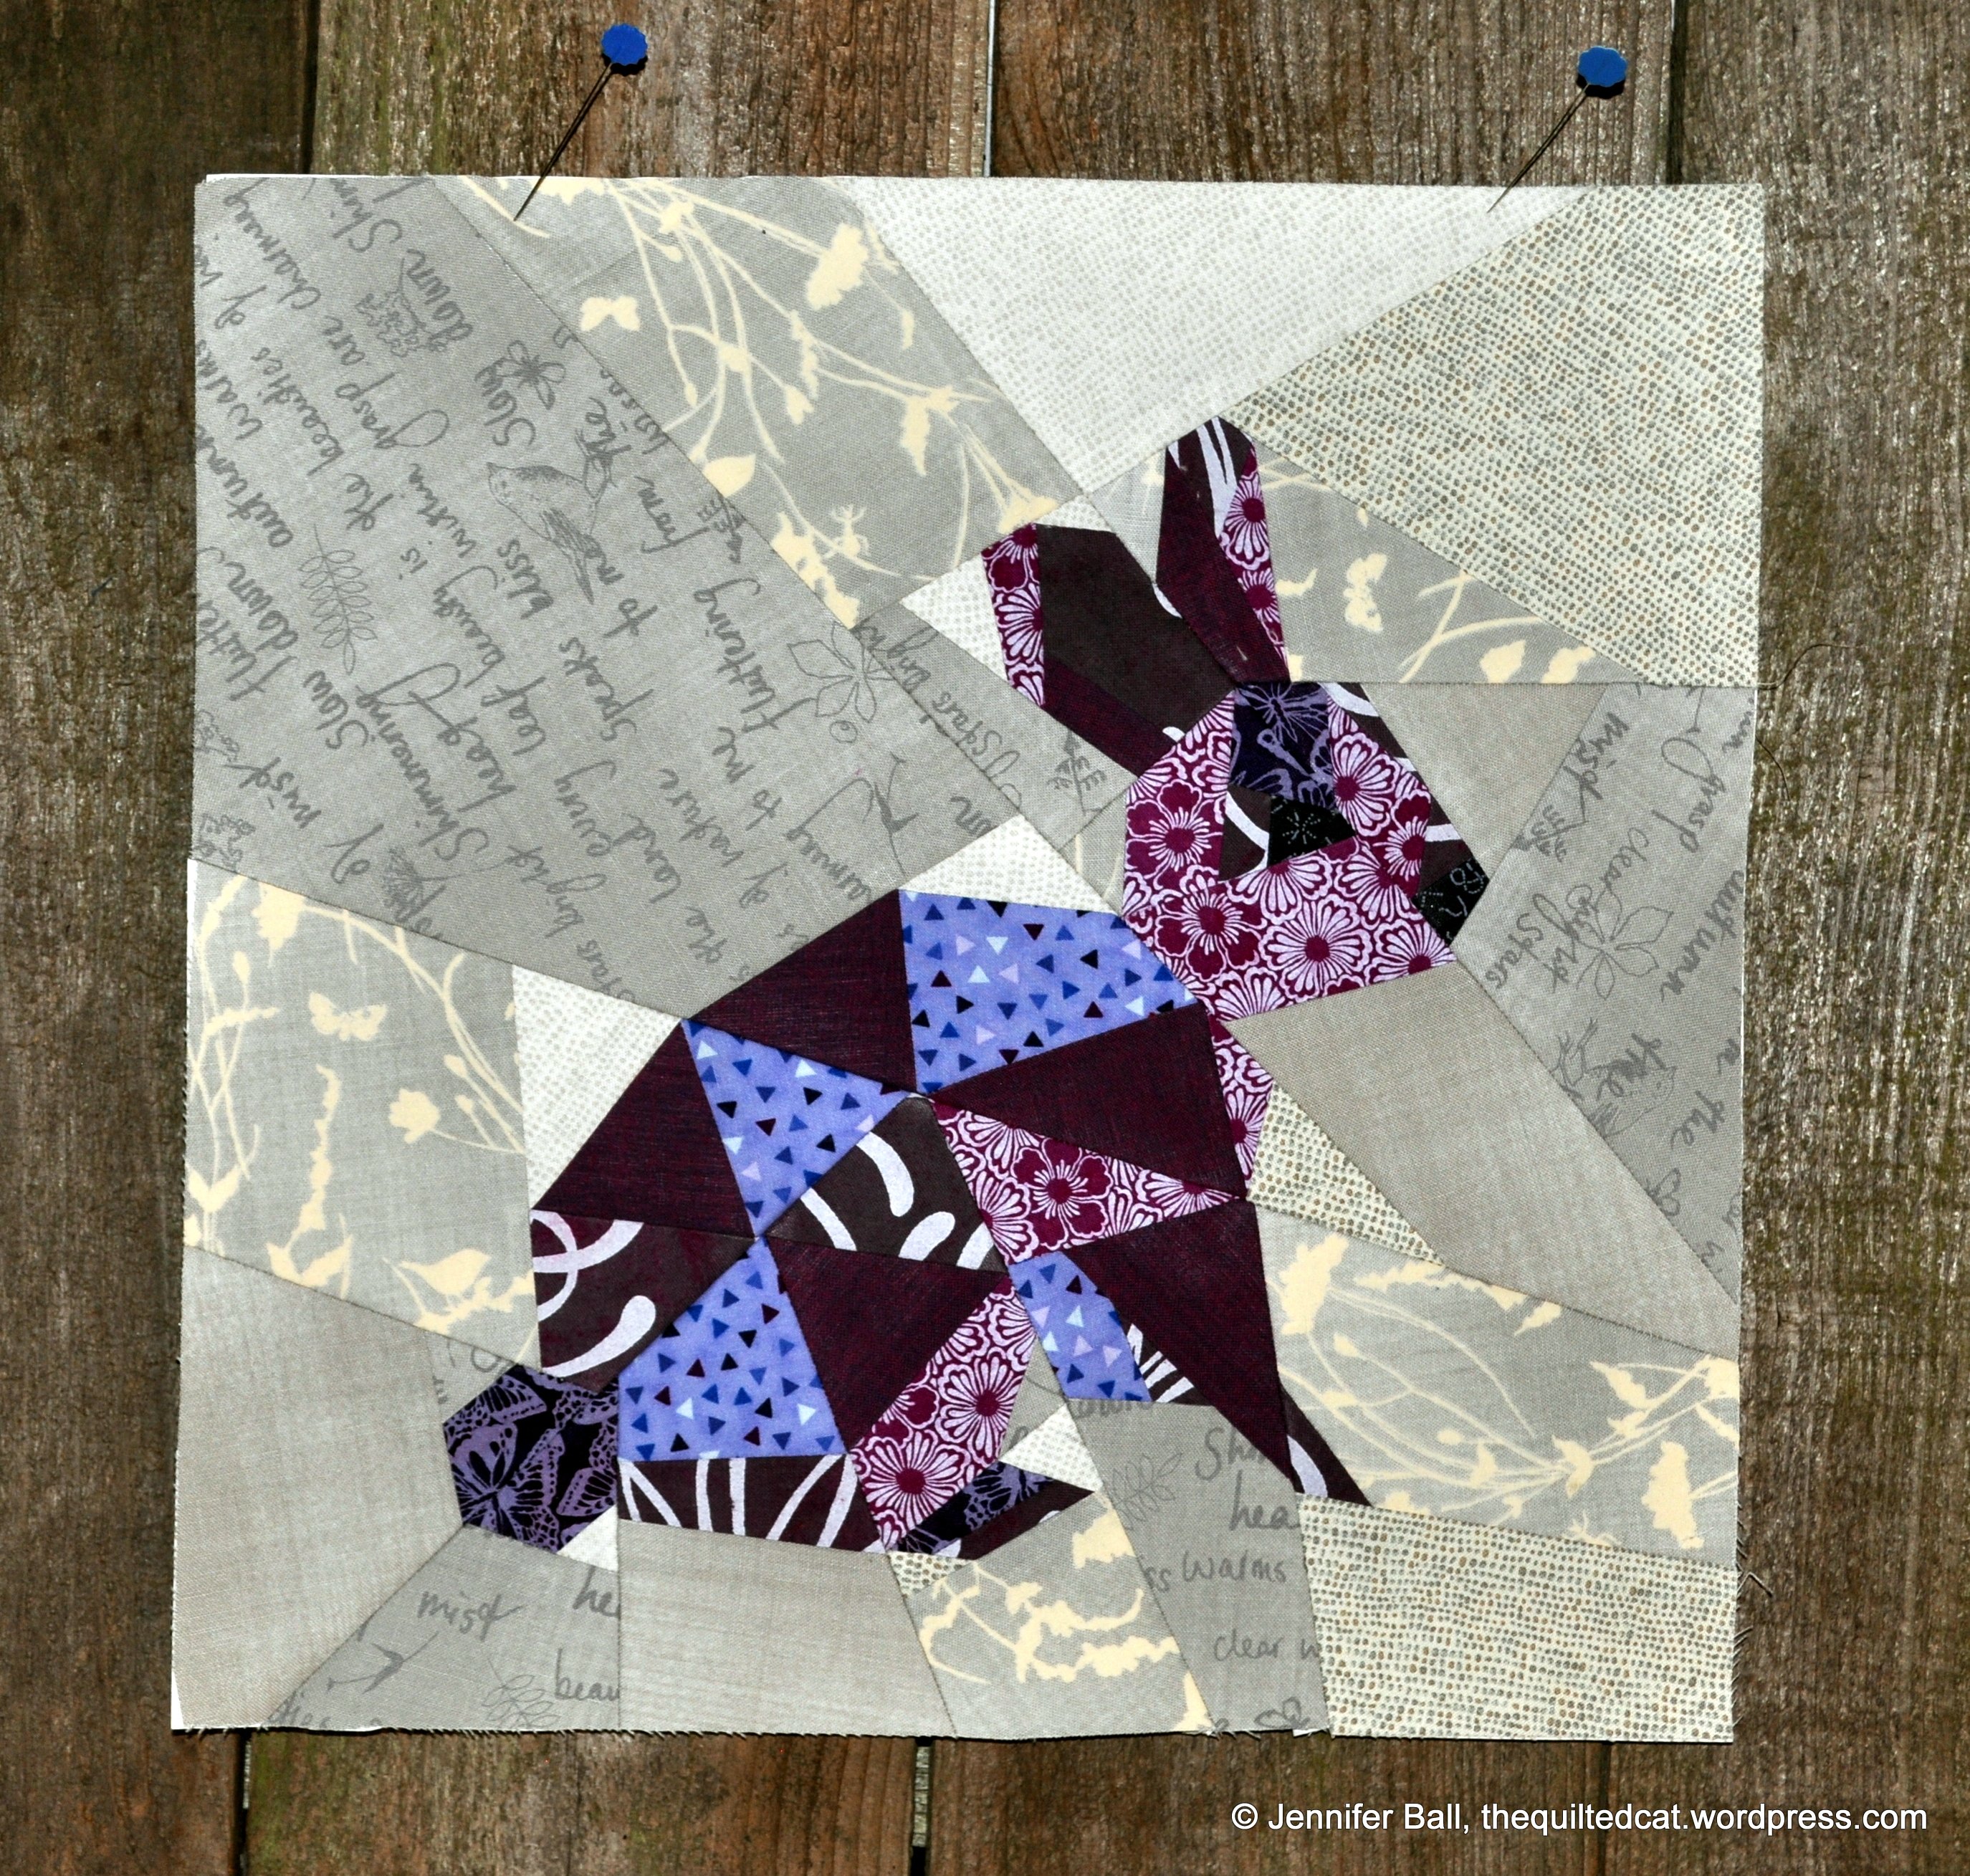
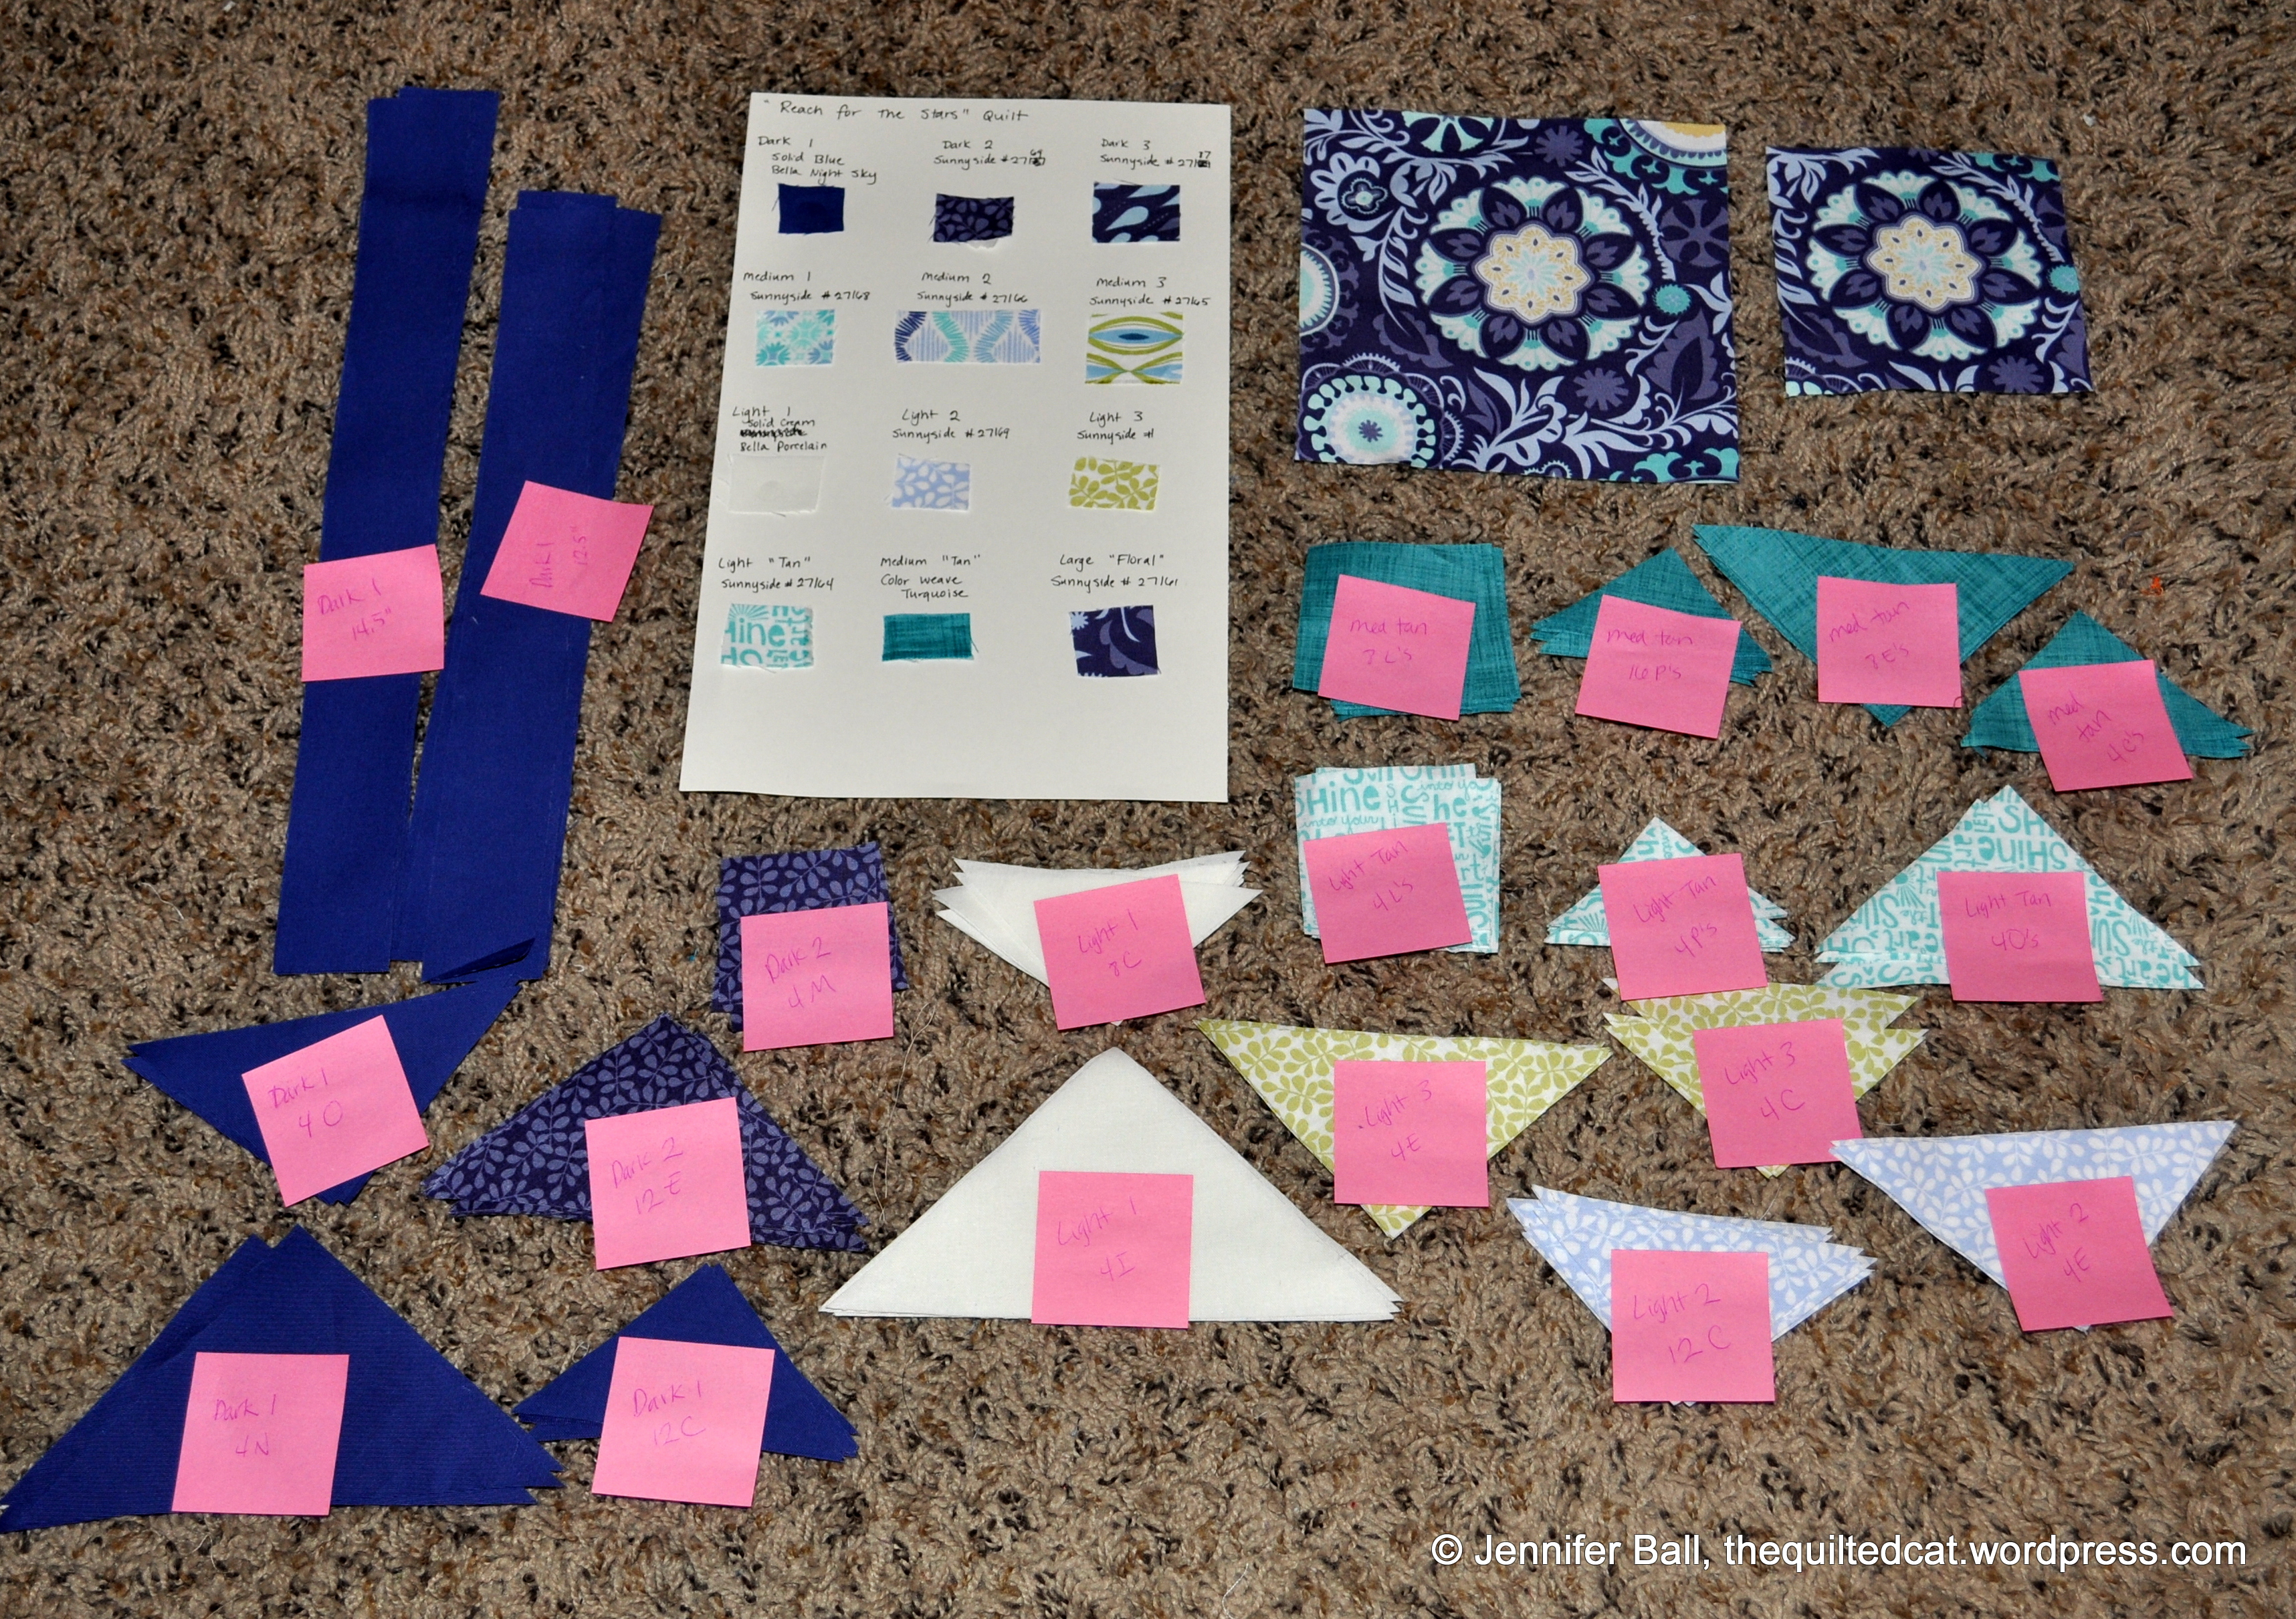
For the bunny, I chose some wonderful purple and magenta fabrics that I picked up at a quilt show last year. I’m pretty sure that I’ll use different colors for each critter in the quilt, but we’ll see.

Forest Abstractions Pattern and Fabrics

Forest Abstractions Pattern and Fabrics

Here’s a look at my completed bunny block:

Forest Abstractions Bunny

Forest Abstractions Bunny

I hope to make another block from this pattern soon.

If you participated in the Black Cat Crossing blog hop, I offered a giveaway on my post here. I used a random number generator and the lucky winner is . . . .

Carole (her blog is From My Carolina Home).

Carole, I will be emailing you today to make the arrangements.

Thanks to everyone who participated in the blog hop. I do hope that you enjoyed all the wonderful Halloween creations.

Stay tuned because I’m participating in Quiltmaker’s 100 Blocks Blog Tour in November. I have a block published in the next issue, and I can’t wait to show it to you!

Enjoy!
~Jennifer

Star Light Star Bright Quilt Finish!

Happy Thursday, quilty friends!

Back in January, I joined a quilt-along called Star Light Star Bright designed and hosted by Melissa over at Happy Quilting. For the most part, I kept up with the project and then set it aside once the quilt flimsy was completed. You can read about my fabric selections using some of the Charley Harper fabrics in this post.

Recently, I decided to finish this project by quilting it and binding it in time for a very special birthday surprise gift! The recipient is my sister, and I’ve kept it under wraps until now since she reads my blog. Now that I’ve given her the quilt, I will show the finish!

For the quilting, I did random free-motion swirls from edge-to-edge. The backing fabric is from Moda’s Forest Friends designed by Ingrid Slyder. I used some of the Fox Fun Pebble Grey (#23142-11) and alternated it with the Birch Trees Pebble (#23143-11).

Star Light Star Bright Quilt and the Fall Leaves

Star Light Star Bright Quilt and the Fall Leaves

Star Light Star Bright Close Up

Star Light Star Bright Close Up

Star Light Star Bright Backing

Star Light Star Bright Backing

Another View of the Star Light Star Bright Quilt

Another View of the Star Light Star Bright Quilt

I think the fabric colors and patterns will look wonderful in my sister’s log cabin style home. I hope to take some pictures of it there soon to share.

I’m very happy to have another project crossed off the to-do list. Now, on to the next one!

Enjoy!
~Jennifer

Aurifil BOM, October’s Block

Hi everyone!

On this first really raining evening of the season, I decided to work on my October block for the Aurifil BOM. I’ve been keeping up with this BOM since January and you can read about my last block here.

My constant color is Kona Shadow, and I’ve been picking different reds and blacks to make each block.

For October, the block is called “Circle of Love” designed by Jane Davidson. I used a little bit of Sweetwater’s new Elementary fabric for the black pieces and some Mama Said Sew fabric for the darker red. The red polka dot fabric is from a scrap bag that I picked up from a local quilt shop.

Here’s a look at my block for October:

Aurifil BOM, October Block, Circle of Love

Aurifil BOM, October Block, Circle of Love

I now have 10 total blocks with just 2 more to go:

Aurifil BOM Blocks, Months 1-10

Aurifil BOM Blocks, Months 1-10

You can still download all the free Aurifil BOM patterns from this year. Each month, one lucky winner wins a box of Aurifil thread!

Enjoy!
~Jennifer

A New Quilted Bag

Happy Monday!

I’ve been using a small, store-bought purse for my day-to-day needs, but decided that I really need to make my own.

I fell in love with the new Elementary fabric collection by Sweetwater and recently picked up a charm pack and some coordinating half-yard pieces. I love how the colors look together in this collection and the back-to-school theme is perfect for fall.

I used a bag pattern called the Oak Park Bag by Loft Creations.

For the base, I wanted a heavier material than cotton, but still something that would look nice with the Sweetwater fabric. I picked up a gorgeous piece of espresso-colored faux leather. I think the leather really adds some character and style to the finished bag!

I used Aurifil 50 wt in brown (#2372) for the piecing and straight-line quilting. The lining is fusible fleece, but I really want to try Annie’s Soft and Stable when I make this bag again. The fleece will work fine, especially once the bag has a few items inside it. But, I saw the Soft and Stable product at a quilt show recently and now really want to try it out!

I did use a leather foot and a leather needle. I stitched really slowly on my Bernina since the leather, especially on the handles, was so thick. I did break 2 needles in the process so I probably will not use the faux leather on the handles again. However, on the base, the faux leather worked fine since it was just 1 layer.

The finished bag measures approximately 13-inches wide by 19-inches high. The inside is lined with the Elementary fabric as well and has 1 pocket.

Here’s a look at the finished bag, hanging in the gorgeous 80 degree weather that we had this weeekend:
Oak Park Bag Closeup

Oak Park Bag

I have only made a few bags so this project really help me improve some skills. I hope to make it again since it came together pretty quickly.

Enjoy!
~Jennifer

National Quilting Month – Color My Heart Quilt

We’re into the final stretch of September, which just happens to be National Sewing and Quilting Month! I heard about this over on the Jolly Jabber blog for the Fat Quarter Shop.

The Fat Quarter Shop has a quick and easy free pattern to celebrate the month called Color of My Heart. It is a 1-block quilt that uses a charm pack and a solid background to make a very cute quilt.

I decided to make my own heart quilt that I could hang up in my office at work. Instead of using a charm pack, I opted to scale the quilt down by using a mini charm pack! My quilt finishes at about 12-1/2 inches square and is so adorable!

Here are the materials that I used:
1 Moda Sphere Mini Charm pack (by Zen Chic)
Moda Cross Weave Woven in Grey for the background and binding
Moda Sphere Grey yardage for the backing
Aurifil #2784 (dark blue) for the free-motion quilting

I followed the piecing instructions exactly as written in the pattern, but I just used the smaller charms to turn the quilt into a mini. The Moda Cross Weave Woven fabric has a really nice texture with some color variety that really appealed to me. I made sure that all my HSTs used the horizontal orientation of the background fabric so that the mini quilt had a consistent look.

Once I pieced the top, I made my quilt sandwich using some left over batting and a piece of the Moda Sphere yardage. I did a quick spray and pin baste on the sandwich.

I decided to free-motion quilt an off-centered heart shape using my Bernina and a dark blue Aurifil thread (#2784). I echoed quilted the small center heart using the edge of my foot so about a 1/4-inch separation between the lines.

Here’s a look at my completed Color of My Heart mini quilt:

Color of My Heart Mini Quilt

Color of My Heart Mini Quilt

For the bobbin, I used a gray Aurifil thread to blend in with the fabric. I didn’t use my usual quilt label on this mini, but got to use my new satin labels from Ikaprint.

Here’s the back:

I’m really tickled with how this mini quilt turned out, and I will enjoy looking at the bright pops of color as our weather turns from sunshine to rain.

Enjoy!
~Jennifer

Reach for the Stars Quilt, Blocks 1-3

This year, I made myself a goal to improve my piecing skills. To achieve that goal, I’m participating in various online BOMs as well as working on the Reach for the Stars quilt. You can read about my start on this quilt as well as all my fabric selections here.

I’m using the delicious Sunnyside line by Kate Spain for Moda, along with several solids thrown into the mix.

I finished up part 2 of 7 this weekend, which included blocks 1-3. I really wanted to get an outdoors photo to show off the fabrics better, but couldn’t squeeze it in before work on Monday.

Here are close-up photos of blocks 1-3. You can click each picture to zoom in on the block.

These blocks will be placed on the top of the quilt, above the center medallion:

Reach for the Stars, Blocks 1-3 with Center Medallion

Reach for the Stars, Blocks 1-3 with Center Medallion

It was challenging to find a floor space big enough for a photo. I stood on a little chair to get high enough, and I’m really surprised that one of my quilt inspectors didn’t come to “rearrange” the blocks, lol!

Since this project stretches over a year or so, I decided to create a little fabric swatch card/cheat sheet.

Fabric Swatch Cheat Sheet

Fabric Swatch Cheat Sheet

This cheat sheet really helped me keep all my fabric placements correct for each block. In the past, I just had my chicken scratches on a piece of paper. I could just see myself confusing dark 2 with dark 3 or light tan with medium 1 if I didn’t have the little fabric swatches.

I cut out all the pieces for blocks 1-3 at the same time and kept them in individual groups with labels:

Cut Fabric Groups

Cut Fabric Groups

Now, if only I could be this organized with all my quilty projects!

I hope you enjoyed seeing photos of this evolving quilt. I still need to “catch up” on parts 3 and 4, which are already published in the magazine.

Happy quilting,
Jen

Triangle QAL + Hollyhill Quilt Shoppe Win!

Greetings quilty friends!

The assignment this week for the Triangle QAL hosted by Paula over at Sassy Quilter is to cut out all our triangle shapes!

I’m using 7 fabrics from Clothworks Brewsky line along with 3 Kona cotton solids. I think this line is now out-of-print, but you may still be able to find a few pieces if you search for it. This will be a fun beer-themed quilt project for my hubby!

Here are the pieces stacked together, looking rather like a slice of fabric pie!

Triangle QAL Fabric Pie

Triangle QAL Fabric Pie

And here are all 204 triangles!

204 Triangles

204 Triangles

Next Friday, we’ll begin piecing all these wonderful 60 degree triangles together.

Last week while at my sister’s house, I learned that I had won an April Showers by Moda charm pack from one of my favorite local quilt shops, Hollyhill Quilt Shoppe. I highly recommend a visit to this quilt store if you visit the Portland area. Hollyhill has a sister store across the street called Boughs of Holly, featuring wonderful Christmas and holiday themed fabrics year-round!

Here’s a picture of me in Hollyhill with the charm pack. I should have taken off my brown winter coat!

April Showers Charm Pack at Hollyhill Quilt Shoppe

April Showers Charm Pack at Hollyhill Quilt Shoppe

This is the first time that I’ve won something at a quilt shop so I’m very happy and thank the wonderful folks at Hollyhill.

Until next time, happy quilting!
~Jennifer