Fierce Cheetah Mama

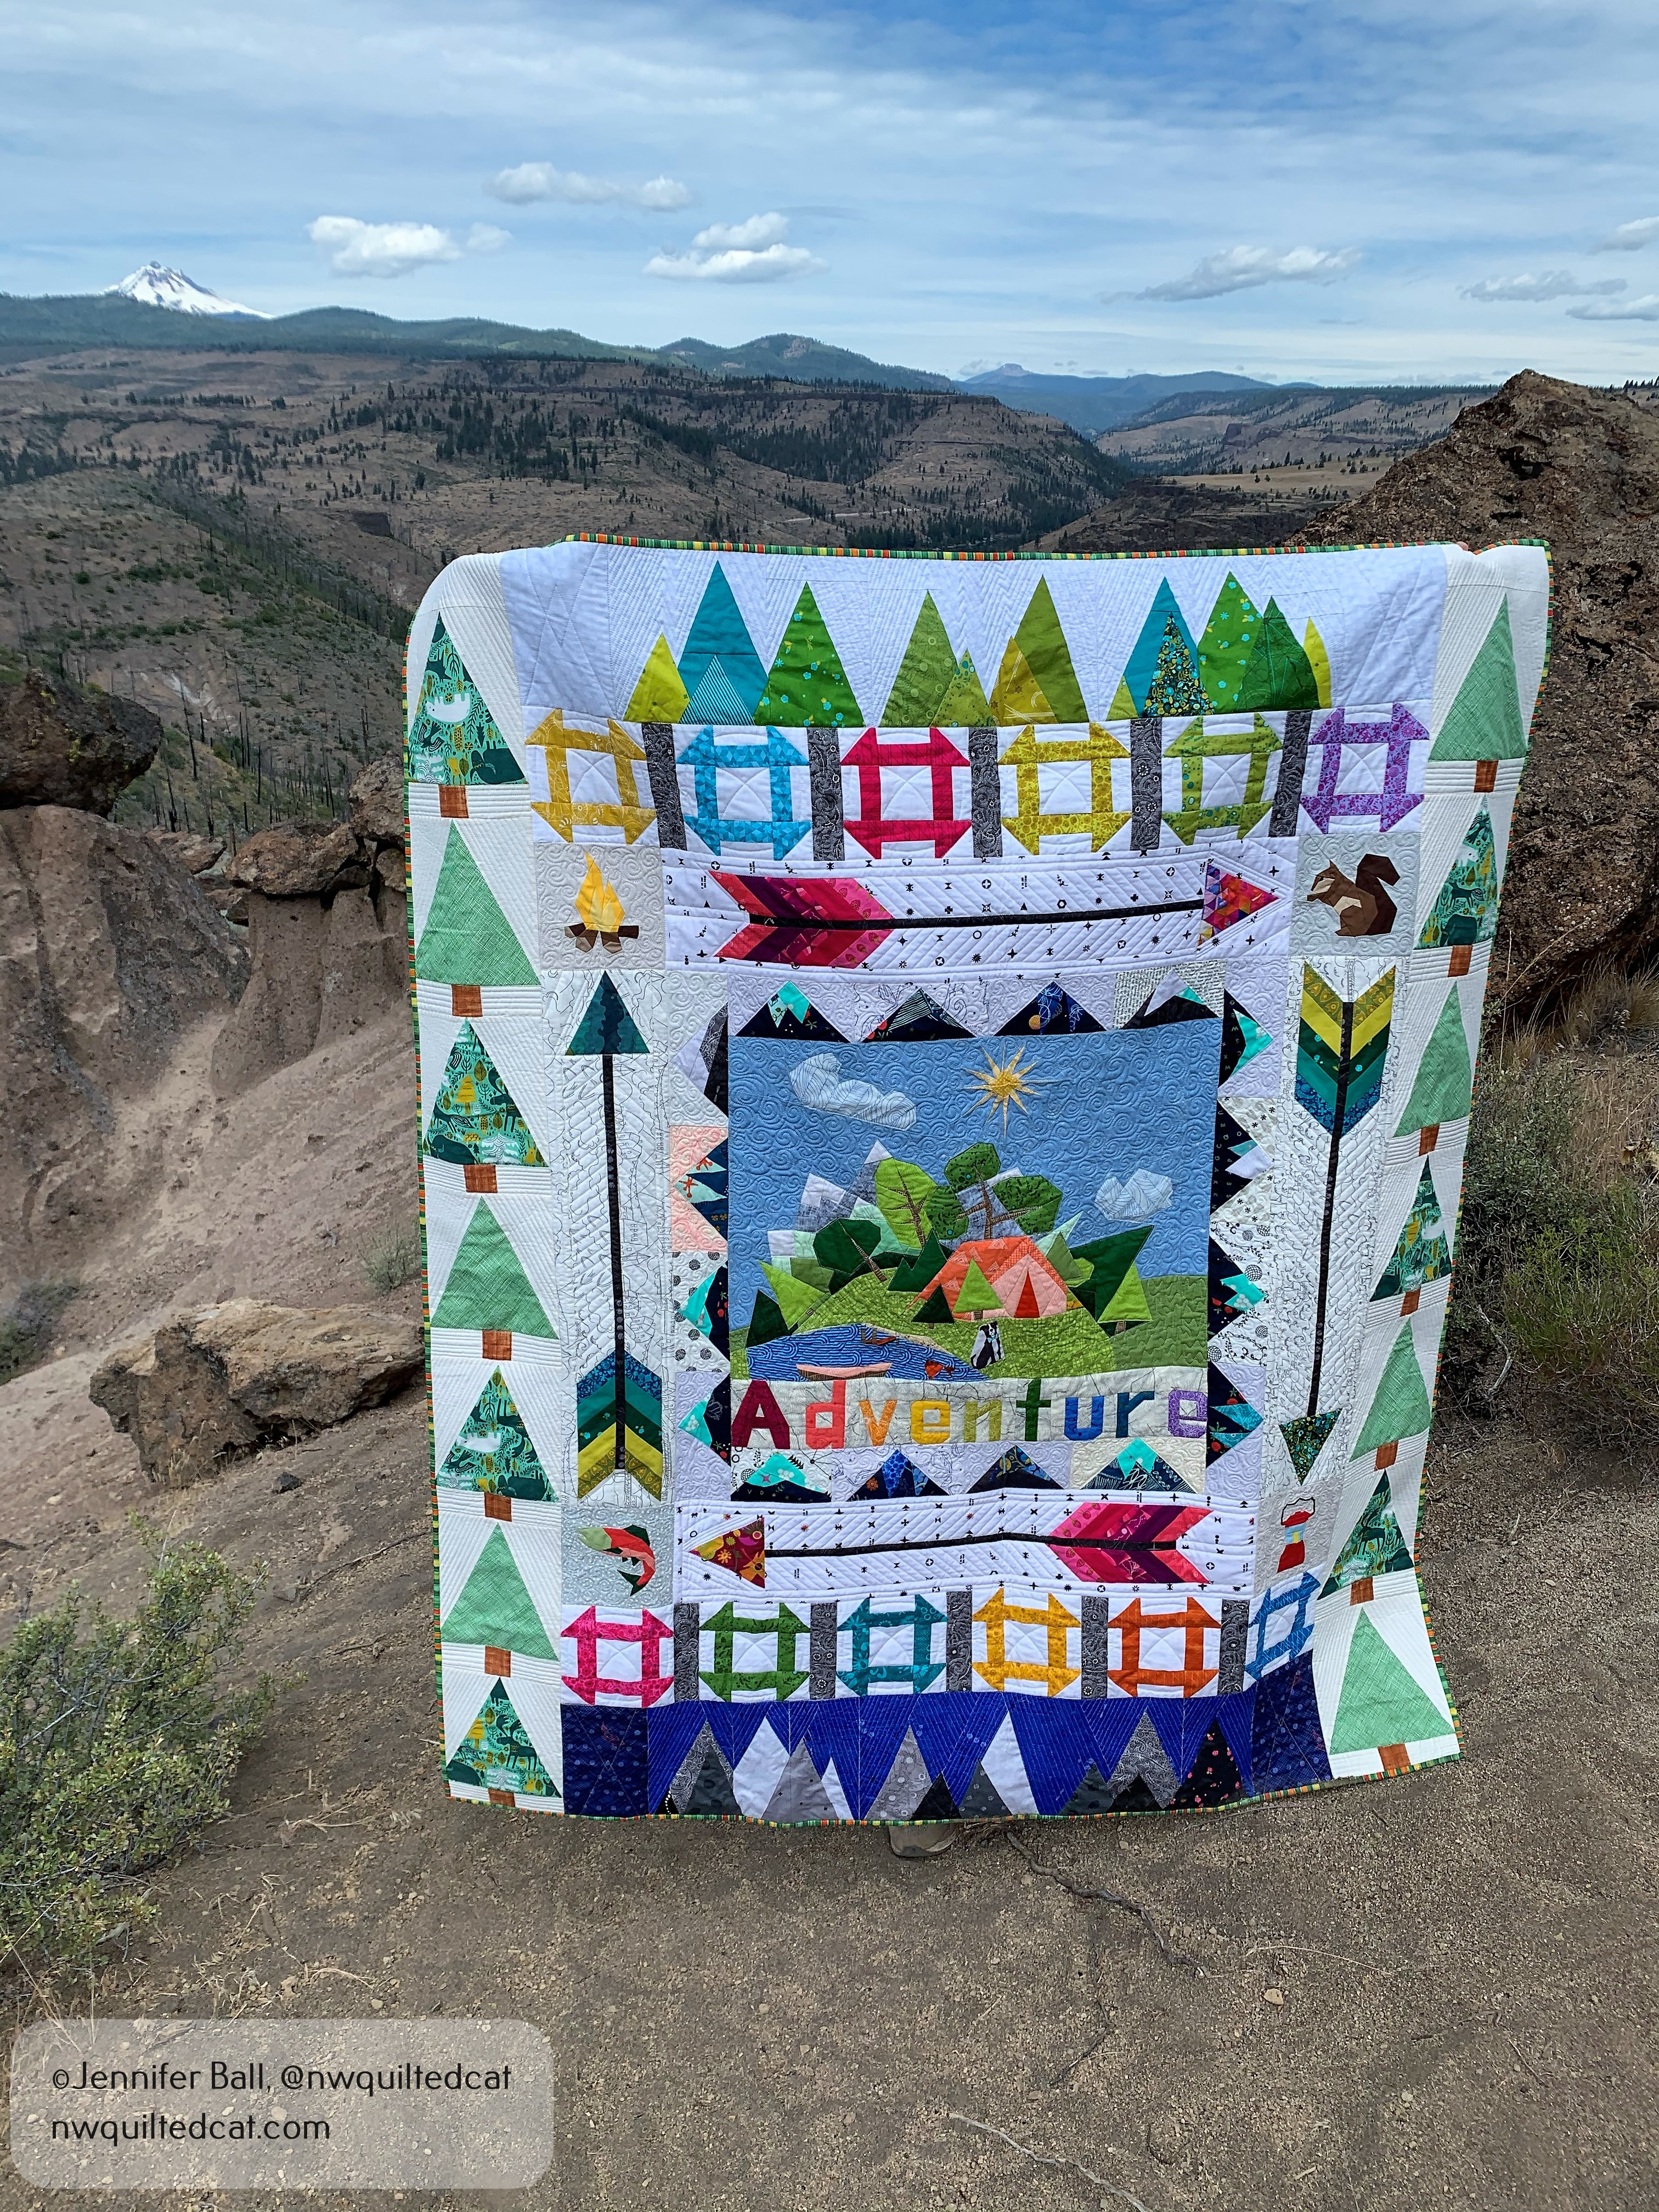
Happy spring, everyone! The days are getting a little longer, bulbs are blooming, and birds are singing. I’m very happy that we’re heading into the warmer spring days because it means more hiking and gardening.

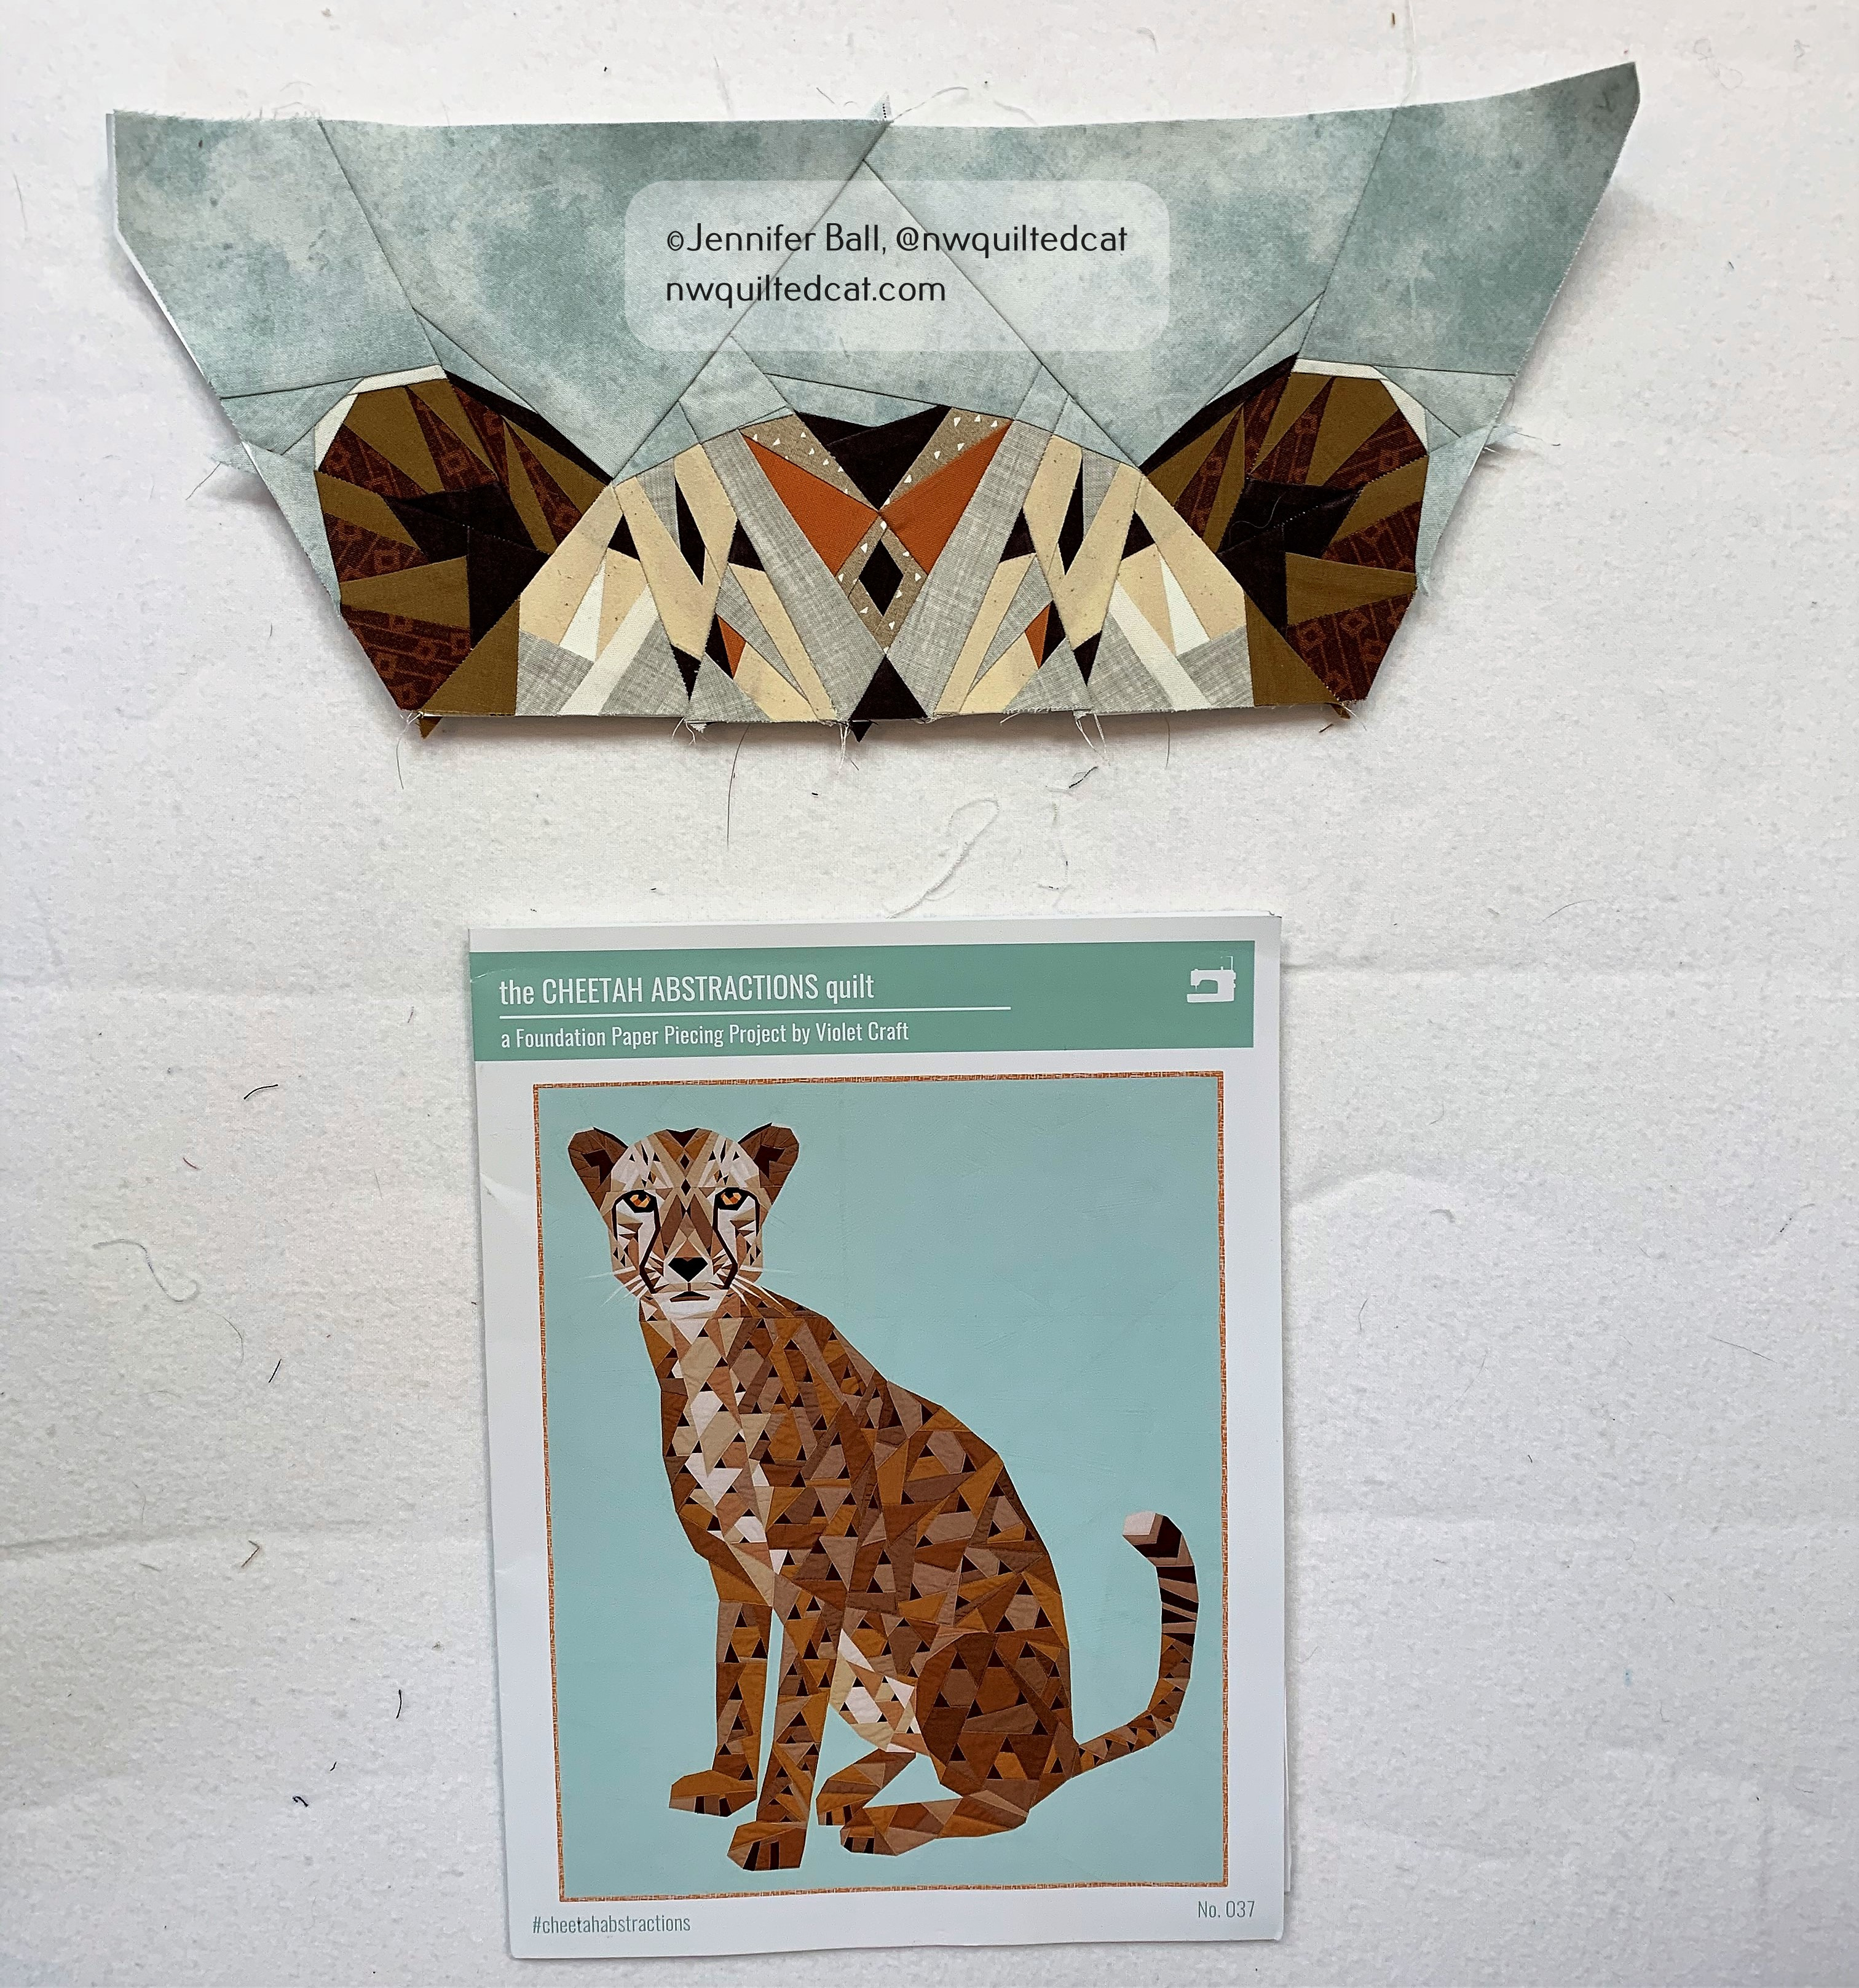
For Christmas last year, my sister sent me the Cheetah Abstractions pattern by Violet Craft. This is a foundation paper pieced pattern that usually finishes at 48 inches by 60 inches, but I decided to shrink it down to 75%. I like to print my foundations using Carol Doak’s Foundation Paper because it is really easy to remove after sewing.

I challenged myself to use only fabrics from my stash. The fabric audition process can take a few days and, for this quilt, my hardest decision was the background. I knew that I’d need about a 2 yard piece in a solid or mostly solid color with enough contrast to make the cheetah body pop. I auditioned creams, grays, grunges, and others until I came across a mottled light aqua fabric. Perfect! It reminded me of a partly overcast day.

Once I had the background fabric, I pulled different solids and lightly patterned fabrics to audition for the cheetah body. I like to use Violet’s included color palette to tape small swatches of my fabrics so that I remember which fabric goes with which symbol while paper piecing.

Cheetah Abstractions – fabric selections

I started with the cheetah face first. I was just so eager to see it come to life in fabric! The head section is the most complicated, especially at just 75% size. If you’re new to paper piecing, just go slow and remember to reduce your stitch length. Here’s the start of the cheetah with the pattern for scale.

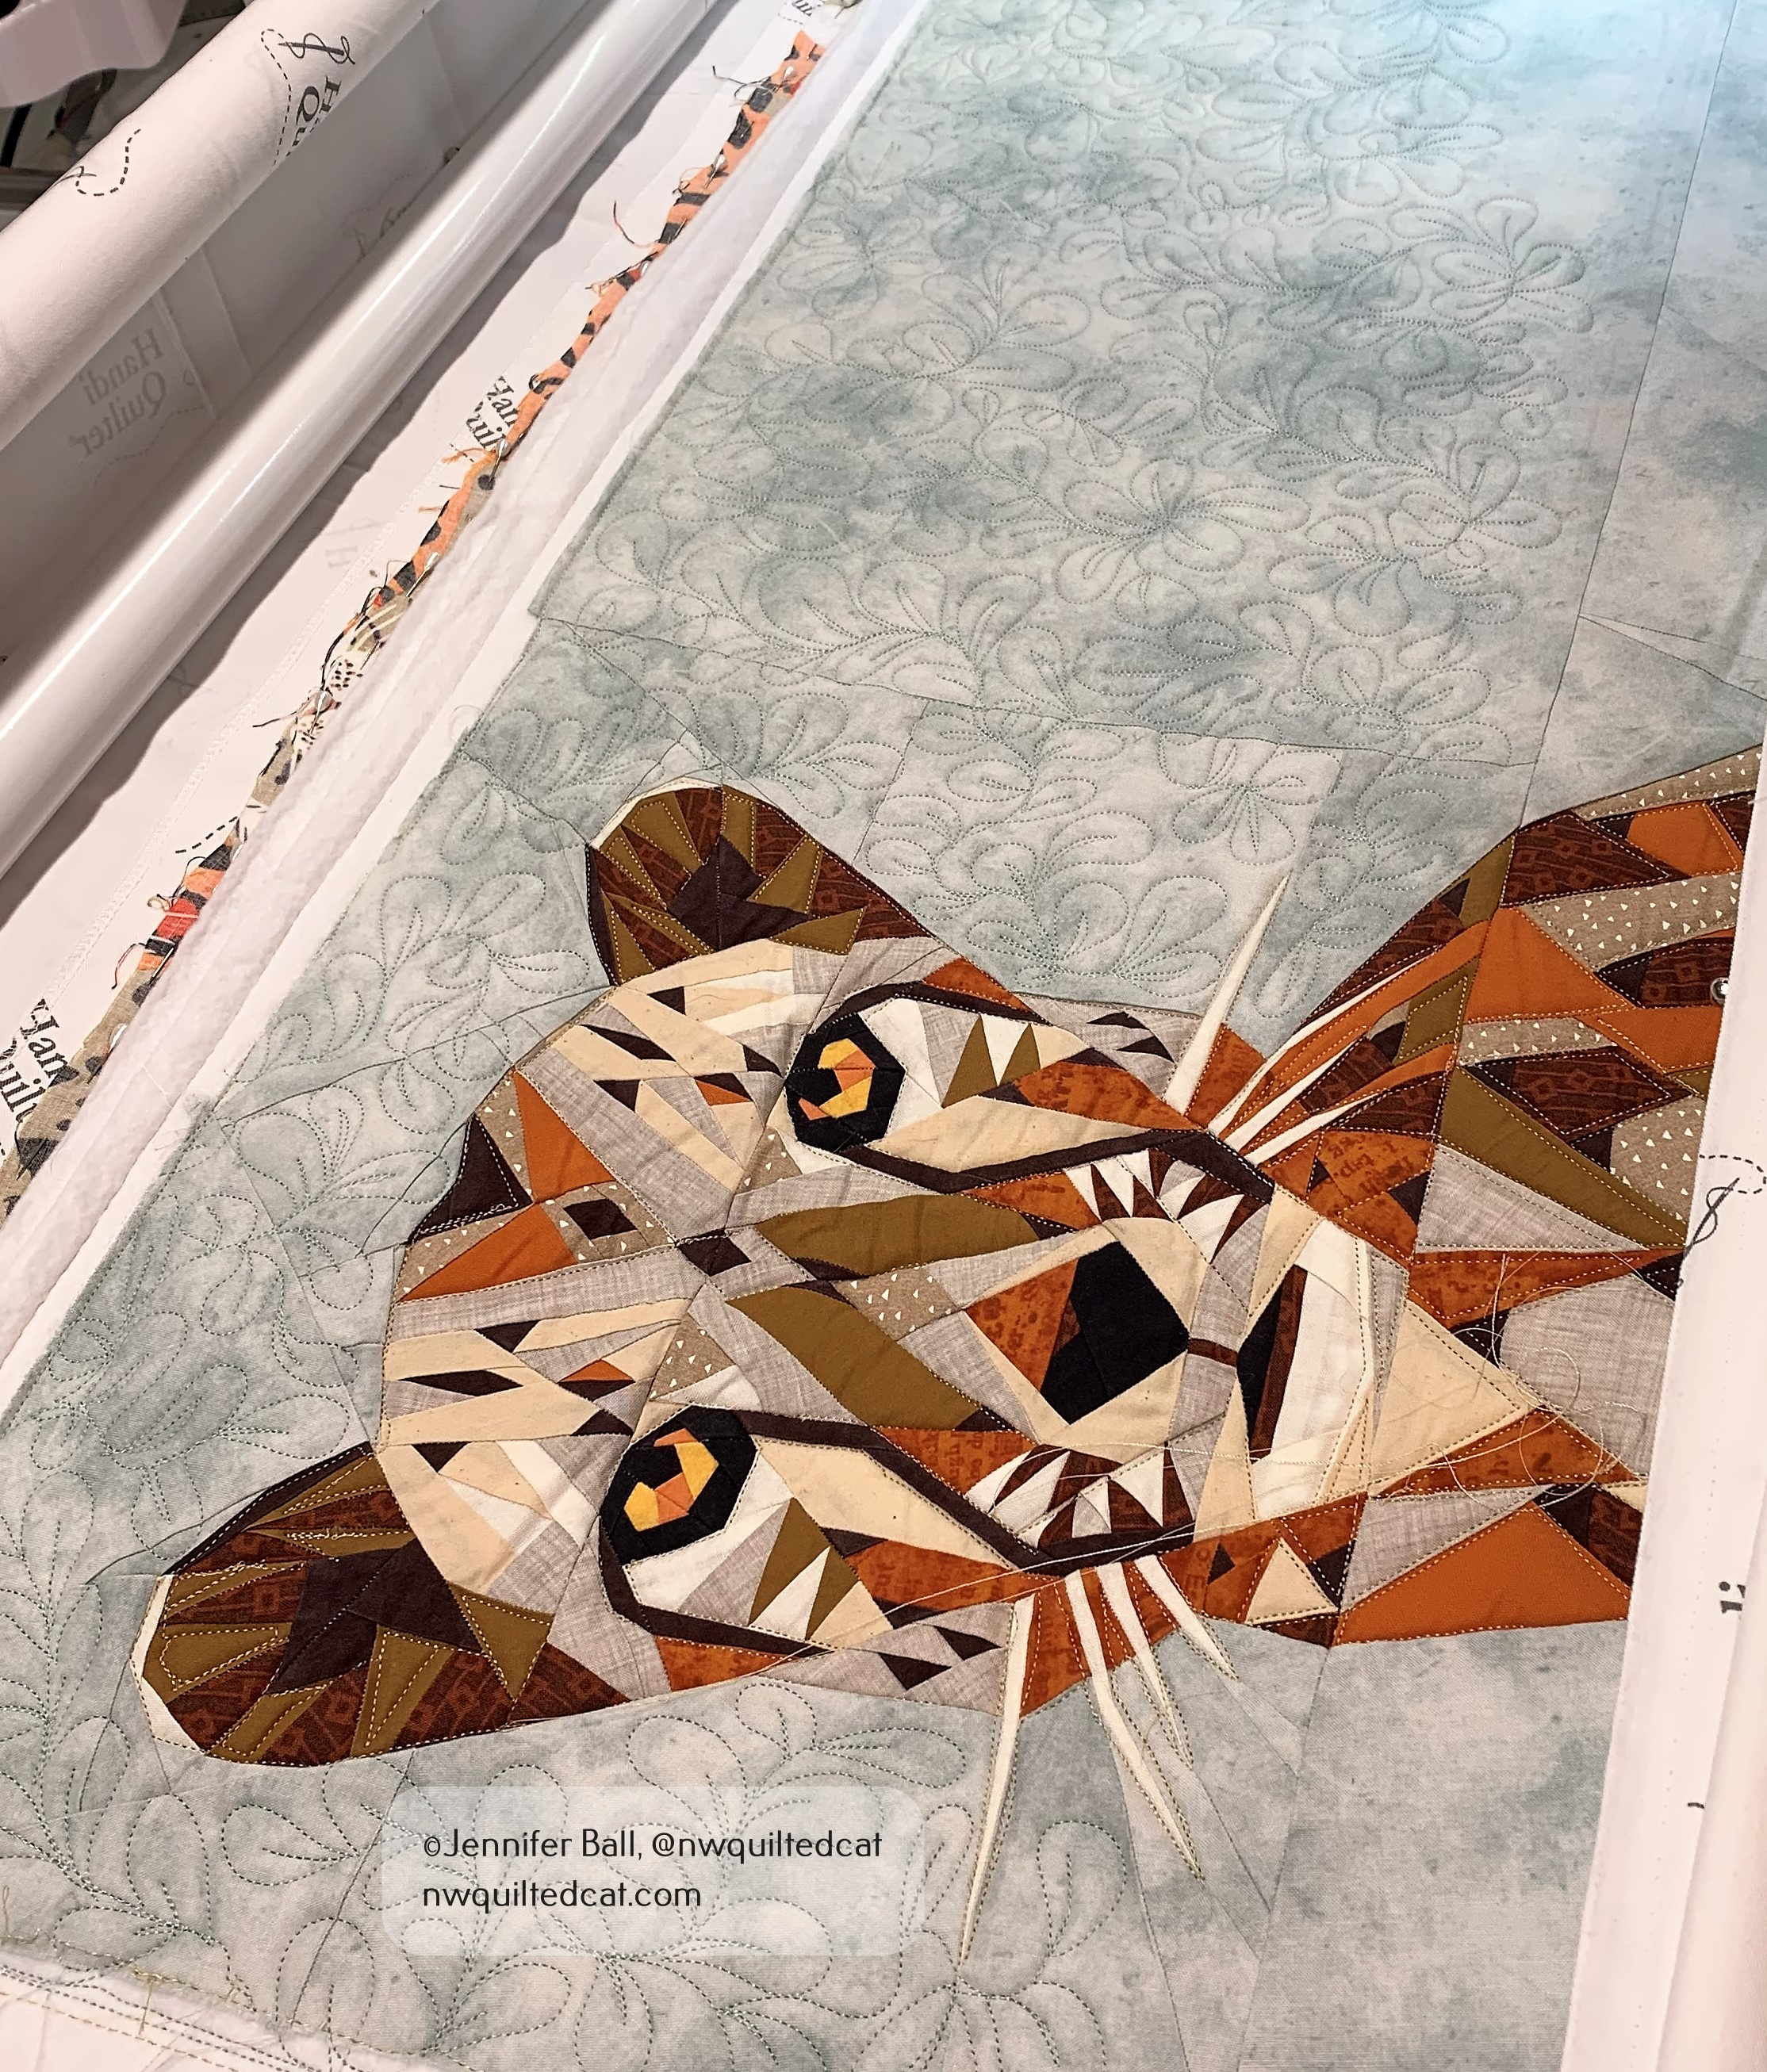
Over the next few days, I tackled sections of the cheetah body. I sewed the smaller sections and laid them out before joining sections together. It is much easier to fix mistakes this way! Isn’t her expression great? Her gaze is so intense and focused.

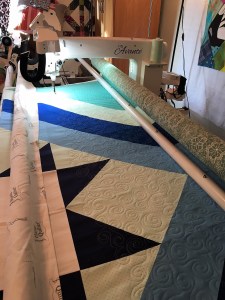
I pieced my cheetah fairly quickly in just a few weeks. I put all my other projects (mostly) on hold. Once pieced, I thought about how to quilt her for a week or two. I didn’t want the quilting to detract from the magnificent cheetah mama.

I decided to do some straight-line quilting all over the cheetah face and body using Glide thread in Sand Dune. For the background, I did some free-motion leaves using Glide thread in Cool Mint. I also used 2 layers of Quilter’s Dream Poly Select batting for extra texture!

The double batting does make this small quilt heavy, but I plan to hang it on a wall rather than using it as a lap quilt. For the binding, I used a dark brown fabric for three-quarters of the quilt and then used a piece of the backing for the remaining one-quarter to accent some of the colors from the cheetah.

The backing fabric is called Kenyan Cats by Alexander Henry Fabrics, which I thought worked so well with the cheetah theme.

I really love how this fierce mama cheetah quilt turned out, and I can’t wait to display her on a wall behind my work desk at home.

Enjoy!

~Jen

Farm Pig Mini Quilts

Hi everyone,

Recently, I decided to make a cute little Penny the Pig block from Lori Holt’s Farm Girl Vintage 2 book. I had some pig themed fabric on hand called State Fair by Windham Fabrics. Why not combine them?

I pulled in other pieces from my stash for the ears, nose, feet, and the ground. The background is hand-dyed Cherrywood. I made the 12″ block size.

Penny Pig block from Farm Girl Vintage 2 book

Isn’t this just the cutest little block? In fact, I decided to make a second one to gift to my sister.

As these blocks are small, I went ahead and quilted them side-by-side using a ruler to create diagonal lines and Glide thread in Cotton Candy.

Quilting the pig blocks

After I quilted them, I decided each little pig needed a name. I didn’t want to name them both “Penny” so I kept one named Penny and one named Mabel.

But how to distinguish them? How about a fun embellishment? I added letter beads on colored jewelry wire to the top of each quilt after I finished the binding.

Completed pigs with names

I gifted one pig to my sister, and she loved it! I have the matching one hanging in my sewing room.

Happy quilting!

~Jen

A Quick and Easy Baby Quilt

Hi everyone,

A family member just had a baby this past week, and I wanted to send her a little gift to welcome the precious little one.

I decided to put together a simple and quick baby quilt using fat quarters and scraps from my stash. I had some super cute safari themed fabric with giraffes, zebras, and alligators that I thought would be perfect for a baby boy.

I cut out 48 squares at 5.5 inches unfinished, and then set them out in 8 rows of 6 blocks each.

Arranging the blocks

It’s was a pretty quick process to sew these blocks together, and then sew the rows together. Once I had assembled the top, I decided to add borders. However, I only had fat quarters and odd scraps, so I had to piece the borders together. I used 3″ borders all around the quilt, with giraffes down the sides and zebras on the top and bottom.

For the backing, I used a piece of minky called “Safari Jeep” by Michael Miller Fabrics. I did purchase this piece from a local quilt shop because I wanted the softness of minky, but I didn’t have any in my stash.

I did a simple stippling for quilting using Glide thread in Lemon Ice. I loved the look of the yellow thread against the quit. The minky back quilted up beautifully on my HQ Avante. The binding is a navy blue and white striped fabric.

I forgot to measure the finished quilt before I mailed it off to the new mom and baby yesterday. I think it is close to a crib size.

Here’s a look at the finished quilt, with my inspector helping:

Cow inspects the baby quilt

The completed baby quilt

I hope the mom and little one enjoy this quilt for years to come!

Happy quilting,

Jen

A Traveling Quilt Takes an Adventure!

Hi everyone,

Last week would have been the 45th anniversary of the Sisters Outdoor Quilt show. I had planned to take classes the week before with my sister, but the classes are postponed until 2021. We decided to have a mini retreat together for some sewing and hiking.

We had fun sewing on small projects in our hotel room, visiting local quilt shops while maintaining social distancing protocols and wearing masks, and hiking in the great outdoors.

I took my Adventure themed traveling quilt with me. I made the center foundation paper pieced block from a pattern called “Camping” by Quilt Art Designs, but without the road and camper van. I also paper pieced the word “Adventure.” My quilt then traveled for about a year around the United States, where 5 different quilters added sections. In return, I added sections to the other quilters’ traveling quilts, all with different themes ranging from Harry Potter to books to gnomes.

Here’s a look at my center block, with and without the word, Adventure:

Each quilter was free to add her own ideas to the quilt, keeping with my theme of travel and adventure.

  • Marianne added an inner border of foundation paper pieced mountains
  • Katie added the next border of foundation paper pieced arrows, a squirrel, a campfire, a fish, and a lantern
  • Kitty added churn dash blocks (one of my favorite blocks) to the top and bottom
  • Gigi added a mountain range in the day to the top and a mountain range in the night to the bottom
  • Jenn added the final left and right borders of trees

I received the quilt back this spring, and then decided to custom quilt it using ruler work and free-motion.

Here is a look at the finished quilting with my dog quilt inspector:


Completed quilting on Adventure quilt with Pepper “helping”

My sister then helped me to photograph this quilt while in central Oregon last week. It was quite windy so it was difficult to hold the quilt still and get a good picture.

We took these pictures at Balancing Rocks, which are volcanic tuffs.

Adventure quilt at Balancing Rocks with Mt. Jefferson in the background

Adventure quilt near a volcanic tuff

I really enjoyed my first experience as part of a traveling quilt/round robin group. I even got to meet one of the quilters in person in July 2019 at the Sisters Outdoor Quilt Show, where she brought me the next quilt in line for my additions. I hope to participate in another one in the future.

Happy quilting!

Jen

Making a Ski Patrol Themed Pillow, Part 2, the Reveal!

Hi everyone,

In my last post, I talked about making a pillow front as part of a special graduation gift for my nephew. Although we are not able to travel to his modified graduation ceremony, I still wanted to make him a gift that he could take with him to college in the fall.

For the pillow back, I designed a foundation paper pieced block based on the logo of the ski resort where he worked as a ski patrol member. I thought it would a fun personal touch!

I used solid Kona cottons in red, blue, and white for the ski resort logo. The background is the same ski lift print from Dear Stella that I used on the pillow front.

For quilting, I used the channel locks on my HQ Avante for hand-guided straight lines. I wanted to keep the quilting very simple. I used Glide thread in white. I did quilt all three of the pillow panels at the same time using solid pieces of backing and batting.

Quilting the ski patrol pillow panels

Once I finished quilting the panels, I cut each panel down to the appropriate size, using the dimensions in the free “Simple Quilted Pillows” pattern by Elizabeth Hartman.

Ski patrol pillow panels after quilting and trimming

I did bind the two back panel pieces using the same red Kona cotton for a nice pop of color on the pillow back. I pre-washed all the fabrics, and washed the red Kona two times with color catchers. I wanted to be sure that my nephew could remove the pillow cover and wash it without worrying about the red fabric bleeding into the other fabrics.

Ski Patrol pillow front, close-up

I really love how this pillow turned out, and I hope that my nephew enjoys it as he starts his college life!

Happy quilting,

~Jen

Double Struck Star Quilt

Hi everyone,

I finished this fun modern quilt earlier this year called Double Struck Star by Krista Moser of The Quilted Life.

This quilt has an off-set, partial star shape, with each of its three star points featuring colorful fabrics. I selected some small-scale modern prints and solids to create my star points in greens, oranges, and turquoises.

The background triangles are from five different low-volume fabrics and one darker gray fabric. I used the same gray fabric for the inner star shadow border and the binding fabric.

Here’s a look at my fabric selections:

star_struck_fabrics

Fabric Selections for Double Struck Star

I cut and pieced all my colorful triangles first and then added them to my design wall, tweaking a few here and there. I made a few fabric substitutions because some of the prints had the wrong scale or wrong shade in my initial fabric pull.

I did follow the pattern recommendation to have more of the lighter triangles towards the middle of the star with the darker triangles radiating out towards the star points.

star_struck_design_wall

Double Struck Star points on design wall

Once I was satisfied with the colorful triangles, I pieced the neutral triangles. The triangles with the gray star shadow were a little tricky, but I used my pins liberally to ensure the seams matched.

For quilting, I used Glide in Cool Grey 3 with free-motion swirls in the colorful triangles. I used the same thread color in the neutral triangles, but I experimented using different free-motion designs and ruler work in each of the triangles.

star_struck_quilting

Quilting the Double Struck Star Quilt

For the binding, I used the dark gray fabric and added a very small color-pop section using left over pieces from the colorful triangles.

I recruited my hubby to hold the quilt while I took pictures of it at a local park earlier this year.

star_struck_finished1

Completed Double Struck Star Quilt

star_struck_finished2

Close-Up of Completed Double Struck Star Quilt

Isn’t this a cheerful quilt? It reminds me of all the beautiful spring flowers emerging after a cold, rainy winter!

Happy quilting!

~Jen

Alpaca Anyone?

Oh my, I haven’t blogged in so long! I have been working on many quilting projects in my spare time, and you can see more real time progress on my Instagram account.

Last week, I had the opportunity to attend some classes at A Quilter’s Affair in the week leading up to the Sisters Outdoor Quilt Show. I usually attend each year, but my sister got to join me after she missed the prior 2 years.

I wanted to surprise her with a fun gift as a memento of our trip. We stay at the Best Western Ponderosa, which used to have a llama herd. The hotel retired the herd and replaced it with an alpaca herd! These alpacas have been at the hotel grounds for just a few weeks so they are still a bit shy.

The lovely Lorna of Sew Fresh Quilts recently posted a series of new mini quilts that she designed, including an alpaca! It was fate!! I immediately purchased the pattern and set out to make 2 alpaca minis.

This pattern is traditionally pieced and goes together pretty quickly. Here’s a look at the quilt tops with my inspector:

Romeo inspects the alpaca quilt tops

The solids are hand dyed from Cherrywood, the background is from Karen Lewis Textiles, and the alpaca body is the aqua Fairy Dust print from Tula Pink’s line called Pinkerville. The other prints are various scraps from my stash.

I quilted these alpaca minis 2-up on my HQ Avante. I did a combination of ruler work to outline the alpacas and some free-motion swirls in the background. I used a black and white striped print for the binding.

Quilting the alpaca minis

I surprised my sister with her choice of quilt last week. She picked the alpaca with the orange hair, and I’m keeping the alpaca with the green hair.

I just couldn’t resist getting a picture of the completed mini quilts with the alpacas at the hotel. One alpaca was very brave and came to check them out!

An alpaca inspects the completed quilts

We had such a fun week together! In my next post, I’ll talk about the classes that we attended at A Quilter’s Affair.

Happy quilting!

Jen

Soak Up the Sun Quilt

Hello quilters!

The sunflower is one of my favorite flowers because it is always in bloom during my birthday month. I love how bright and cheerful sunflowers are while dancing in the sunshine.

When I saw the Soak Up the Sun quilt in a new book, Mini Wonderful Curves by Sew Kind of Wonderful, I fell in love and had to make this quilt right away.

I purchased some Pepper and Flax fabric from my local quilt store to use as the sunflower petals. In the book, the petals are all scrappy yellows, but I wanted to use this pretty fabric for all the petals.

The background is made up from 5 different gray and white low-volume fabrics from my stash. The green petals are from 4 different fabrics, and the dark gray centers are also from 4 different fabrics. A great way to use up some stash!

Soak Up the Sun block

This quilt uses the QCR Mini ruler, and it goes together pretty quickly. Don’t let the curves scare you! The ruler makes it easy and fun.

I assembled my quilt top over about a week, sewing most of a weekend and then after work in the evenings.

Here’s my inspector performing his initial cat scan and quality check:

Tiger Inspects Soak Up the Sun Quilt Flimsy

Now onto the quilting! I used my HQ Avante, and did some free-motion flowers and swirls using Glide thread.

Soak Up the Sun Quilt, Just Off the Longarm!

I used a dark gray fabric from the Pepper and Flax fabric line to bind the quilt. My backing material is also from the same line, but I selected a lighter gray with yellow flowers.

Here’s a look at the completed quilt:

Soak Up the Sun Quilt

Soak Up the Sun Quilt

I really enjoyed making this picnic blanket sized quilt! I’m ready for summer with this beautiful quilt.

Happy quilting!

~Jennifer

A Modern Star Quilt – Zoomer!

Happy Mother’s Day to everyone!

I recently finished a modern quilt called Zoomer. This pattern is by Elizabeth Dackson from the book, Rock Solid.

I used mostly solids but added a subtle print from Cotton + Steel in mint green. It adds just a hint of texture when you look at the quilt closely.

The quilt is pieced with Aurifil 50 weight thread in #2800, which is a very light mint color. For quilting, I used a similar light green mint by Omni. It blends in really well with the fabric colors without detracting from the modern design. I did free-motion swirls in the exploding star block, and I used my channel locks to quilt straight-lines in the negative space.

Here’s a look at the free-motion swirls on my HQ Avante:

Free-motion swirls on Zoomer

Here’s a look at the finished quilt in a field of Camas flowers:

Finished Zoomer Quilt

I also just finished another quilt using curved seams so I will blog about that one soon!

Happy quilting!

~Jen