Mini Rotary Mat Holder Project

Happy 2023!

I recently participated in a holiday project swap on Instagram where participants made 13 items using modern fabric. In exchange, we received 12 items from other swappers and the extra items were auctioned off by the organizers.

I decided to make a mini rotary mat holder to use when going to quilt classes or retreats. I really liked the idea of having a little case to hold a small rotary mat and cutter for trimming up little foundation paper pieced blocks.

This project uses a free pattern from American Patchwork & Quilting.

My Supplies

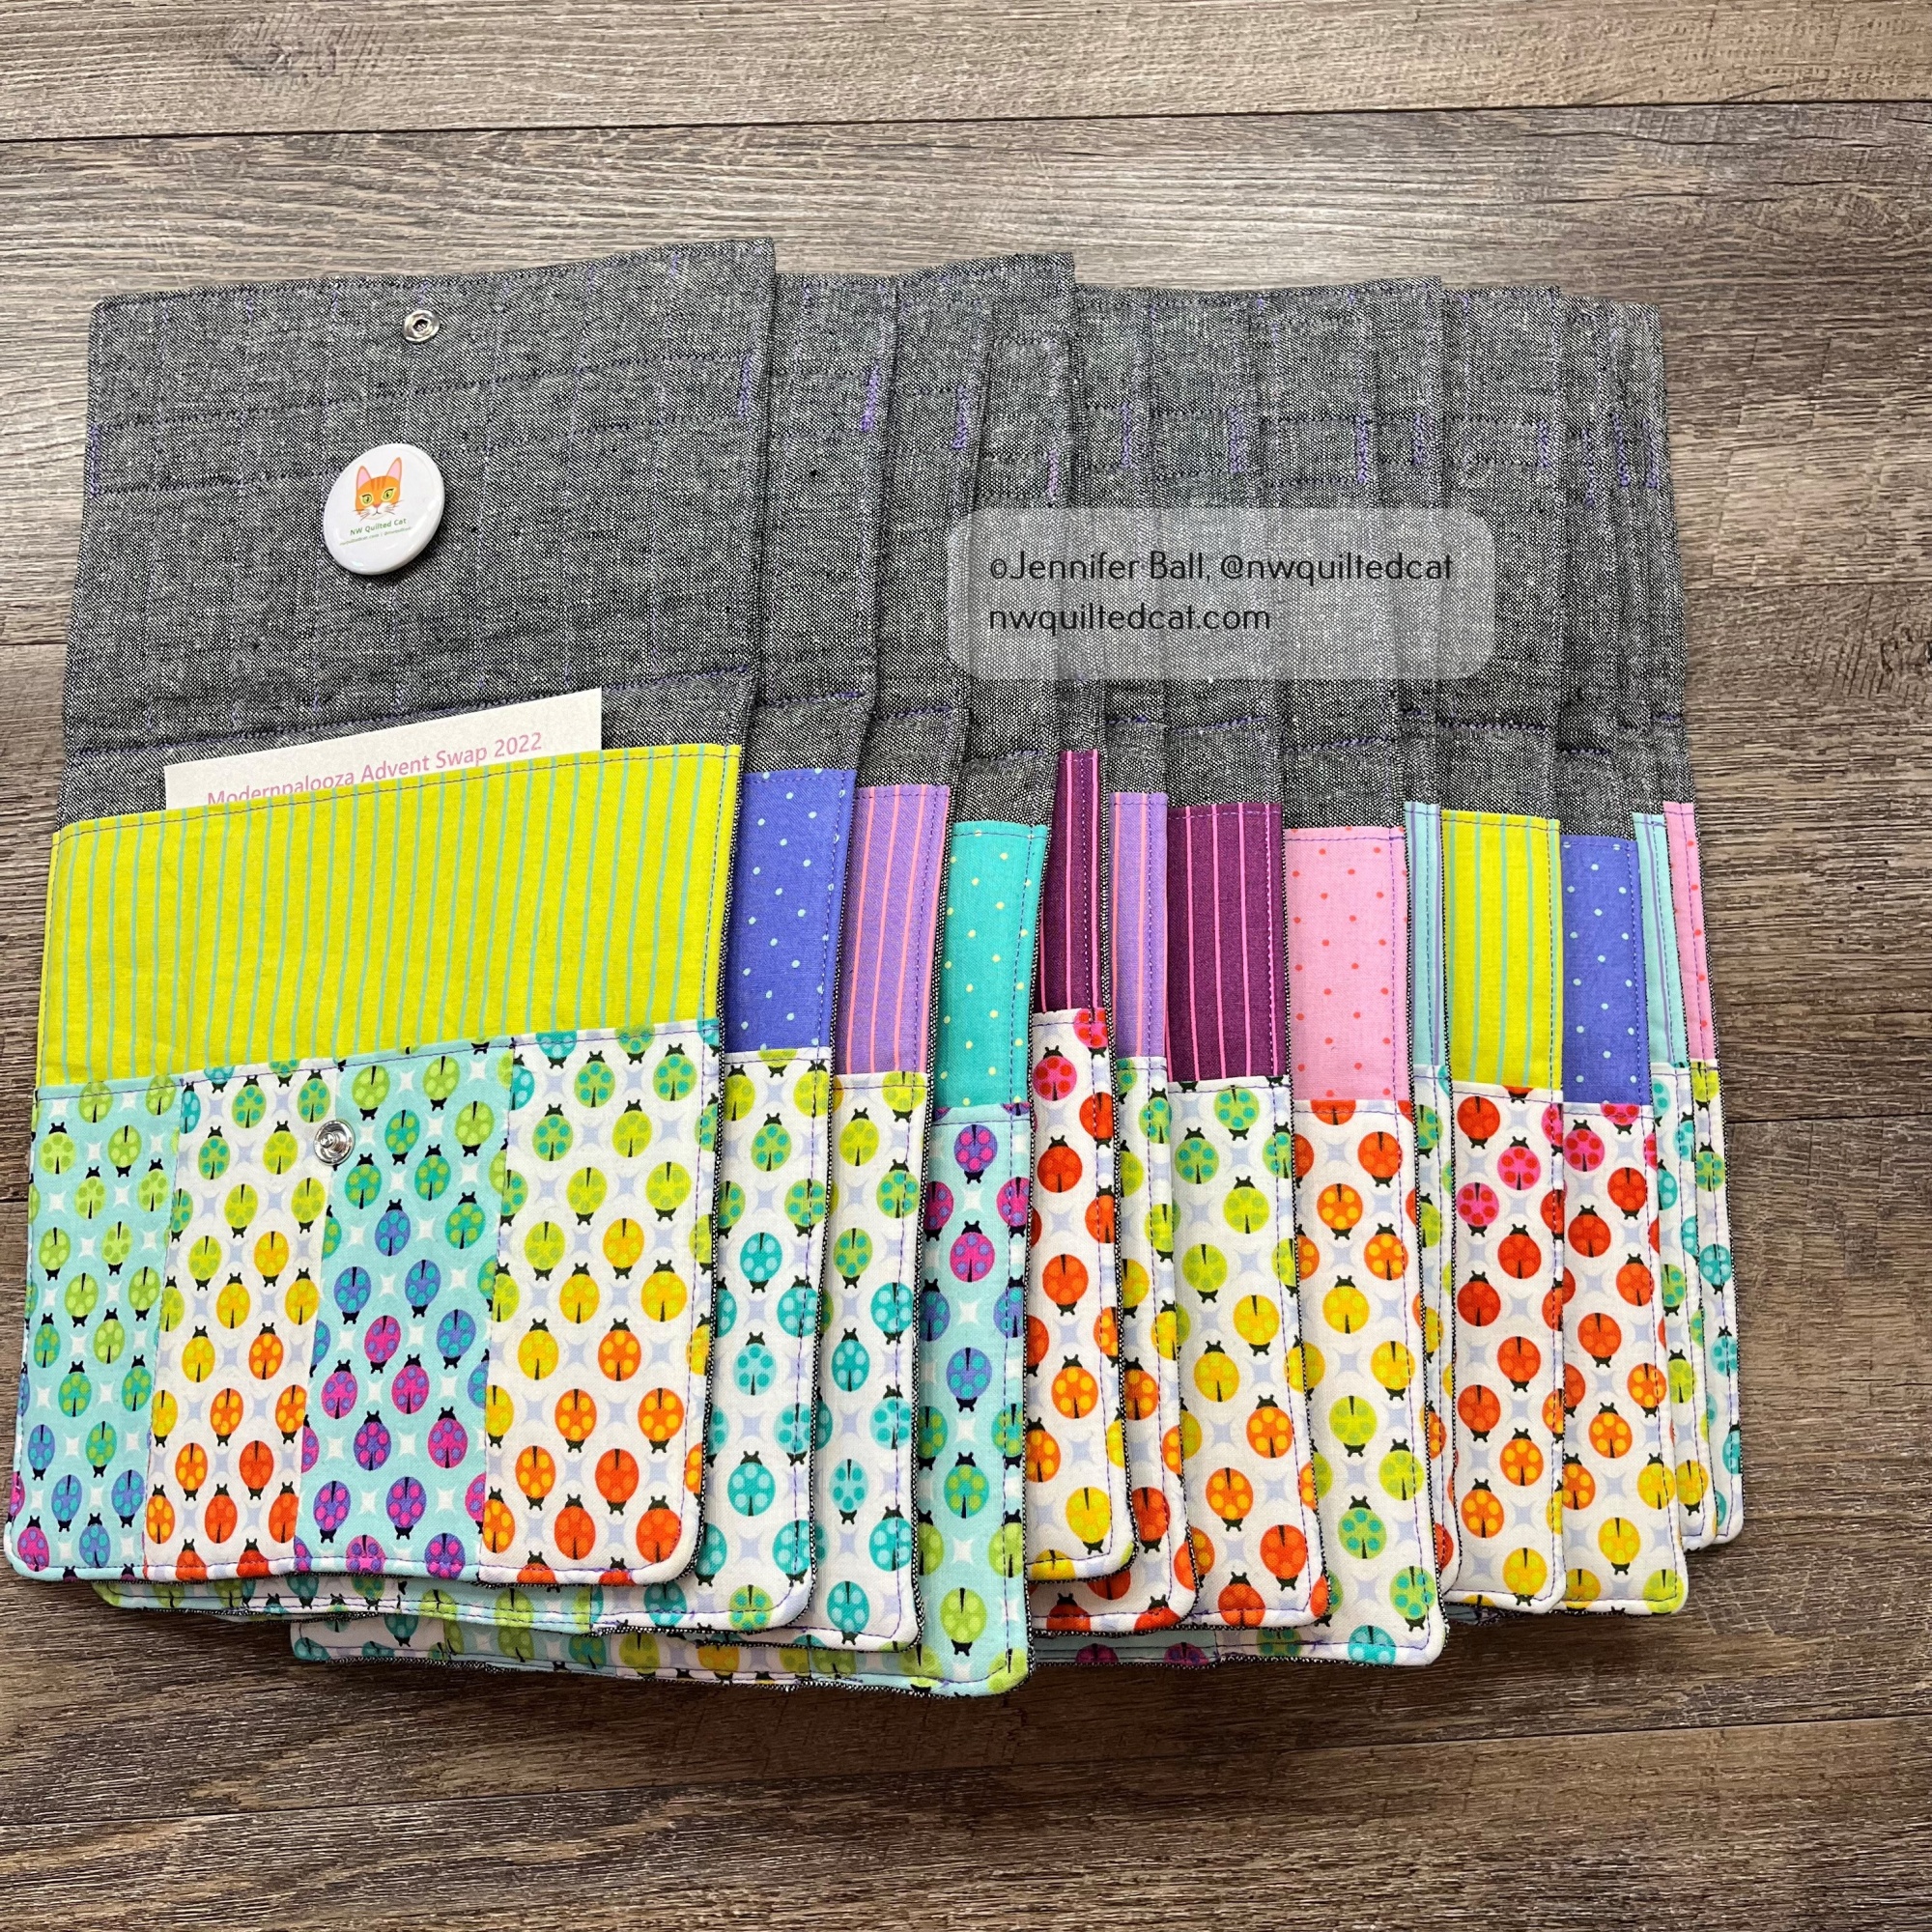
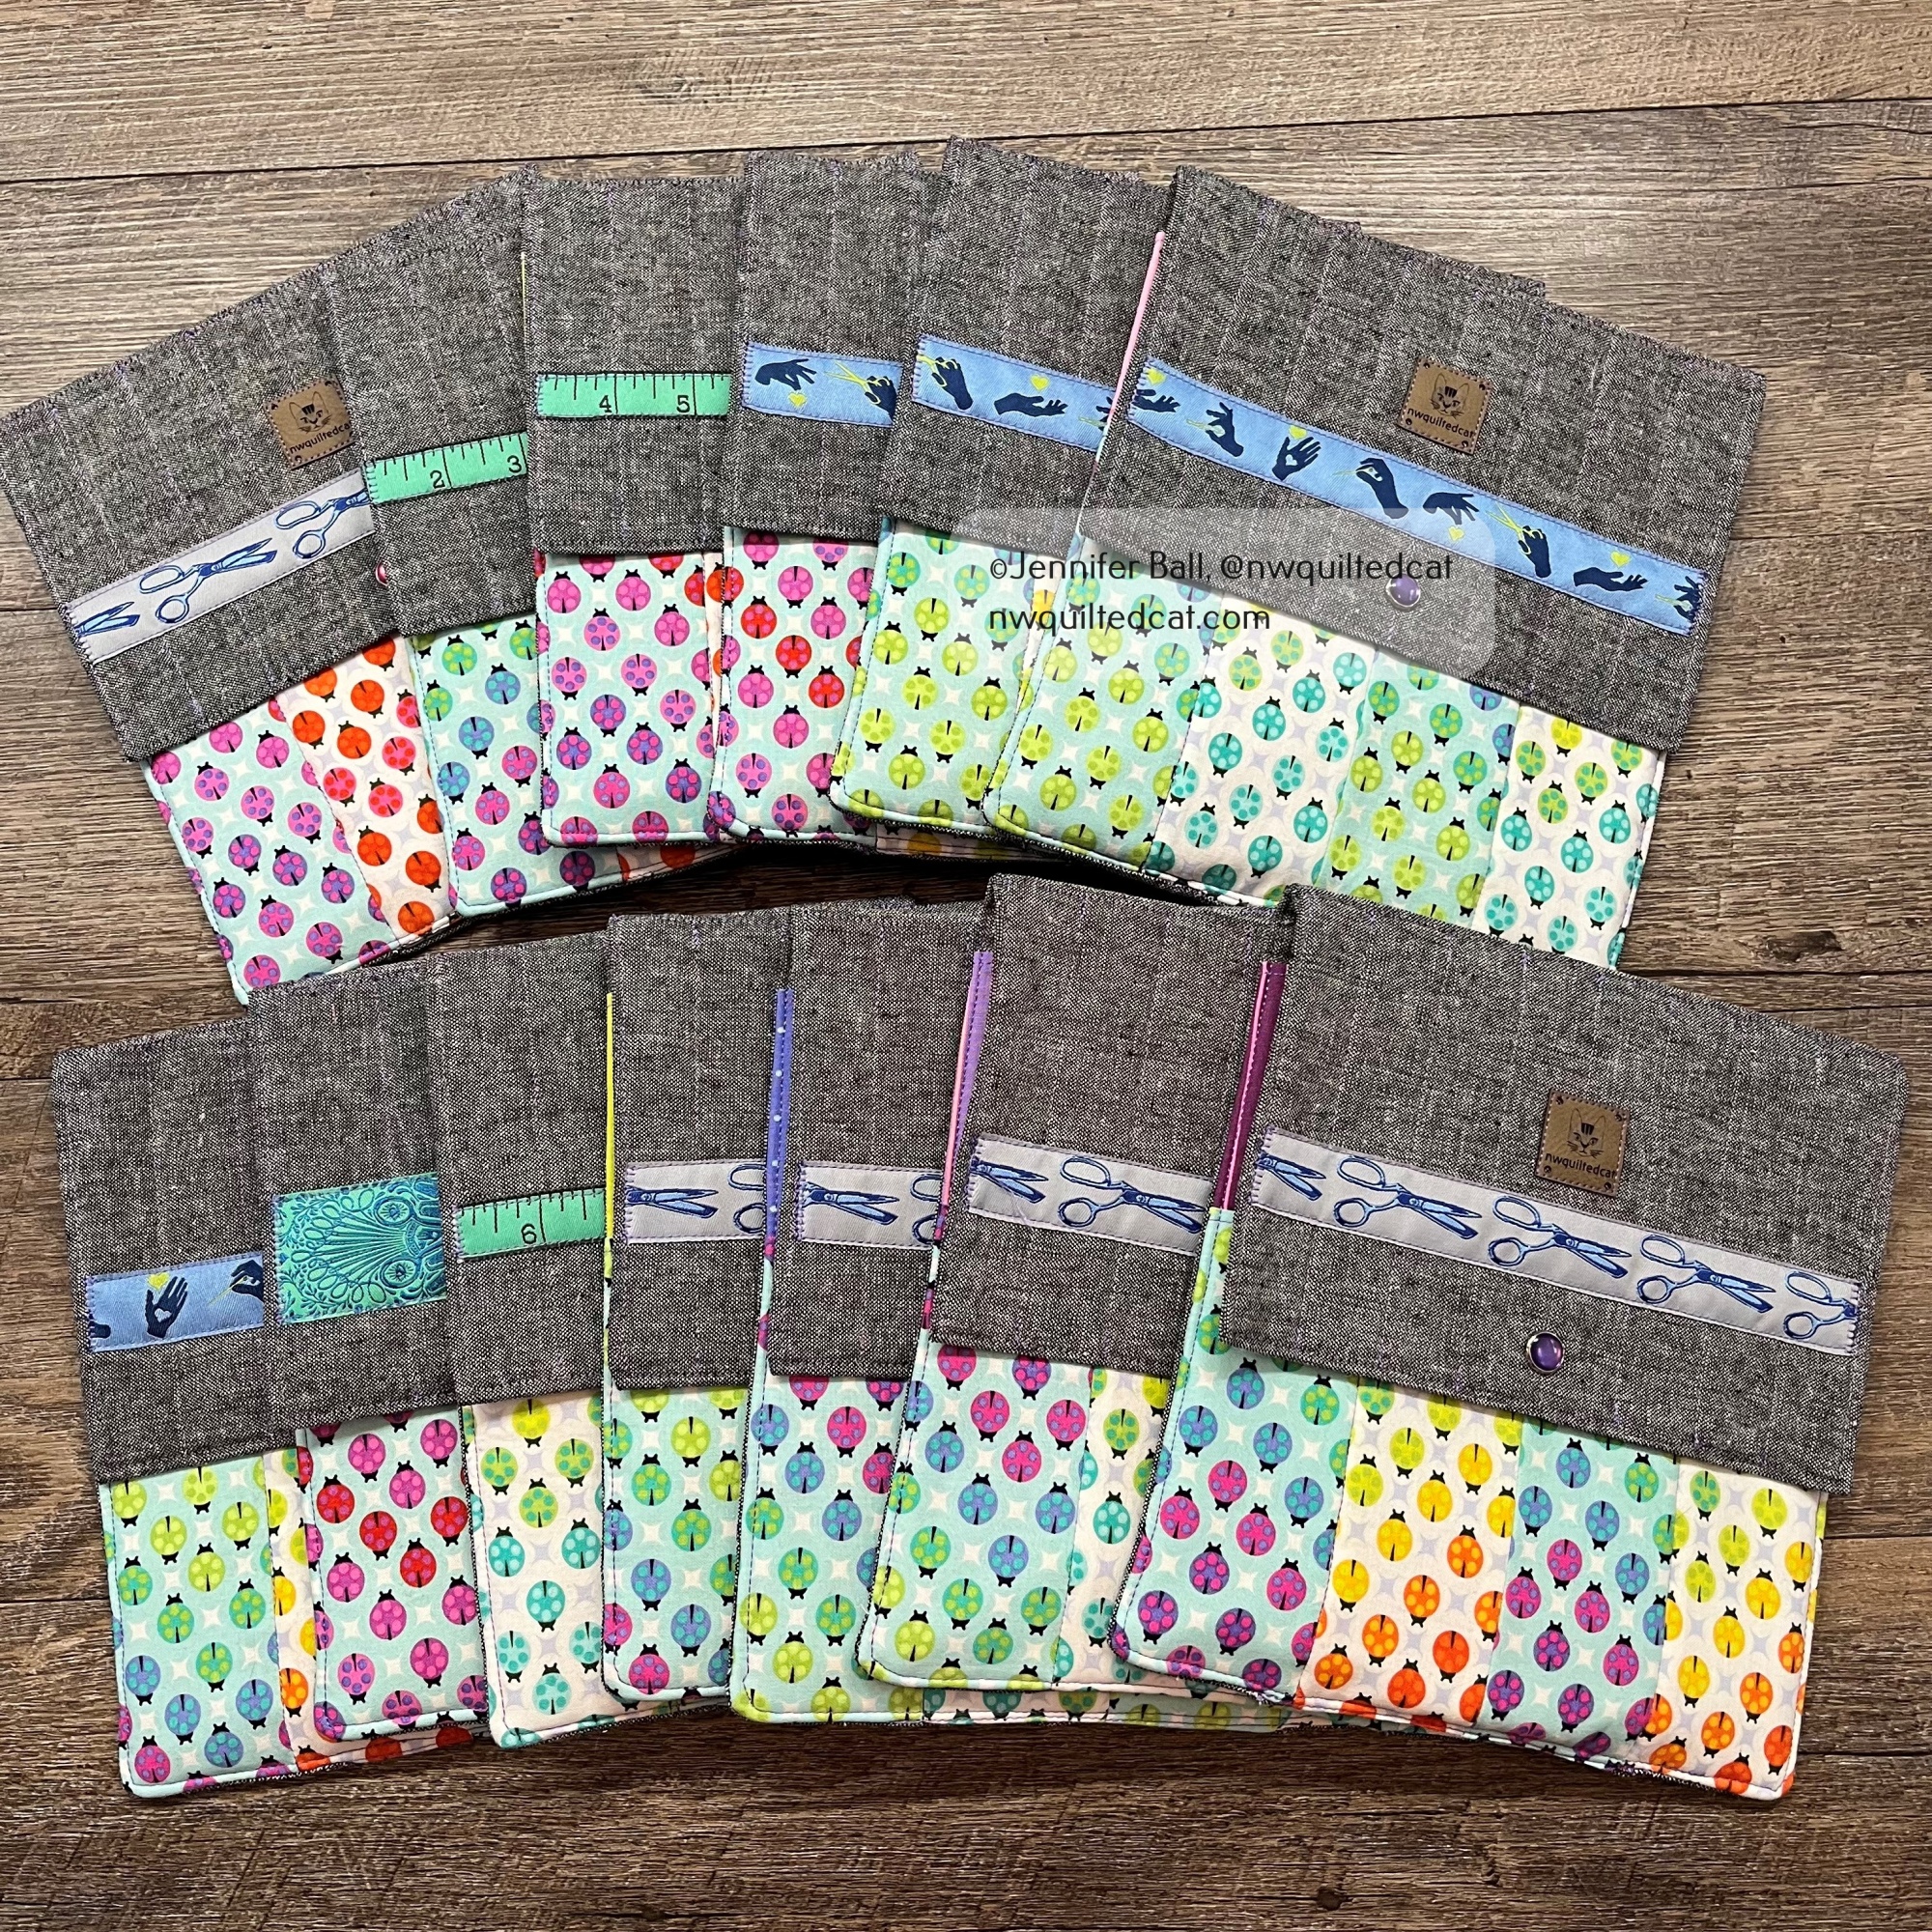
My Custom Tula Pink Mini Rotary Mat Holders!

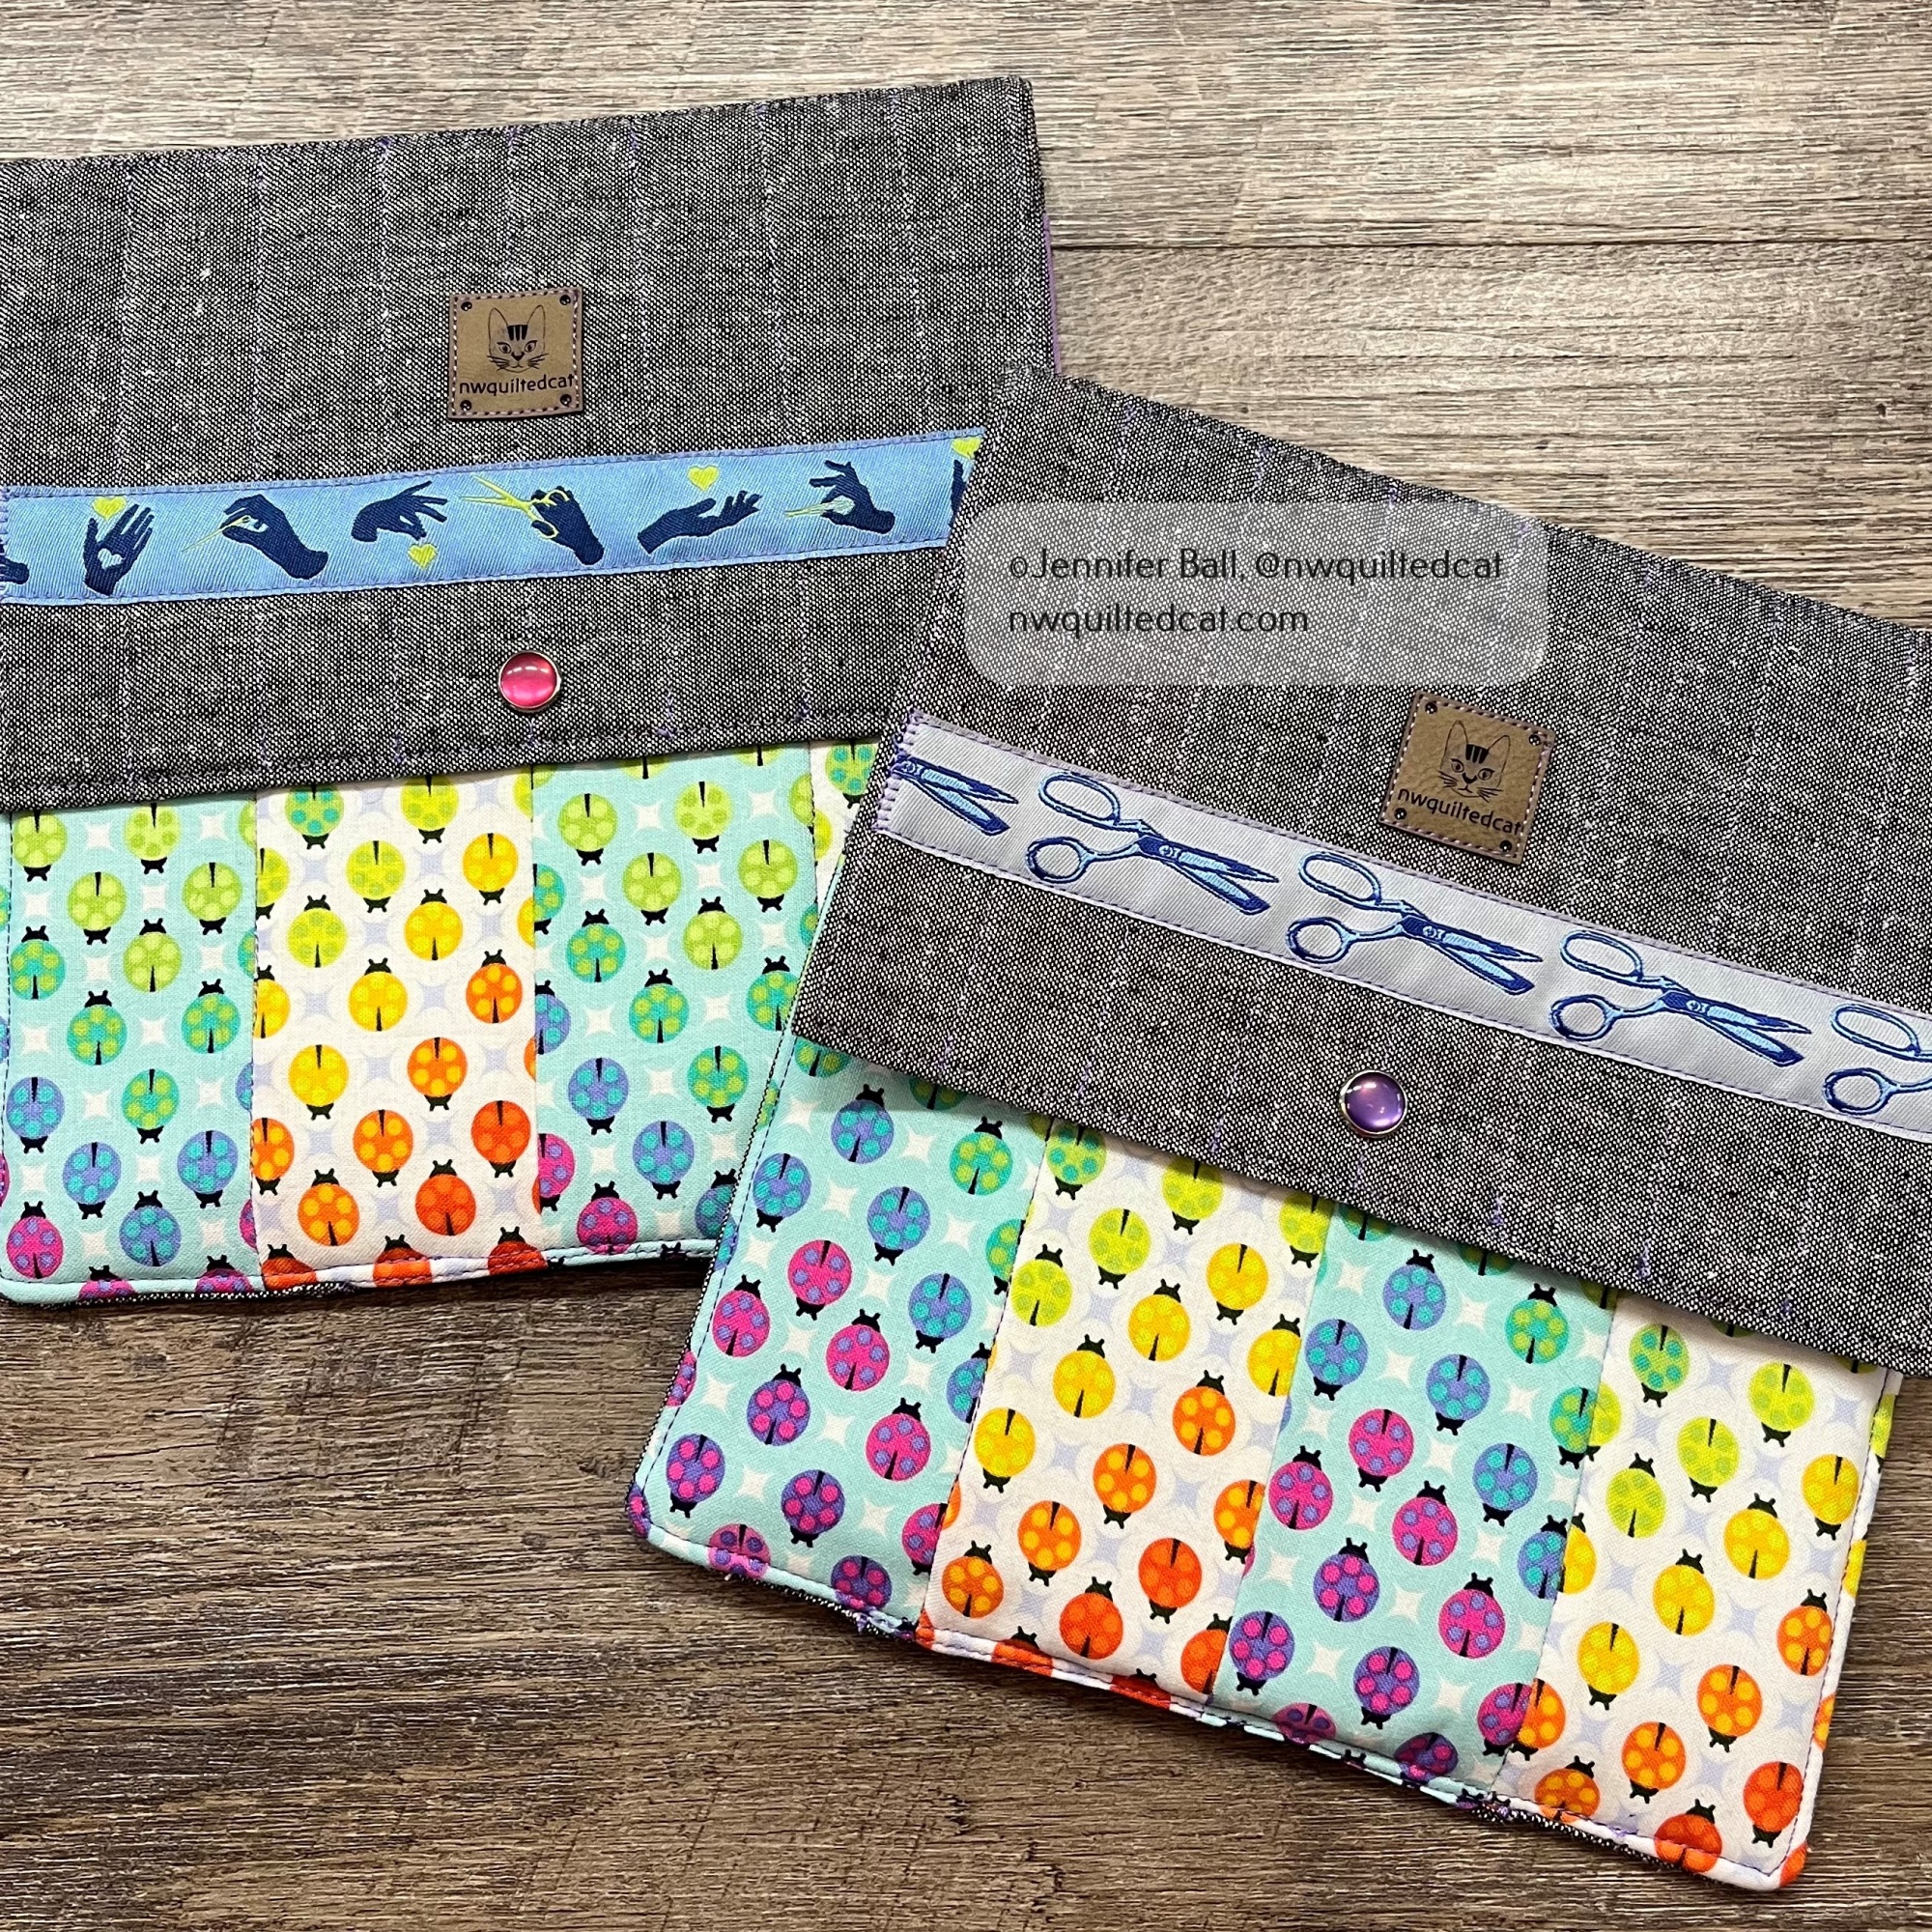
I altered the pattern slightly by piecing a Deja Vu Parisville cameo into the back of each mat. I really wanted something that could showcase this large scale print, and this little project worked great. I used the Essex Yarn Dyed linen for a little extra structure and stability, and to provide a nice contrast to the bright Tula Pink fabrics.

Here’s a look at the front and back of 2 mini rotary mat holders opened:
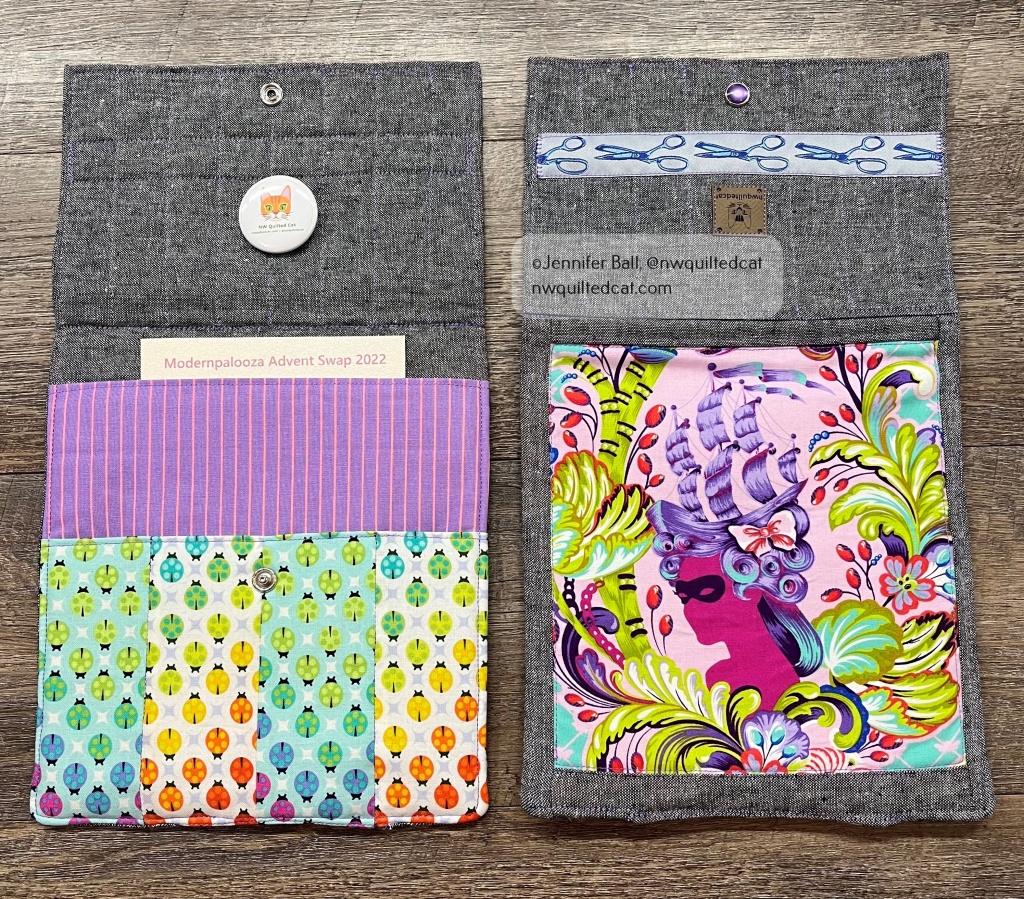
The large pocket holds a 6×8 inch rotary mat. The smaller pocket is divided into 4 sections to hold small tools such as a rotary cutter, scissors, pencils, and more. I added a ribbon to each exterior flap for a cute accent.

Each holder uses the same Painted Ladies fabric in alternating “glow” and “glimmer” colorways. The “glow” colorway is the white background and the “glimmer” colorway is the aqua background. I had a fat quarter stack of the Tiny Dots and Stripes prints so I used a different one for each rotary holder. I really love how colorway these little cases are all together!
Everyone in the swap wrapped their items so that participants could unwrap one item a day for the 12 days leading up to Christmas.

I wrapped my items in a polka-dot printed paper with a pink ribbon:
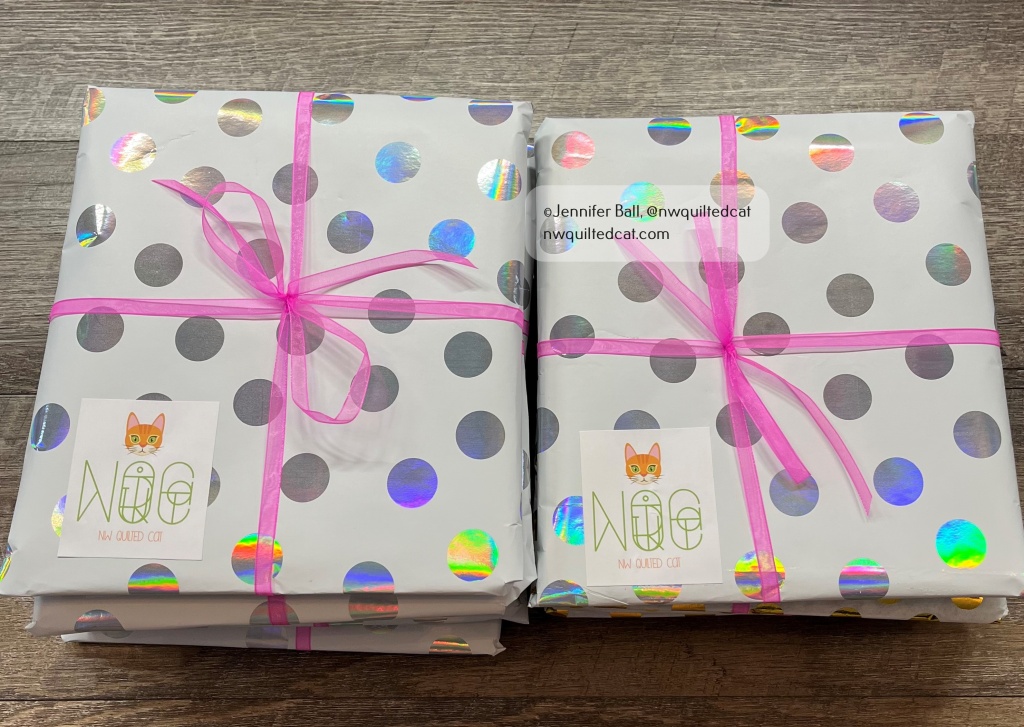
I really enjoyed participating in this swap, and I received some really fun items in return! This project comes together pretty easily if you want to make one for yourself or as a gift for a quilting buddy.

Happy quilting!

Jen

Thread Catcher Baskets!

I needed a fun and useable container to place all those little threads and small fabric clippings that seem to pile up while sewing. Fortunately, I happened to come across a swap for a quilt-as-you-go thread catcher on Instagram recently with a fun group of quilters called @modernpalooza.

For this swap, each person created a thread catcher using a free pattern by The Sewing Chick. The swap organizers matched us up with a secret partner, and sent us some hints as to their fabric likes and dislikes.

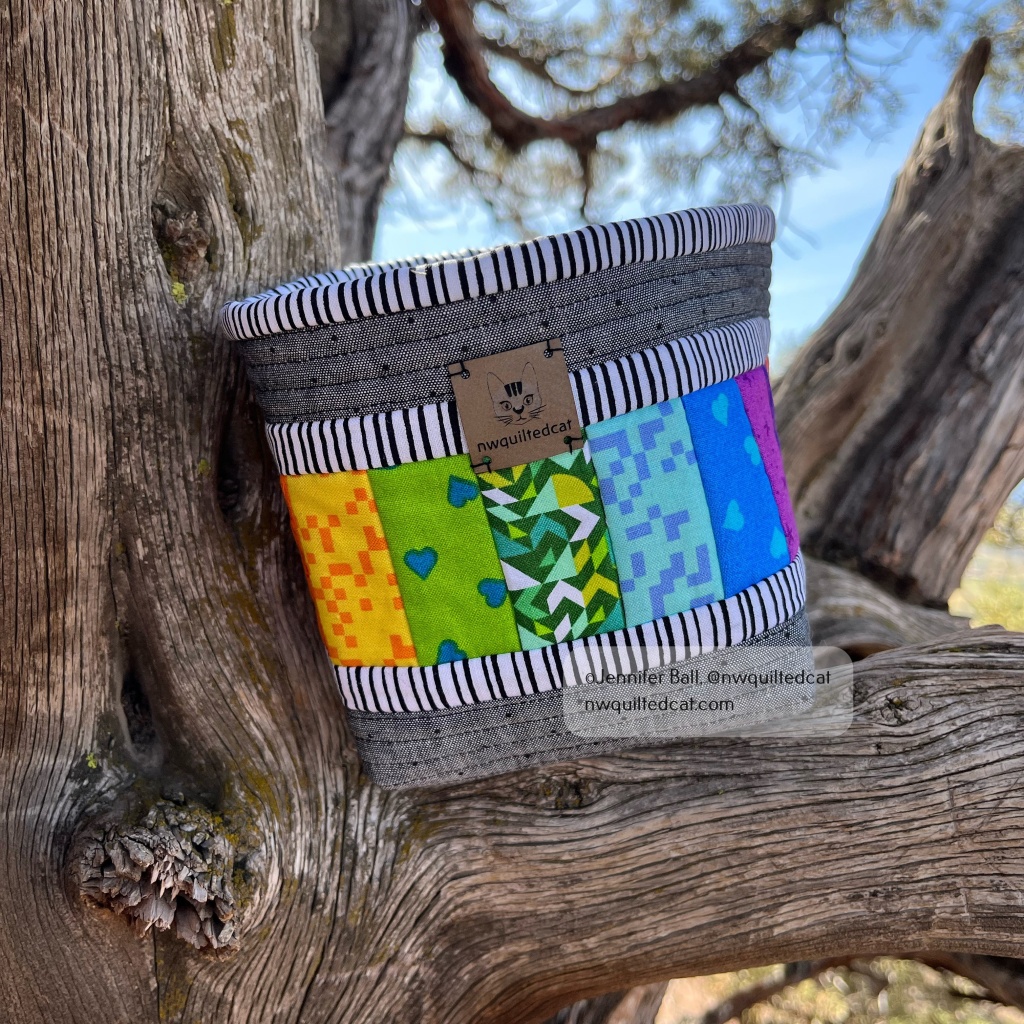
I decided to pull some Libs Elliott fabrics from my stash as my modern, bright fabrics to use for the patchwork scraps. I changed up the pattern slightly by deciding to add a black and white border to the top and lower edges of my colorful patchwork strip. I then added a smaller width of a dotted gray fabric for contrast.

I also didn’t have duck canvas on hand as called for in the pattern. Instead, I fused some Pellon Shape Flex to my lining fabric before adding the quilt-as-you-go fabric pieces.

For the binding, I used the same black and white fabric to echo the borders. I took my little completed thread catcher basket on a hike to central Oregon, and I think it looks great resting on this old juniper tree.

Thread catcher basket that I made for my partner

We were also asked to send a favorite treat or snack along with the bucket. I sent some Moonstruck chocolate made by an Oregon company along with some fabric and other little goodies. I didn’t think to take a picture of the complete package before I mailed it.

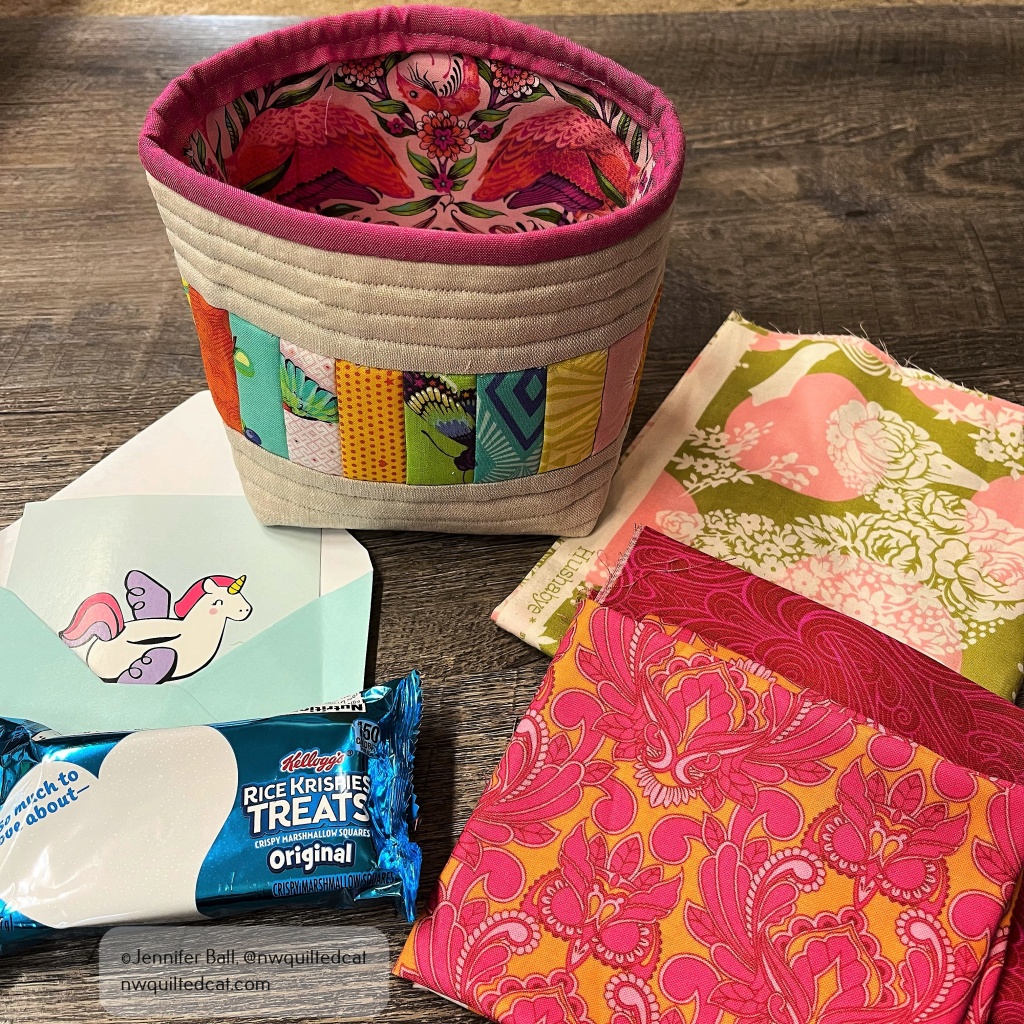
In return, I received a wonderful thread catcher basket from my partner!

Thread catcher basket that I received

My partner made me this super cute basket using Tula Pink’s Daydreamer fabric! Isn’t it bright and cheerful? She also very thoughtfully included some super rare out-of-print Tula Pink fabrics that I do not own. I’m very excited to use them in a future project just for me.

What I really loved about this little thread catcher basket swap is that the project was pretty small and not too time consuming. Sometimes, swaps can be overwhelming for people because they try to make something too complicated or underestimate how long it might take to make a larger item like a mini quilt. I do enjoy swaps because it gives me a chance to try new projects, learn new skills, and make new friends!

Happy sewing!

-Jen

Modern Quilt Guild Mini Quilt Swap 2022

Hi everyone,

Earlier this year, I participated in the annual MQG mini quilt swap. This swap event is an open swap, meaning that you and your partner are making mini quilts for each other. In contrast, most swaps are not open but secret, meaning that the person you are making a mini quilt for is usually not the person who is making a mini quilt for you. It’s a surprise when you get your mini in the mail.

For the MQG swap, many participants plan to attend and swap their mini quilts in person at the annual modern quilt show called QuiltCon. For those who cannot attend, you have the option of swapping with your partner via mail. That’s the option that my partner and I selected this year.

I received my partner’s name and quilt preferences via email from our “Swap Fairy,” who is the person assigned to a group of swappers to ensure that everything is running smoothly. My partner listed her favorite colors, fabric designers, and preferences so I could take those into consideration when making her a fabulous mini quilt.

I decided to do a modern traditional feel for this swap. I designed a mini quilt using the traditional churn dash block, but I made it feel modern by setting it on-point, elongating it slightly, and then added little color accents in each corner. My partner’s favorite colors are jade, green, turquoise, and yellow.

Here’s a look at the finished mini quilt:

Modern Churn Dash mini quilt for the Modern Quilt Guild 2022 swap

I took the mini quilt with me on a short hike to Latourell Falls in the Columbia River Gorge before mailing it to my partner. My teen did the honors of holding it up while I snapped the pic. He’s such a great quilt holder!

I used a variegated Aurifil thread to quilt the spiral on the mini quilt using my domestic sewing machine. The background fabric is a light-colored Spectrastatic print by Giucy Giuce, the churn dash fabrics are Kona cotton solids, and the yellow and green accents are from my scrap bin.

I usually like to make a small extra gift to go along with mini quilt swaps. For my partner, I made a Woppet bucket, pattern by @cleverwoppet.

Woppet Bucket

Isn’t it a cute bucket? I made the little charm pull and added it to the pink handle. You can pull the fabric handles up to carry it like a little bag.

I sent my little mini quilt and bucket off to my partner, and received a package from her in return. She made me this fun rectangular shaped mini quilt with bright colors, a low-volume background, and black and white pinwheel blocks!

Mini quilt that I received in the 2022 swap!

I really enjoyed the mqgswap this year! If you want to see more pics from this swap from other quilters, you can browse Instagram using the tags, #mqgswap2022 or #makeaminimakeafriend .

Happy quilting!

~Jen

A Ghastlie Reveal!

Hi everyone,

Two years ago, I attended a quilt retreat with my sister and some friends. We decided to do a Ghastlie themed round robin, where we would each create our own center block. We determine a round robin order, and then send our centers to the next person. We had 4 total members and had no restrictions other than using Ghastlies fabrics with blenders.

The Ghastlies is a line of fabric by Alexander Henry, featuring a splendidly creepy family including a cat! It is unusual, whimsical, and funny fabric, and definitely outside of traditional quilting.

For my quilt, I really wanted my theme to be Sebastian, the Ghaslie cat. I used a foundation paper pieced pattern by Linda Hibbert of Silver Linings Originals called Miss Teree. I don’t see the pattern on her website, but you may be able to email her if you are interested in the pattern.

Here’s what my center looked like in December 2018:

Sebastian, my center block

Coincidentally, the other 3 members of our round robin all selected the same Ghastlie fabric for their center block, but added personalized details:

All the Ghastlie center blocks for the round robin

Aren’t they fun? From 2018 to 2020, we added rounds and mailed them to the next person. The last round finished up this September, and we each received our completed tops in October.

Here are the completed Ghastlie quilt flimsies!

Kimberly’s Ghastlie quilt flimsy
Shannon’s Ghastlie quilt flimsy
Jody’s Ghastlie quilt flimsy
Jen’s Ghastlie quilt flimsy

Our plan is to quilt them and enter them into a quilt show in fall 2021,and we’re hoping for the COVID crisis to be lessened by then so that we can have in person quilt shows again.

We had so much fun with this round robin, and we’re planning another one. The next round robin will be different. Instead of complete quilt flimsies, we are thinking about a Ghastlie themed block swap.

Happy quilting!

Jen

Introducing Alfie the Alpaca Foundation Paper Pieced Pattern!

Hi everyone,

I’m so excited to introduce you to Alfie the alpaca! I designed this cute alpaca block for a mini quilt exchange with my sister.

Alfie is foundation paper pieced, suitable for quilters with some paper piecing experience. The block size is about 16.5 inches by 8 inches before adding borders. The pattern does include instructions for adding the same size borders as shown in my finished quilt.

You can purchase Alfie for just $4 on my Etsy store, QuiltedCatPatterns!

Let’s take a closer look at Alfie the alpaca! I based this pattern on a photo that I took of a cheeky little alpaca in Sisters, Oregon during summer 2019. I used Cherrywood fabrics for the alpaca body, and Pie Making Day in Key Lime from RJR fabrics for the background. I pieced each section of the pattern, and then pinned the sections to a design board before stitching them together. This process helps you to catch any fabric placement mistakes before the whole block is stitched together.

The picture on the left shows all of the individual foundation sections pieced. The picture on the right shows the sections as I started to sew them together into units. I love watching foundation paper piecing patterns come together!


Alfie the alpaca block without borders

After I sewed all of the sections together, I decided to add some off-set borders to the Alfie block. I used a very narrow inner border from a peach colored Grunge fabric on the left side and along the bottom side. This peach fabric matches the peach tone of the blankets on the llamas in the outer green border.

I knew that I would add the dark green outer border before ever designing this block. My sister picked out this fabric as our challenge fabric for our mini quilt swap. We each had a fat quarter to use in our mini quilt somewhere. The llama fabric is called Llama Life Faraway Places by Cloud 9 Fabrics.

I also auditioned many fabrics for the bottom border, and finally settled on a black and white square print that I had in my stash.

I did simple quilting with an all-over meander on Alfie’s face and body using Glide thread in Linen and Bone, free-motion swirls using Glide in Celery in the light green background print, and some diamond shapes in the dark green border. I also free-motion quilted “Alfie” in Glide Apricot Blush on the bottom border.

Alfie the alpaca block without hair

I thought Alfie might be missing something, some integral part of his cheeky self. I figured that he needed some hair!! I went to a local alpaca farm and purchased some alpaca yarn in a shade to match Alfie’s head.

I used a couching foot on my Bernina to sew the yarn to Alfie’s head in little swirls. I love the texture and dimension that the yarn added to this mini quilt. I think it brings Alfie to life!

Adding alpaca yarn to make hair

Here’s a look at my Alfie completed mini quilt from a recent day hike with his fluffy head and shorn body:

Alfie the alpaca mini quilt with avalanche lilies

I hope you enjoy my new pattern, Alfie Alpaca available now for purchase. I’d love to see a photo if you make something using this pattern!

Happy quilting,

Jen

Quilters for Koalas Mini Quilt Swap

Hi everyone,

In January, I signed up for a mini quilt swap to benefit various wildlife rescue charities in Australia to help them out due to the massive wildfires. Each person who signed up for the swap agreed to donate $10 towards the charities in addition to making a mini quilt featuring an Australian animal.

Sharon (@shoppershaz_swaphost on Instagram) hosted the swap. We had over 250 swappers so she organized us into groups and assigned us each a secret partner.

I made a little koala on a tree for my partner using the Koalas pattern by Elizabeth Hartman. This is a traditionally pieced pattern rather than a foundation paper pieced pattern, and it was really fun to make!

My partner, Debbie, indicated that she preferred blues, teals, and yellows for her colors, and I knew that she liked batiks based on previous posts to her Instagram account.

I do combine batiks with quilting cottons, although some quilters cringe at the idea! I used a really pretty teal batik for the koala body with light blue Grunge for the ears. The background is also a batik in a warm neutral that is lightly patterned. I found scraps in my stash for the tree trunk, leaves, belly, and facial features. The binding is a dark teal batik.

The tree trunk fabric is directional so I had to make sure each piece faced in the correct direction. No drunken trees here with vertical and horizontal stripe mismatches!

I quilted this mini quilt on my trusty Bernina  Activa 145 S, my everyday piecing machine. For the domestic machine quilting, I used the Bernina free-motion foot #24 with Aurifil 50 weight thread in a light cream color. I did some free-motion swirls in the background, some leaf shapes in the leaves, and some ruler work on the koala and tree. If you look closely at the koala body, I added three free-motion heart shapes.

Here’s a look at my completed koala mini that I made for my partner:

Koala that I made for my partner

For my mini quilt, I asked for a koala, but I left the individual pattern up to the maker. I also mentioned that bright modern fabrics would work or more natural colors.

My partner, Sandy, made me a very cute little koala using a pattern by Joe, June, and Mae. She used natural colors and Essex linen for a rich texture.

Here’s a look at the mini quilt that I received:

Koala mini quilt that I received in the swap

This little koala mini quilt is now hanging in my sewing room, along with other minis that I treasure from swaps over the past few years on Instagram.

I’m happy that I was able to contribute to the wildlife rescue agencies in Australia during this swap! If you want to see more mini quilts from this swap, check out the #quiltersforkoalas hashtag on Instagram.

Enjoy,

~Jen

First Quilt Finish of 2017!

Wow, it’s been a long time since my last blog post! This year, I hope to blog more often than I did last year. I tend to post everyday to Instagram and my poor blog suffers.

Last year, I participated in a monthly bee on Instagram. I was queen bee in August and received 11 Fizzy blocks from the bee members. Several years ago, I painted a cherry blossom mural in my bedroom so I chose colors to match the mural so that I could finally make a bed quilt. I made many more blocks to go with the bee blocks during the fall and winter. I added some borders and finished up the binding today.

I used Aurifil in cream to piece my blocks. For the quilting, I used So Fine 50# weight thread in Silver Screen and silver SuperBOBs for the bobbin.

I’m calling the quilt “Cherry Blossoms.” Here are some pictures of the finished quilt. My husband and I held up the quilt while our son took the outside photos. The back of the quilt features signature blocks from the ladies in the bee.

dsc_0309 dsc_0310

Cherry Blossom quilt on a king-size bed

Cherry Blossom quilt on a king-size bed

Next, I need to make some matching pillow cases with some of the leftover fabric and blocks!

This quilt will be featured in Make Modern Magazine, Issue 26 in January 2019 as part of an article on Bee Hive Quilts.

Happy quilting!

~Jennifer

Dog Days of Summer Mini Quilt Swap Signups!

Hi everyone,

I’ve decided to host my first Instagram mini quilt swap, using a dog theme! I recently participated in a cat themed swap so I think we need equal time devoted to our canine friends.

Dog Days of Summer SignUps Now!!

Dog Days of Summer SignUps Now!!

The signups for the “Dog Days of Summer” mini quilt swap are now live. This is an Instagram only swap so you need to have an account. My Instagram name is @nwquiltedcat so please visit me!

The URL to sign up is here.

I’ll leave signups open until April 15, 2015.

The rules:

  • Swap is open to everyone of all skill levels.
  • You are committing to making and sending a mini quilt to your partner by August 10, 2015.
  • This is a blind swap. Don’t tag your partner!
  • Mini quilts are typically no smaller than 12×12 and no larger than 24×24.
  • Use the tag #dogmini2015 for all IG posts.
  • Post an inspiration mosaic to IG for your partner to get ideas!
  • Post a minimum of 3 progress photos throughout the swap.
  • Be sure to post a pic of the mini you receive and thank your partner!
  • Additional details will be in the partner assignment emails.
  • Have fun! woof! woof!

If you have any questions, please email me!

Enjoy!

~Jennifer

Charley Harper Mini Quilt Swap

Hi quilty friends!

I’ve got 4 Instagram mini quilt swaps due in late March and April. I’ve finished 3 out of 4 so I’m going to start sharing what I created.

For the Charley Harper inspired mini quilt swap, my partner indicated that she liked the penguins from the Nurture fabric line so I decided to create a penguin mini.

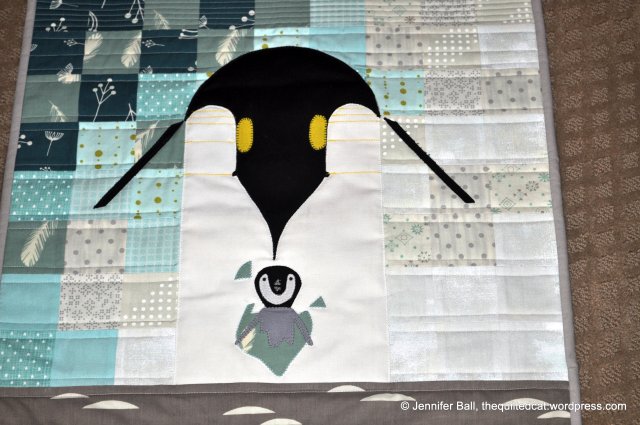
First, I started by creating a larger sized penguin and chick by making my own applique pattern. I used Kona snow, black, and yellow for the adult penguin body. For the chick, I used Kona black, snow, gray and a piece of medium blue Charley Harper fabric.

Next, I created the background piece by stitching together 2-1/2 inch squares, using some Charley Harper fabrics and adding in other fabrics from my stash. I decided to use aquas, blues, and neutrals with the aquas/blues starting in the upper left-hand corner and fading slowly into the all neutrals. The bottom gray portion resembles the ground and is also Charley Harper fabric.

Then I carefully added my penguin appliques to the background and used a blanket-stitch in matching Aurifil thread colors to secure all the individual pieces to the back. I used yellow Aurifil 40 wt thread to add some detail stitching o the adult penguin (mimics the Nurture fabric).

Here’s a look at the completed mini:

Charley Harper Penguin Mini Quilt

Charley Harper Penguin Mini Quilt

Closer look at the penguin:

Penguin close-up

Penguin close-up

I added a few extras to the swap package, including a open wide pouch that I made from the Charley Harper Nurture fabric. I couldn’t resist adding a little stuffed penguin plus some chocolates and wildflower seeds to represent my home state of Oregon:
DSC_0059-001

I hope my partner loves this mini as much as I do! I had so much fun making this quilt, and it was very hard to take it to the post office yesterday for mailing.

I received a wonderful red cardinal Charley Harper mini in return. I’ll show pictures on my next post!

Until then, happy quilting!
~Jennifer

Schnitzel & Boo Round 3 Mini Quilt Swap!

Hi everyone and Happy Monday to you!

I recently participated in my first Instagram (IG) mini quilt swap ! This swap was organized by Kristi (IG is schnitzelandboo) and you had to be an IG user to participate. My IG name is nwquiltedcat if you want to follow me.

My partner has received the mini quilt and extras that I made for her so I’m going to share them here. I haven’t yet received my mini in exchange but the mailing deadline isn’t until this Friday, the 23rd so I need to have patience!!

I used a pattern called “Candy Dish” by This & That Patterns and used April Showers fabric by Bonnie and Camille with a little white dot solid for the background by Michael Miller. I didn’t take a final measurement, but this mini quilt finishes at about 18 x 18 inches. The binding is also from the April Showers line. I did straight-line quilting using white Aurifil 50 weight thread.

Here’s the mini:

Schnitzel and Boo, Round 3 Mini Quilt

Schnitzel and Boo, Round 3 Mini Quilt

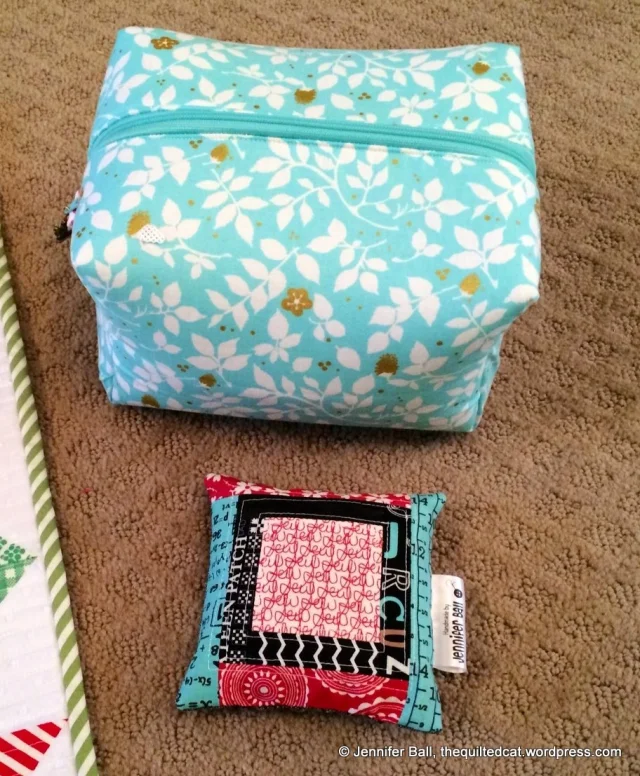
For extras, I used the free pattern “no guts” boxy pouch by So Chick. For this pouch, I used fabric from Violet Craft’s Brambleberry Ridge line and paired it with some pink polka-dot fabric for a contrasting zipper pull.

I also made a little pin cushion using Sweetwater fabric scraps and no pattern. I just winged it by starting with a 2.5 x 2.5 inch piece in the middle, and then adding little strips of fabric to the sides and tops.

Here are the extras:

Swap Extras: No Guts Boxie Pouch and a Pin Cushion!

Swap Extras: No Guts Boxie Pouch and a Pin Cushion!

I really had fun with my first IG swap! I’ve signed up for 3 more with 2 being due at the end of March and one in mid-April. I like using these mini quilts to help hone my skills and work from my stash!

Enjoy!
~Jennifer