Modern Quilt Guild Mini Quilt Swap 2022

Hi everyone,

Earlier this year, I participated in the annual MQG mini quilt swap. This swap event is an open swap, meaning that you and your partner are making mini quilts for each other. In contrast, most swaps are not open but secret, meaning that the person you are making a mini quilt for is usually not the person who is making a mini quilt for you. It’s a surprise when you get your mini in the mail.

For the MQG swap, many participants plan to attend and swap their mini quilts in person at the annual modern quilt show called QuiltCon. For those who cannot attend, you have the option of swapping with your partner via mail. That’s the option that my partner and I selected this year.

I received my partner’s name and quilt preferences via email from our “Swap Fairy,” who is the person assigned to a group of swappers to ensure that everything is running smoothly. My partner listed her favorite colors, fabric designers, and preferences so I could take those into consideration when making her a fabulous mini quilt.

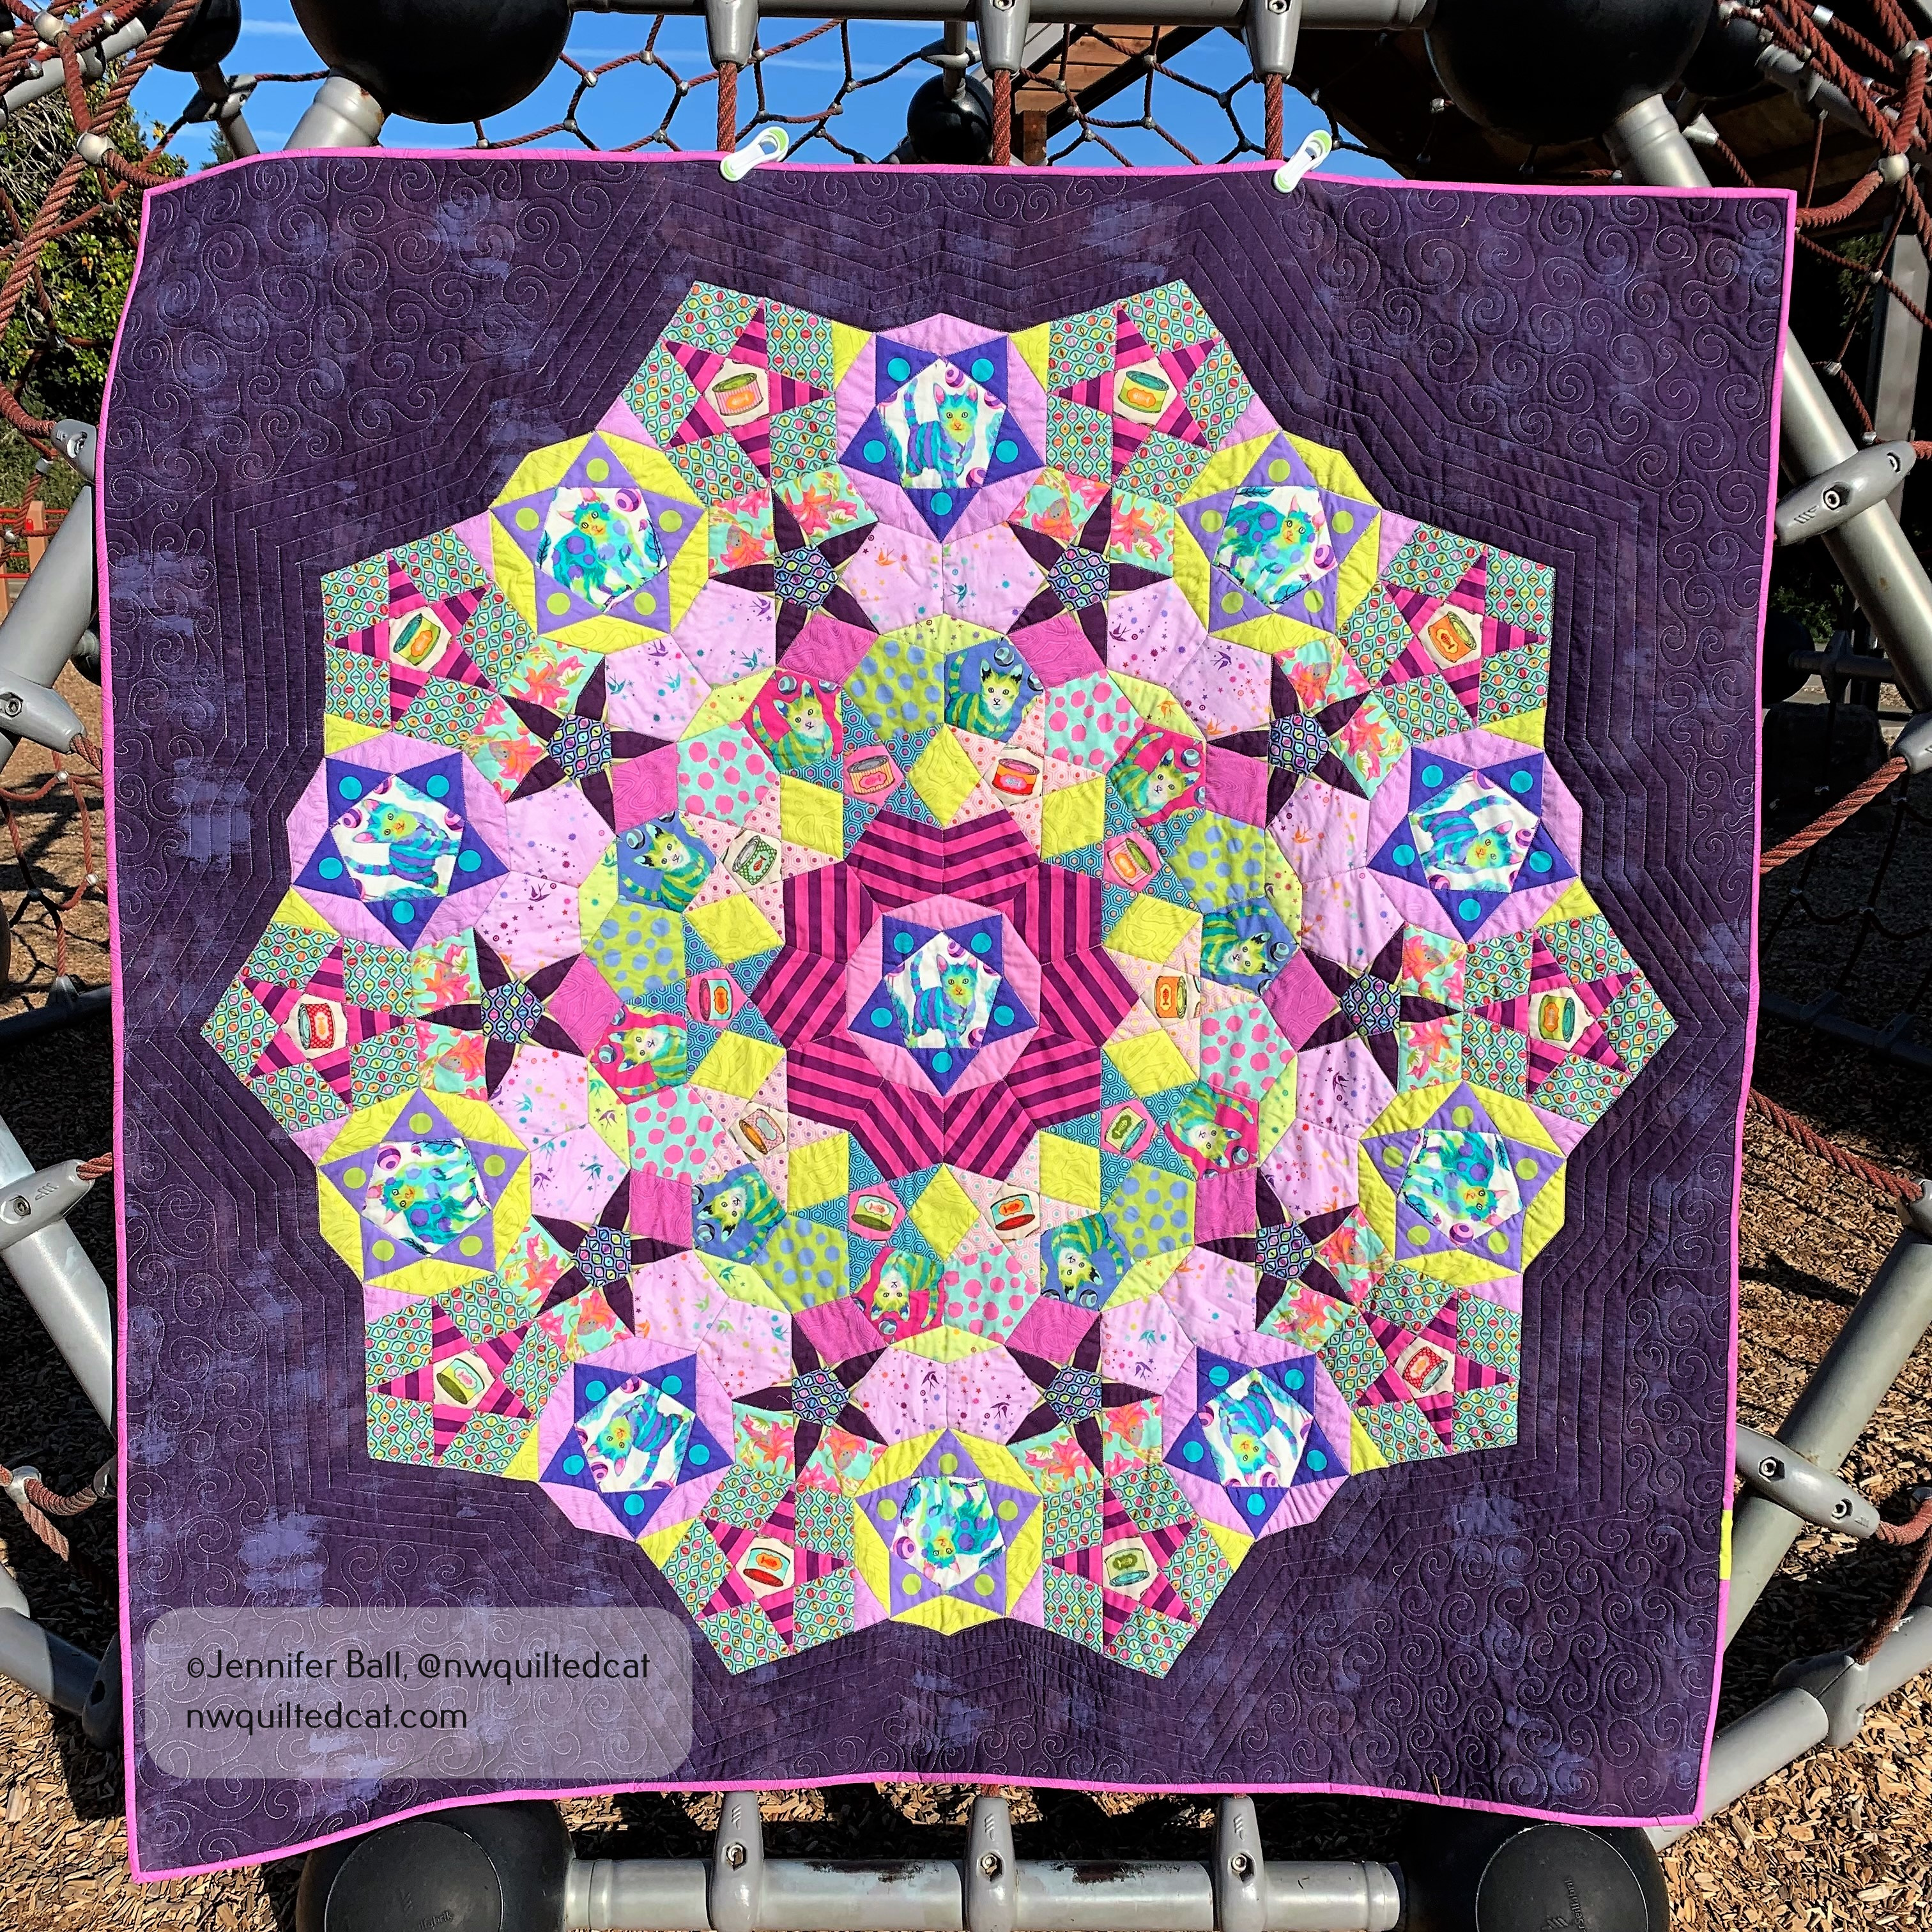
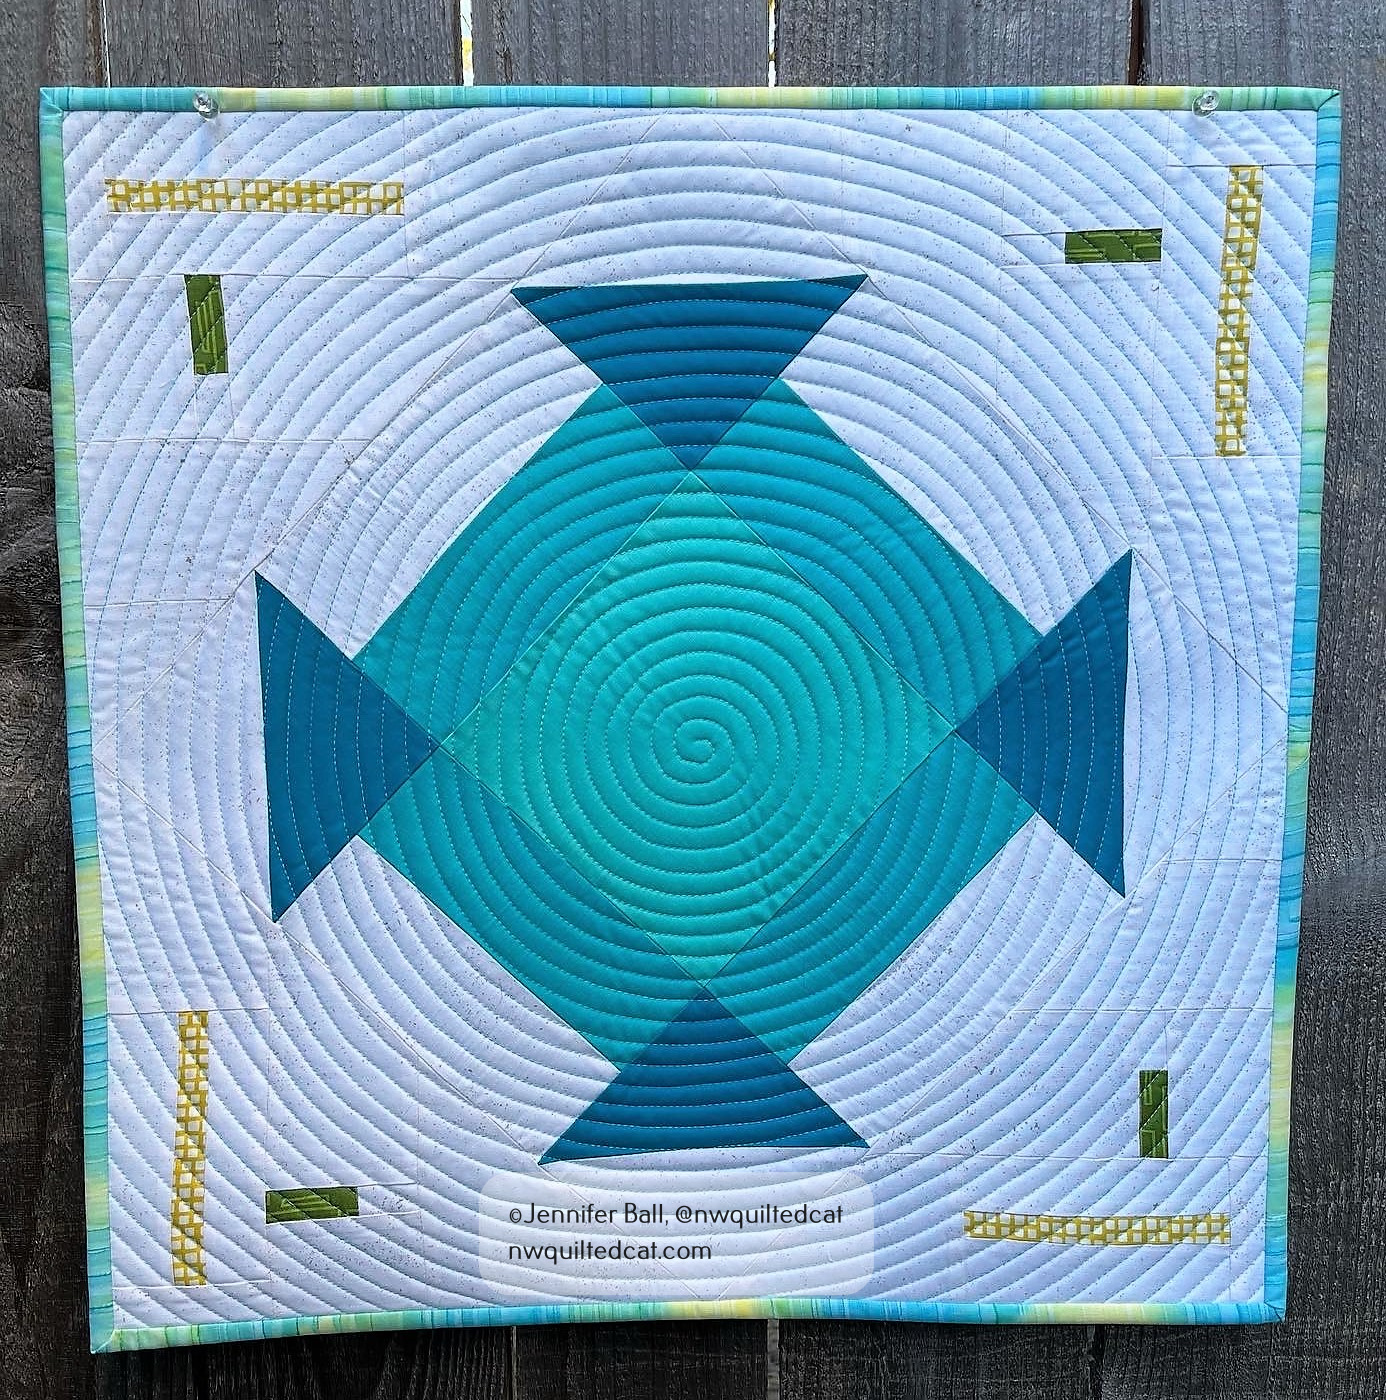
I decided to do a modern traditional feel for this swap. I designed a mini quilt using the traditional churn dash block, but I made it feel modern by setting it on-point, elongating it slightly, and then added little color accents in each corner. My partner’s favorite colors are jade, green, turquoise, and yellow.

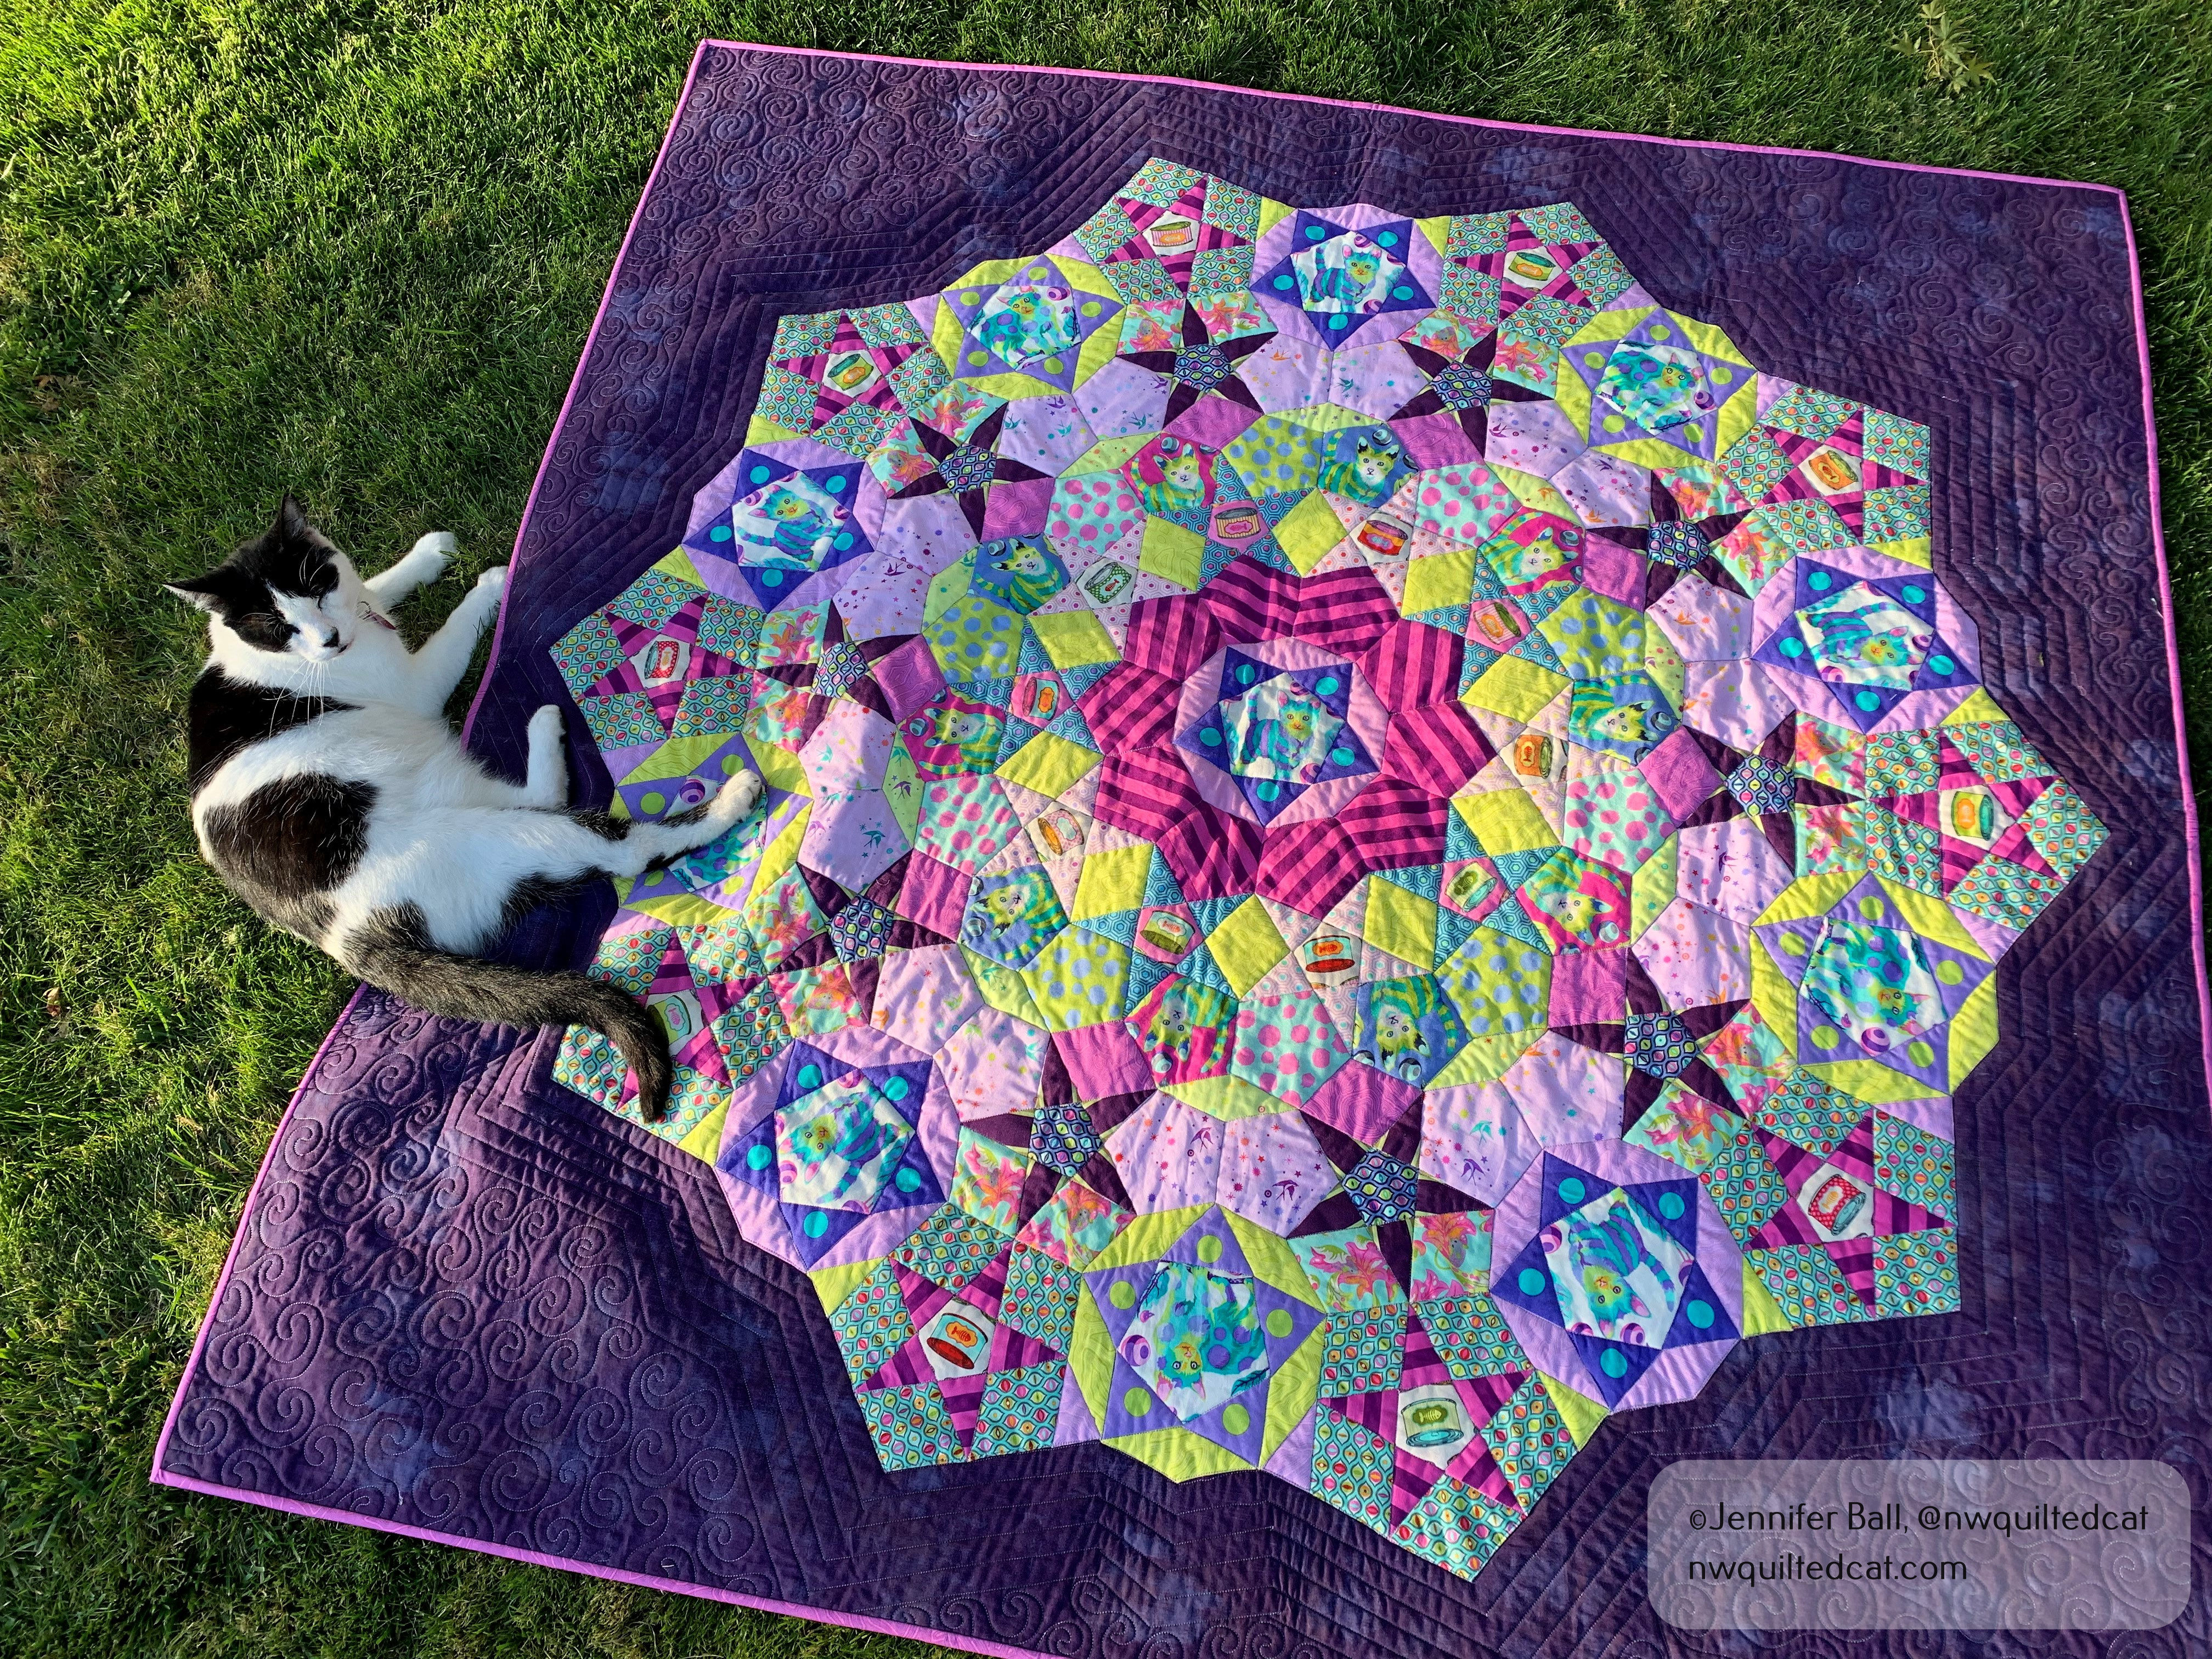
Here’s a look at the finished mini quilt:

Modern Churn Dash mini quilt for the Modern Quilt Guild 2022 swap

I took the mini quilt with me on a short hike to Latourell Falls in the Columbia River Gorge before mailing it to my partner. My teen did the honors of holding it up while I snapped the pic. He’s such a great quilt holder!

I used a variegated Aurifil thread to quilt the spiral on the mini quilt using my domestic sewing machine. The background fabric is a light-colored Spectrastatic print by Giucy Giuce, the churn dash fabrics are Kona cotton solids, and the yellow and green accents are from my scrap bin.

I usually like to make a small extra gift to go along with mini quilt swaps. For my partner, I made a Woppet bucket, pattern by @cleverwoppet.

Woppet Bucket

Isn’t it a cute bucket? I made the little charm pull and added it to the pink handle. You can pull the fabric handles up to carry it like a little bag.

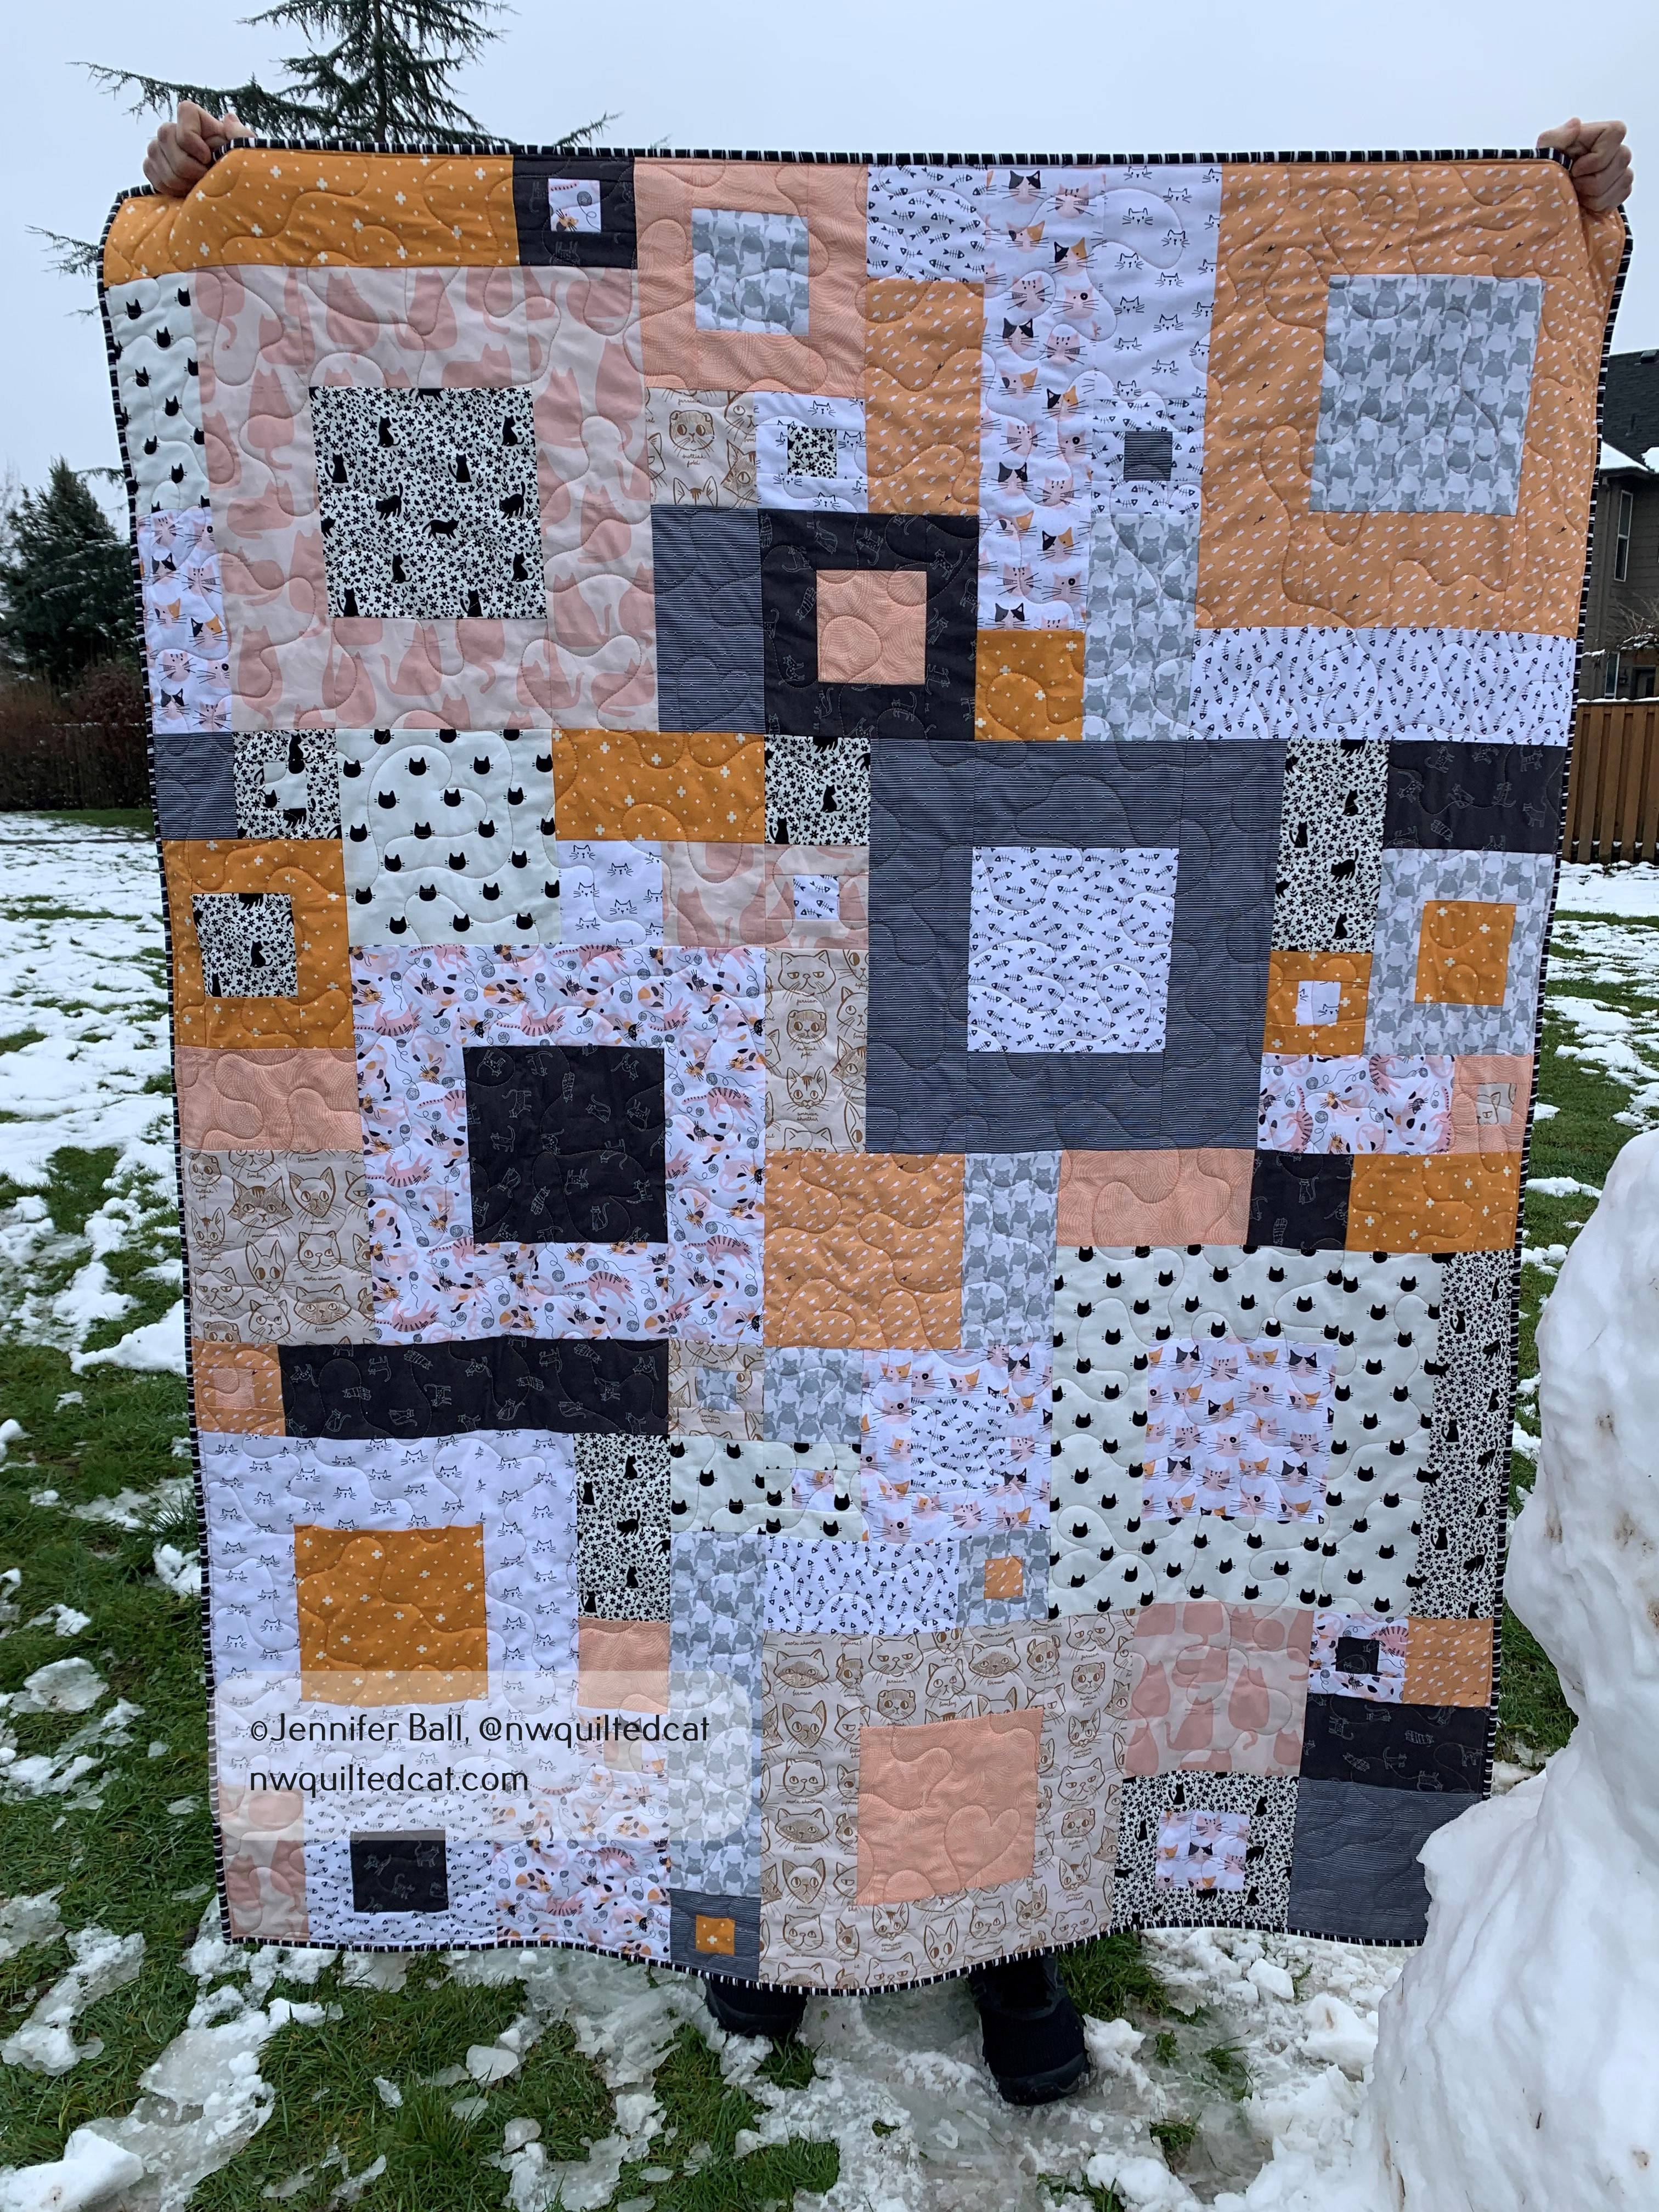
I sent my little mini quilt and bucket off to my partner, and received a package from her in return. She made me this fun rectangular shaped mini quilt with bright colors, a low-volume background, and black and white pinwheel blocks!

Mini quilt that I received in the 2022 swap!

I really enjoyed the mqgswap this year! If you want to see more pics from this swap from other quilters, you can browse Instagram using the tags, #mqgswap2022 or #makeaminimakeafriend .

Happy quilting!

~Jen

Cat Themed Fourteen Squared Quilt

Hi everyone,

I’m catching up on some quilts last I finished in December. I made several fat quarter friendly quilts last year to have on hand to give as gifts. The pattern that I selected is called Fourteen Squared by Hunter’s Design Studio, and it is a quick and easy quilt to make. I love it so much because I can work from my stash and find ways to use up some of my fat quarters.

The first one that I made is cat themed, of course! My quilt inspector practically demanded it. He was so happy with the cat fabric that he couldn’t wait to help me piece the backing!

Romeo helping to piece the backing

For quilting, I did an easy all-over meandering with some free-motion hearts thrown in for good measure. My goal on these quilts is to use everything from my stash so I pulled a fun chunky stripe for the binding, again with the inspector’s help.

Romeo approves the binding choice

I used pinks, oranges, dark grays, and low volume fabrics for this quilt. The cat prints are from a variety of manufacturers that I’ve collected over the years.

I finished the binding just in time to get pictures of this quilt outdoors with a little snow that we had in December before it melted. My teen helped with the photo shoot while my outdoor quilt inspector lingered just out of view.

Cat Themed Fourteen Squared quilt front
Cat Themed Fourteen Squared quilt back

I have so many ideas for this quilt! A Halloween version is a must for me at some point. I plan to make a few more this year to give as gifts and to donate to charity. The pattern is such a great stash buster.

I’m participating in a couple of swaps that I will blog about soon. One is a block swap, one is a bag swap, and one is a mini quilt swap. Stay tuned!

Happy quilting,

Jen

A Completed Tula Nova Quilt!

I started working on hand piecing my Tula Nova quilt during summer of 2020 and just finished the binding in October 2021. I’m going to call my quilt “Tabby Nova” because I used a great deal of Tabby Road fabric by Tula Pink (now out-of-print).

This quilt is entirely hand pieced using a method called English Paper Piecing or EPP for short. In EPP, you use paper templates and baste them to fabric, using either thread basting or glue basting. I use the glue basting method because it is much faster. I used Aurifil 50 weight threads for the piecing, in colors to match the fabrics.

Once the pieces are sewn together and stable, you remove the paper backings. The advantage to EPP over machine sewing is that this method is portable so you can take your sewing with you. I often stitch while waiting for my son at sports or other appointments. I even stitched the initial center block while camping last August.

I decided to quilt my Tabby Nova using a combination of ruler work and some free-motion swirls. I used straight lines to echo the pieced shape out into the background 5 times. Then, I quilted swirls in the remaining spaces. I used a Rainbow thread called “Lilac Bouquet” by Superior Threads, which is variegated and beautifully accents the colorful fabric.

My backing is another out-of-print wide back fabric by Tula Pink called Free Fall with large dots and birds. I had this small piece in my stash for a few years, and I thought it went pretty well with the quilt top. The backing fabric is a purple Moda grunge, and I used Tula’s True Colors in Tourmaline Mineral for the binding with a small color burst of Citrine Mineral on the lower right-hand side.

Are you ready to see this quilted explosion of color?? Here are a few pictures that I took this weekend, with the help of some very special quilting inspectors and assistants.

My “Tabby Nova” with the fall leaves and my husband’s feet!
“Tabby Nova” on a play structure at a local park
“Tabby Nova” back
“Tabby Nova” getting a quality cat scan from Cow in the dappled sunlight
“Tabby Nova” getting a second inspection by our neighbor’s cat. Do you see him?

I really enjoyed making this Tula Nova quilt. It is my first completed quilt using EPP. I have since started a second quilt called La Passacaglia using Tula Pink fabrics. This one is going to be huge and take more than a year to complete.

Enjoy and happy quilting,

Jen

Fall 2021 Swatch Service from the Confident Stitch

Are you ready for fall? After a long, hot summer here in the Pacific Northwest, we are expecting our first soaking rain tomorrow. The leaves are beginning to turn brilliant colors, and the evenings are cooler and comfortable.

I’m starting to sew more now that summer is winding down, and I’m thinking about fall and winter projects. This quarter’s quilting cotton swatch fabrics and patterns from the Confident Stitch are absolutely perfect for the season, featuring the gorgeous fall colors.

In this quarter’s package, you’ll receive the following items:

  • (14) individual 5.5″ swatches of quilting cotton fabrics
  • (1) 5.5″ x 22″ strip of bronze solid fabric
  • (1) 5.5″ x 44″ strip of dragon fruit solid fabric
Fall 2021 Quilting Cotton Swatch Service Bundle

What is the best part? You can use the fabric in this swatch set to make the included pattern, Turkey Time Table Topper, which is perfect for your fall table settings. The table topper finishes at 17.5″ x 25.25″, and the Confident Stitch has an accompanying video for you to watch on how to make this project.

You also get an Information Card listing all the fabrics and prices in this quarter’s swatch service. The large project featured is the Faster Fourteen Quilt by Hunter’s Design Studio, and the Confident Stitch has a kit available to order or you can choose your own individual fabrics.

Fall 2021 Quilting Cotton Swatch Service Contents

I’ve used patterns from Hunter’s Design Studio, and they are great patterns that can you complete pretty quickly. Most recently, I’ve made these quilts to give as charity quilts to organizations such as Project Linus. They also make great baby quilts!

If you want to subscribe to quarterly swatch service, also known as Kate’s Swatch Experience, the cost is $15 every 3 months. The Confident Stitch offers 3 options: quilting cottons, garment fabrics in warm tones, and garment fabrics in cool tones. You can sign up for 1, 2 or all 3 swatch services. As a quilter, I highly recommend the quilting cotton service to get a nice variety of swatches plus a fun project as happy mail every quarter!

Let me know in the comments if you’ve joined! I plan on making a project with my swatches soon, and I’ll blog about it in an upcoming post.

Happy quilting,

Jen

Tula Nova Flimsy Completed

Hi everyone,

I haven’t blogged much this summer, but I have been doing a little sewing, a little gardening, and a little hiking. I will share some of these experiences over the next few posts.

One project that I did complete is the hand-piecing of my Tula Nova quilt. This quilt is an English Paper Pieced (EPP) design, meaning that all sections are individually stitched together by hand rather than by machine. Hand piecing does take much longer than machine piecing, but EPP projects are portable. I enjoyed being able to work on this project while traveling, camping, sitting in the backyard, or watching TV.

I worked on my last block while in my backyard, with my dog sitting lazily in the grass and my cat snoozing in the chair beside me. Here’s a look at my last block:

Last Tula Nova block!

Yep, that light blue print is really little cat eyes and the white center is a tin of cat food! I decided to do a cat theme for my Tula Nova by using many prints from her Tabby Road line (now out-of-print) that I had in my stash.

Once I stitched in my final block, the main body of my quilt was completed. I took it with me for some photographs while hiking earlier this summer.

My Tabby Road themed Tula Nova quilt at Fort Rock, Oregon (before basting to a background fabric)

See those feet in the photo? I asked my husband and son to hold up the quilt so I could get a picture of it with the rock formations in the background. With a few eye rolls, they agreed.

To finish the quilt flimsy, the pattern instructs you to applique the blocks to a background. I auditioned 5 or 6 different fabrics, but settled on a deep purple Grunge background. I first spray basted the top to the backing, and then machine basted using a very long stitch. I didn’t want the top to shift while I hand-appliqued the blocks.

What you don’t see in the picture below is my cat, Romeo, sitting under the quilt and “helping” me!

Hand-appliquing the top to the background

After I finished the applique work, I removed all of the machine basting stitches. Here’s a look at the completed quilt flimsy:

Tula Nova appliqued to the Grunge background

I really love how this deep purple background accents this quilt overall and pulls out the deep purple stars in the flimsy.

Next, I carefully cut a circle on the backside of the background, about an inch or so inside the applique stitching line. This step is not only to remove the excess background fabric, but also to remove the EPP papers from the last round. Here’s a look at the backside of the quilt flimsy with all the papers removed:

I have not yet quilted my Tula Nova, but this quilt flimsy is first in my to-quilt pile this fall. I will show you pictures when I finish the quilting!

If you want to piece your own Tula Nova quilt, you can purchase the pattern, paper templates, and acrylic templates from the Fat Quarter Shop. I highly recommend purchasing the acrylic templates because they include the seam allowance and make it so much easier to cut out the pieces.

Happy quilting,

Jen

Hello Mr. Scarecrow!

Hi everyone,

In 2017, I joined a block-of-the-month program through a local quilt store. In this program, we made all of the blocks from Lori Holt’s Farm Girl Vintage book over the course of a year. I kept up each month, made the blocks, and then set them aside because I couldn’t decide on a quilt layout.

Later on, I made a few more blocks from Lori’s second book, Farm Girl Vintage 2, because the new animal blocks were so cute! I couldn’t decide which blocks to keep so I decided to combine all of my blocks into a quilt layout. I also couldn’t resist adding the little dog from her book, Spelling Bee, because what is a farm without a dog?

Here are a few of my blocks going up on my design wall. Hmm, what layout should I use?

Farm Girl Vintage blocks on my design wall

I played with a few layouts, turning blocks this way and that way. Then, I decided to sew more blocks!!

My little farm needed a scarecrow out in the fields with the tractor. The Mr. Scarecrow block is from the Farm Girl Vintage 2 book, and is a fun addition to my quilt.

Look at all the pieces! I kept them organized by using Alphabitties, which are little plastic squares that you use to label block components.

Alphabitties – great labels to use while making blocks with many pieces

I use Clover Clips to attach the Alphabitties to the fabric pieces so that I don’t lose them in the chaos of my cutting table.

Here’s a look at my assembled Mr. Scarecrow block:

Mr. Scarecrow block

Hmm, I thought that Mr. Scarecrow could use a little friend so I made him one!

A crow joins Mr. Scarecrow in my Farm Girl Vintage quilt

I will hand embroider Mr. Scarecrow’s facial features before I start the quilting. I plan to add this block in front of the tractor in my final layout.

This quilt is so bright and cheerful, and I’m having a blast figuring out how to assemble it into a unique layout. Stay tuned to see how I finish this quilt.

Happy quilting!

~Jen

Running with Scissors! + More

Hi everyone,

I recently made the Take A Stand bag from ByAnnie patterns, and I blogged about it here. I then decided to create the companion tool organizer called Running with Scissors using similar fabrics from Tula Pink.

Isn’t the name fun? This organizer is really a clever zipped tote that you can use to carry your quilting tools to a class or a retreat or use it at home to save space on your sewing table.

I used Tula Pink’s Pinkerville line with its beautiful unicorn as my front pocket centerpieces. This organizer has 2 large quilted fabric pockets with zippers on the outside. You’ll find smaller inside pockets made out of mesh, vinyl, and quilted fabric, all sized nicely to fit a variety of tools.

Here’s a look at the organizer once I had sewn on the outer pockets and the inner pockets, but before I added the center facing to the inside.

For me, one of the tricky parts is attaching the outer zipper and binding. When you purchase this pattern, it comes with a $5 off coupon for the accompanying video from Annie, making it free. I highly recommend the video, and I watched it while attaching the binding so I could pause and re-watch as needed. I also use Clover Clips rather than pins to avoid poking myself and because they are just so much easier to use.

Attaching the Binding

The inside center facing uses clever elastic loops to hold a variety of items from sewing machine feet to bobbins to thread. I had 2 colors of elastic on hand so I decided to use both colors by alternating them on the facing.

Inside Center Facing

Once I had sewn the inside center facing, then I just needed a few finishing details such as zipper pulls to complete my Running with Scissors tool case!

Here’s a look at the front of the completed case:

Completed Running with Scissors Case

I decided to do a little photo shoot with my 2 new ByAnnie bags, along with my foster kitty, Gracie. She provided excellent inspection services!

In the picture where Gracie is sitting next to the bags, you can see my new Running with Scissors tool case folded over my Take A Stand bag. I’m going to use these 2 bags together at my sewing table to keep frequently used tools close at hand.

Another pic of both bags together;

Take A Stand Bag and Running with Scissors Case

I now have more confidence to tackle a bigger bag project! On my to-do list is the A Place for Everything 2.0 bag from ByAnnie. It’s a great bag to hold English paper piecing projects and supplies. I haven’t decided which fabric to use yet so stay tuned!

Do you follow me on Instagram (@nwquiltedcat)? I’m very close to reaching 2,000 followers. I’m going to do a little giveaway once I reach that milestone, and it will most likely feature Tula Pink products. Come follow me if you don’t already!

Happy quilting!

~Jen

Fierce Cheetah Mama

Happy spring, everyone! The days are getting a little longer, bulbs are blooming, and birds are singing. I’m very happy that we’re heading into the warmer spring days because it means more hiking and gardening.

For Christmas last year, my sister sent me the Cheetah Abstractions pattern by Violet Craft. This is a foundation paper pieced pattern that usually finishes at 48 inches by 60 inches, but I decided to shrink it down to 75%. I like to print my foundations using Carol Doak’s Foundation Paper because it is really easy to remove after sewing.

I challenged myself to use only fabrics from my stash. The fabric audition process can take a few days and, for this quilt, my hardest decision was the background. I knew that I’d need about a 2 yard piece in a solid or mostly solid color with enough contrast to make the cheetah body pop. I auditioned creams, grays, grunges, and others until I came across a mottled light aqua fabric. Perfect! It reminded me of a partly overcast day.

Once I had the background fabric, I pulled different solids and lightly patterned fabrics to audition for the cheetah body. I like to use Violet’s included color palette to tape small swatches of my fabrics so that I remember which fabric goes with which symbol while paper piecing.

Cheetah Abstractions – fabric selections

I started with the cheetah face first. I was just so eager to see it come to life in fabric! The head section is the most complicated, especially at just 75% size. If you’re new to paper piecing, just go slow and remember to reduce your stitch length. Here’s the start of the cheetah with the pattern for scale.

Over the next few days, I tackled sections of the cheetah body. I sewed the smaller sections and laid them out before joining sections together. It is much easier to fix mistakes this way! Isn’t her expression great? Her gaze is so intense and focused.

I pieced my cheetah fairly quickly in just a few weeks. I put all my other projects (mostly) on hold. Once pieced, I thought about how to quilt her for a week or two. I didn’t want the quilting to detract from the magnificent cheetah mama.

I decided to do some straight-line quilting all over the cheetah face and body using Glide thread in Sand Dune. For the background, I did some free-motion leaves using Glide thread in Cool Mint. I also used 2 layers of Quilter’s Dream Poly Select batting for extra texture!

The double batting does make this small quilt heavy, but I plan to hang it on a wall rather than using it as a lap quilt. For the binding, I used a dark brown fabric for three-quarters of the quilt and then used a piece of the backing for the remaining one-quarter to accent some of the colors from the cheetah.

The backing fabric is called Kenyan Cats by Alexander Henry Fabrics, which I thought worked so well with the cheetah theme.

I really love how this fierce mama cheetah quilt turned out, and I can’t wait to display her on a wall behind my work desk at home.

Enjoy!

~Jen

Updated Swatch Service from The Confident Stitch

Hi everyone!

One of my favorite modern quilt shops, The Confident Stitch in Missoula, Montana, has recently updated their swatch service. The new name is Kate’s Swatch Experience. In the past, this quarterly subscription came with a folded brochure and small pieces of the featured fabrics. Beginning with Spring 2021, the swatch service now comes with at least 20 pieces of 5×5 inch fabric swatches and a pattern!

Let’s take a look at what you’ll get in the Spring 2021 quilting cotton swatch packet!

Spring 2021 Quilting Cotton Swatch Packet from The Confident Stitch

When you sign up for the swatch service, you’ll receive this cute wrapped package in the mail. The card on the front gives you a glimpse of the yummy fabrics contained inside. On the back of the card, you’ll find a brief description of the swatch contents plus a special discount code for swatch subscribers only.

Spring 2021 Swatch Service Fabrics and Pattern

When you unwrap the package, you’ll get the following goodies:

  • 5×5 inch swatches, labeled with the fabric name and pricing. These swatches can be a combination of prints and solids.
  • A packet containing instructions for 2 projects: the Scrappy Diamonds Pillow and the Primavera Pinwheels Lap Quilt. You may need additional supplies to complete some of the projects.
  • Discount code for swatch fabrics.
  • Directions for accessing a companion YouTube video.

The subscription costs $15 per quarter, and you can choose to join the quarterly program where the swatches are mailed to you automatically or you can choose to buy just one swatch service. In addition to the quilting cotton swatch service (also known as We Quilt This City), the store also has a garment fabric swatch service in warm tones or cool tones, called  {gar} Meant for You.

I think this swatch experience is a great value, and I love these larger swatches. I enjoy being able to touch these fabrics, to see the scale of the patterns, and to match actual colors in the swatches to fabrics that I already have in my stash.

I plan on using my swatches on a project soon so stay tuned! Let me know if you join the swatch service, and I’d love to see the projects that you make.

Happy quilting!

~Jen

My Quilt at QuiltCon Together

Happy March, everyone! We are seeing glimmers of spring everywhere around us after our ice storm several weeks ago. I have crocus and some early daffodils blooming and birds are joyfully singing!

A few weeks ago, I attended QuiltCon Together, which was a virtual quilt show this year due to the pandemic. Normally, QuiltCon, which features modern quilts in many categories, is held in person and alternates between west coast venues and east coast venues.

This year, I entered a quilt in the “Floral & Vine Fabric Challenge” category and, for the first time ever, I got a quilt juried into QuiltCon!! In this category, participants received 4
fat-eighths of specific fabric prints to use in the construction of a modern quilt. We could only use these prints plus any number of solid fabrics. We could buy extra quantities of the specified prints, but I decided to challenge myself by using only the provided fat eighth pack. I used 3 of the 4 prints plus a white solid in my quilt. The binding is a gray solid.

I drafted my pattern using paper and pencil initially. I wanted my quilt to express my hope that we will soon be able to gather together in person, and that this weird situation that we are currently living through will not last forever.

I came up with a design and then used EQ8 to create my foundation paper pieced templates and curved traditionally pieced templates. I then calculated my setting triangles to complete the design. I called my quilt, Concourse.

Here’s a picture of Concourse:

My quilt, Concourse, at QuiltCon Together, February 2021

Although QuiltCon Together is now over, the images below show what my quilt looked like displayed virtually. Quilt show attendees could zoom in on individual quilts and even listen to a short audio clip from the quilt makers.

My quilt, Concourse, hanging virtually at QuiltCon Together 2021, front view
My quilt, Concourse, hanging virtually at QuiltCon Together 2021, back view

I was very pleased to have my quilt selected as one of the entrants in this challenge fabric category. Although I did not win a ribbon, I’m just so happy to have had a quilt in the show.

I took a screen cap of the other quilts in the category so that you could see the variety of modern quilts that used just these 4 prints plus solids. Quite impressive!

QuiltCon 2022 is scheduled to be an in-person quilt show in Phoenix in February. I’m very hopeful that we’ll be returning to in-person events later this year. I hope to enter a quilt into that show and maybe (just maybe), I might get to attend it with my sister!

P.S. I added a new page to my blog with recommended quilting supplies and notions. Go check it out!

Happy quilting!

-Jennifer