Are you looking for a cute and not scary block for Halloween? How about a cute little cat face on a pumpkin? This adorable block will work on trick-or-treat bags, table runners, mini quilts, and larger quilts.
Pattern
For a limited time, this cute cat jack-o-lantern quilt pattern is on sale in a favorite Halloween craft magazine. You can choose to purchase a hard copy that is mailed to you or a PDF download, which you can download to your computer.
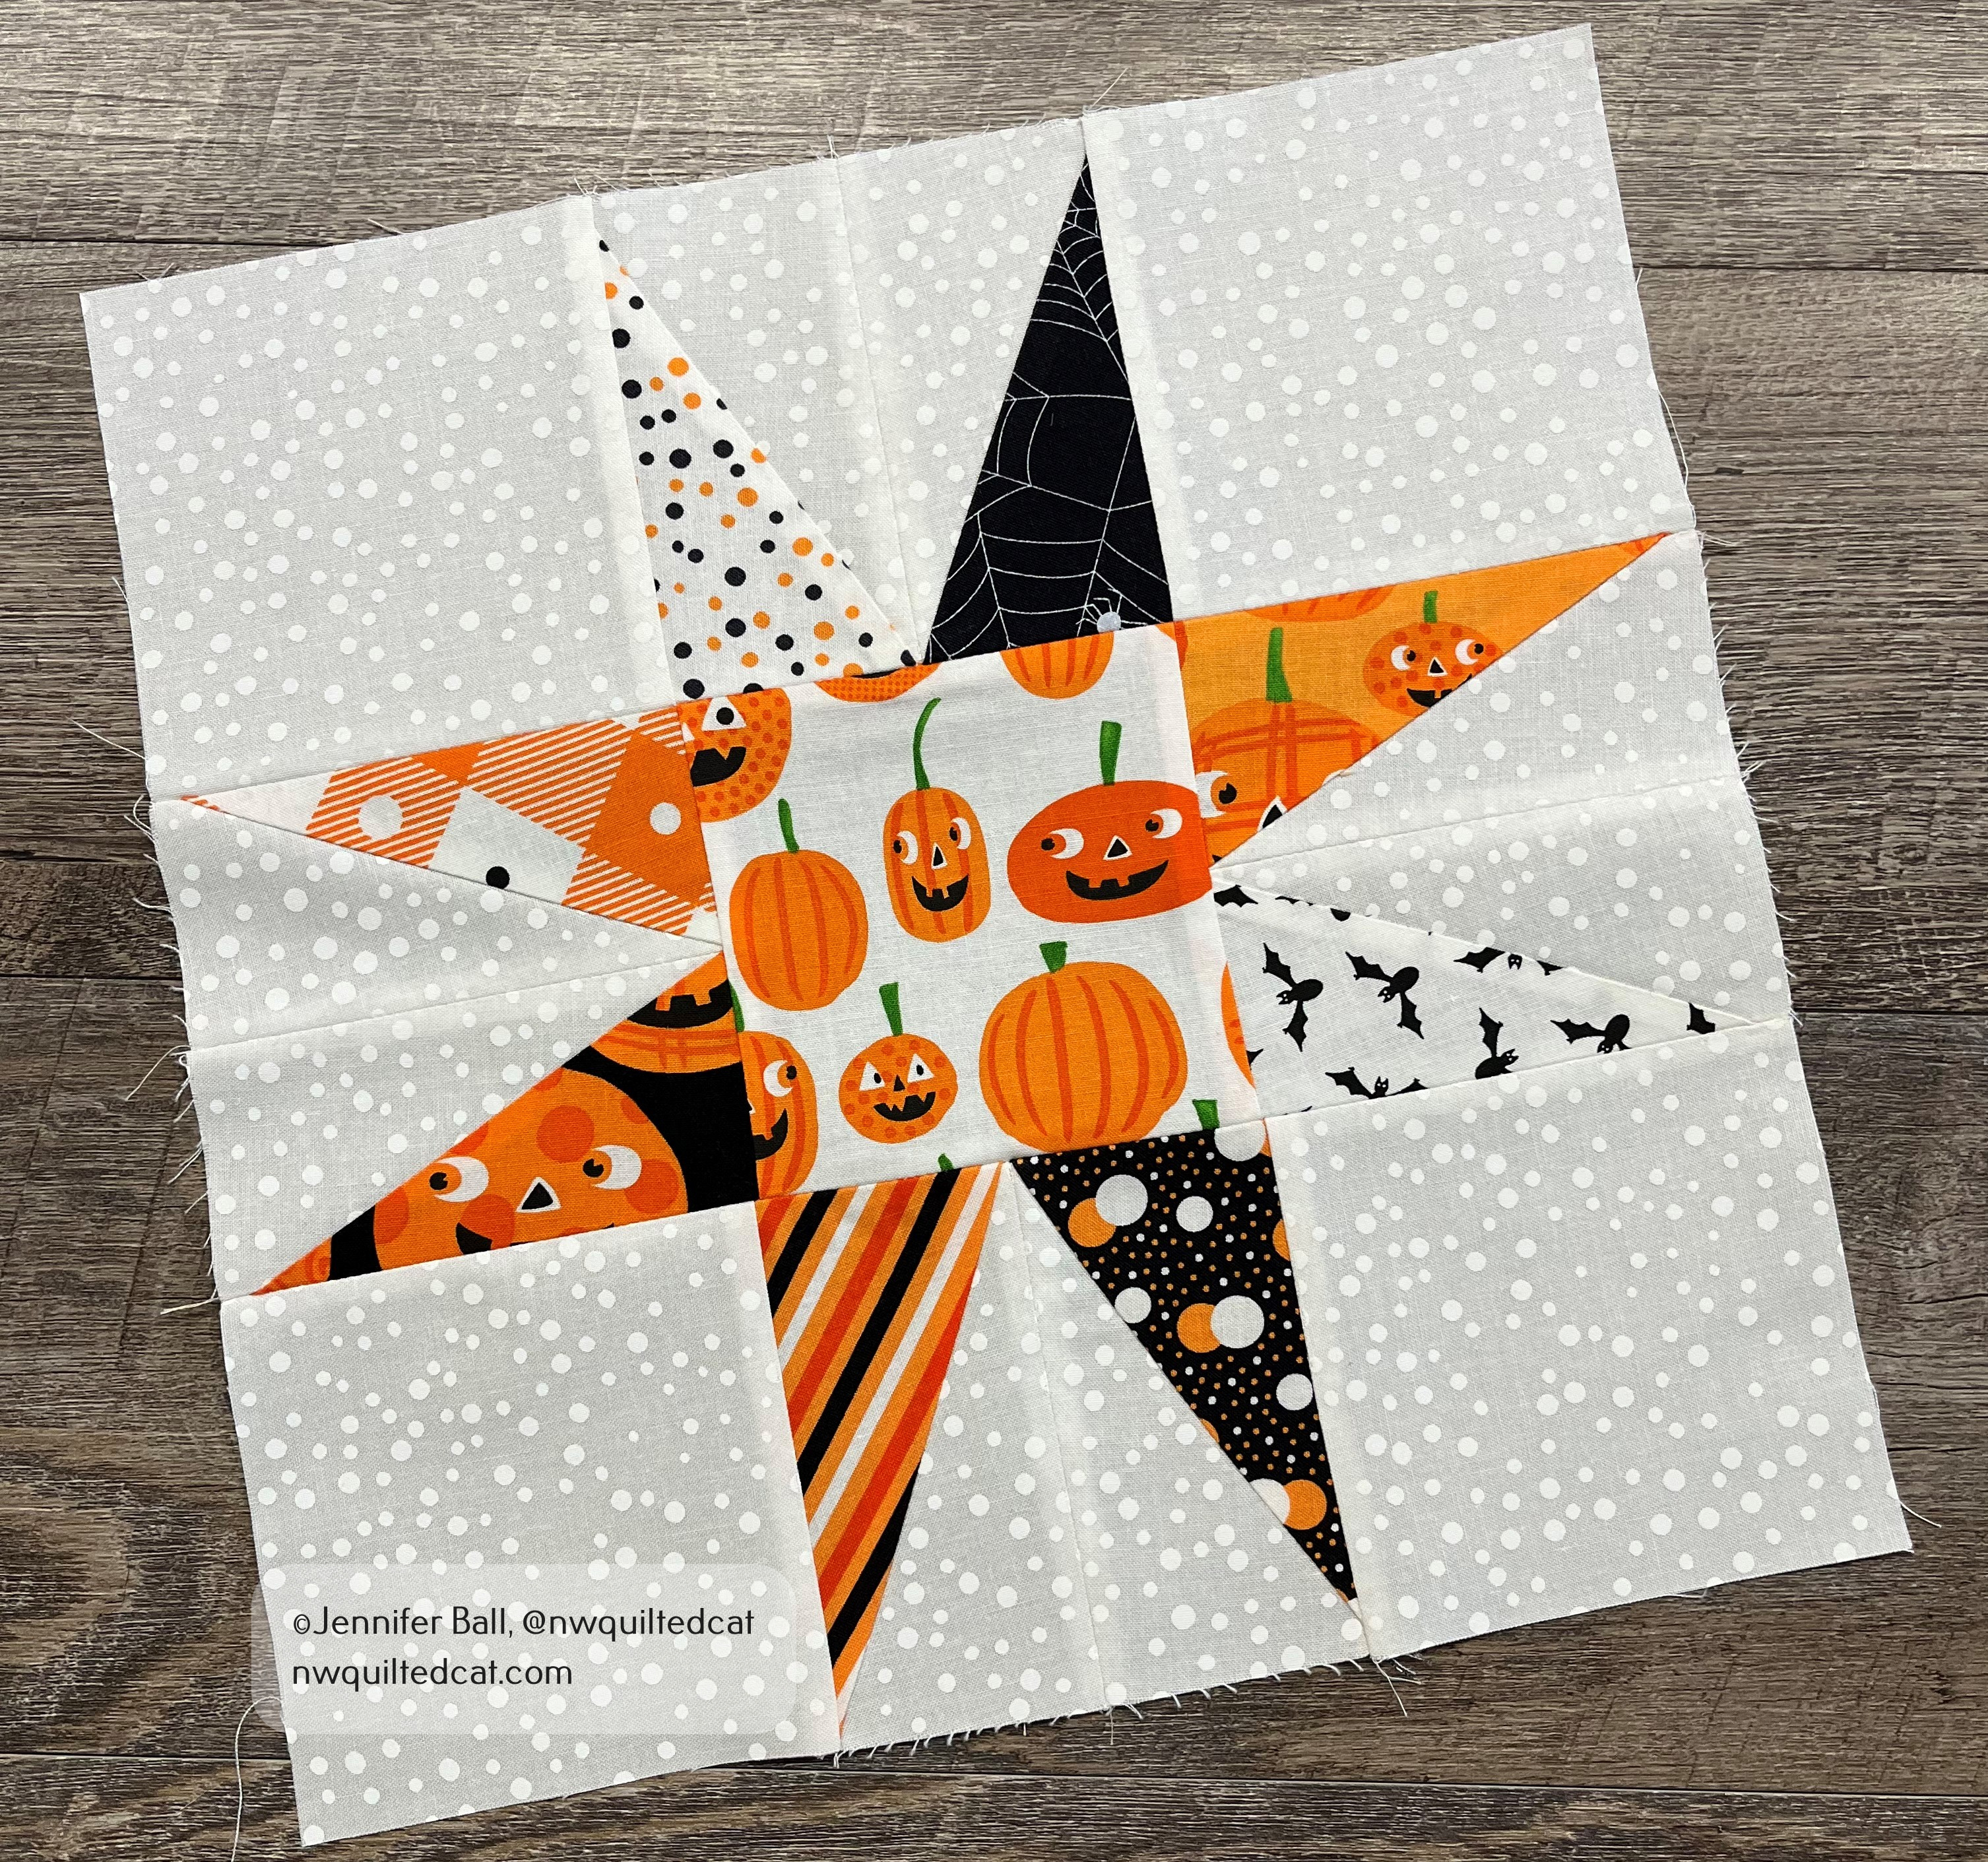
Here’s a look at my block:
I loved using a pumpkin-themed fabric for my cat face! Aren’t those little cat-faced pumpkins with fangs just adorable? I want to make several different fabric combinations using different oranges, blacks, and low-volume backgrounds and create a lap quilt.
For my block, I used the following fabrics:
Background fabric: white dotted fabric from “Too Cute to Spook” by Me and My Sisters Designs.
Cat and handle fabric: purple/orange pumpkin fabric from “Bring Your Own Boos” by Cotton + Steel
Pumpkin fabric: orange fabric from “All Hallow’s Eve” by Fig Tree Quilts
This block is a great stash buster, and you can really have great fun with different fabric combinations. I love seeing a cat face block with the whiskers. It adds a nice element of whimsy to the block.
The quilt pattern in the magazine has a great layout with plus-shaped blocks added between rows of cat jack o’ lanterns and makes a finished quilt at 45″ x 48″.
I completed a new quilt called Black Diamonds from the Fat Quarter Shop. This quilt features a new ruler called the half triangle trimmer, which helps you to create perfect 2″ x 4″ half rectangle blocks.
If you purchase the supplies for this quilt using the links in my post, I get a small percentage of the sale to help offset the costs of running this blog. I appreciate any and all purchases via my affiliate links!!
Quilt Kit and Pattern Available Soon!
The Fat Quarter Shop will be announcing this new quilt pattern and quilt kit later in August or early September so watch for an announcement on their social media. The quilt kit will feature a fabric line called “Create” by Alli K Designs.
For my version of the quilt, I used the Too Cute to Spook line by Me and My Sister Designs. I thought this pattern would make a really cute Halloween themed quilt.
Supplies for my Black Diamonds quilt: Too Cute to Spook Fat Eighth bundle, background fabric, pumpkin fabric for center blocks, binding fabric, half rectangle trimmer, and pattern
This pattern is really simple to make because it only contains 2 blocks: a star block and a diamond block. Both blocks use the half rectangle trimmer. I decided to make a test block before cutting out all the pieces and chain piecing.
Here’s my test star block:
Black Diamonds quilt: a test star block
Usually, star blocks are made with half square triangles so I really like the look of this elongated star using the half triangle trimmer tool. It’s a really fun shape! I also made a test diamond block, which went together perfectly.
I decided to go for it and cut out all of my fabric pieces according to the directions. For my center squares in my star blocks, I used the same fabric for consistency. If you decide to go this route, then you’ll need a 1/2 yard of fabric. If you go scrappy, then you could use fat eighths or fat quarters.
TIP: A Stripology ruler saves you so much time and effort when cutting out strips of fabric.
I chain-pieced the star block units first and then the diamond block units. In this pattern, pay special attention to directions because you need to make right-side facing units and left-side facing units.
TIP: Use a Sue Daley rotating cutting mat when trimming your half rectangle units. As a bonus, I also use this mat to cut out pieces for English paper piecing.
Here’s a look at all my completed star blocks and diamond blocks:
Completed blocks for the Black Diamonds quilt
Aren’t they cute? When I pieced the units together, I didn’t worry about having 2 of the same fabrics touching each other. There is so much movement in the finished quilt that no one will notice!
After I had completed all these blocks, I laid them out on the floor with the help of my quilt assistant. As a way to check my placement, I usually take a picture with my cell phone. This picture helps to identify any block placement mistakes, and it also helps me to remember what order I need to sew the blocks.
My quilt inspector checks my block placement!
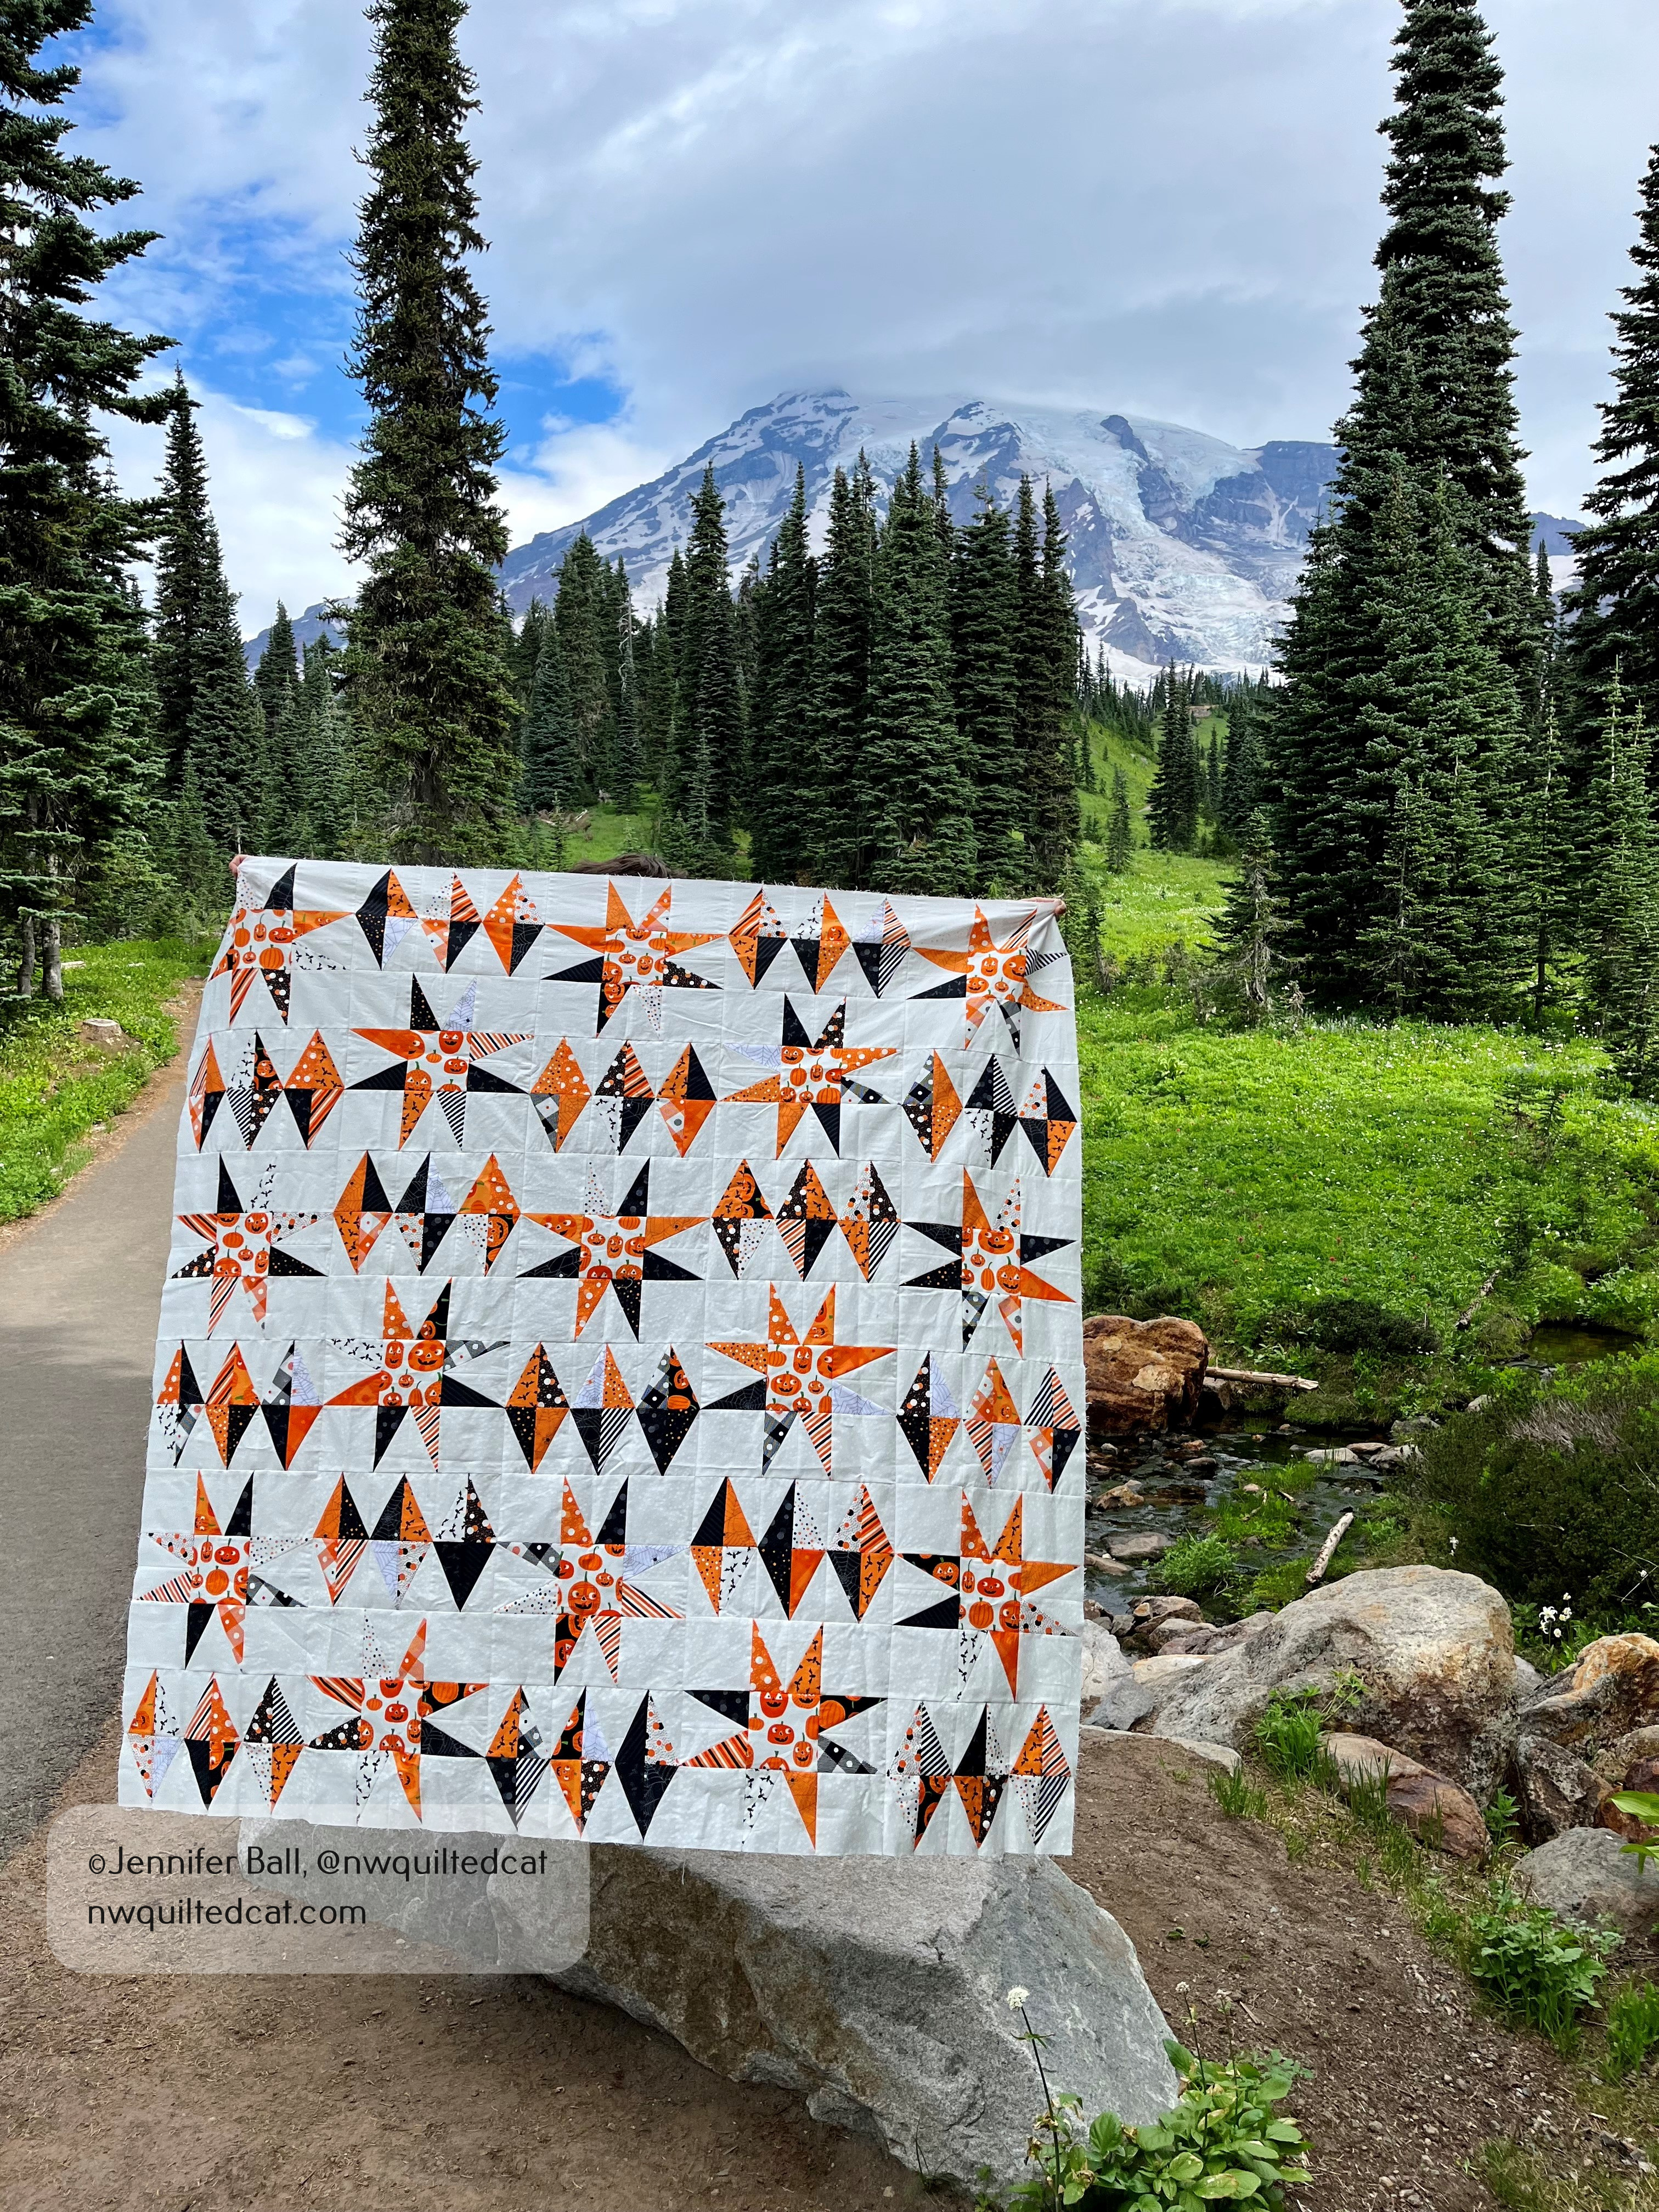
My quilt inspector sometimes likes to rearrange things when I’m not looking! I sewed the rows together and finished the quilt flimsy in time to take on a little mom and son hiking trip. My son was a good sport and held up the quilt top while I took a quick picture.
Black Diamonds quilt flimsy
Once home from our short adventure, I decided to quilt it with an open free-motion stipple pattern using white thread. For the binding, I used a striped fabric from the Too Cute to Spook line, which I think is the perfect finishing touch for this quilt!
Here’s a look at my completed Black Diamonds quilt, Halloween style!!
Completed Black Diamonds quilt
This quilt finishes at 60.5″ x 60.5″ so it’s a perfect lap size. You can easily enlarge it by making more blocks to expand it, and be sure to watch the Fat Quarter Shop for a blog post announcing the pattern and quilt kit plus a look at all the sample quilts. Watch for a live tutorial by the Fat Quarter Shop launching on September 8th.
One of the things that I really enjoy doing is stargazing, especially while traveling. I love to go on road trips to some dark sky parks around the west each summer with my husband and teen. We usually just have a blanket, some snacks, and maybe a pair of binoculars.
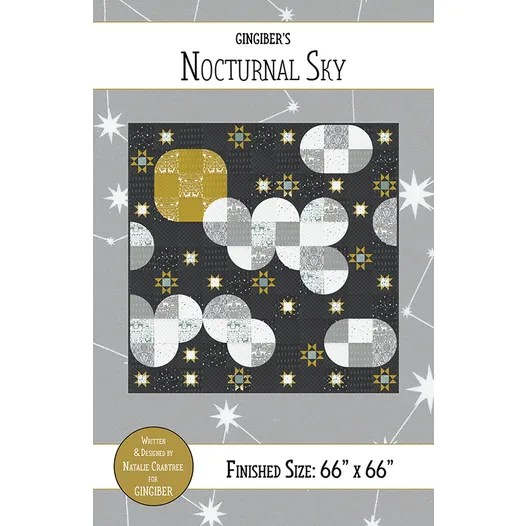
During a recent quilt retreat, I started working on blocks for a stargazing quilt. The pattern is called Nocturnal Sky by Natalie Crabtree for Gingiber. The quilt has a modern feel with curved pieces representing the moon and clouds.
There are two types of traditionally pieced blocks for the stars, and the composition of these blocks in the quilt remind me of looking at twinkling stars at night.
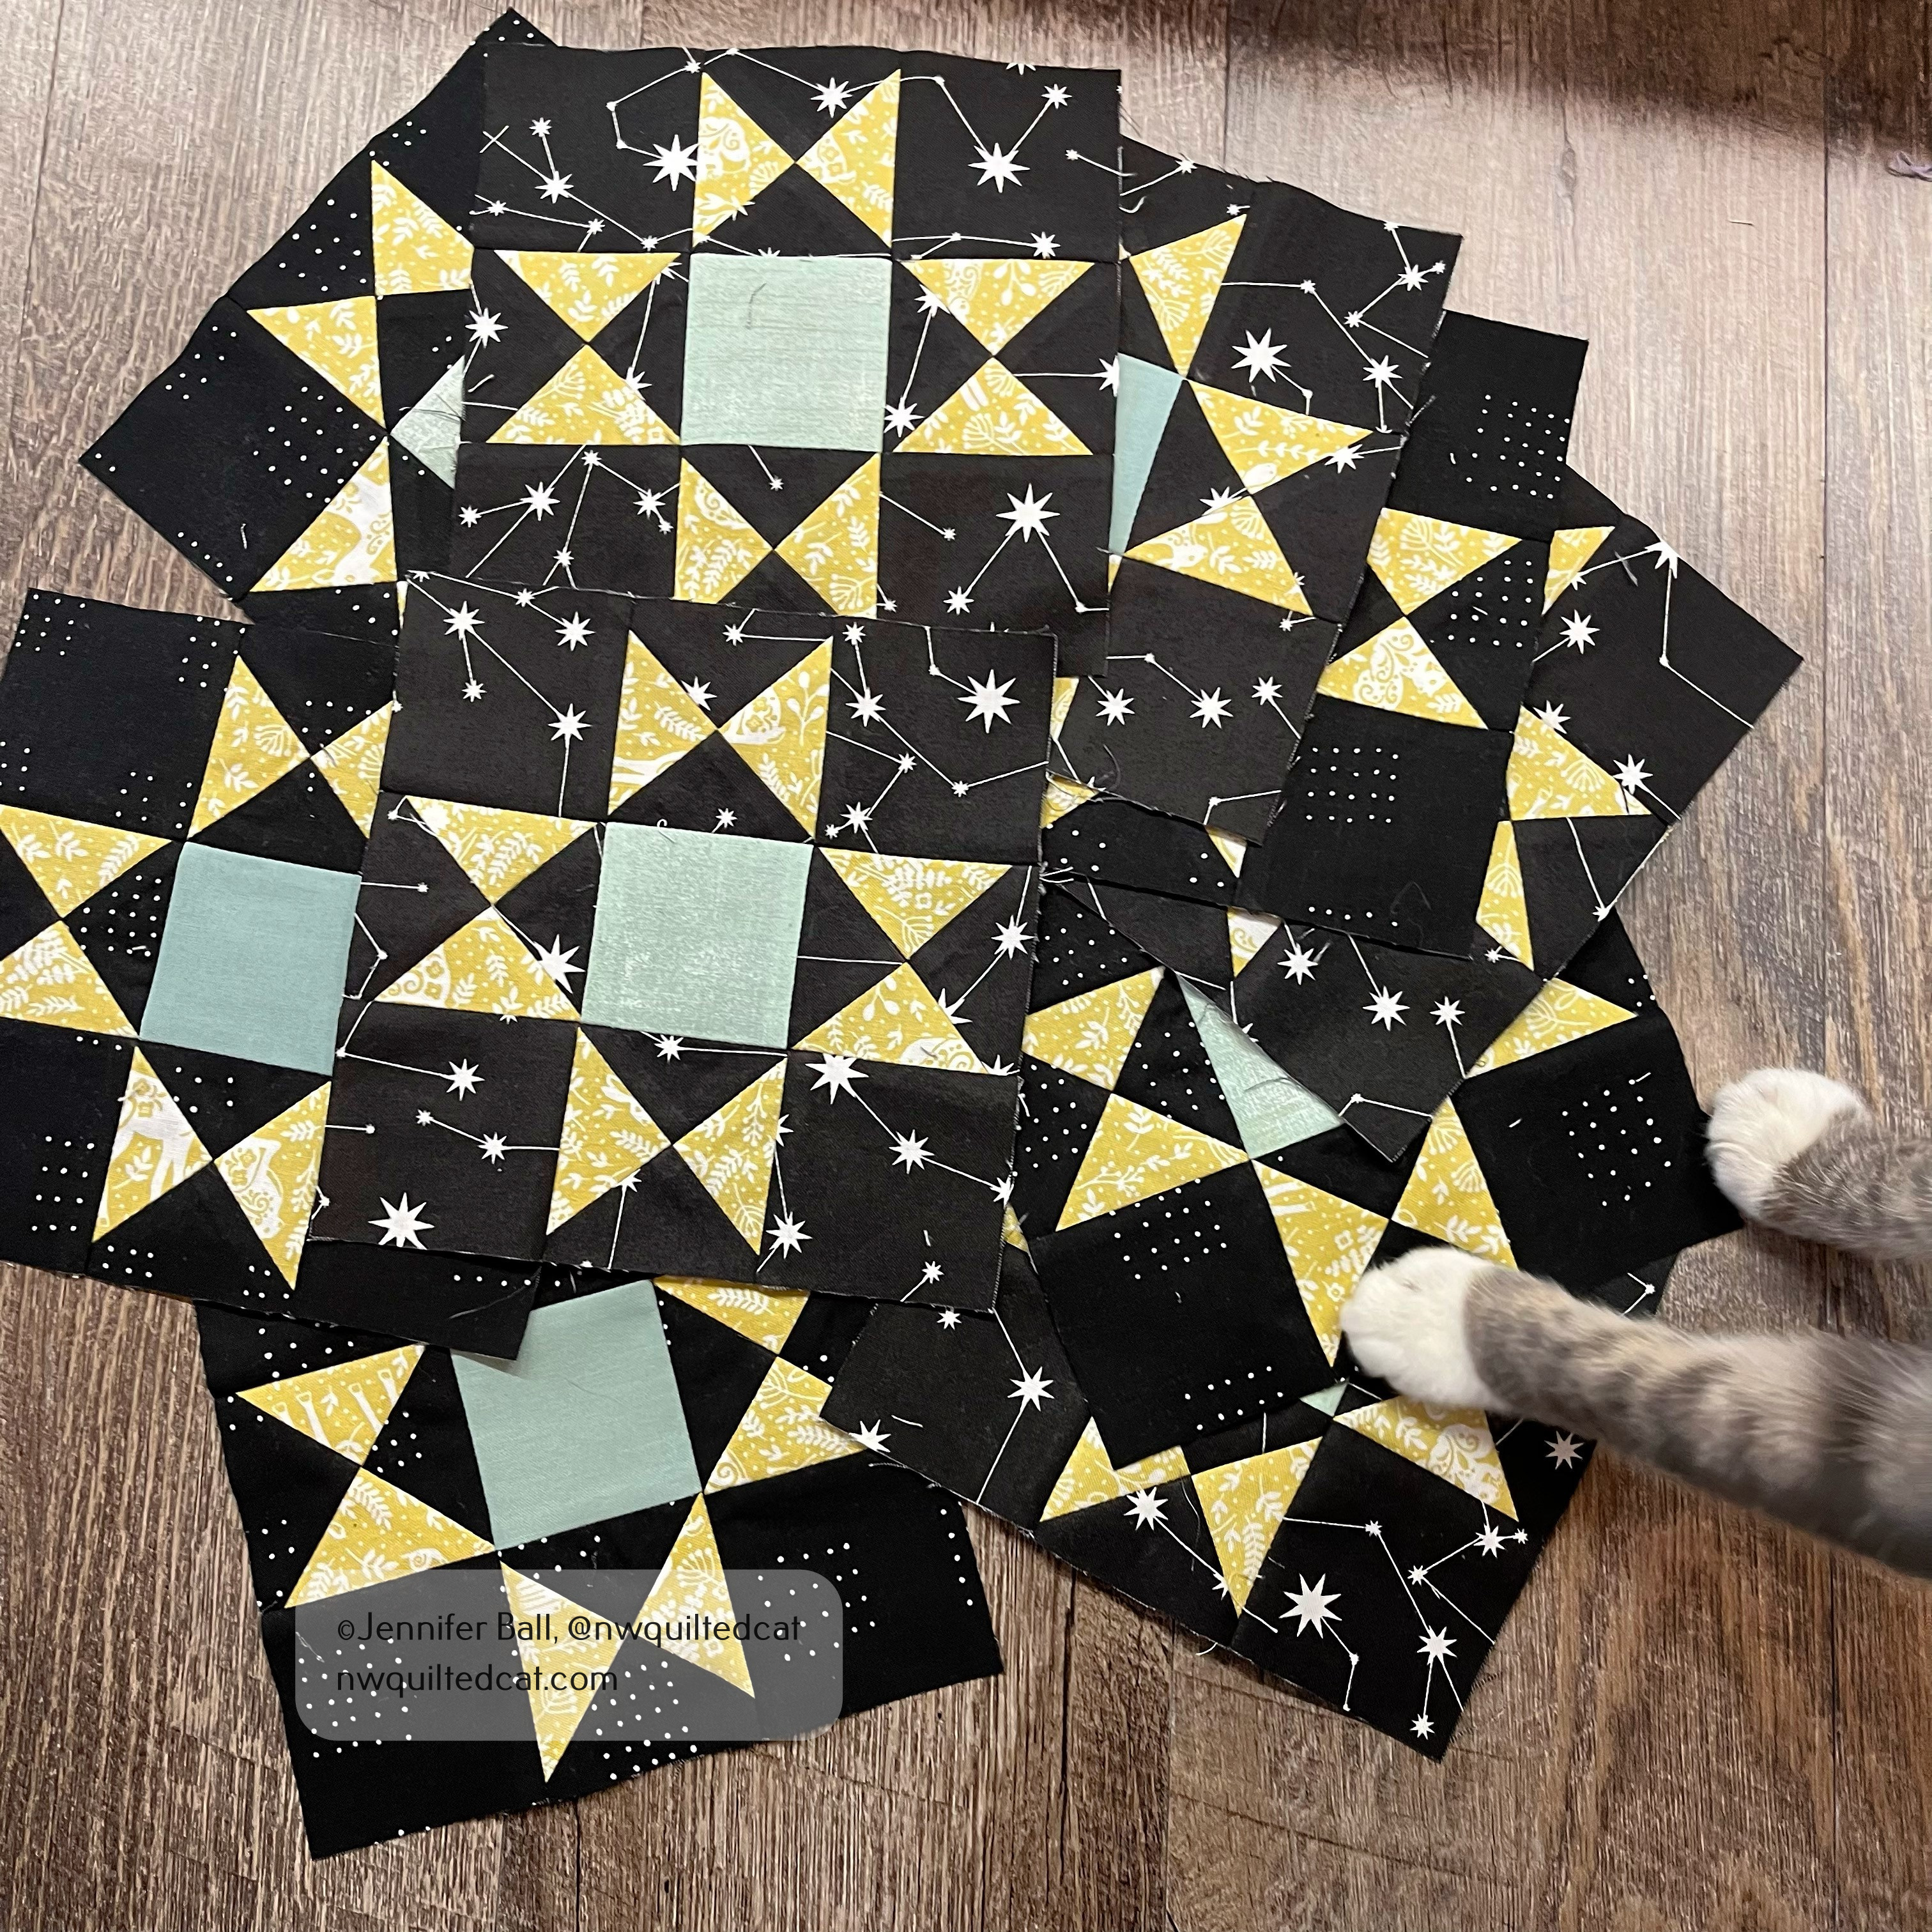
I finished all of my “A” star blocks, and I’ve started working on my “B” star blocks . Some nights after work, I can only manage to sew part of a block and other nights, I can sew two or three blocks. I’m taking this quilt nice and slow, while working on other projects.
Here’s a look at my “A” star blocks all pieced. The inner squares are light green.
My “A” Star Blocks
Do you see my little helper? He couldn’t help inspecting these star blocks as soon as I tried to photograph them.
I’m thinking about backing this quilt in a cozy flannel so that it can be a traveling quilt when we go on a road trip or go stargazing.
I needed a fun and useable container to place all those little threads and small fabric clippings that seem to pile up while sewing. Fortunately, I happened to come across a swap for a quilt-as-you-go thread catcher on Instagram recently with a fun group of quilters called @modernpalooza.
For this swap, each person created a thread catcher using a free pattern by The Sewing Chick. The swap organizers matched us up with a secret partner, and sent us some hints as to their fabric likes and dislikes.
I decided to pull some Libs Elliott fabrics from my stash as my modern, bright fabrics to use for the patchwork scraps. I changed up the pattern slightly by deciding to add a black and white border to the top and lower edges of my colorful patchwork strip. I then added a smaller width of a dotted gray fabric for contrast.
I also didn’t have duck canvas on hand as called for in the pattern. Instead, I fused some Pellon Shape Flex to my lining fabric before adding the quilt-as-you-go fabric pieces.
For the binding, I used the same black and white fabric to echo the borders. I took my little completed thread catcher basket on a hike to central Oregon, and I think it looks great resting on this old juniper tree.
Thread catcher basket that I made for my partner
We were also asked to send a favorite treat or snack along with the bucket. I sent some Moonstruck chocolate made by an Oregon company along with some fabric and other little goodies. I didn’t think to take a picture of the complete package before I mailed it.
In return, I received a wonderful thread catcher basket from my partner!
Thread catcher basket that I received
My partner made me this super cute basket using Tula Pink’s Daydreamer fabric! Isn’t it bright and cheerful? She also very thoughtfully included some super rare out-of-print Tula Pink fabrics that I do not own. I’m very excited to use them in a future project just for me.
What I really loved about this little thread catcher basket swap is that the project was pretty small and not too time consuming. Sometimes, swaps can be overwhelming for people because they try to make something too complicated or underestimate how long it might take to make a larger item like a mini quilt. I do enjoy swaps because it gives me a chance to try new projects, learn new skills, and make new friends!
It’s no secret that I’m a cat lover! I’m currently owned by three cats, including one special foster kitty named Gracie. The three cats take turns playing musical laps, rotating on my lap so that each one gets some special petting and snuggle time. When I saw a new pattern by Elizabeth Hartmann called Cats in Space, I just knew that I had to make it as soon as possible.
I had a short quilt retreat recently with my sister and two of our quilting friends. I tossed this pattern into my bag along with some fabrics to make one cat block. Usually, I like to precut pieces for a quilt retreat, but I didn’t have time with this project.
I started by cutting out each section according to the pattern, and I labeled the sections with these amazing little plastic squares called Alphabitties. I take each label and clip it to the fabric piece using a Wonder Clip. These Alphabitties labels are game changers for patterns with tons of little pieces that can be easily confused with one another.
I did notice a possible pattern error related to the diagrams. If you look at the picture on the pattern cover, the space pack on the cat’s back is higher than in some of the pictures inside of the pattern. The pattern pieces (V, GG, and HH) are sized so that your space pack comes out shorter than the pattern cover photo. I adjusted these few pieces so that my kitty’s space pack is the higher version.
Here’s a close-up view of the space kitty:
Isn’t the background fabric fun? It has little fireflies, shooting stars, and constellations. It’s called Night Sky by Dear Stella. The other fabrics are from my stash. I used some Alison Glass pink fabrics for the space suit details, some sparkly Essex linen for the helmet, and Kona cotton solids for the kitty.
Once I had created my kitty block, I wasn’t sure if I wanted to keep it as-is or go ahead and add the three stars surrounding the kitty. I’m pretty sure that I’m going to turn this block into a mini quilt so I thought that the three stars would just up the cuteness factor.
Here’s a look at my finished block:
Swoon! This block is so adorable. The kitty looks like she’s coming in for a hug with her favorite human. I love it so much!
I’m still leaning towards keeping this space kitty as a mini quilt to hang in my sewing room. If I decided to make the small size quilt, I’d need three more space kitty blocks.
Earlier this year, I participated in the annual MQG mini quilt swap. This swap event is an open swap, meaning that you and your partner are making mini quilts for each other. In contrast, most swaps are not open but secret, meaning that the person you are making a mini quilt for is usually not the person who is making a mini quilt for you. It’s a surprise when you get your mini in the mail.
For the MQG swap, many participants plan to attend and swap their mini quilts in person at the annual modern quilt show called QuiltCon. For those who cannot attend, you have the option of swapping with your partner via mail. That’s the option that my partner and I selected this year.
I received my partner’s name and quilt preferences via email from our “Swap Fairy,” who is the person assigned to a group of swappers to ensure that everything is running smoothly. My partner listed her favorite colors, fabric designers, and preferences so I could take those into consideration when making her a fabulous mini quilt.
I decided to do a modern traditional feel for this swap. I designed a mini quilt using the traditional churn dash block, but I made it feel modern by setting it on-point, elongating it slightly, and then added little color accents in each corner. My partner’s favorite colors are jade, green, turquoise, and yellow.
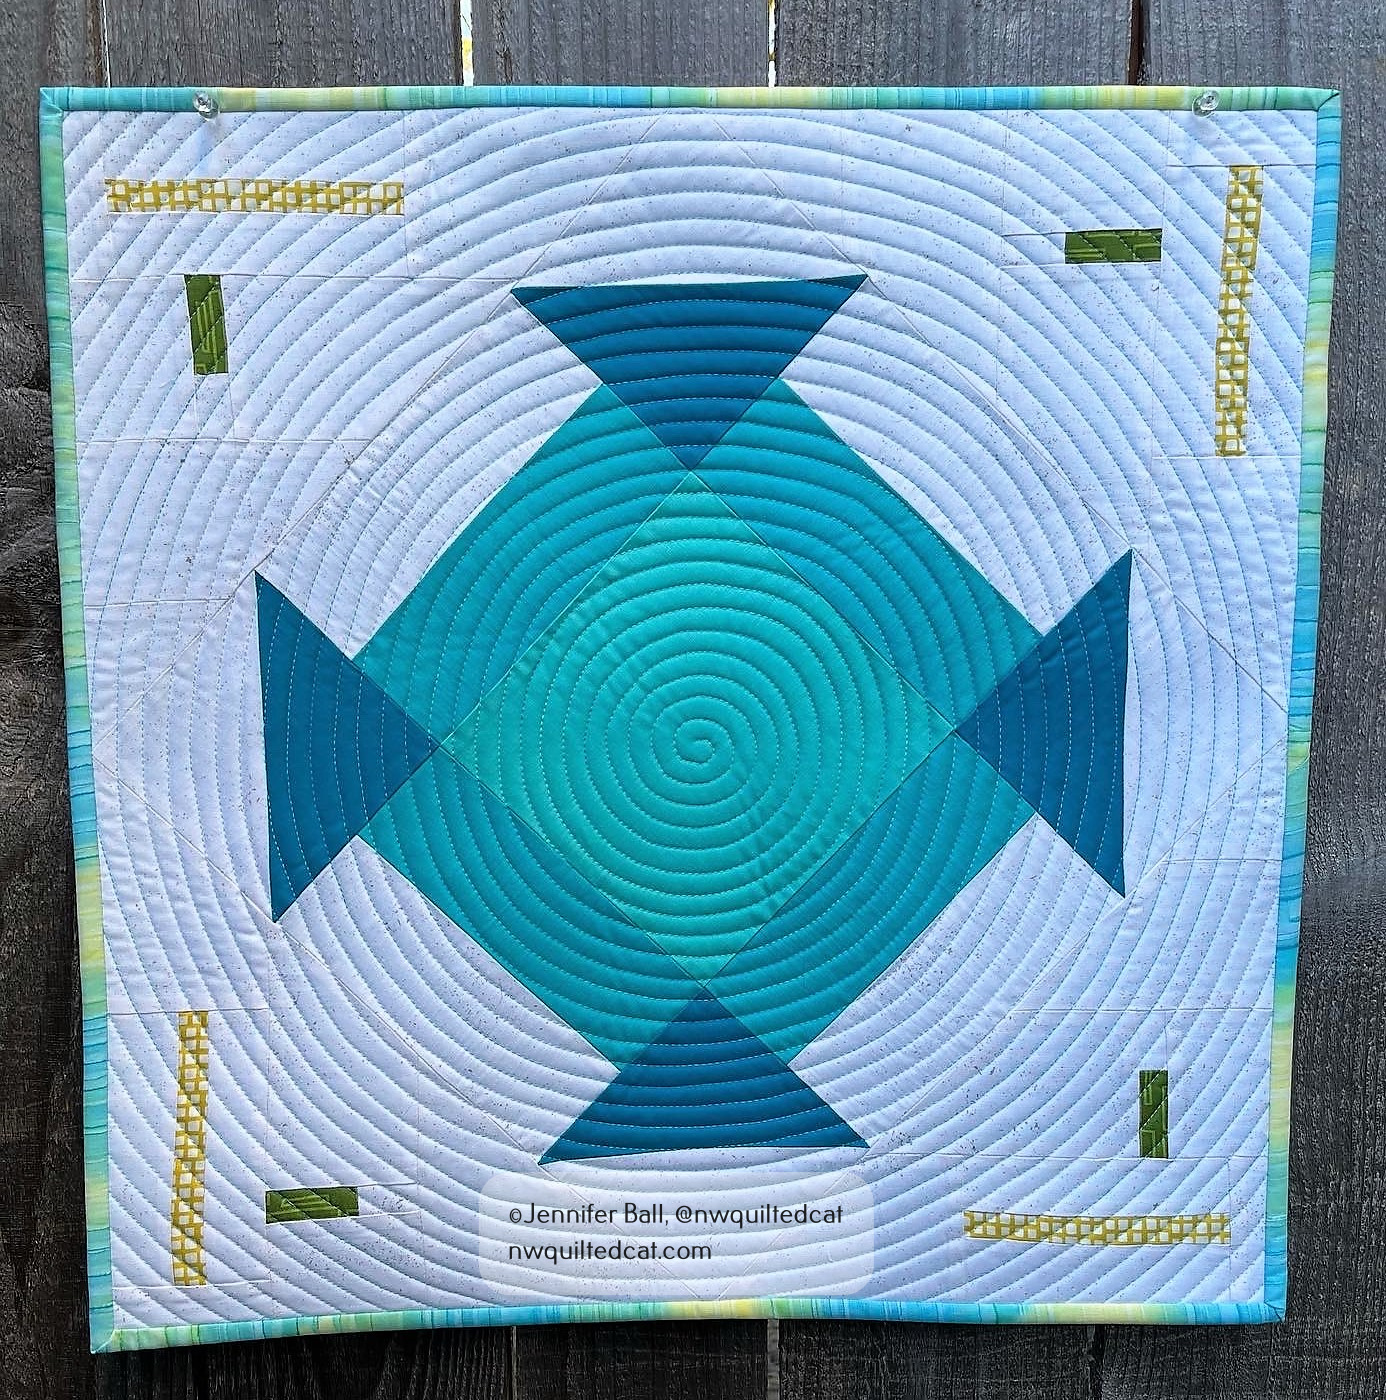
Here’s a look at the finished mini quilt:
Modern Churn Dash mini quilt for the Modern Quilt Guild 2022 swap
I took the mini quilt with me on a short hike to Latourell Falls in the Columbia River Gorge before mailing it to my partner. My teen did the honors of holding it up while I snapped the pic. He’s such a great quilt holder!
I used a variegated Aurifil thread to quilt the spiral on the mini quilt using my domestic sewing machine. The background fabric is a light-colored Spectrastatic print by Giucy Giuce, the churn dash fabrics are Kona cotton solids, and the yellow and green accents are from my scrap bin.
I usually like to make a small extra gift to go along with mini quilt swaps. For my partner, I made a Woppet bucket, pattern by @cleverwoppet.
Woppet Bucket
Isn’t it a cute bucket? I made the little charm pull and added it to the pink handle. You can pull the fabric handles up to carry it like a little bag.
I sent my little mini quilt and bucket off to my partner, and received a package from her in return. She made me this fun rectangular shaped mini quilt with bright colors, a low-volume background, and black and white pinwheel blocks!
Mini quilt that I received in the 2022 swap!
I really enjoyed the mqgswap this year! If you want to see more pics from this swap from other quilters, you can browse Instagram using the tags, #mqgswap2022 or #makeaminimakeafriend .
My husband and I found a little table a few years ago while antiquing that we use to have our breakfast. The table faces a sliding glass door, looking out on our background. It’s relaxing to watch the birds flitting about while sipping coffee before starting work for the day.
However, we don’t want to scuff up the table’s surface more than it already is so we’ve been using various items like kitchen towels and coffee coasters as protection. Last weekend, I decided to make a table topper for this little table, but it also reminds me of a giant mug rug! When it gets dirty, we can just toss it in the wash.
Here’s what the table looks like without any topper:
Little antique table
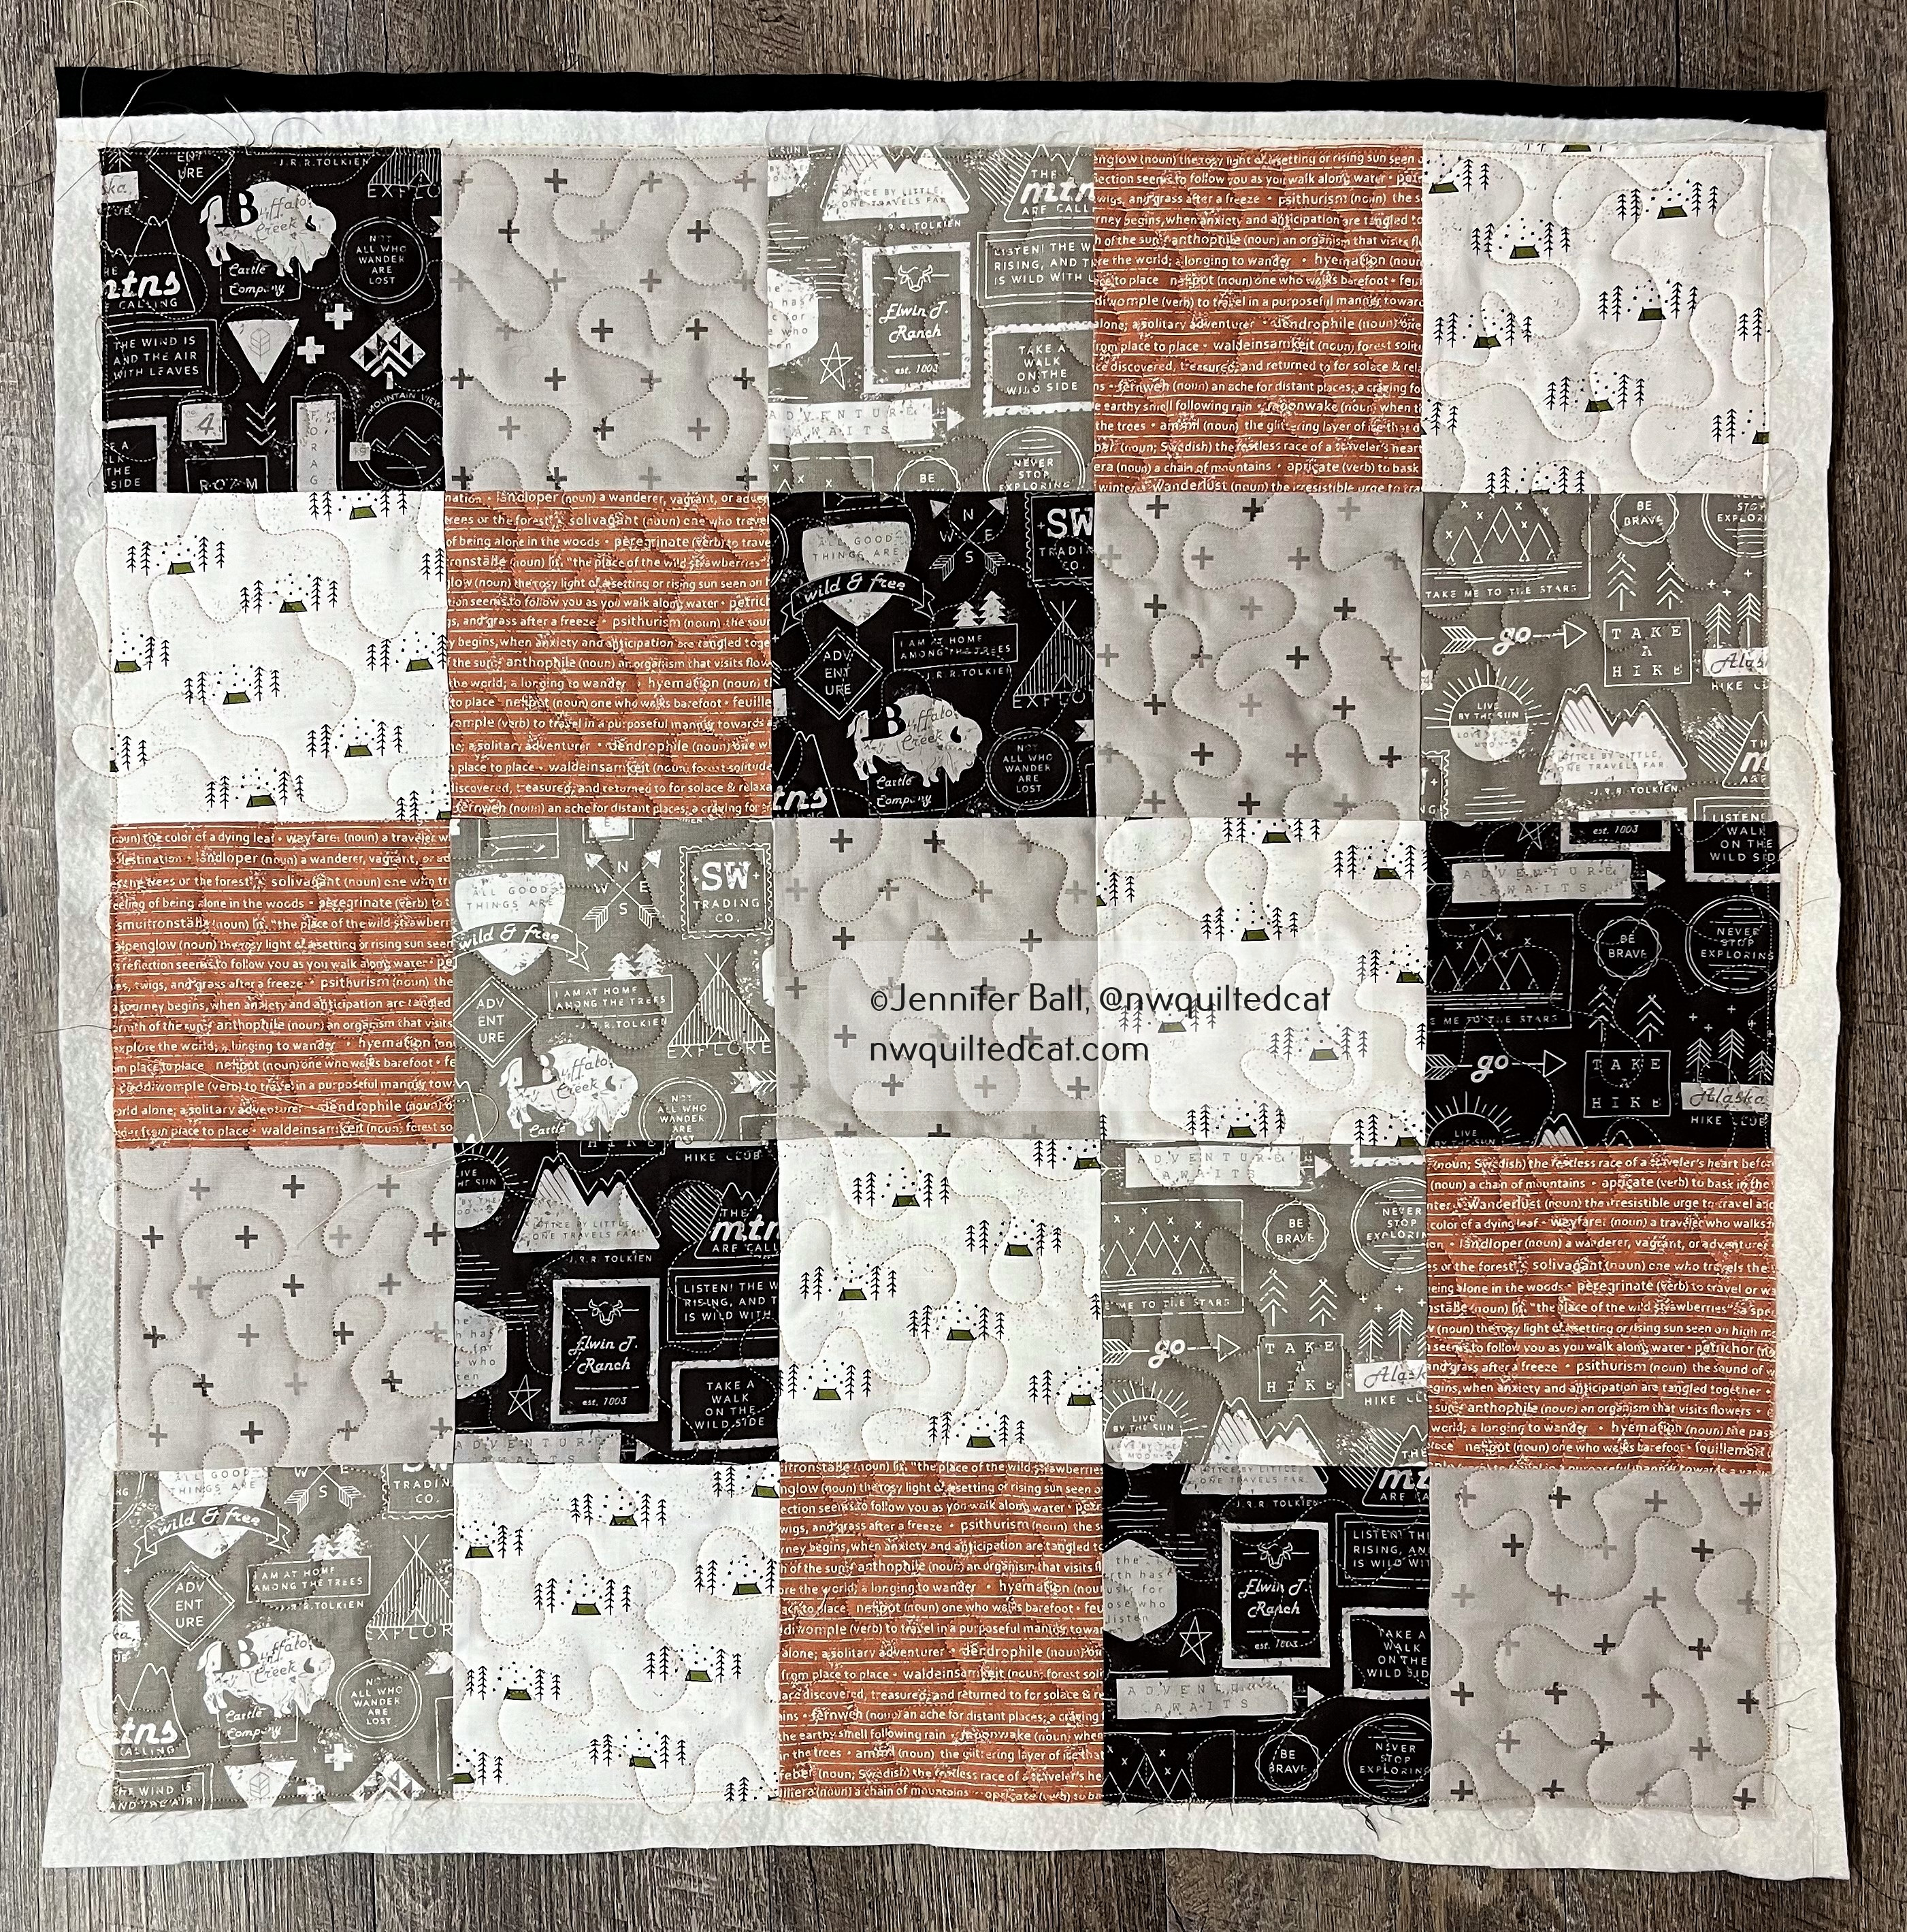
I had some fun fabric in my stash with an outdoors theme that I thought would work well. The colors match the kitchen, and we love to be out hiking! I measured the diameter of the table, which is 25 inches. I selected 5 fabric prints, and cut out 5.5 inch squares that finish at 5 inches each. I placed them in a 5×5 grid, stitched them together, and then quilted this base shape.
Starting quilt shape for table topper
The fabrics that I used are:
5130-15 (dark mountain print) from Smoke & Rust by Lella Boutique
5130-14 (gray mountain print) from Smoke & Rust
5135-13 (plus sign print) from Smoke & Rust
5131-16 (orange text print) from Smoke & Rust
55551-21 Timber Campsite Cream from Timber by Sweetwater
I quilted the project using meandering free-motion with Glide thread in Apricot Blush.
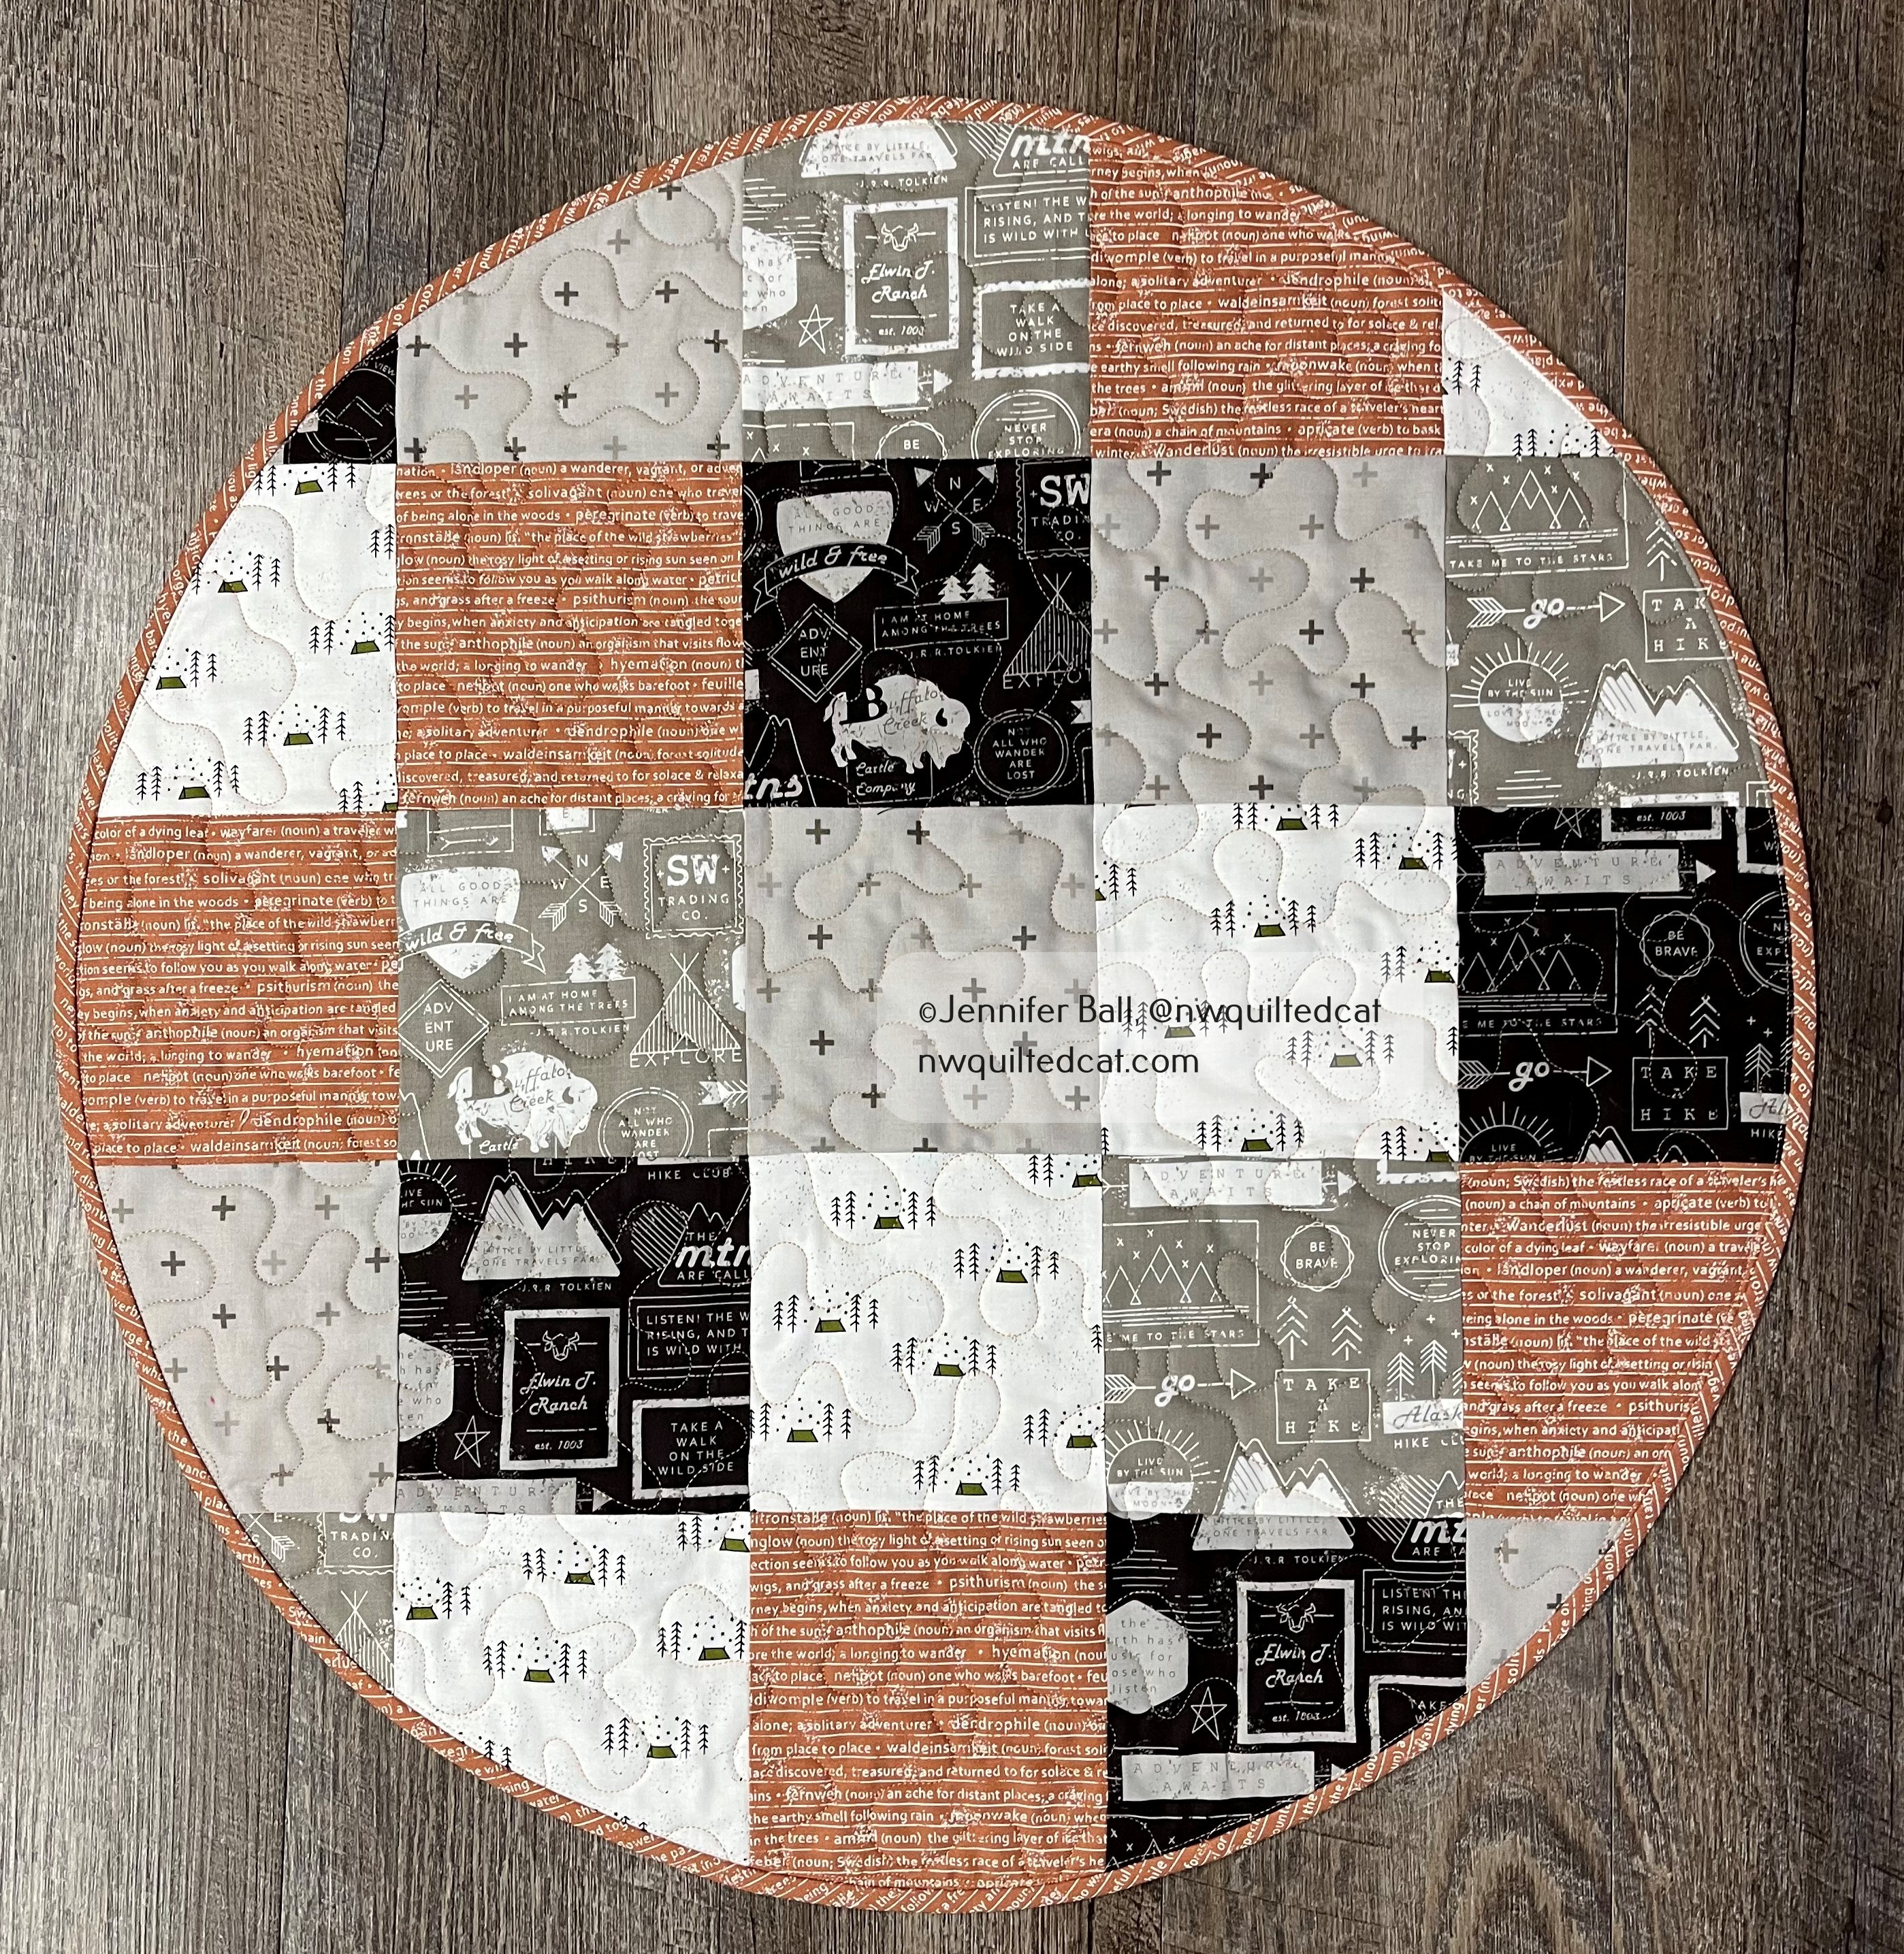
Once I had my square-shaped base, I took placed the table upside down on the back of the quilt and traced the circle. I drew a cutting line in about 3/4″ from the original tracing line so that my quilt would not extend to the edges of the table. I wanted a little peek-a-boo border of the table.
Table topper, trimmed to fit
I choose the orange text print for my binding. I needed to use bias binding to get a stretchy binding that I can easily sew to curves. It worked out so nicely!
Circular table topper, bound
Now for the reveal! Did my quick table topper project work? Does the coffee taste better while using it?? Yes, it does, because I don’t have to worry about leaving water marks anymore.
Completed table topper
Completed table topper with chairs that need to be reupholstered
We also have these 2 antique chairs to go along with the little coffee table. However, they are in sore need of reupholstering. I hope to tackle that project this year, and choose a new fabric that will go with the table topper fabrics.
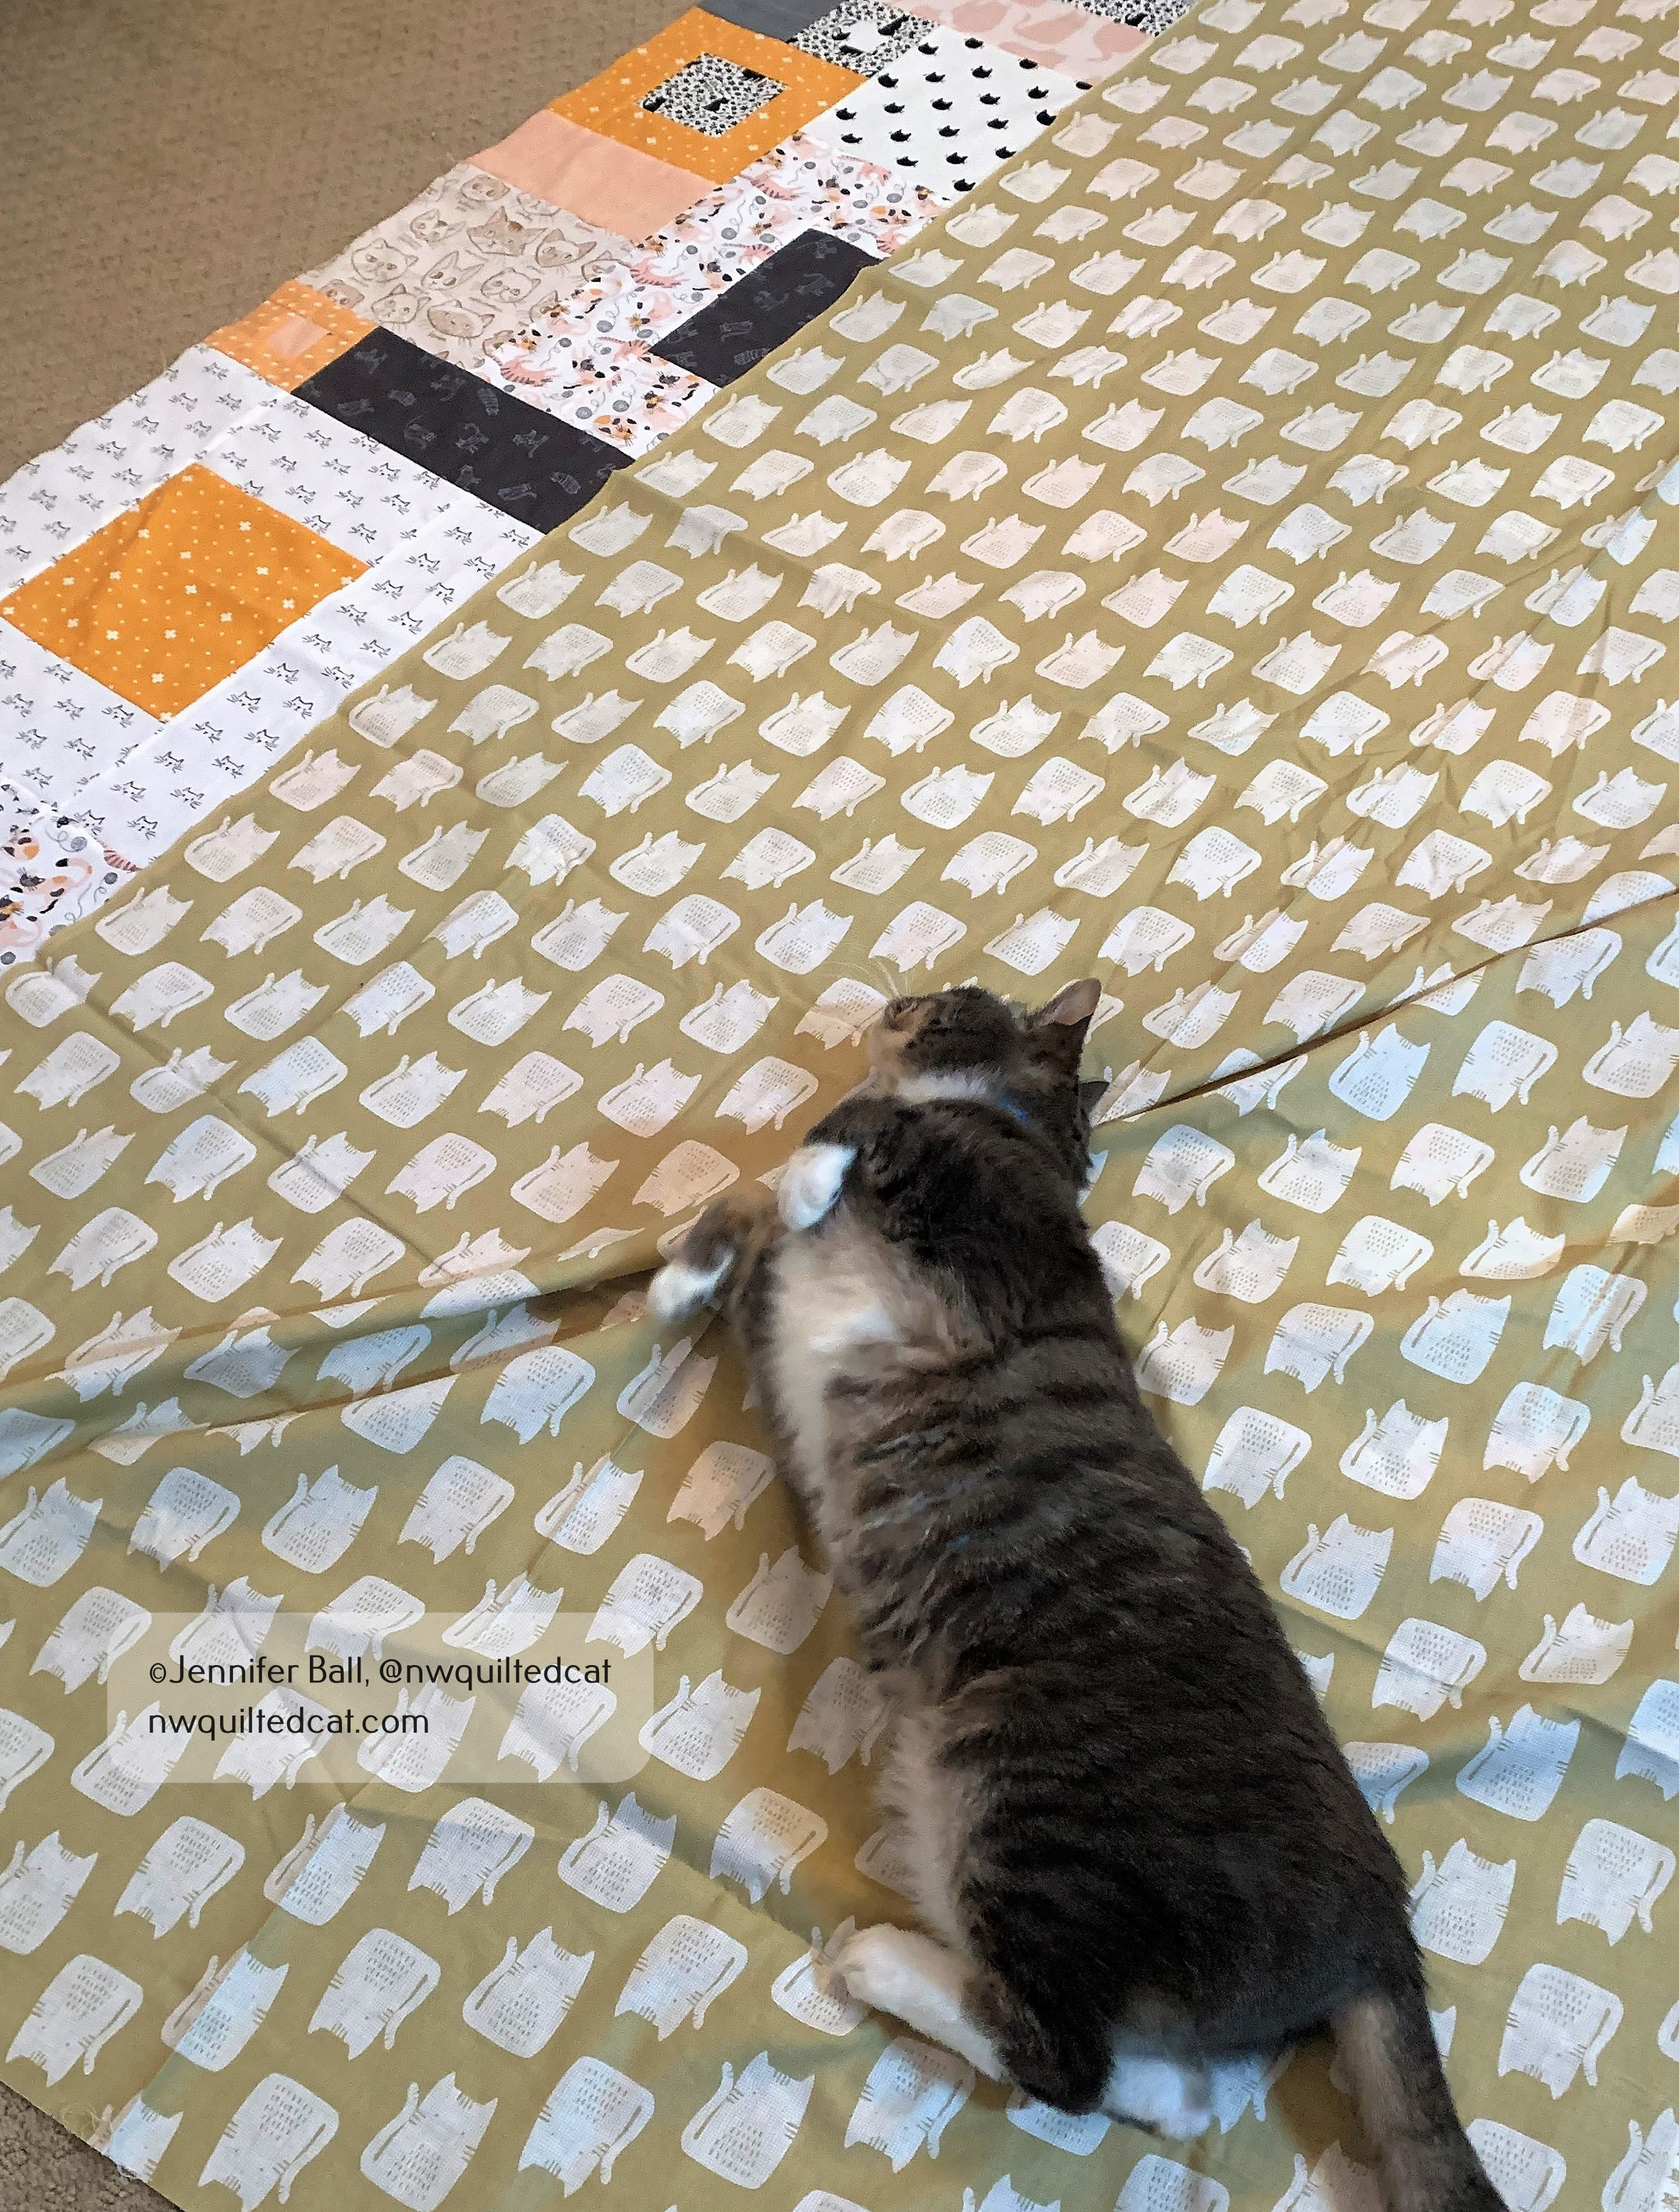
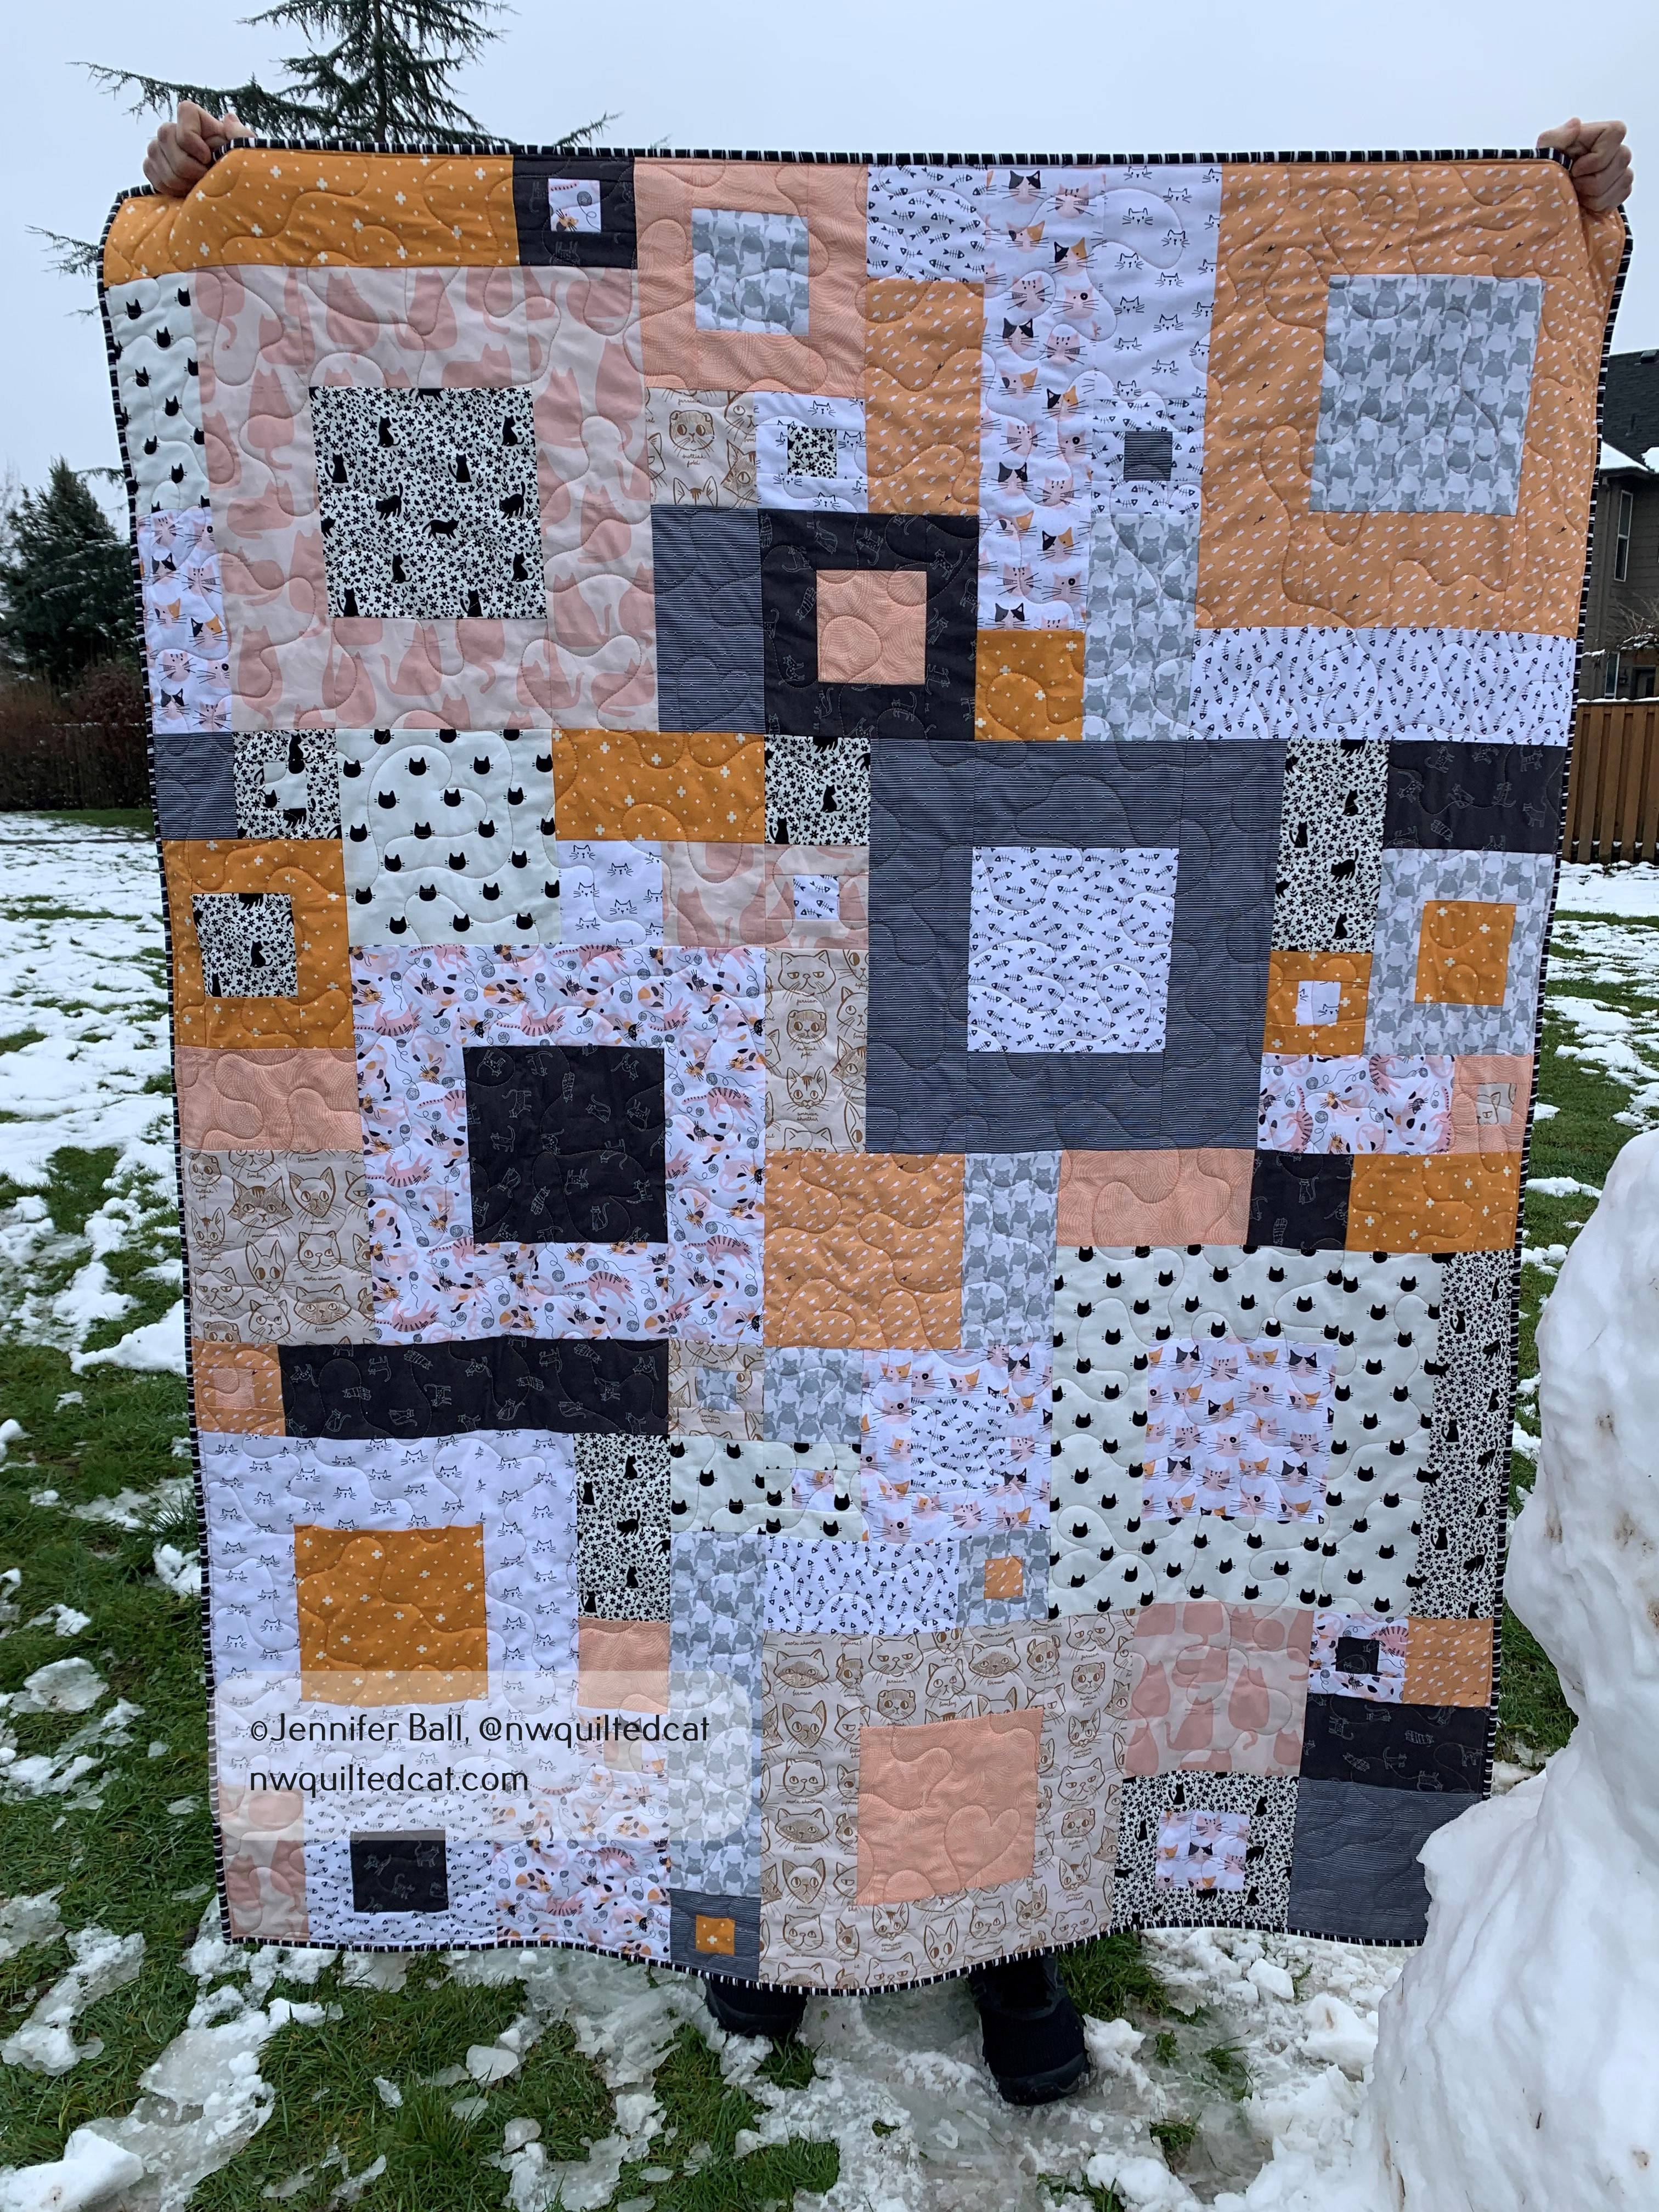
I’m catching up on some quilts last I finished in December. I made several fat quarter friendly quilts last year to have on hand to give as gifts. The pattern that I selected is called Fourteen Squared by Hunter’s Design Studio, and it is a quick and easy quilt to make. I love it so much because I can work from my stash and find ways to use up some of my fat quarters.
The first one that I made is cat themed, of course! My quilt inspector practically demanded it. He was so happy with the cat fabric that he couldn’t wait to help me piece the backing!
Romeo helping to piece the backing
For quilting, I did an easy all-over meandering with some free-motion hearts thrown in for good measure. My goal on these quilts is to use everything from my stash so I pulled a fun chunky stripe for the binding, again with the inspector’s help.
Romeo approves the binding choice
I used pinks, oranges, dark grays, and low volume fabrics for this quilt. The cat prints are from a variety of manufacturers that I’ve collected over the years.
I finished the binding just in time to get pictures of this quilt outdoors with a little snow that we had in December before it melted. My teen helped with the photo shoot while my outdoor quilt inspector lingered just out of view.
I have so many ideas for this quilt! A Halloween version is a must for me at some point. I plan to make a few more this year to give as gifts and to donate to charity. The pattern is such a great stash buster.
I’m participating in a couple of swaps that I will blog about soon. One is a block swap, one is a bag swap, and one is a mini quilt swap. Stay tuned!
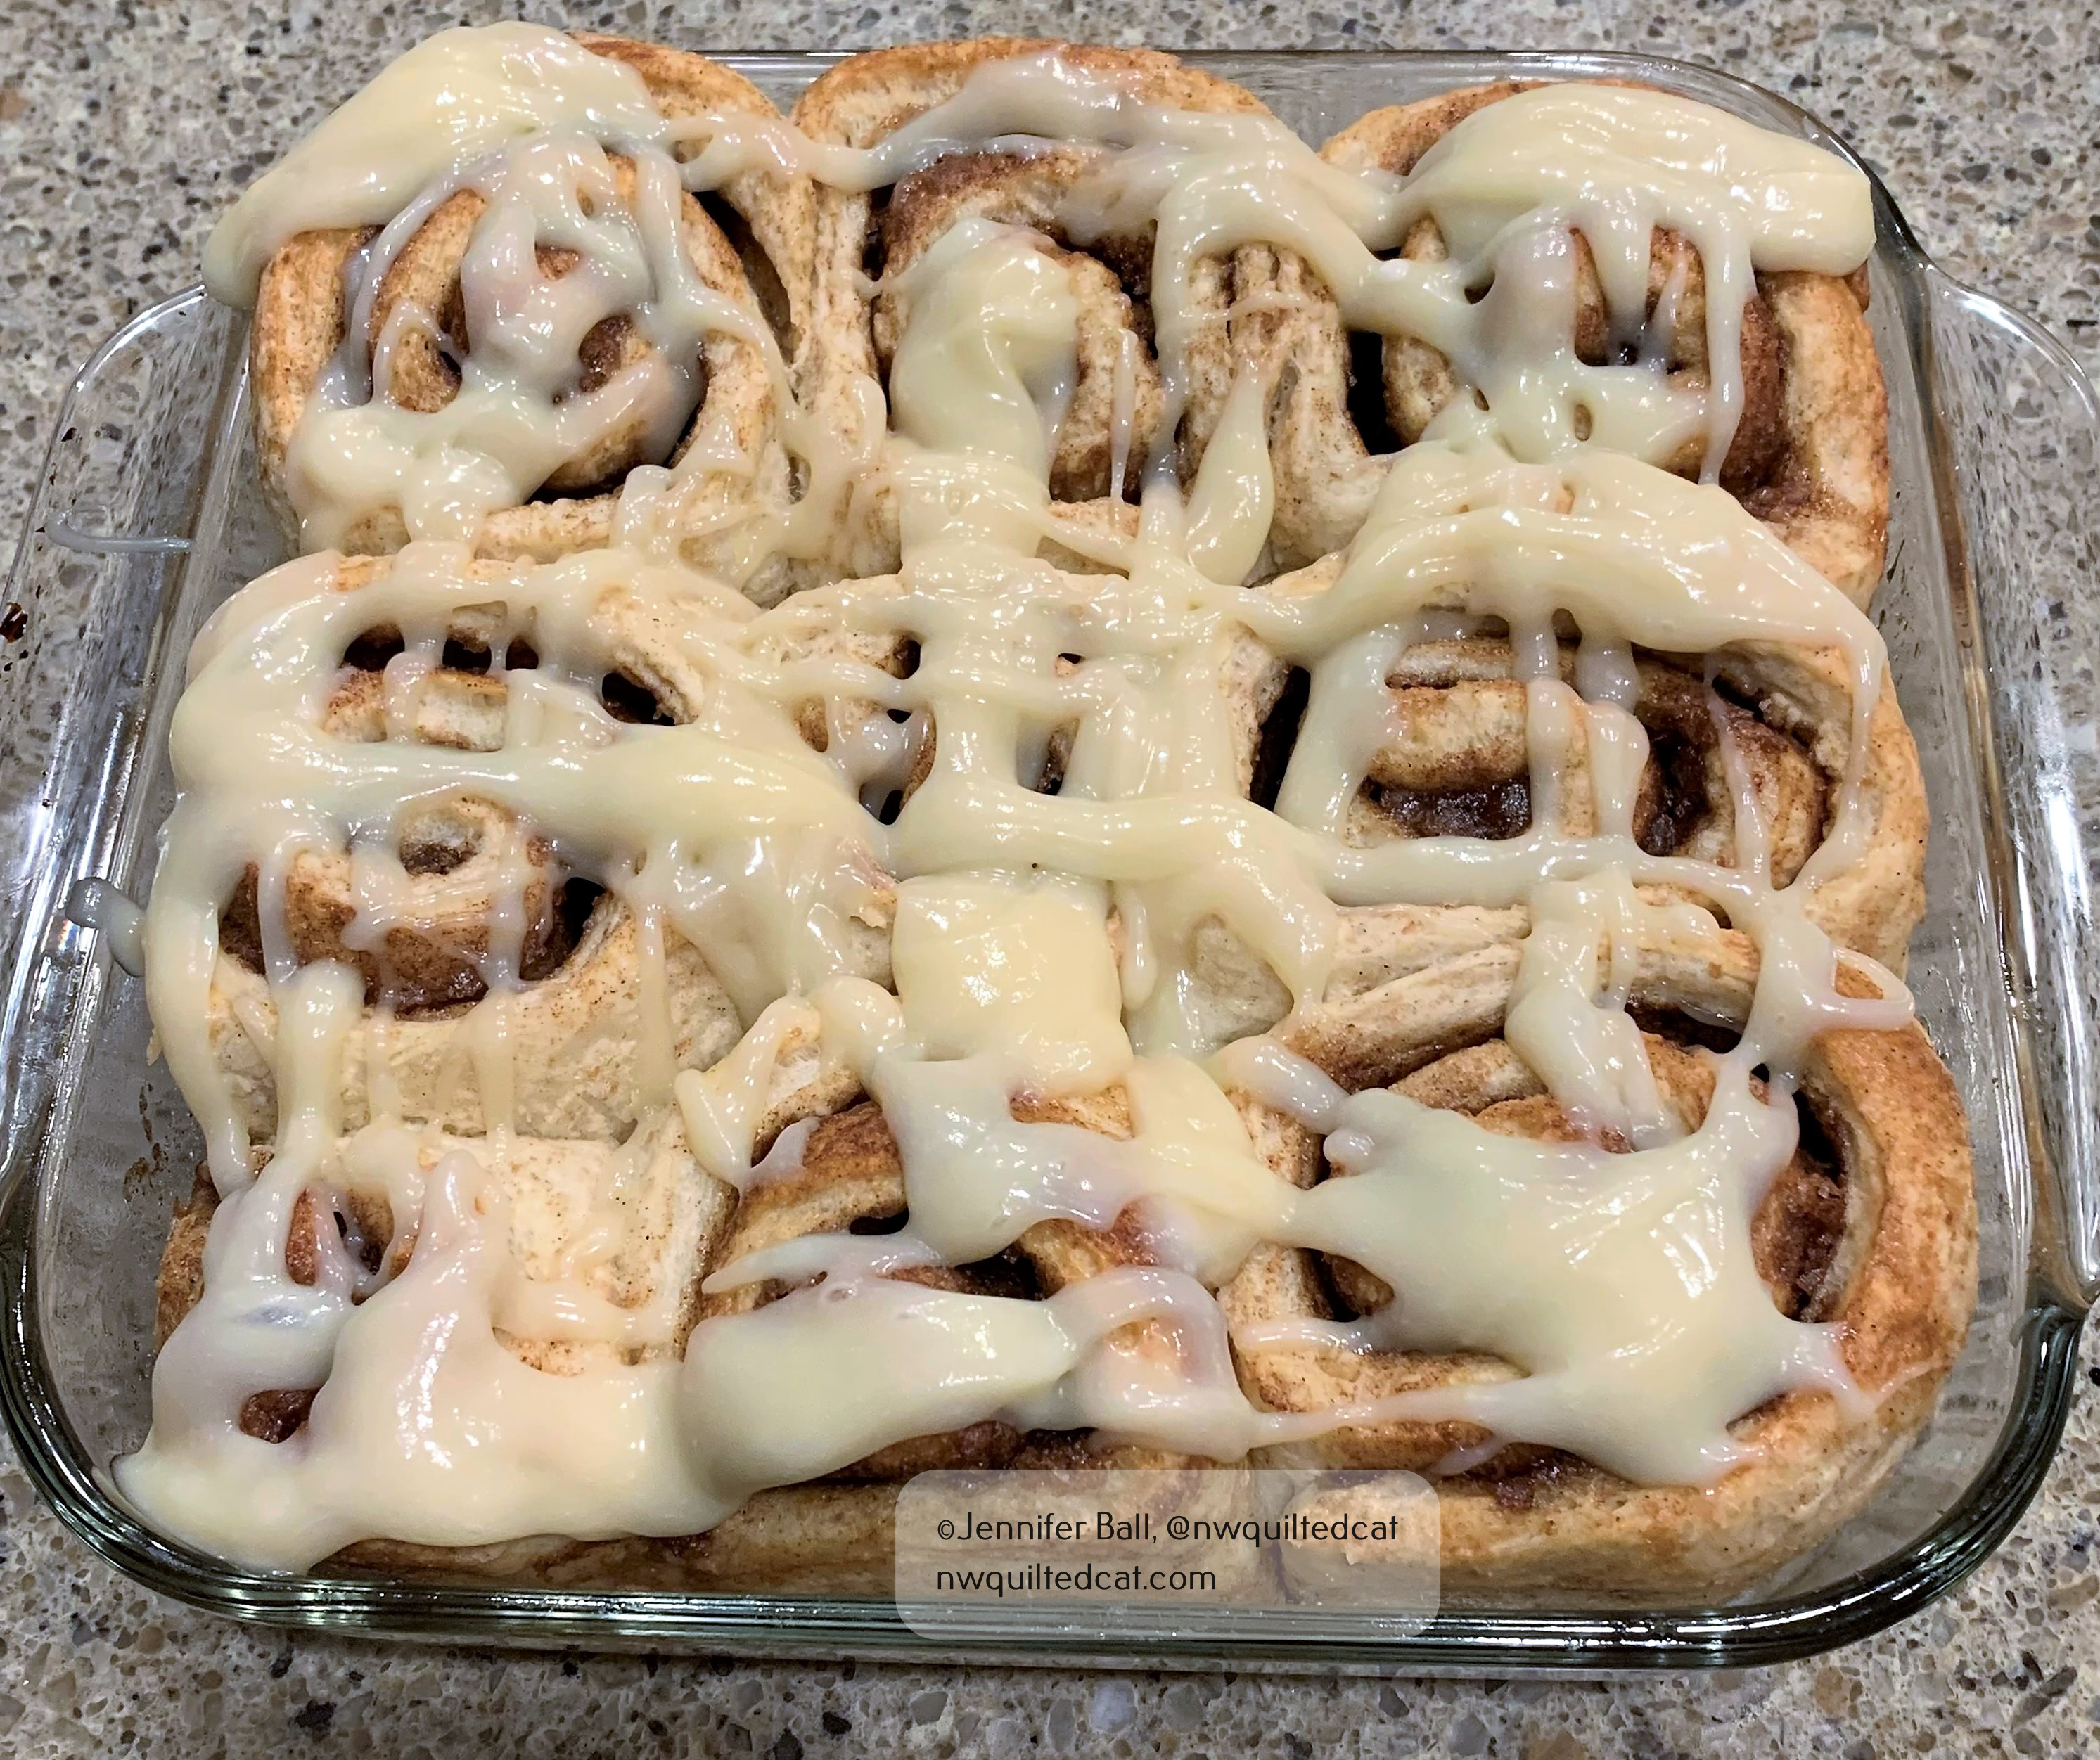
I recently made a batch of eggless cinnamon rolls as a test run for Christmas morning. I needed to create a yummy, fluffy cinnamon roll without eggs because my sister is allergic to them. This recipe can be made vegan by substituting vegan butter in place of real butter and skipping the cream cheese in the glaze.
I used some spelt flour (an ancient grain) in this recipe for added flavor and dimension.
Eggless Cinnamon Rolls (unglazed)
Ingredients for Cinnamon Rolls
2-1/2 cups Bob’s Red Mill Artisan Bread Flour
1/2 cup Bob’s Red Mill Spelt Flour
1 cup oat milk
3 Tbsp butter
1 packet instant yeast
1 Tbsp cane sugar
1/4 tsp salt
Ingredients for Filling
1/4 cup sugar
1/4 cup firmly packed brown sugar
1 Tbsp cinnamon
Ingredients for Glaze
3 oz. cream cheese
3 oz. butter
1 cup powdered sugar
2 tsp vanilla
Direction
Heat the oat milk and butter in a bowl in the microwave in 30 second bursts. You want this mixture to be warm but not hot for the yeast to activate. About 110 degrees.
Transfer the mixture to a large bowl and add the yeast. Let it sit for about 8-10 minutes.
Add 1 Tbsp sugar and 1 tsp salt. Stir.
Add the flours gradually to the mixture and stir. When it becomes thick, remove from bowl and knead for a minute or so until it forms a ball. Do not knead the dough for too long.
Add the dough to an oiled bowl, cover, and let it rise until doubled in size. (Hint: I have a food dehydrator that I set to low, about 95 degrees. I place my dough inside to rise faster).
Roll out the dough on a lightly floured surface into a rectangle shape, about 1/4 inch thick.
Optional: brush the dough with melted butter.
Combine the sugar, brown sugar, and cinnamon filling in a small bowl.
Spread the filling mixture across the rectangle.
Roll the dough tightly along the long edge. Pinch the edges closed.
Cut the dough into 9 equal portions.
Place the rolls into a buttered or oiled 8×8 inch square pan, with the swirls facing up.
Cover and let rise for 30-60 minutes until doubled.
Preheat the oven to 350 degrees while the rolls are rising.
Optional: brush the tops of the rolls with melted butter just before baking.
Bake for 25-30 minutes.
Make the optional glaze by combining the cream cheese and the butter into a bowl. Microwave for about 20 seconds or just long enough that you can whisk the ingredients together easily.
Add the vanilla and powdered sugar and whisk together.
Use the whisk to drizzle the glaze on top of the cinnamon rolls.
Eggless Cinnamon Rolls with Optional Cream Cheese Glaze
I usually talk about sewing quilt blocks on my blog, but I recently did a project where I painted quilt blocks. Painted? Yes! Much like painted barn blocks are used to embellish buildings, you can embellish furniture with painted blocks.
In August, I got my son a different computer desk and so his old desk needed a new purpose. It is about 10 years old and was banged up quite a bit from years of kid, and then teenage, use. I cleaned up the desk, tightened up the screws, and repainted it glossy white. Pepper kindly guarded my work area from squirrel invaders!
Desk freshly painted white while Pepper watches in the background
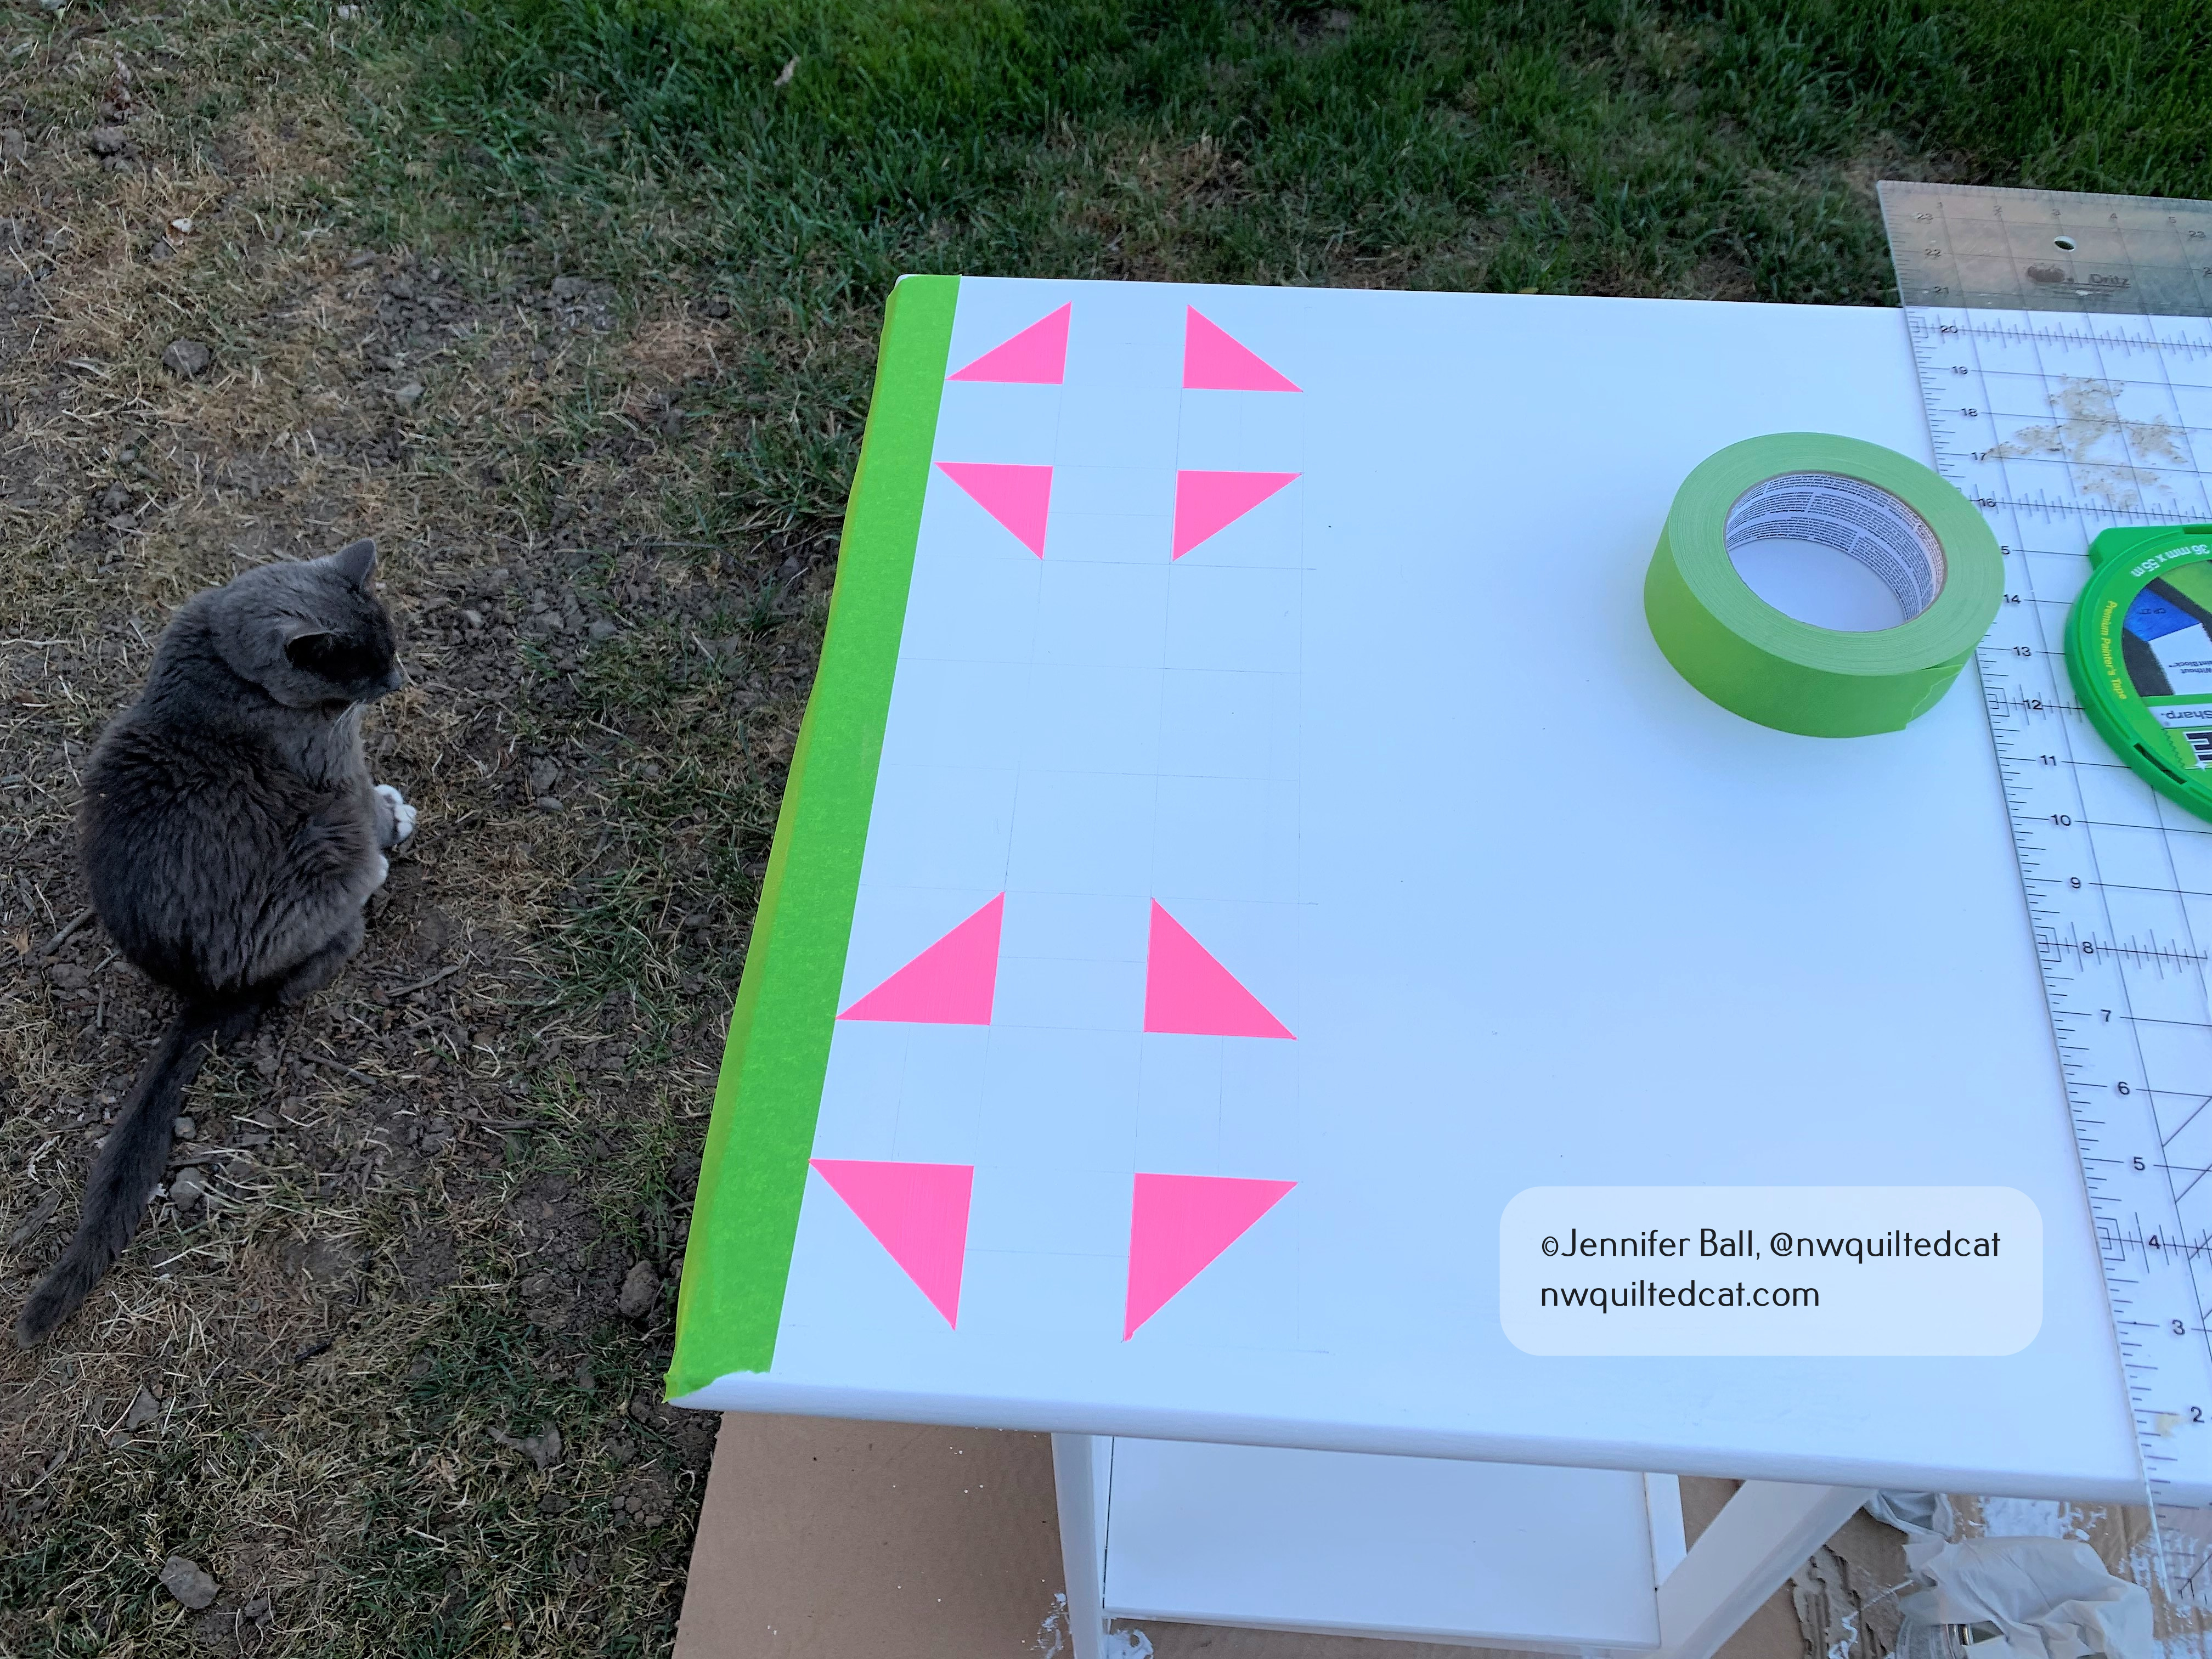
I decided to paint 2 classic quilt block shapes on the left-hand side of the desk top: the churn dash block and the 9-patch block.
I used FrogTape to mask off the far left side of the table and the initial parts of the churn dash blocks. I used regular craft acrylic paints. Here’s what the first part of the churn dash blocks looked like after they were dried and I removed the tape:
The beginning of painted churn dash blocks with Gracie helpfully supervising
For each section of the painted quilt blocks, I carefully used the tape to mask off sections where I didn’t want the back. I completed the churn dash blocks first before working on the 9-patch block. I applied 2-3 coats of each color so this process took about a week with drying time.
FrogTape works really well to keep the painted edges sharp
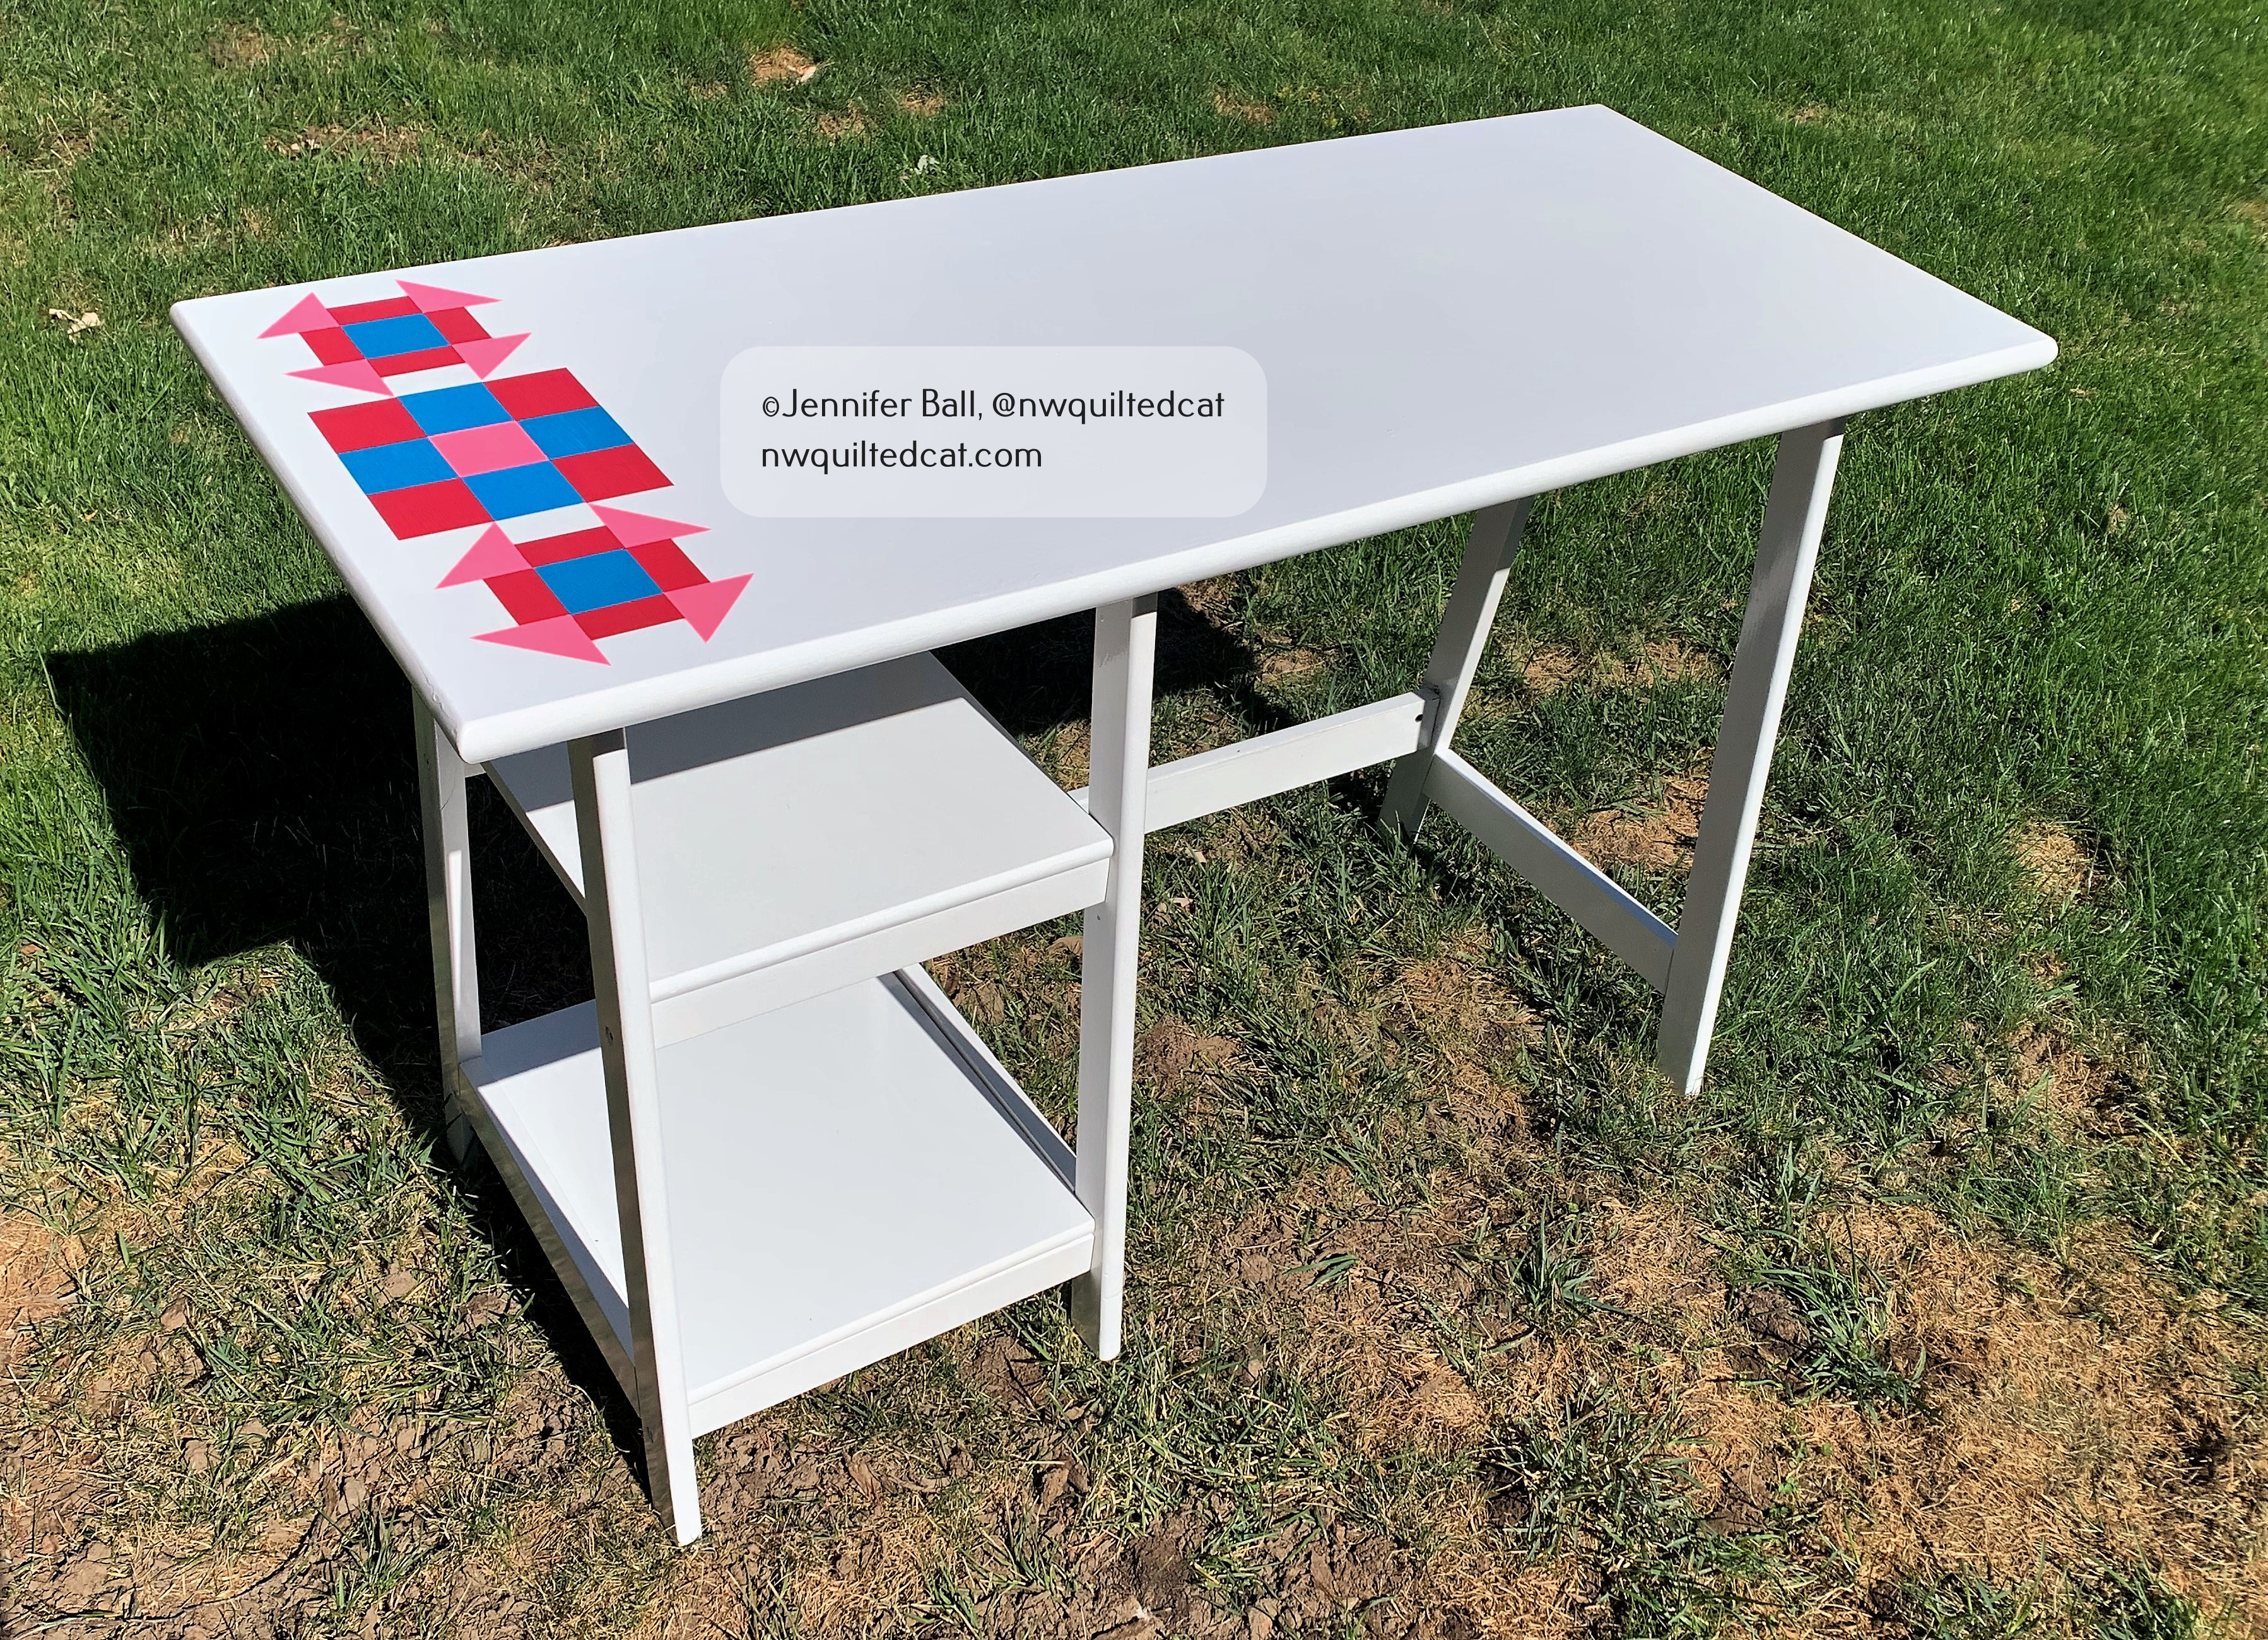
Once I finished painting my blocks, I let the paint dry overnight. I used a glossy crystal clear spray paint to finish the project and to protect the painted blocks.
Here’s a look at the freshly painted desk:
My newly painted quick blocks with dry September grass, lol
With some help from my teen, we transported this newly painted table into my sewing room. I thought my little Singer Featherweight would look cute on it!
My newly painted quick block desk with a Singer Featherweight
I now have a fun table with brightly painted quilt blocks that I can use for years to come!